User
The user administration and the creation of user attributes and roles take place under the menu item Users. Each new user has admin rights, which can be extended or limited by the User roles. In addition, each user is assigned to at least one client.
User management
All created users, including user identifier (#), are listed here in a table and new users are also created.
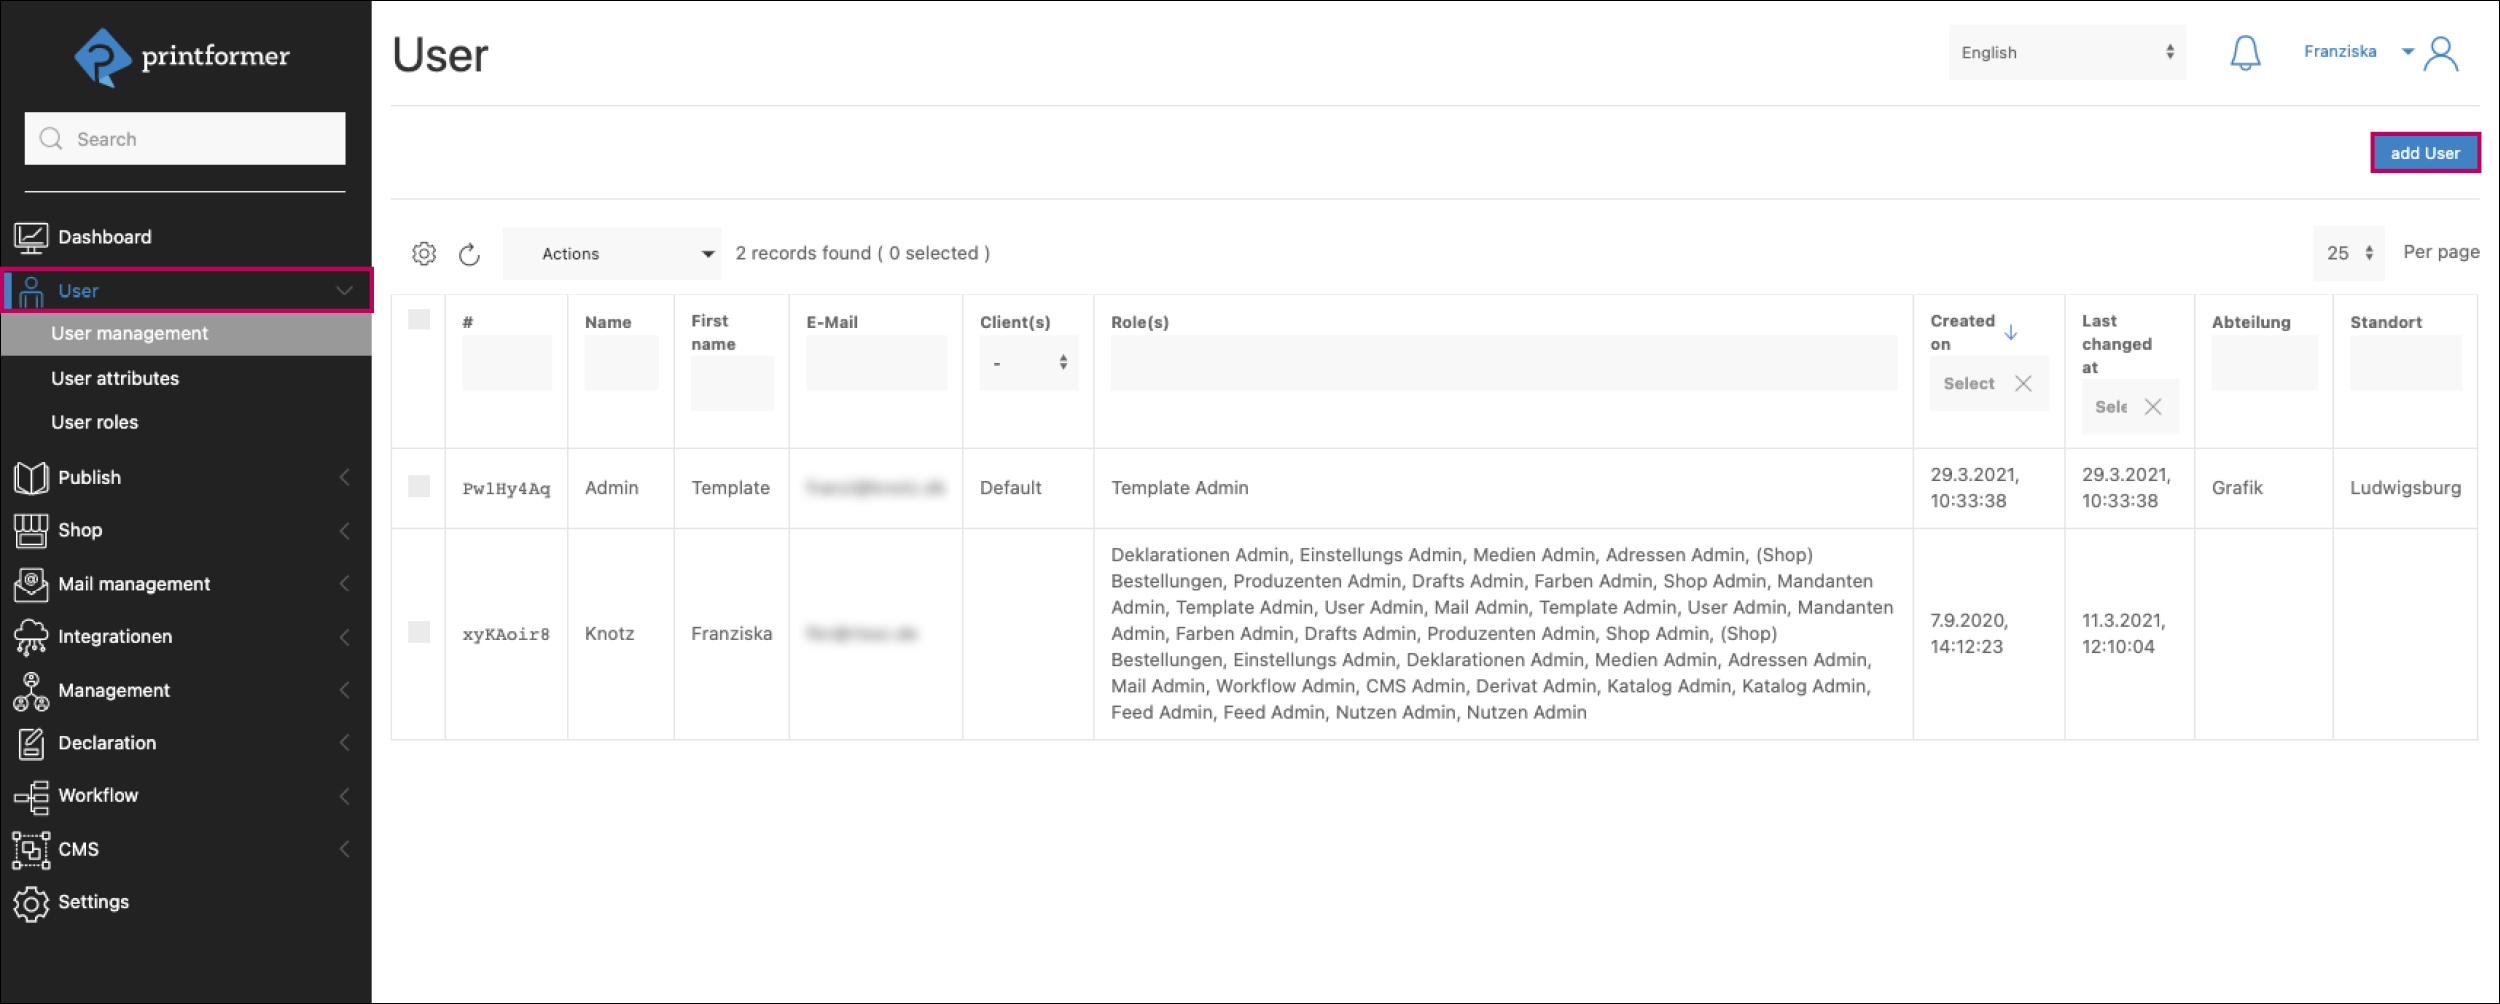
Add User
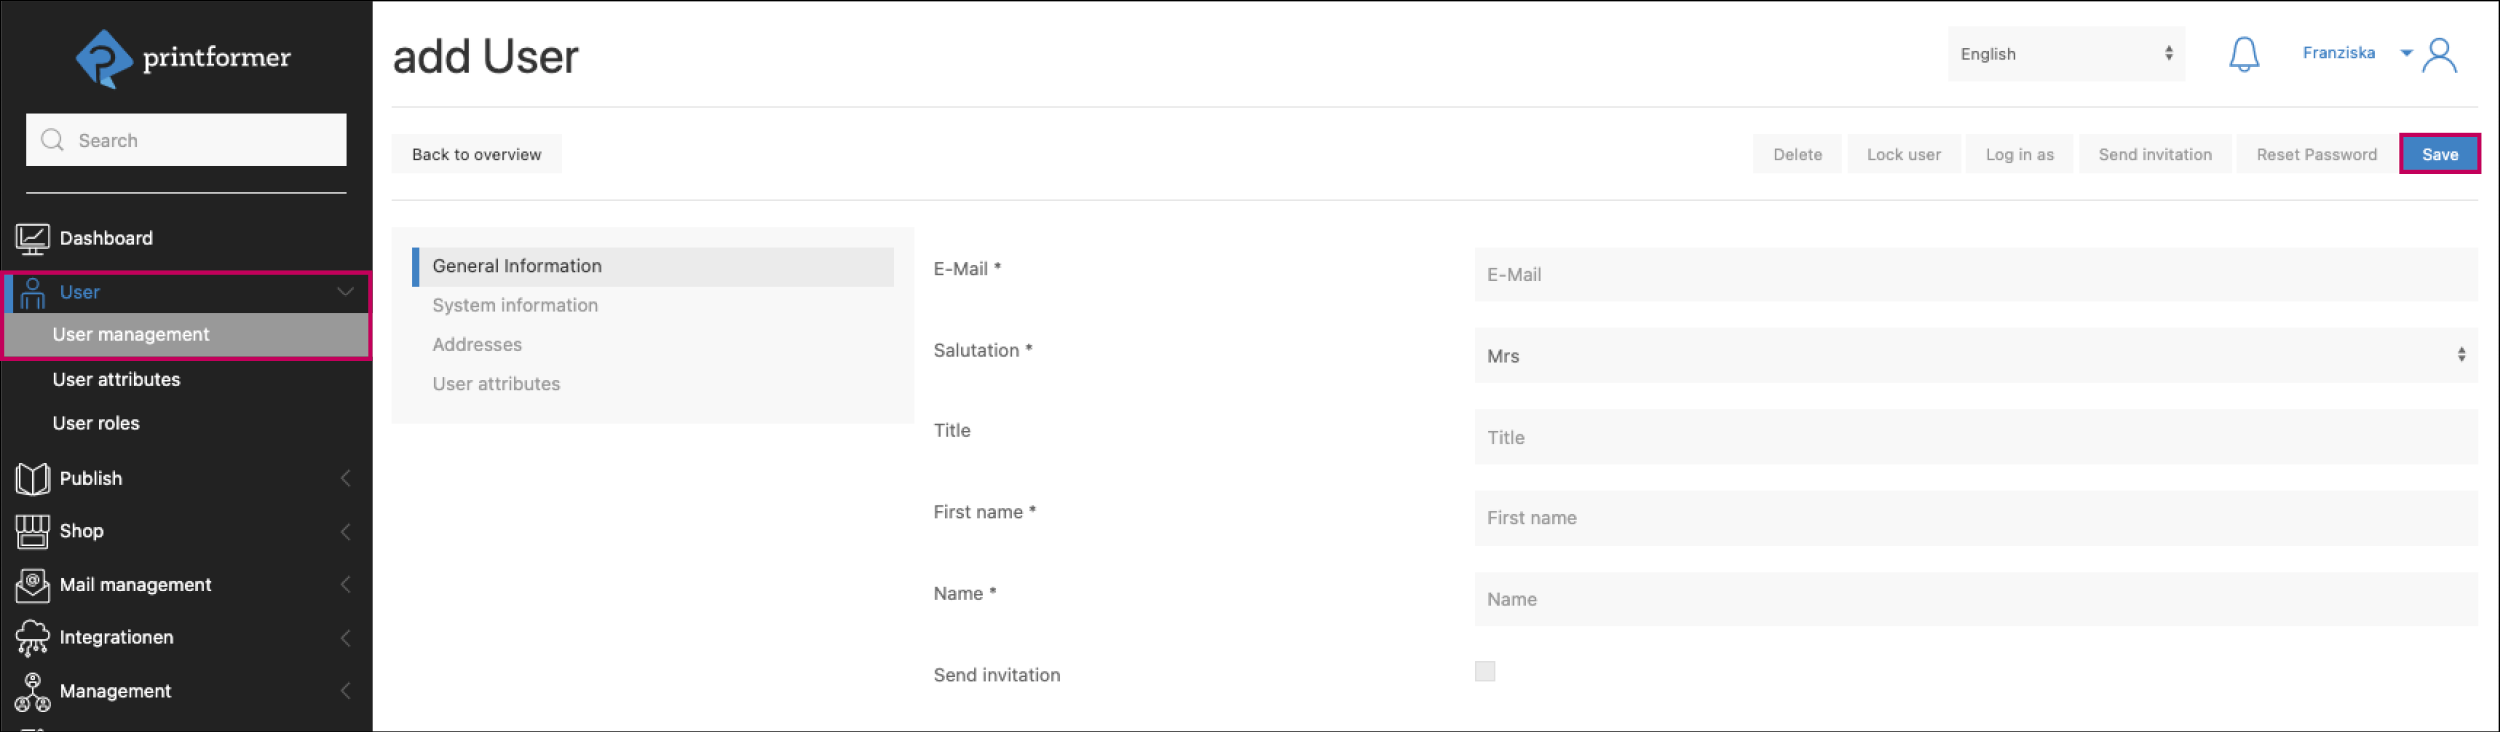
The personal data (e-mail, name, etc.) is entered under General information.
In the System information, clients are then assigned and the necessary admin roles (rights that can be defined under User roles) are assigned and the desired language(s) are selected.
Default Roles
Depending on the assignment of admin roles, different access rights are assigned to the user:
Role | Description |
|---|---|
Template Admin | Rights to manage Templates in the system. |
User Admin | Rights for User management in the system. |
Mandanten Admin | Rights for Client management in the system. |
Shop Admin | Rights for Shop management in the system. |
Farben Admin | Rights for Color management. |
Drafts Admin | Rights to edit Drafts. |
Produzenten Admin | Rights for Producer management in the system. |
(Shop) Bestellungen | Rights to view all orders in the ClosedShop. |
Medien Admin | Rights for management of System media. |
Adressen Admin | Rights for Adress management in the system. |
Einstellungs Admin | Rights for general Settings in the system. |
Deklarationen Admin | Rights for Declaration management. |
Mail Admin | Rights for Mail management. |
Workflow Admin | Rights for Workflows management. |
CMS Admin | Rights for Content management. |
Derivat Admin | Rights for Derivate management. |
Katalog Admin | Rights for articletemplates. |
Feed Admin | Rights for Product-Feeds. |
Nutzen Admin | Rights for Avail templates. |
After saving the new user, existing or newly created (Add address) addresses can be assigned.
And, if user attributes have already been defined, individual values for the individual user can be entered here.
User configuration
The menu items Delete, Lock user, Log in as, Send invitation, Reset password in the upper area are activated as soon as the user has been created and it is given an identifier.

If a user has been blocked, the button changes to Unblock user and they can be assigned access to the system again.
The Log in as button can be used to check whether the rights have been assigned as desired; how the system looks from the point of view of the respective user).
By clicking the Send invitation button, the new user will receive an e-mail with a link that allows him to create a password and log in to the system for the first time.
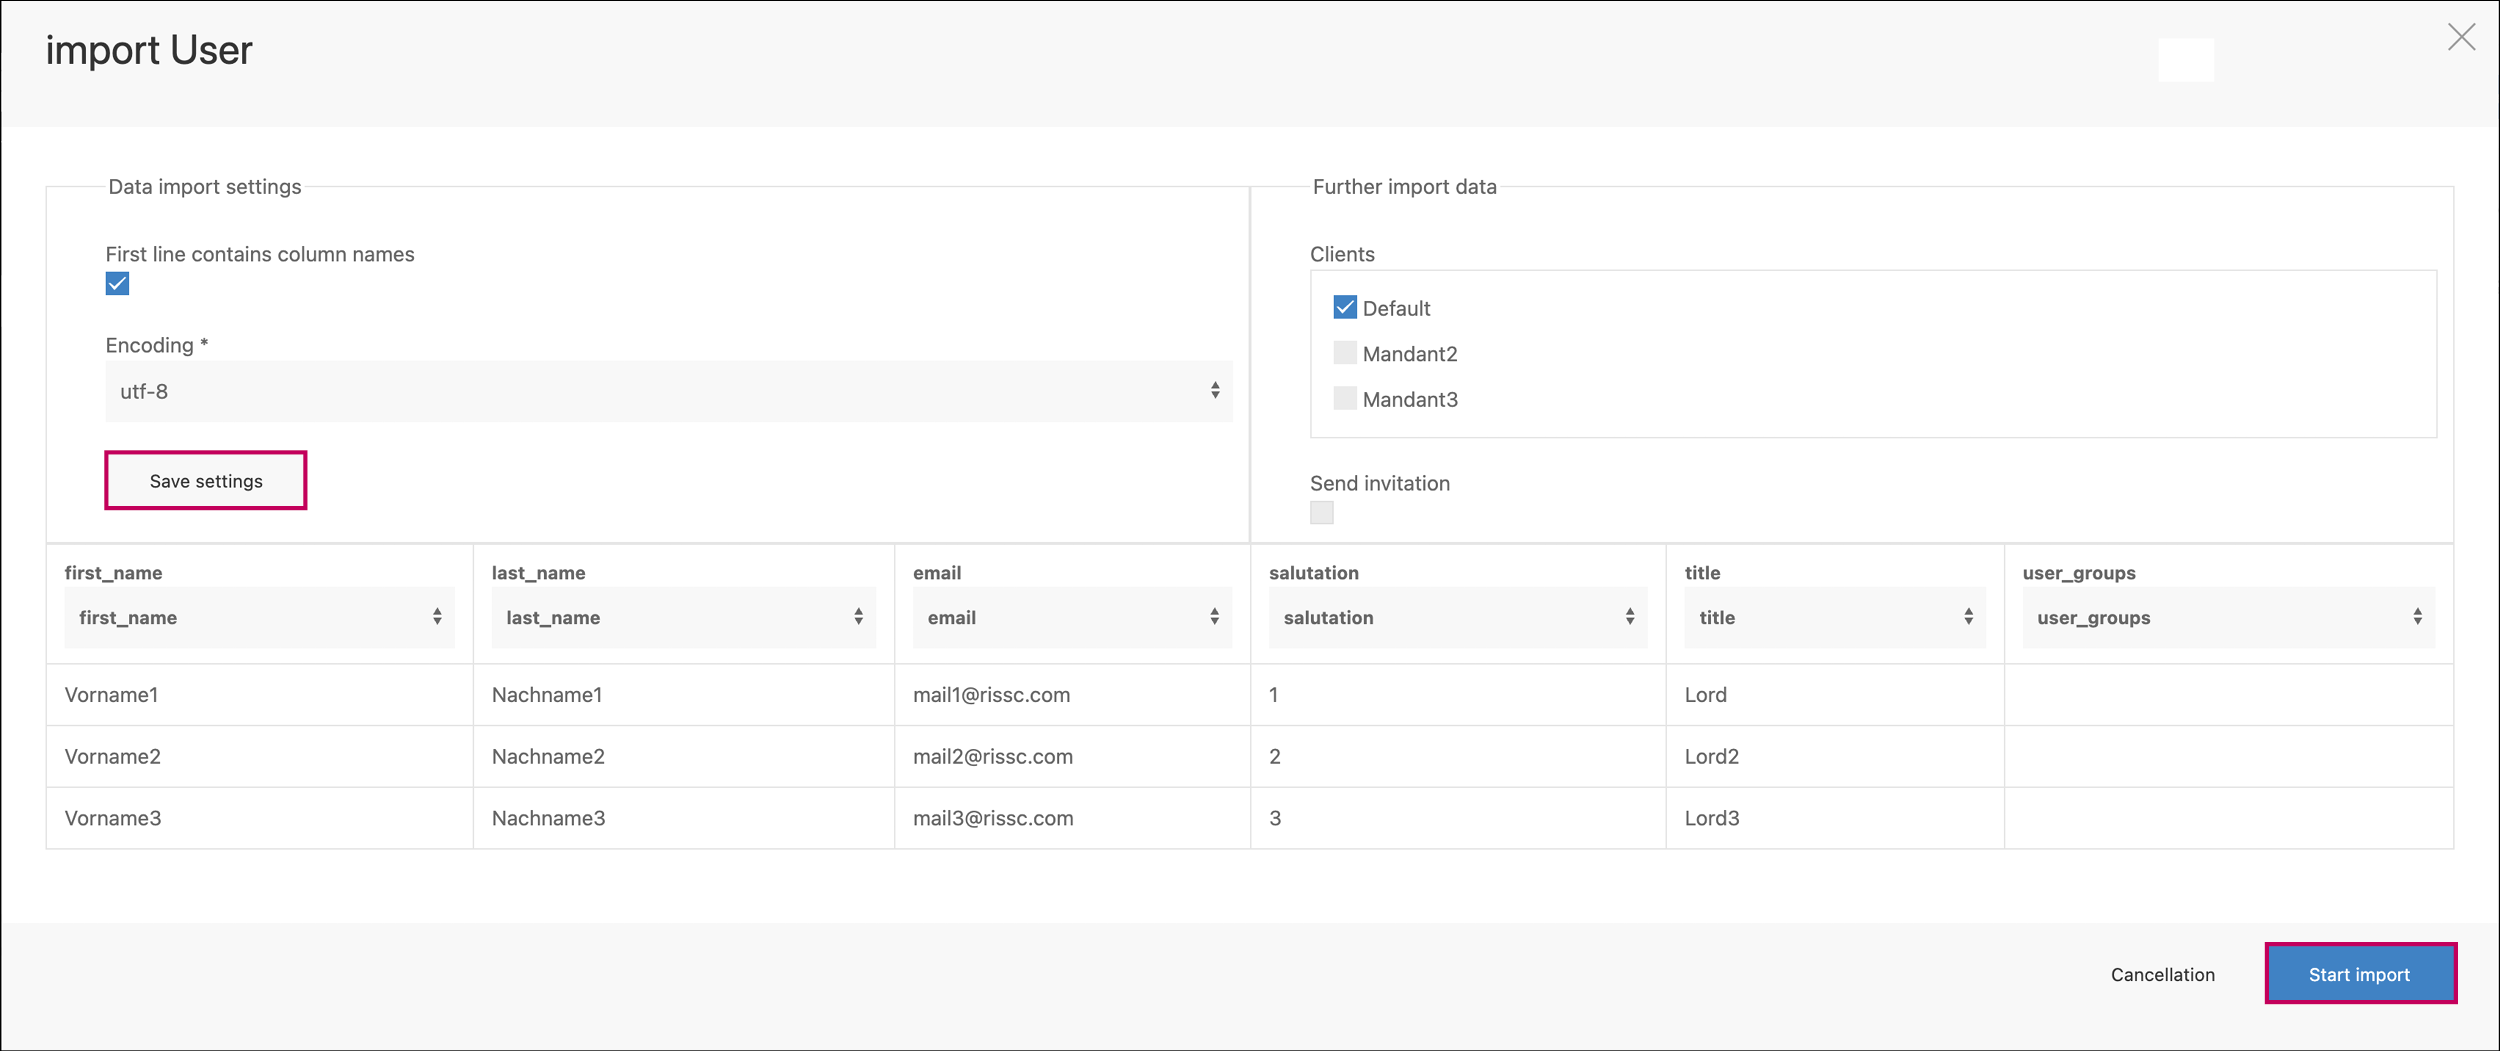
Import User
The Import User button can be used to automatically create users via CSV file.

The CSV file must contain the columns first_name, last_name, email, salutation and title.
For the salutation, the following values must be entered:1 = Mr. / 2 = Mrs. / 3 = Divers.
The column user_groups must also be included for technical reasons, but the assignment to the user groups can only be made after the import.
Sample file:
After selecting the CSV file, the column titles are assigned accordingly and the import is started
User attributes
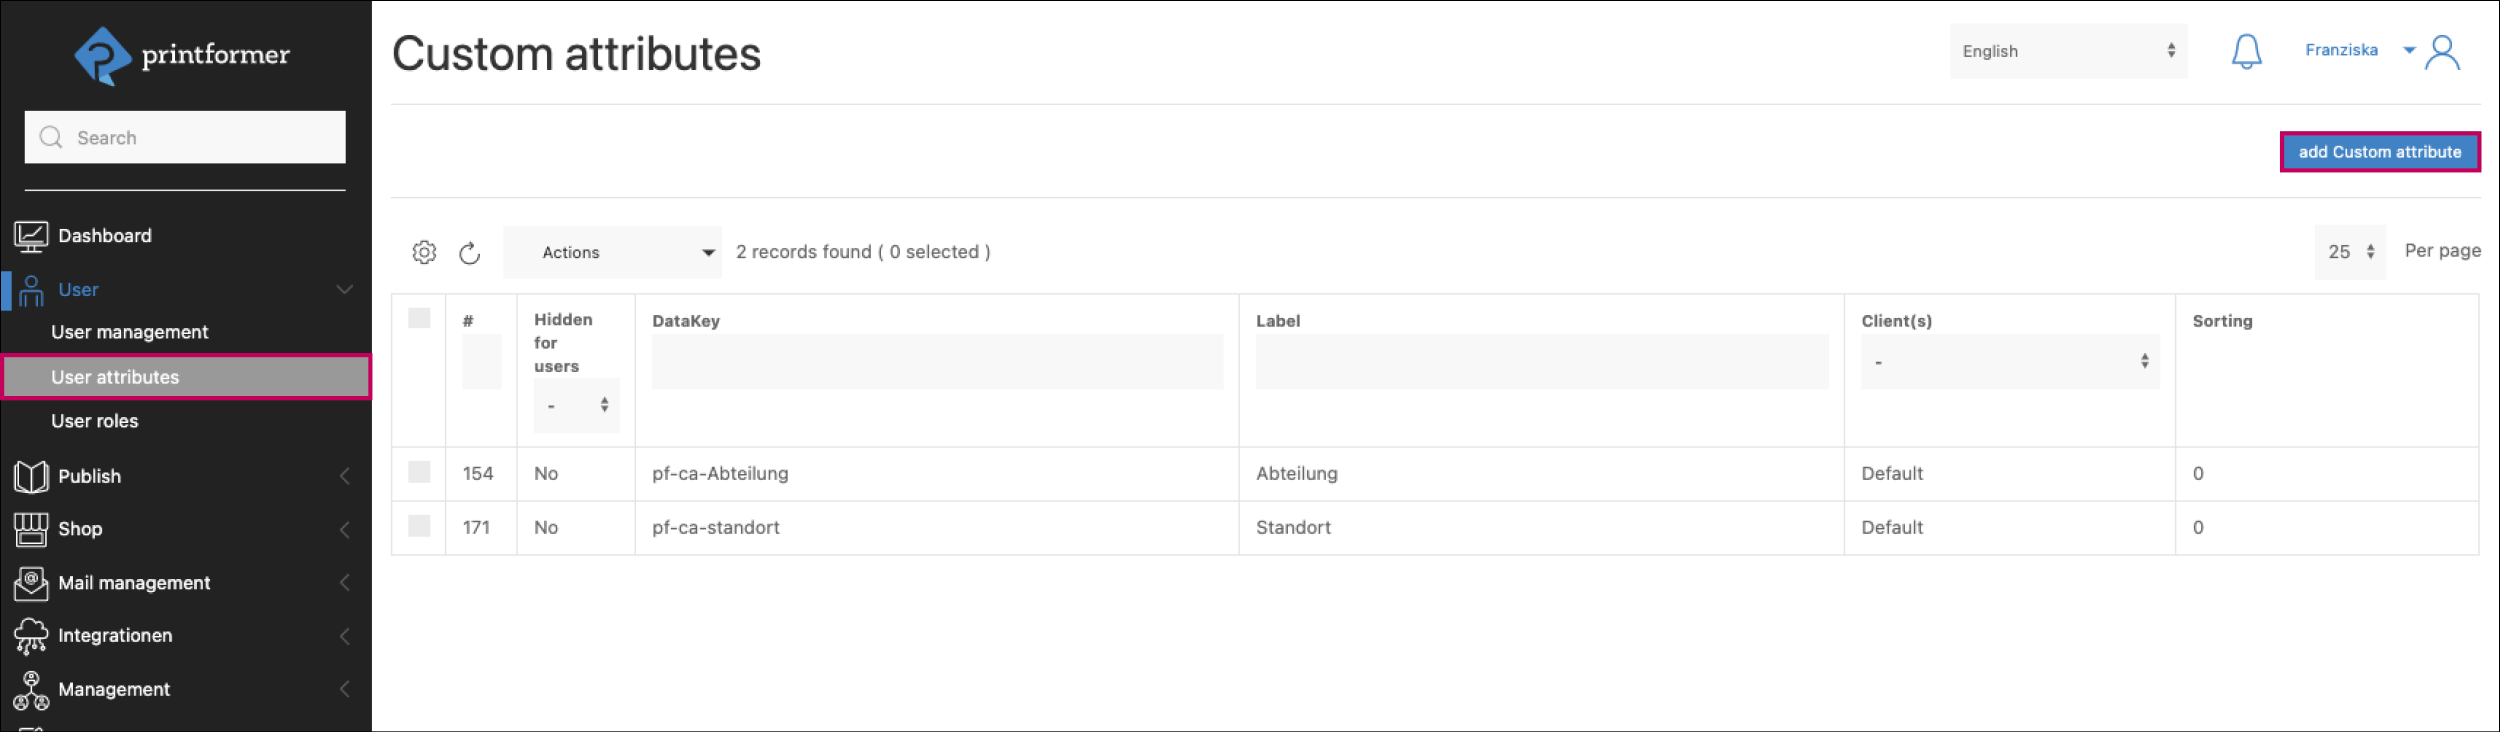
A user attribute is a self-defined attribute that can get a different value depending on the user (e.g. branch location, region, etc.). The assignment is made via the client selection. Thus, a user attribute can be assigned to one or more clients. A default value is defined, which can then be customized for each user. For example, if the user attribute Location is created with the default Stuttgart, this value will appear for all selected clients. This value can be individualized for each user via the user administration (User administration > Select user > User attributes).
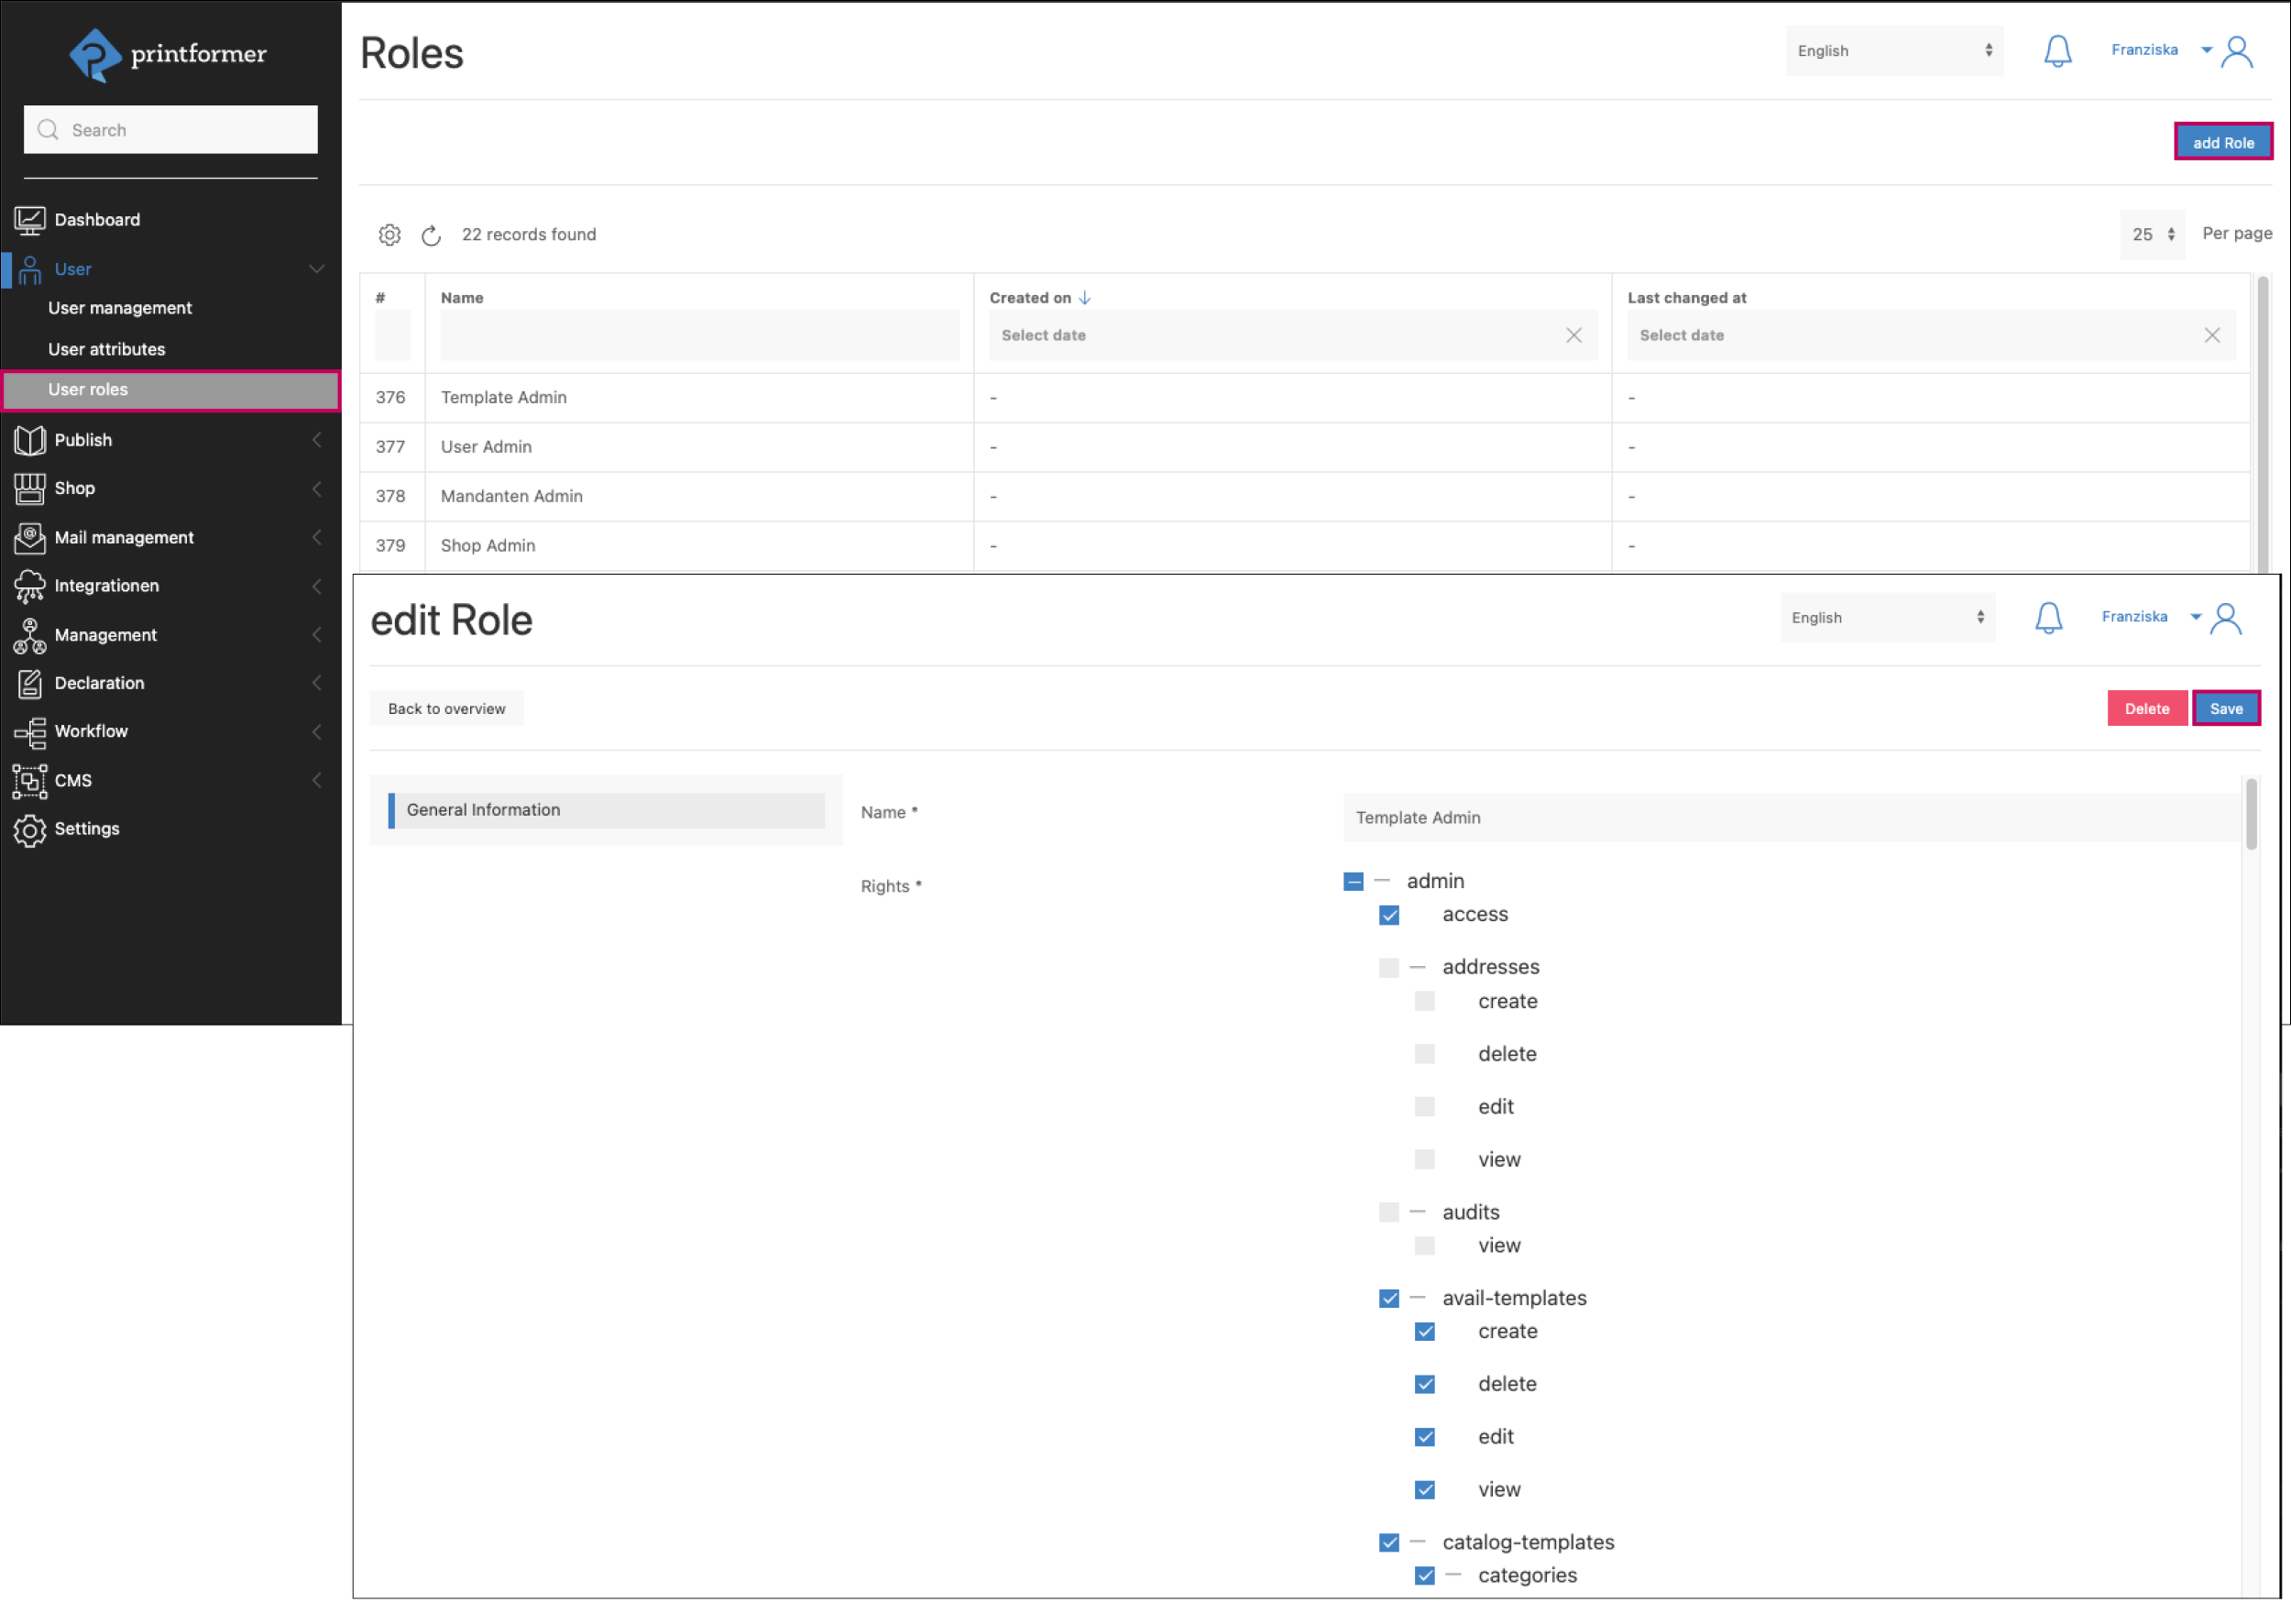
User rolles
The user role determines which printformer features the user is allowed to use and manage.
In this menu item, the predefined admin rights per role can be adjusted (limited) or completely new roles can be created. For example, a special role for graphic designers to edit templates, but without access rights to other areas.
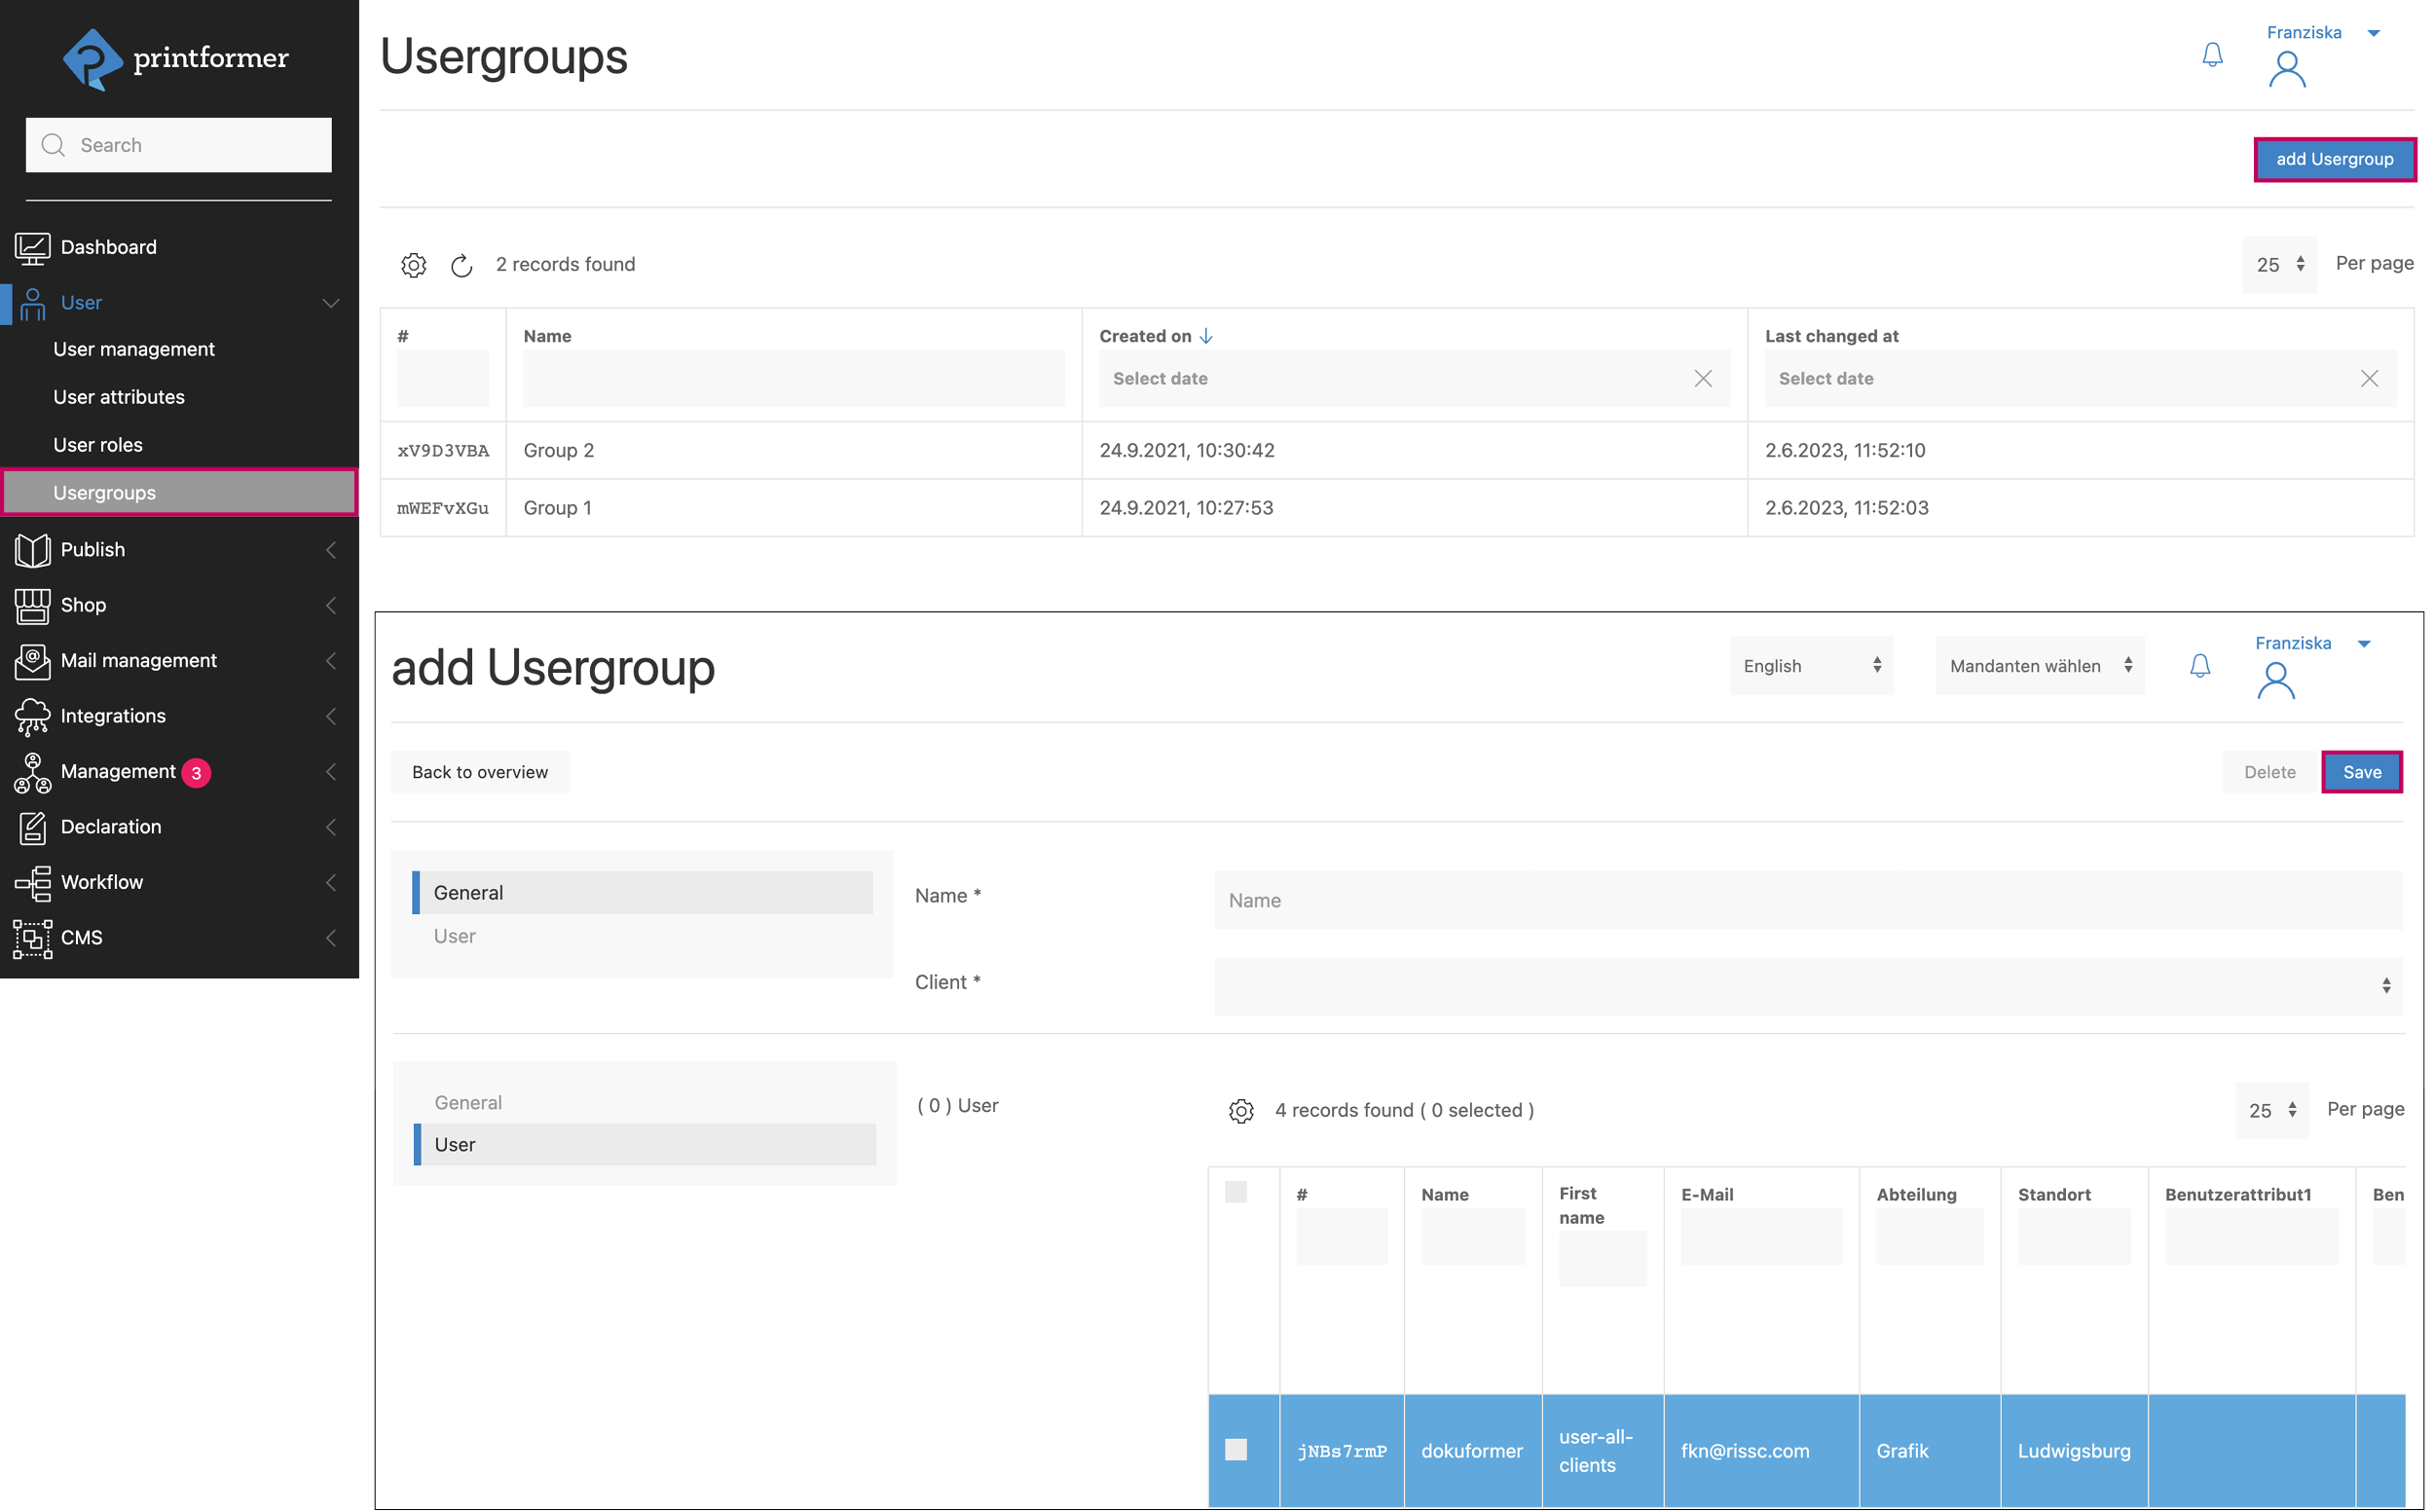
Usergroups
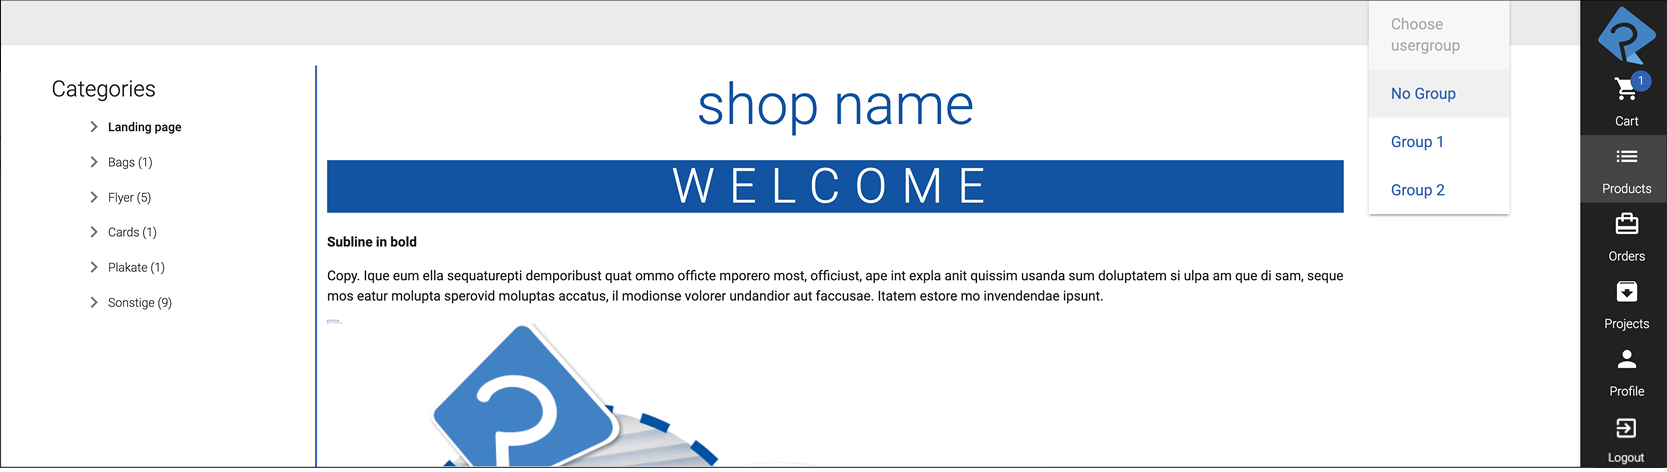
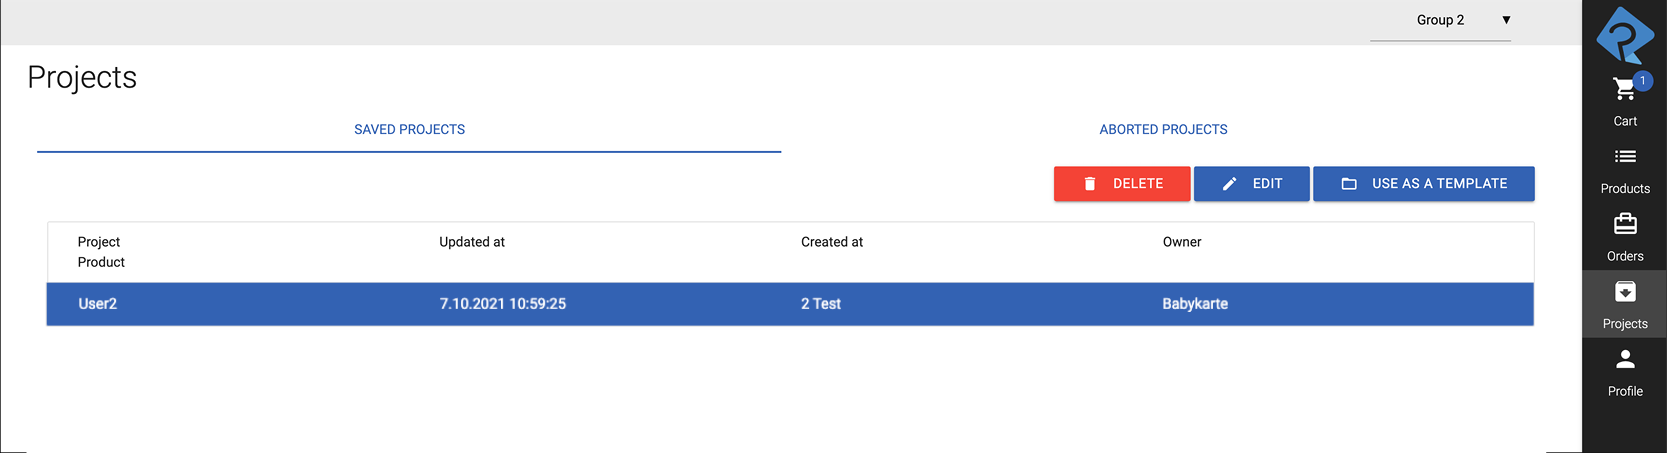
Via user groups, several users can be combined in one (or more) group(s). Projects in the Closed Shop can also be assigned to groups. They are then visible to all users who are assigned to this group and can also be edited by them.
(Example: User A in group 1 & 2, User B in group 1, User C in group 2, if User B creates a project, A and B are allowed to see/edit the project, but C is not).