Data merging (personalisation)
To obtain content from data sources, text of a placeholder is selected in the InDesign document and tagged with PFPlaceholder (see Creating placeholders in InDesign and PFPlaceholder attributes).
Possible data sources
with an existing shop:
Draft setup (XML values for DataKeys) see data sources.
Custom Attributes:
Exist in different places in the printformer and can be edited/overwritten separately. (Each admin can modify the data themselves)
With the setting ‘Can be overwritten in the editor’, the attributes are content-modifiable, i.e. when editing in the editor, the content is transferred to the saved data and thus also to all templates that have not yet been produced).
The attributes can also be used for condition-JSON.printformer > User > User attributes
printformer > Publish > Templates > Custom attributes
printformer > Publish > Drafts > Draft attributes
printformer > Shop > Products > Attributes
an Excel or CSV file can be uploaded to the printformer editor for mass personalisation to generate a PDF/VT.
API Default values (values can be specified when creating the draft and updated via the API)
If the template contains DataKeys that are not to be filled using personalisation, a Template DataKey (checkbox Hidden for user) can be created to hide it in the assignment of the data (as well as in the editor).
Data merging in the printformer editor
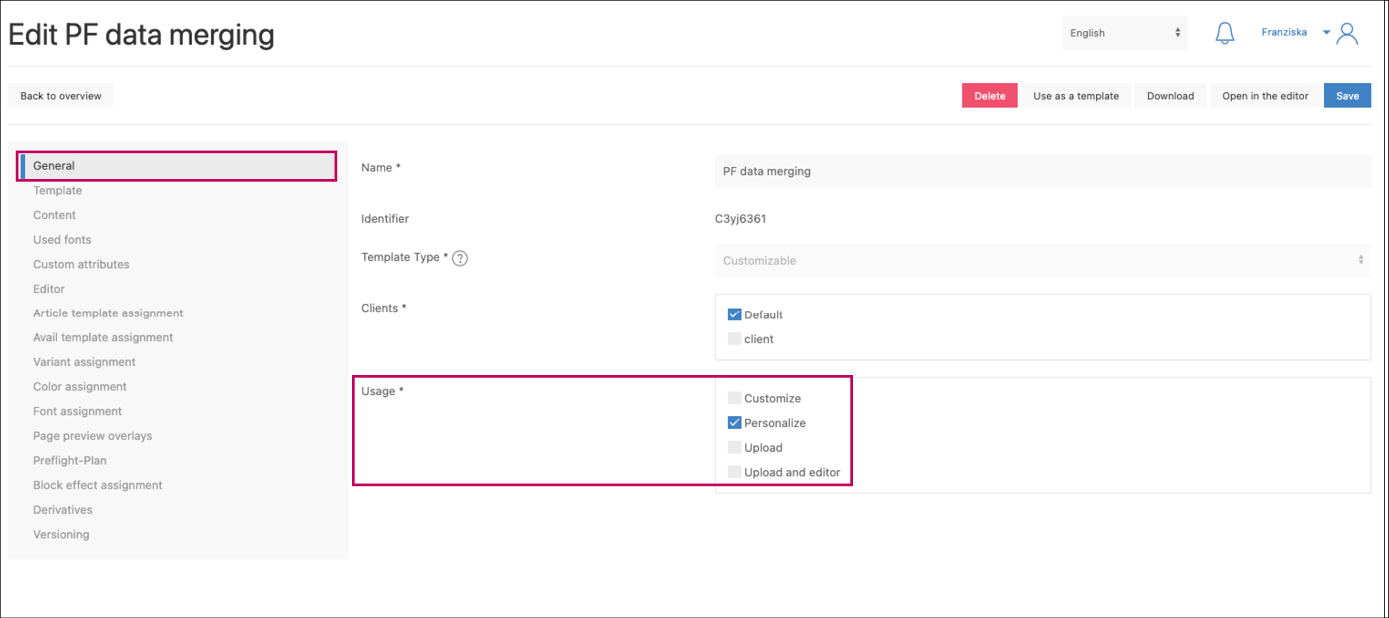
In order to be able to upload a data source (Excel or CSV file) in the printformer editor, Personalize must be selected as the use when creating the template in printformer.

In addition, the form editor can be activated and thus individual fields in the editor can be overwritten (the changes are saved in the data source).
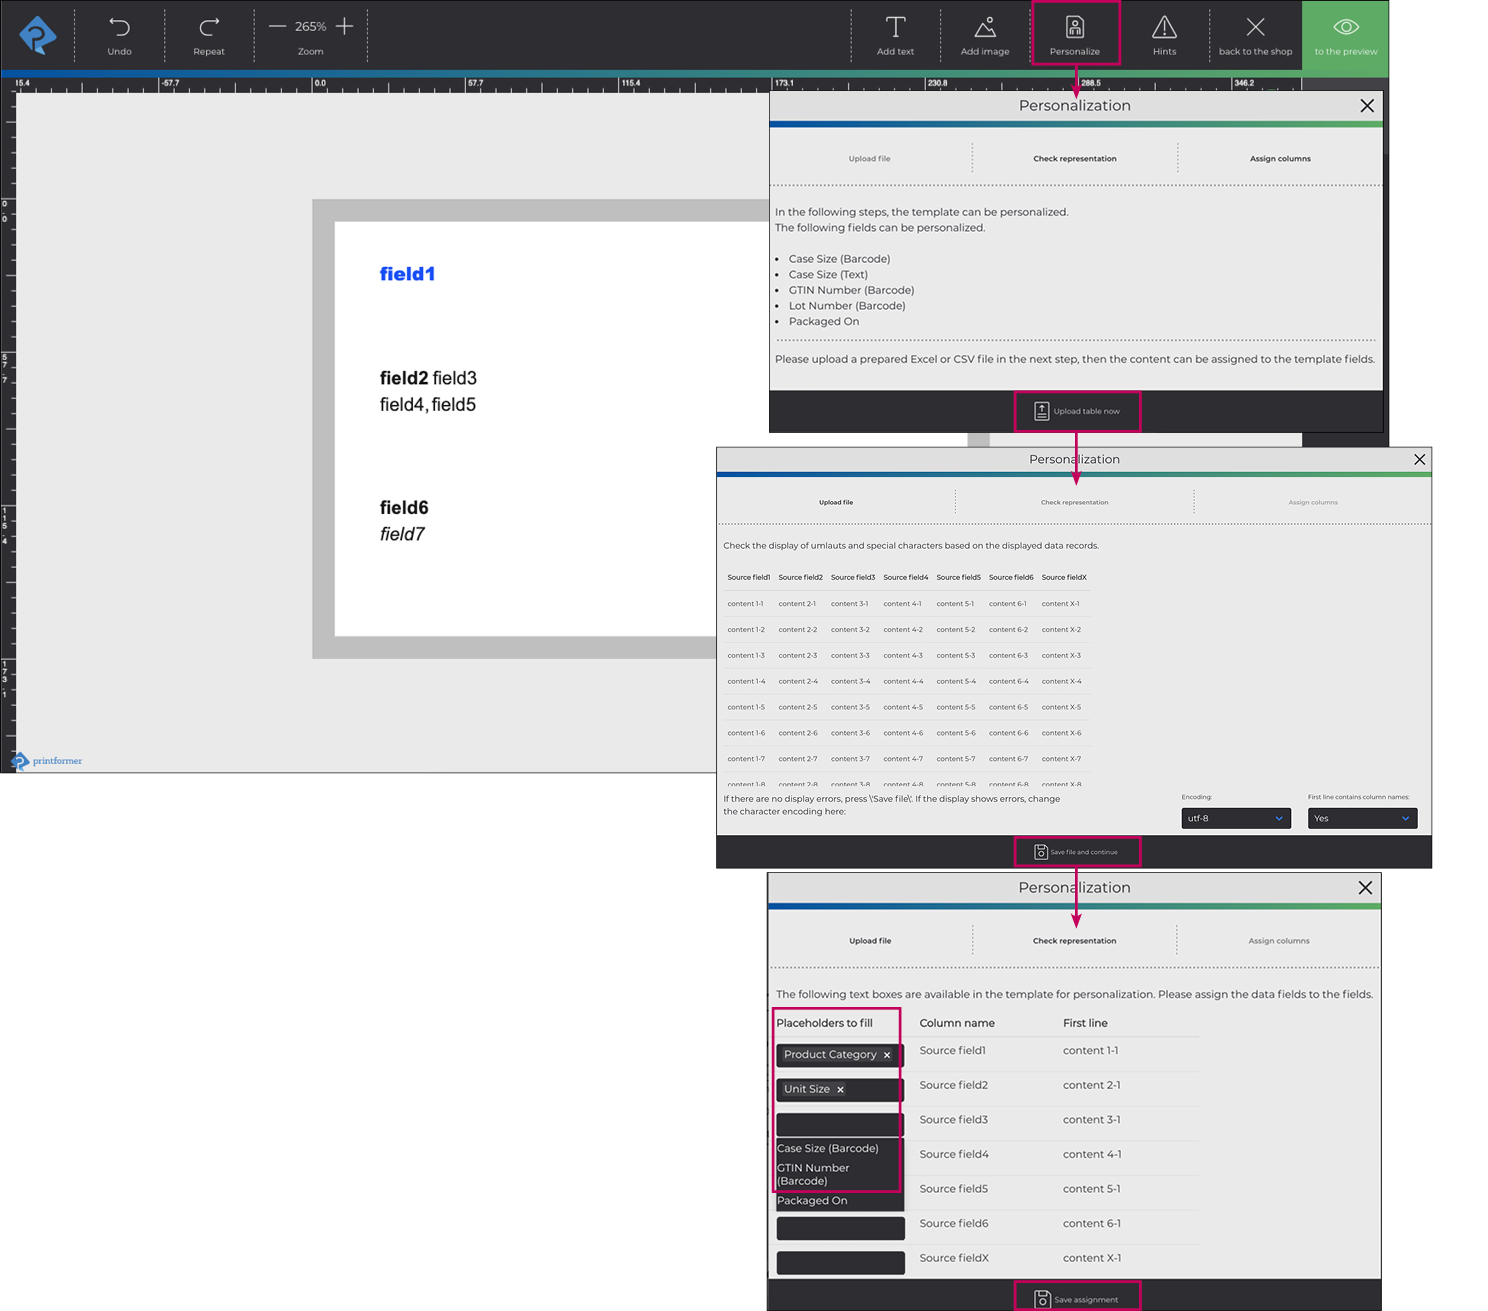
When opening the template in the editor, the icon Personalisize now appears in the top menu bar:
Upload table now (Button at the bottom of the window)
Check display and save file and continueDatei
The data fields are now assigned to the placeholders (text frames).
If the DataKeys match the column names, they are assigned automatically.
At least one placeholder must be selected for each data field. (However, individual data fields can also be assigned to several placeholders).
Save Assignment

If the column name and the DataKey of the placeholder are identical, they are automatically assigned.
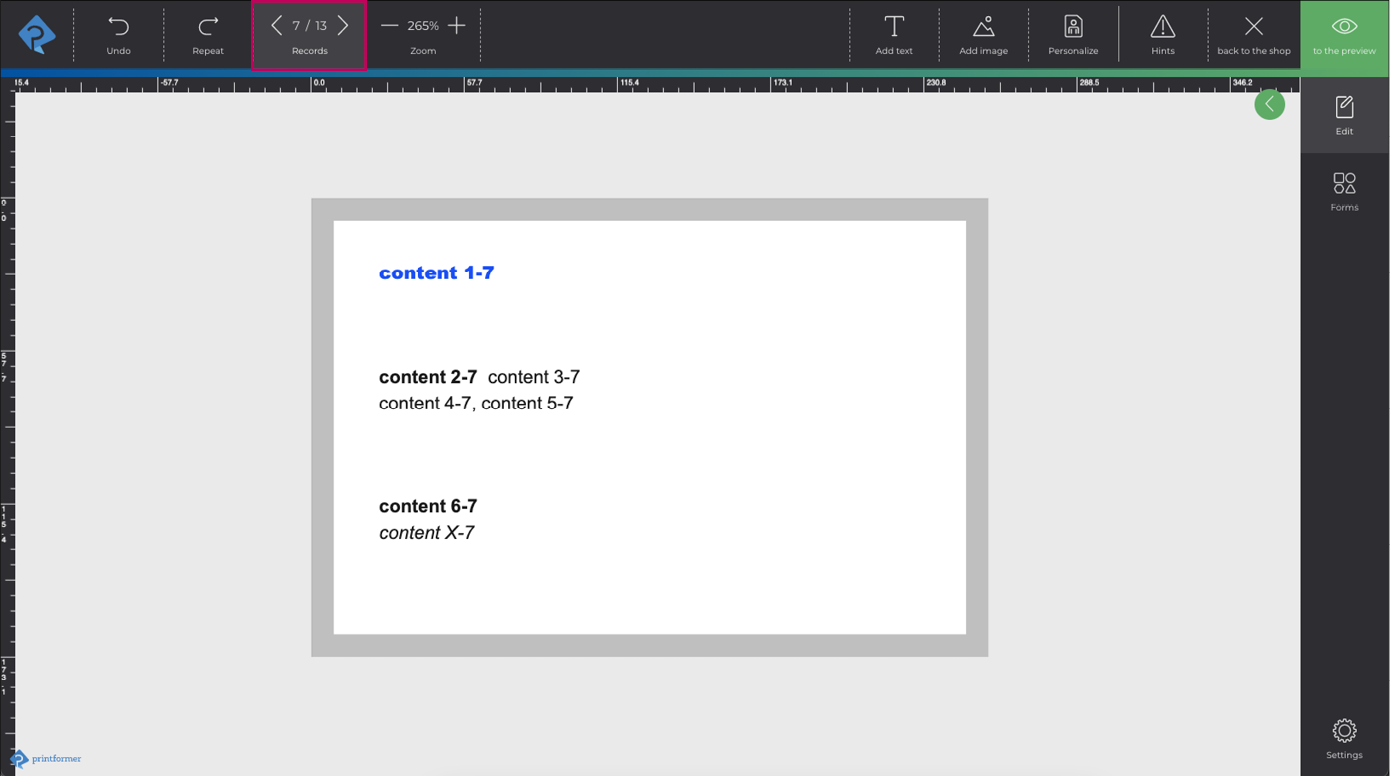
The text frames are then filled with the selected data.
In the top menu, the individual data records can be clicked through for viewing.
(Only the currently selected data record is displayed in the preview).

Two versions are created when the print data is produced:
a PDF/VT in which all data records are stored
one PDF with one data record each
In the admin area under Producers, the Producer profile and Delivery method can be used to specify how the print data is to be created for transfer (one file per data record; one file for all data records (PDF/VT-1); both options).
In order for the print data generation of the draft to start, a file must be uploaded under Personalize purpose.
