Variants
eWith this feature, any number of color versions can be created for one template without having to create additional templates. By simply defining rules, assets (image files) or colors (fill, stroke or text color) can be switched. (Provided that a corresponding element with fill, stroke or text color is already contained in the template, e.g. the stroke color of an object cannot be changed if the object does not have a stroke in the IDML).
Sample variant
Since this feature is very complex, it is worth looking at an example first:
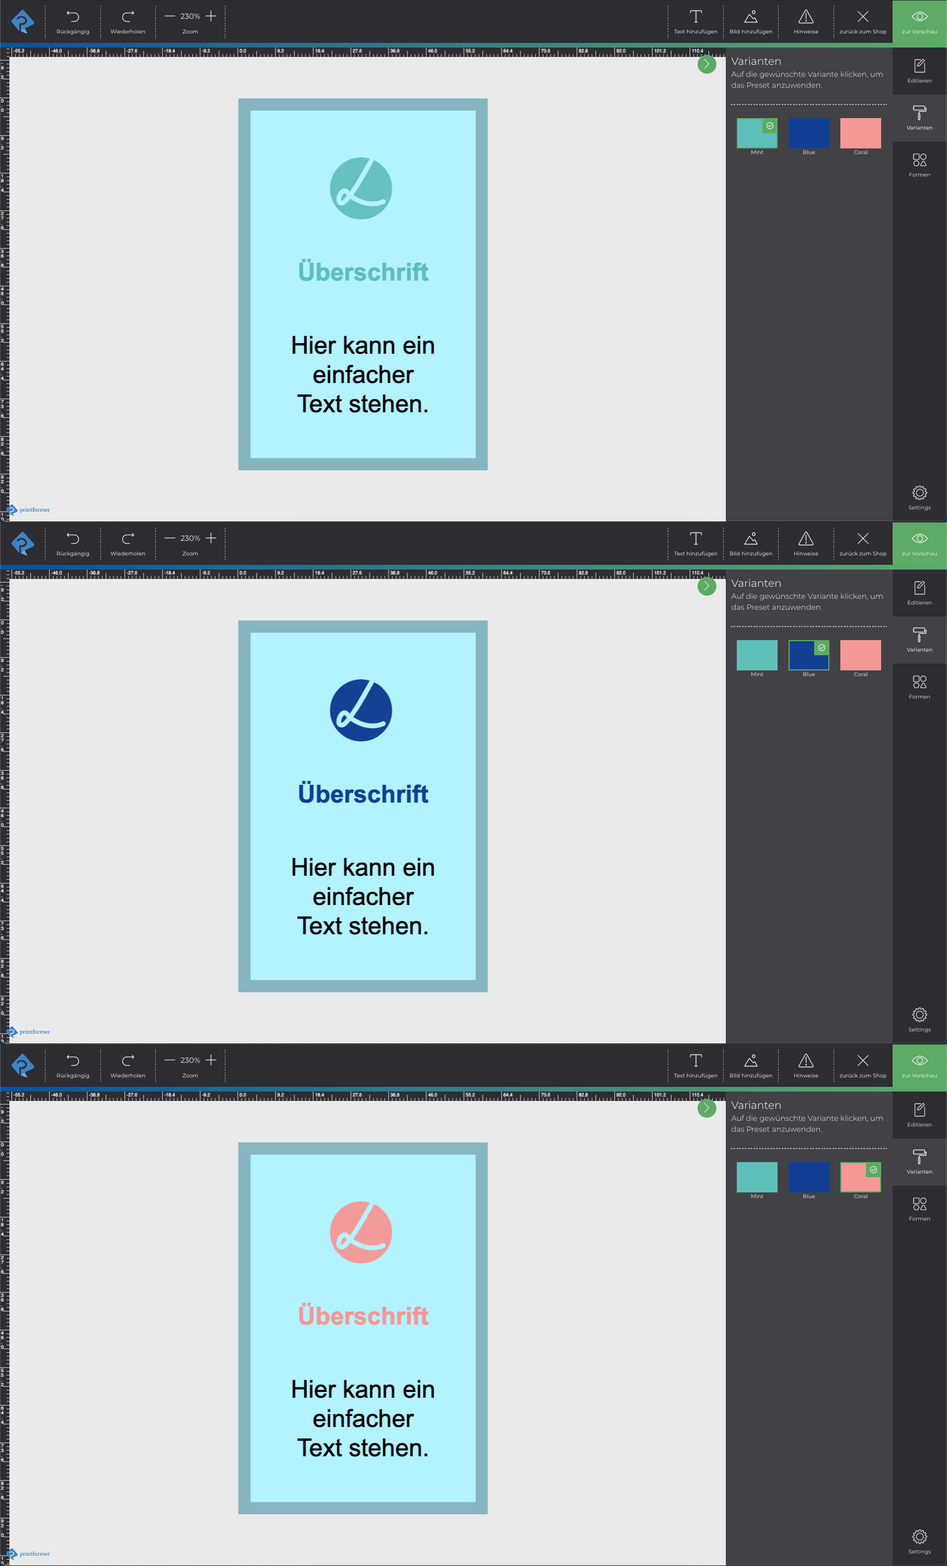
When opening the template in the printformer editor, the image block is (automatically) filled with a logo and there are three color variants of logo and headline to choose from: Mint, Blue and Coral.
You can find the complete instructions for this example here: Tutorial Variants
Overview
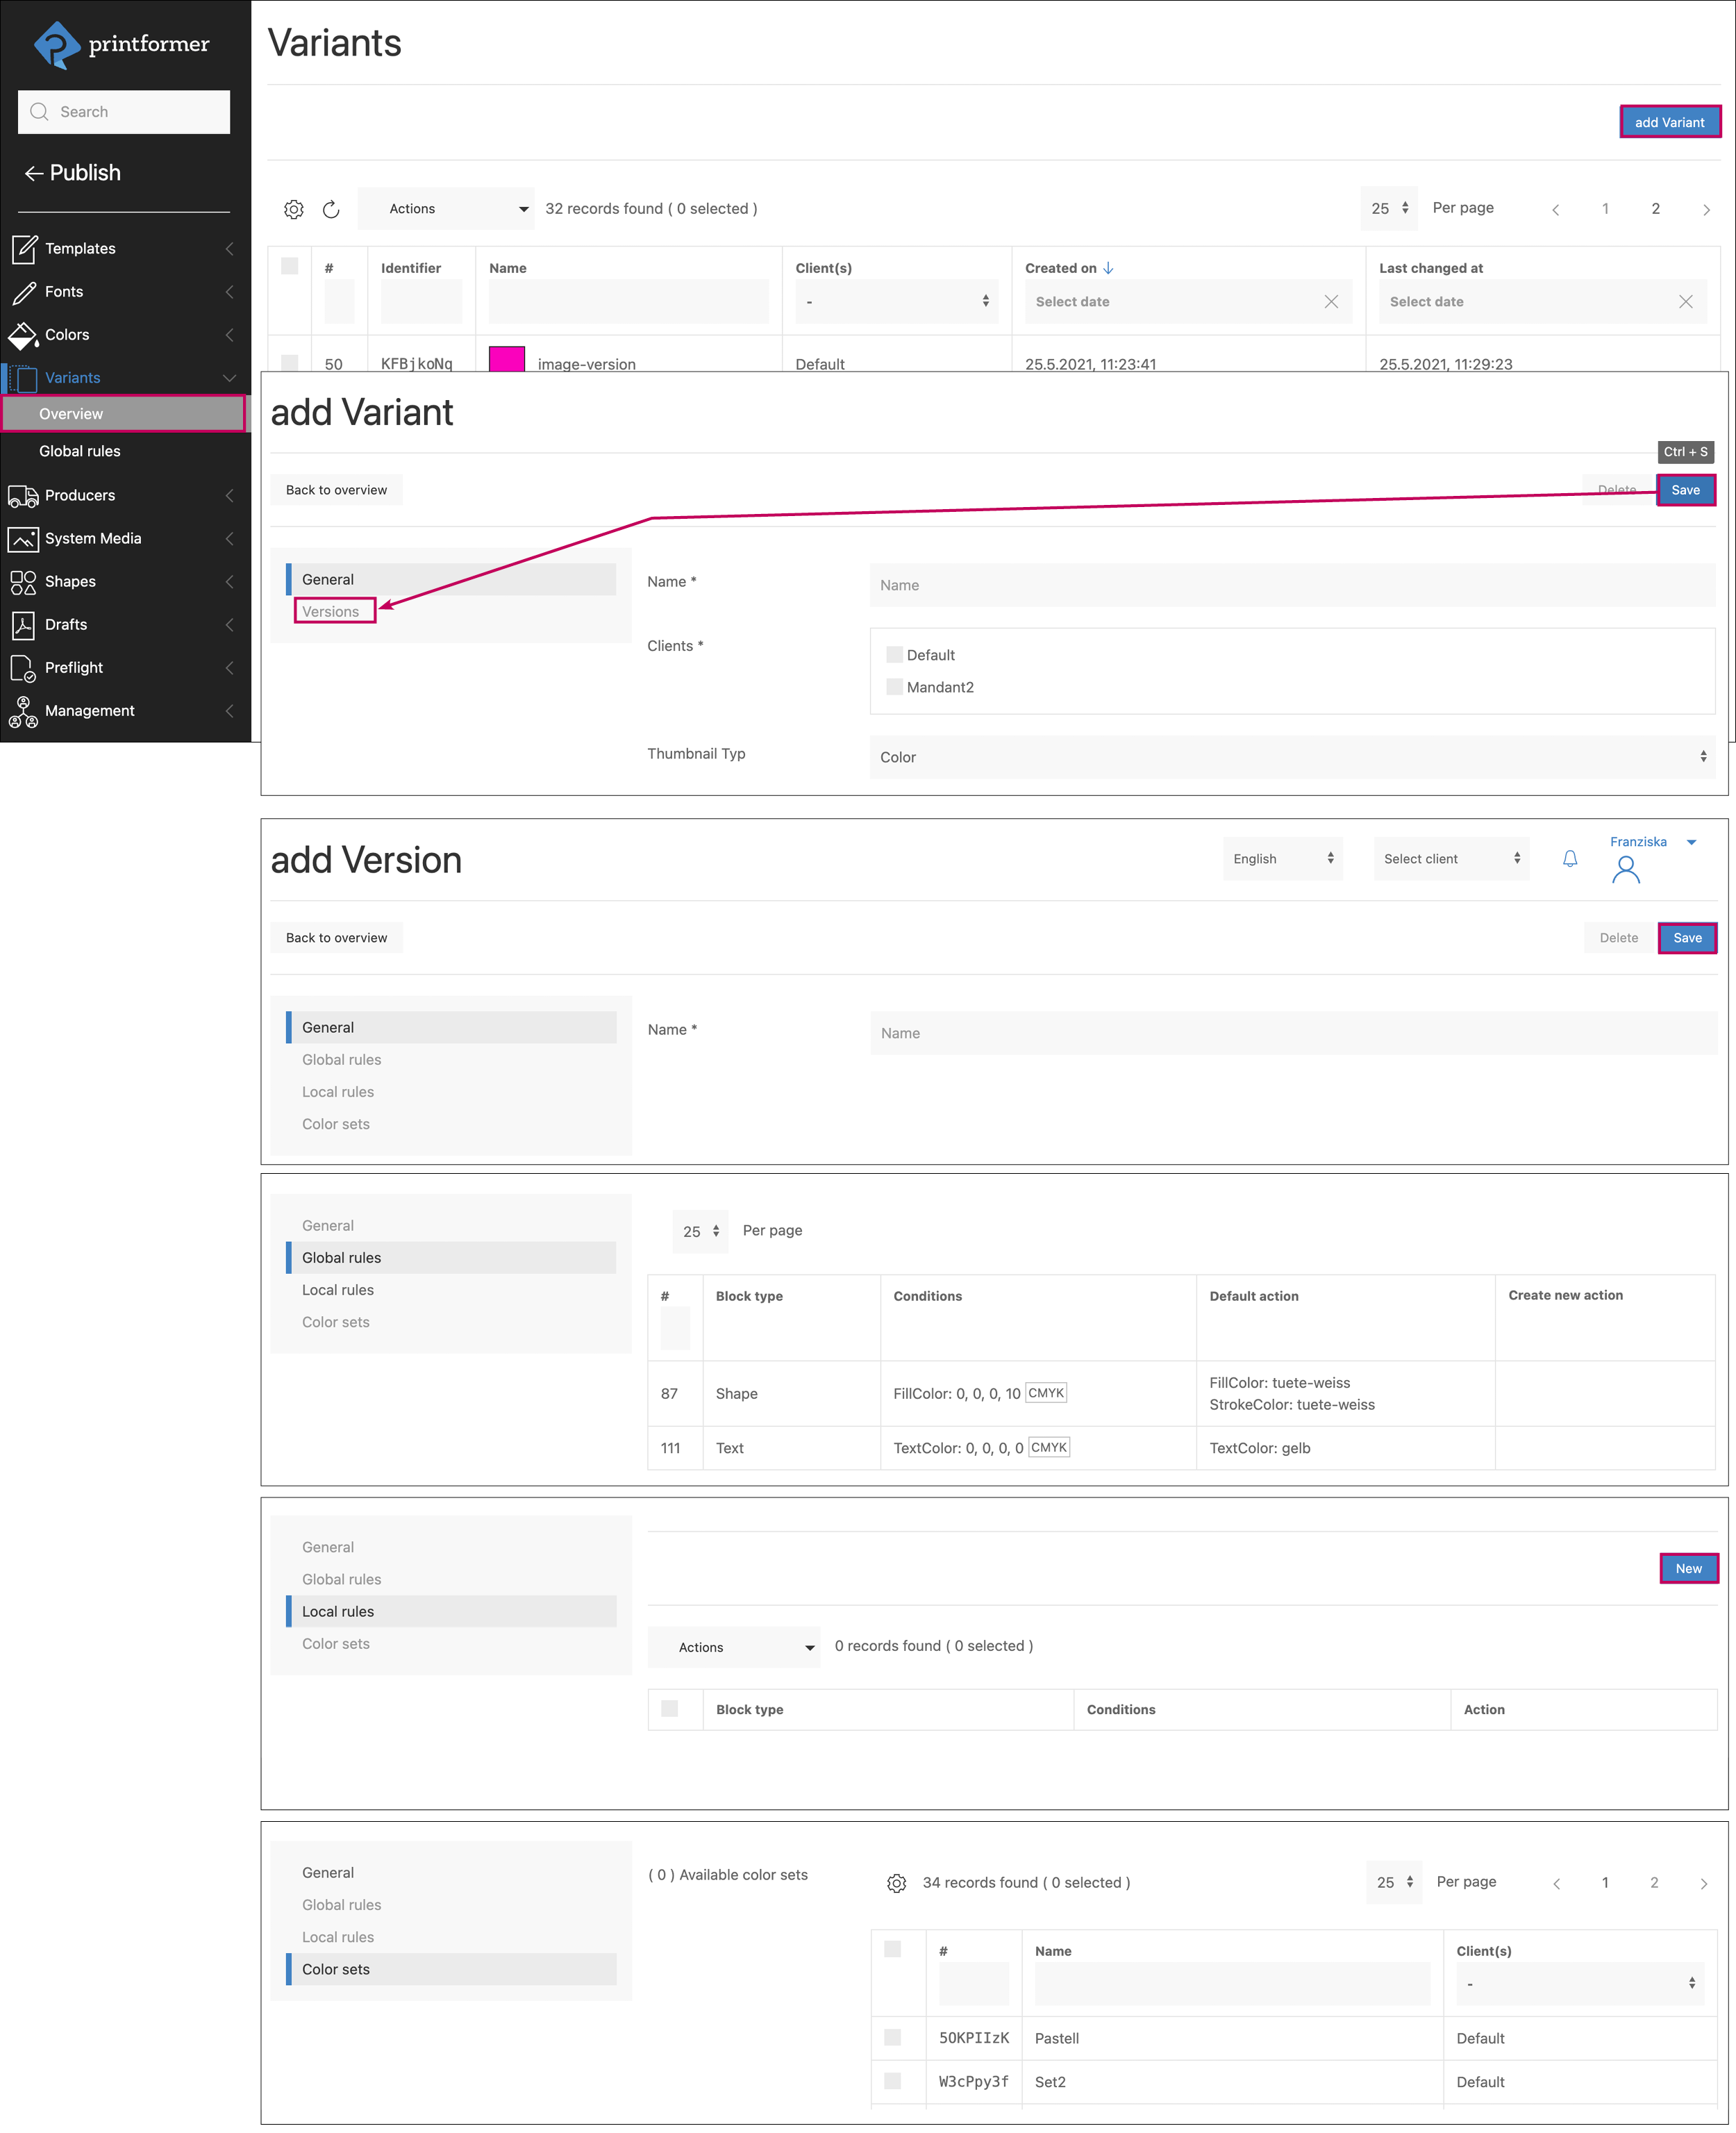
All existing variants are displayed in the variant overview and can be customised with a click.
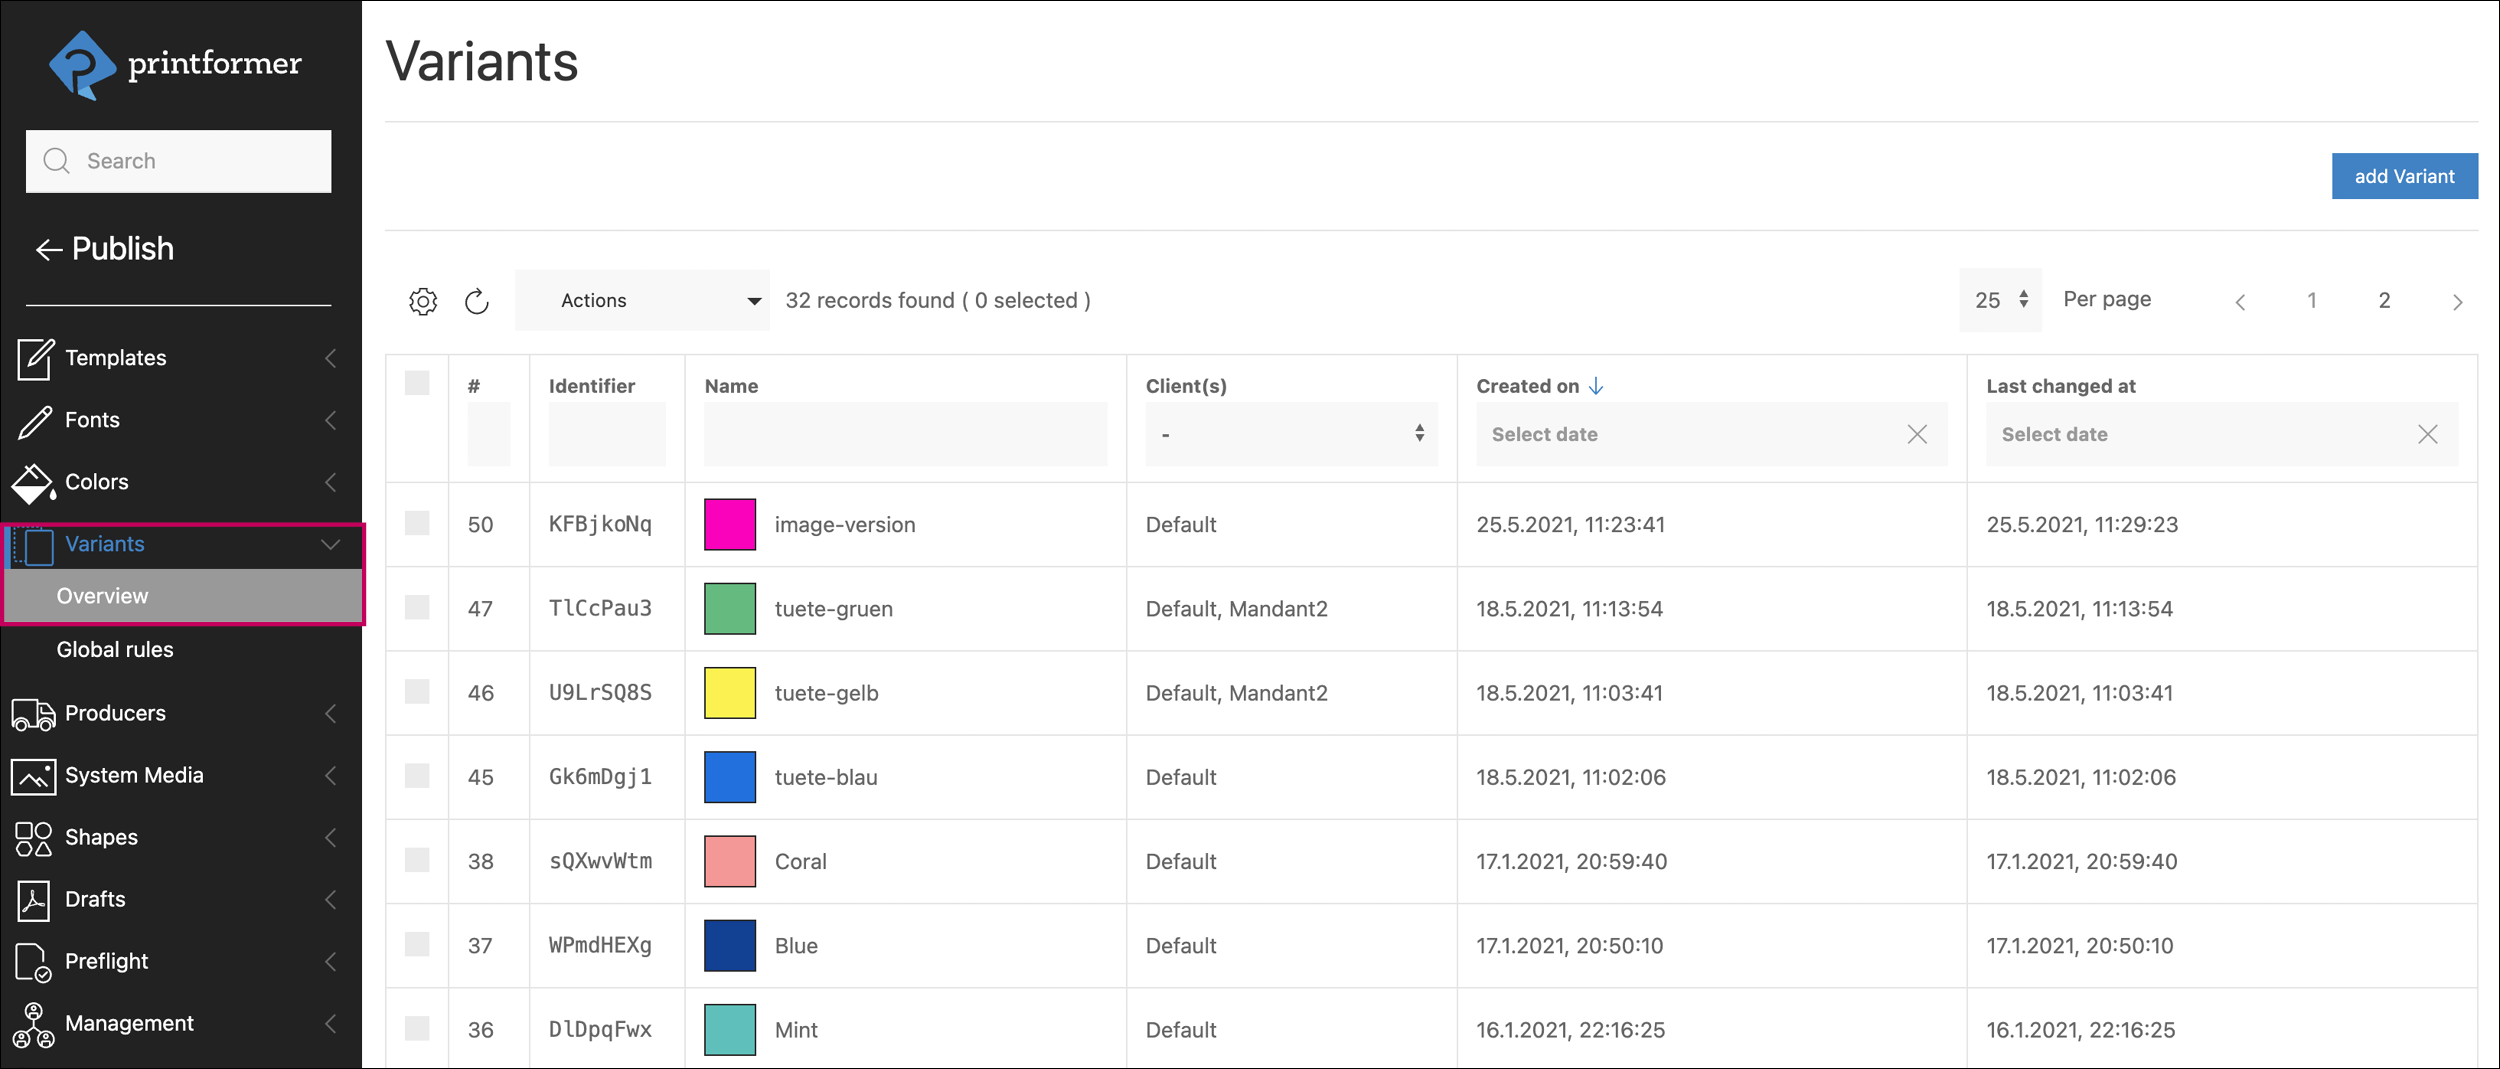
Each Variant can contain one or more Versions. The required rules are defined in these versions.
The Rules each consist of a condition (when the rule should be applied, e.g. if an element has the fill color white) and an action (what should be changed by the rule, e.g. the area should now be colored green instead of white).
Globale Rules
Global rules can be created as masters to simplify the creation of variants later on.
The block type and the conditions for this are determined and a standard action is defined.
This can then be customised for each variant. (If there are additional local rules in a variant with the same conditions as in a global rule, the local rule is applied).

Global rules apply to all templates to which variants are assigned (regardless of whether the global rule is overwritten in the variant or not).
Add Rule
Click on the button to create a new rule.
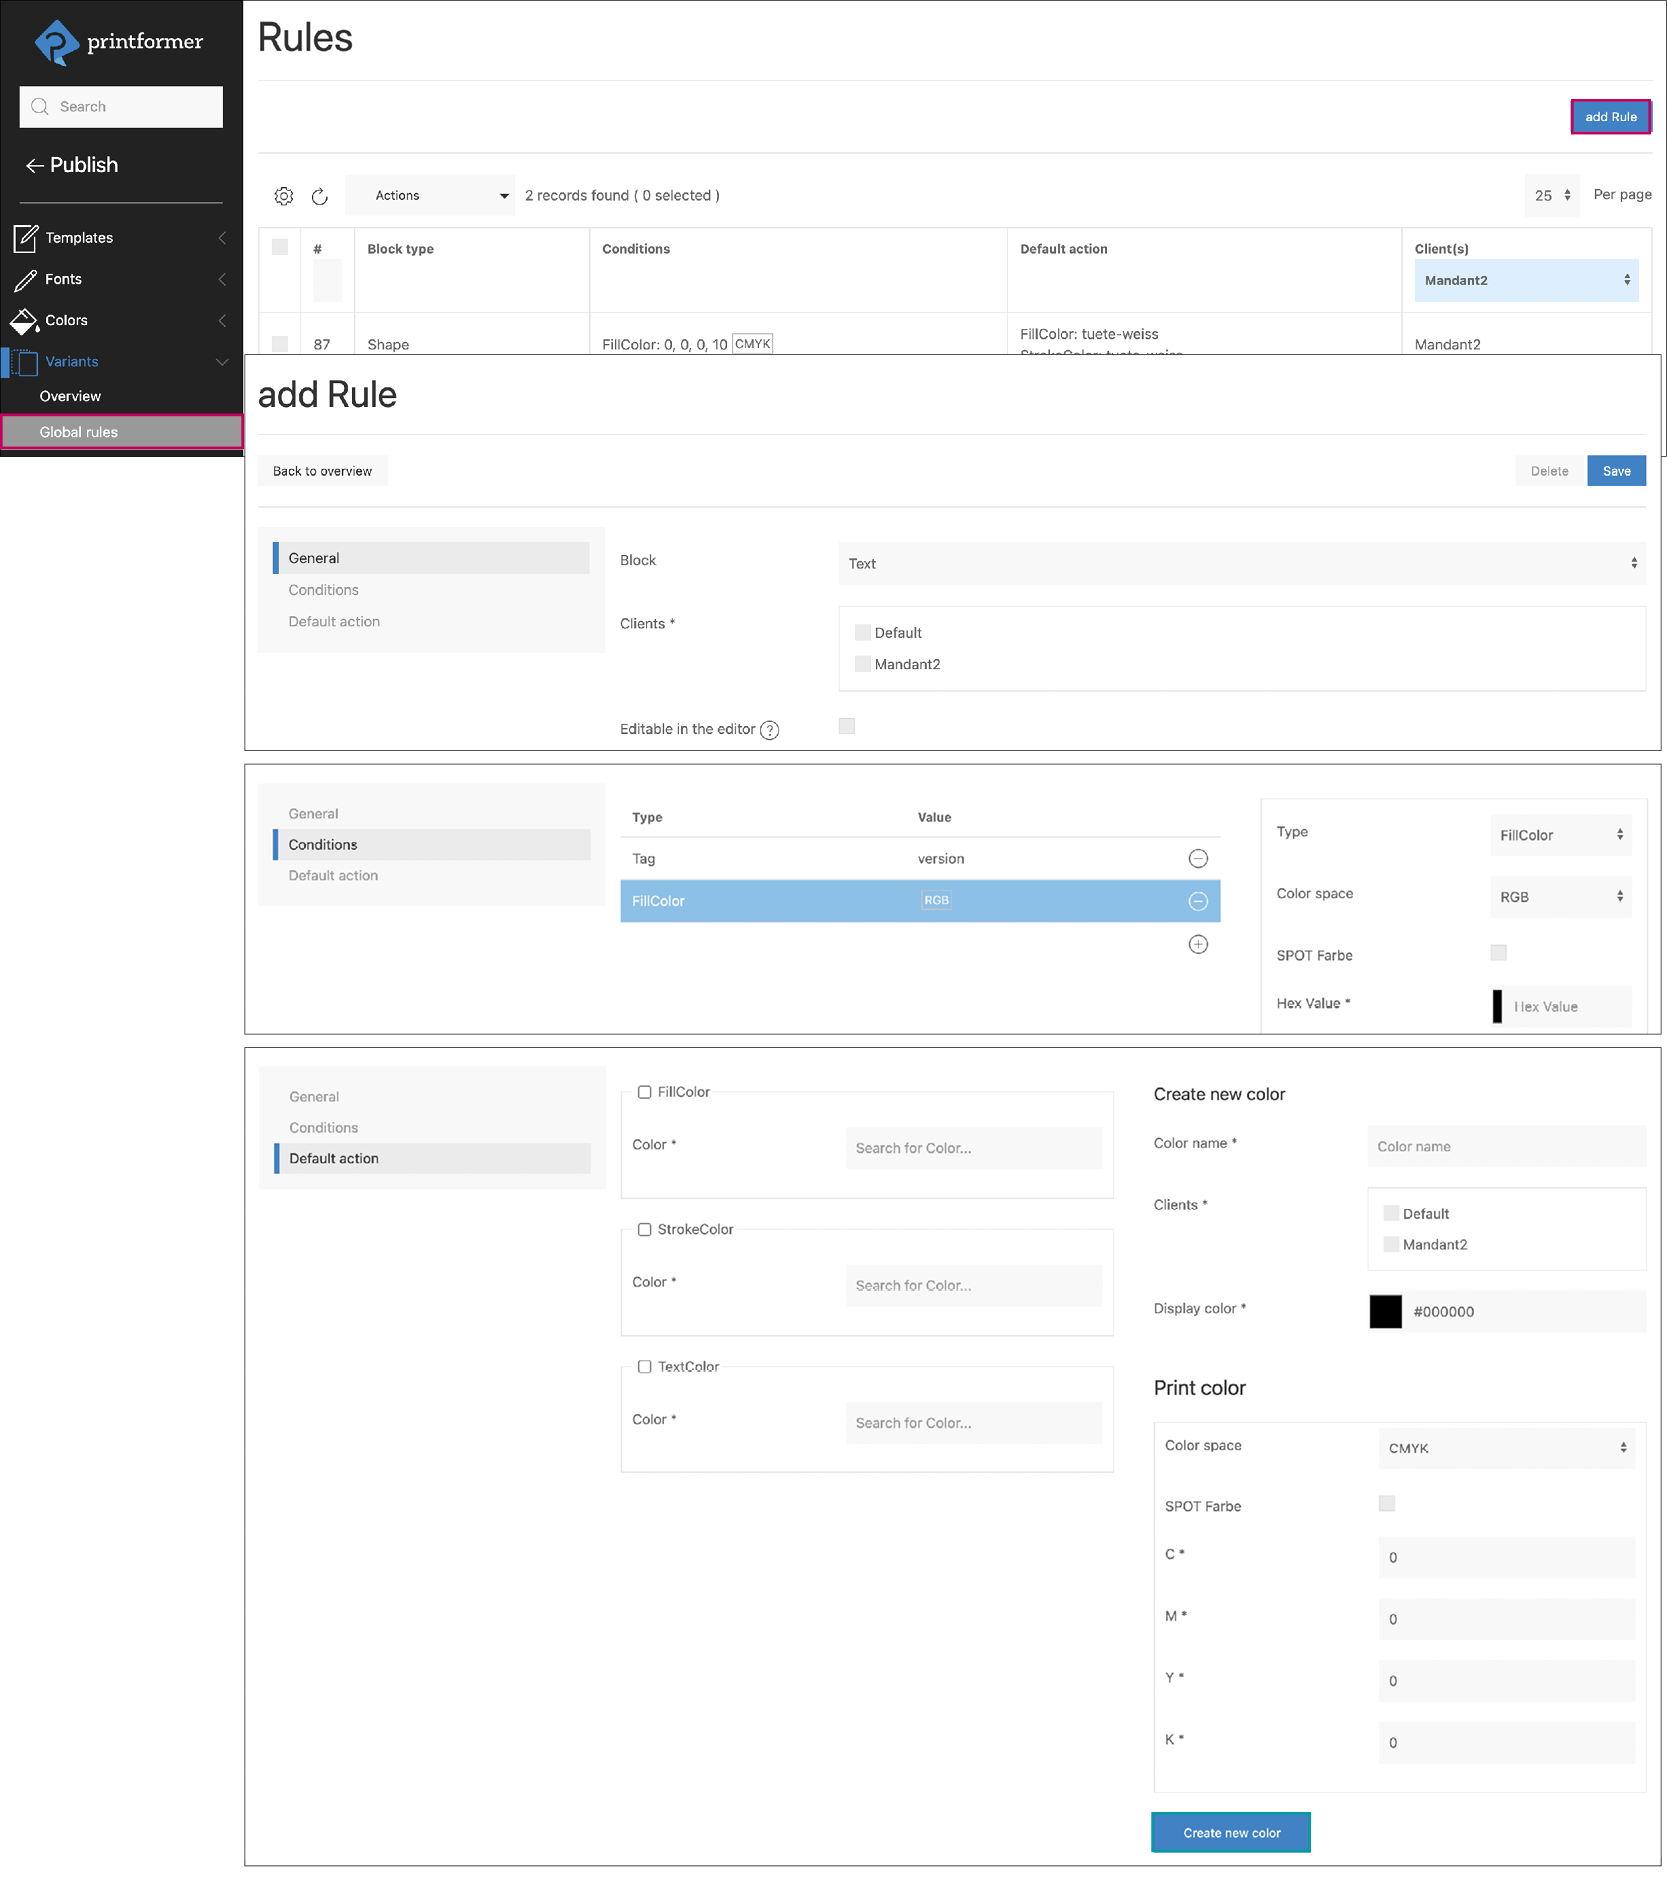
Under General, you first determine which block type (Text, Graphic, Shape or Image) the rule applies to. By activating the respective checkbox, the global rule is assigned to one or more clients. You can also specify here whether the rule can be overwritten by the user in the editor.
More Info Editable in the editor
The Conditions define when the rule should be applied. The plus symbol creates a new condition. (Existing rules can be revised by clicking on them).
The type and a value must be defined for each condition; the following combinations are available for selection:
Conditions | ||
Block | Type | Value |
Graphic, Shape | freely selectable (the tag is assigned to the block in the IDML as a new attribute, name: tags) | |
FillColor | Specification of the color values (RGB or CMYK) or the name of the spot color | |
StrokeColor | Specification of the color values (RGB or CMYK) or the name of the spot color | |
Text | freely selectable (the tag is assigned to the block in the IDML as a new attribute, name: tags) | |
FillColor | Specification of the color values (RGB or CMYK) or the name of the spot color | |
TextColor | Specification of the color values (RGB or CMYK) or the name of the spot color | |
DataKey | freely selectable: the DataKey is assigned to the image block in the IDML as a new attribute (Name: data-keys) | |
|
The image block in the IDML must be empty (no default image). In addition, the media-hunter attribute must be added with the value system-media. | ||
FillColor | Specification of the color values (RGB or CMYK) or the name of the spot color | |
StrokeColor | Specification of the color values (RGB or CMYK) or the name of the spot color | |
Under Default action, you can now specify which action the global rules are to execute.
This means that as soon as a type fulfills one of the (previously defined) conditions, the specified variant is applied to it.
Actions | ||
Blockart | Possible actions | |
Graphic, Shape | FillColor | Enter the Color name of an (existing) color (you can also create and save a new color in the menu on the right and then enter the name just given, on the left). |
StrokeColor | ||
Text | FillColor | Enter the Color name of an (existing) color (you can also create and save a new color in the menu on the right and then enter the name just given, on the left). |
TextColor | ||
Image (Place image) | Selection of an asset from the system media | |
FillColor | Enter the colour name of an (existing) color; the color actions only work as long as the image block is empty. | |
StrokeColor |
The Graphic block type must be selected when using SVGs. It is important that SVG files are saved with these CSS properties: Style attributes. If Fill- or StrokeColor is selected as a condition, the RGB value must be entered. (In the print file, the shape is then output in CMYK if this was defined by the action.)
For Shapes from InDesign (ShapeBlocks), the block type Shape is selected. The corresponding value from the IDML (CMYK or RGB) is specified as the Fill or StrokeColor condition. Spot colors cannot currently be used for this.
Click the Save button to apply all the settings you have made and complete the creation of the rule.
Create Variants
Click on the Add variant button to define the Name, make a client assignment if necessary and specify the Thumbnail typ. You can choose between color or image. The color is created as a hexadecimal color code (later visible in the backend variant overviews and in the printformer editor) and a JPG or PNG file can be uploaded as an image, which will later be used as a thumbnail.
Click on the Save button to continue the variant configuration.
Add Version
The desired rules can now be defined within the variant by using the Versions button.
First you have to add a new Version.
A name for the version is assigned in the General menu.
Under Global rules, the Action of an existing global rule (by clicking on it) can be individually adapted for this individual version (e.g. changing the FillColor).
Under Local rules, new rules (conditions and actions) can be created for the version (instructions Add rules).
A color set can also be assigned to each version: If this color set contains all the colors used in the variant, no color profile and/or color set needs to be assigned to the template later.
Use the Save button to apply all the settings made and complete the creation of the version.
Template settings when using Block Image
*If the variant is used to insert images into an image block, this block must also be added with the attributes data-keys and media-hunter = system-media in the IDML file.
Example:

Template settings when using Condition Tag
If the variant is created with the condition Tag, the relevant elements in the IDML must be added with the attribute tags.
Example:

Note on colors used in variants
In order for the variants to take effect in the template, a Color profile or Color set must first be created that contains all colors used in the versions/rules. This is then assigned to the template under color assignment; alternatively, the Color set can also be assigned directly to the variant.
Assign variants to template(s)
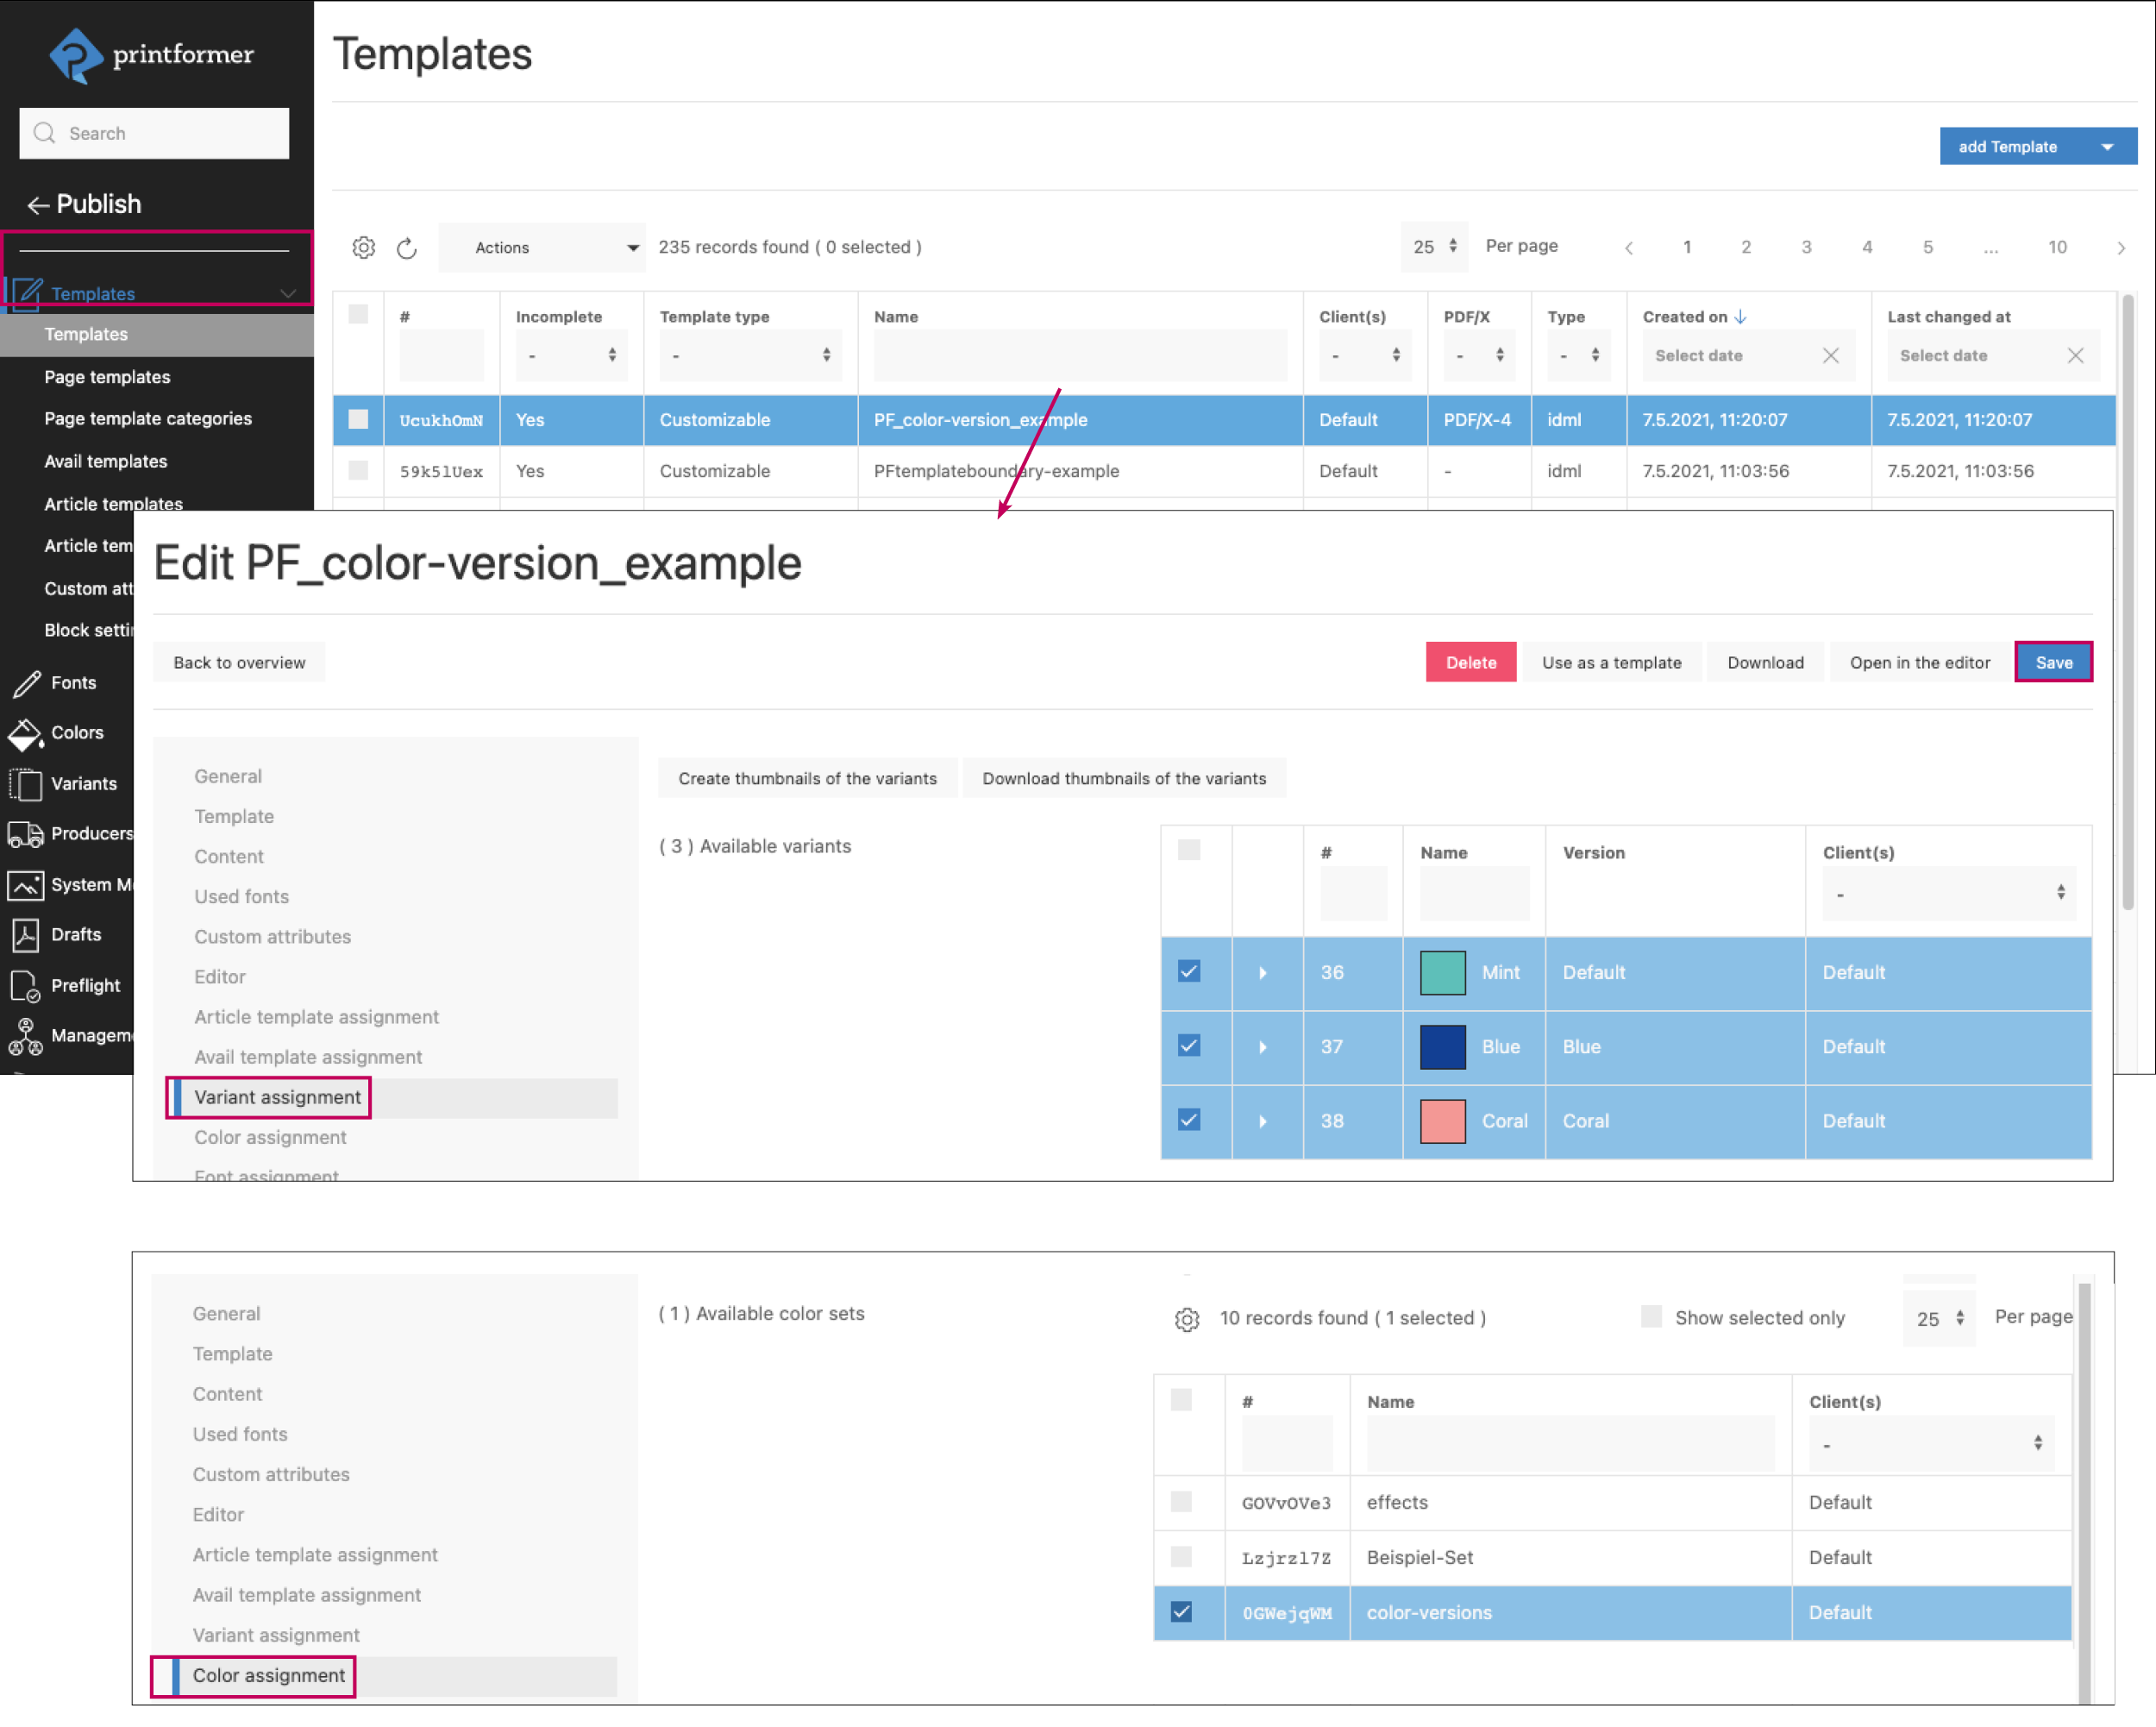
The relevant template is selected under Publish > Templates.
The required data records are assigned in the Variant assignment.
If not assigned directly via the variants, a color profile or color set is also assigned under Color assignment.
Checkbox Editable in the editor
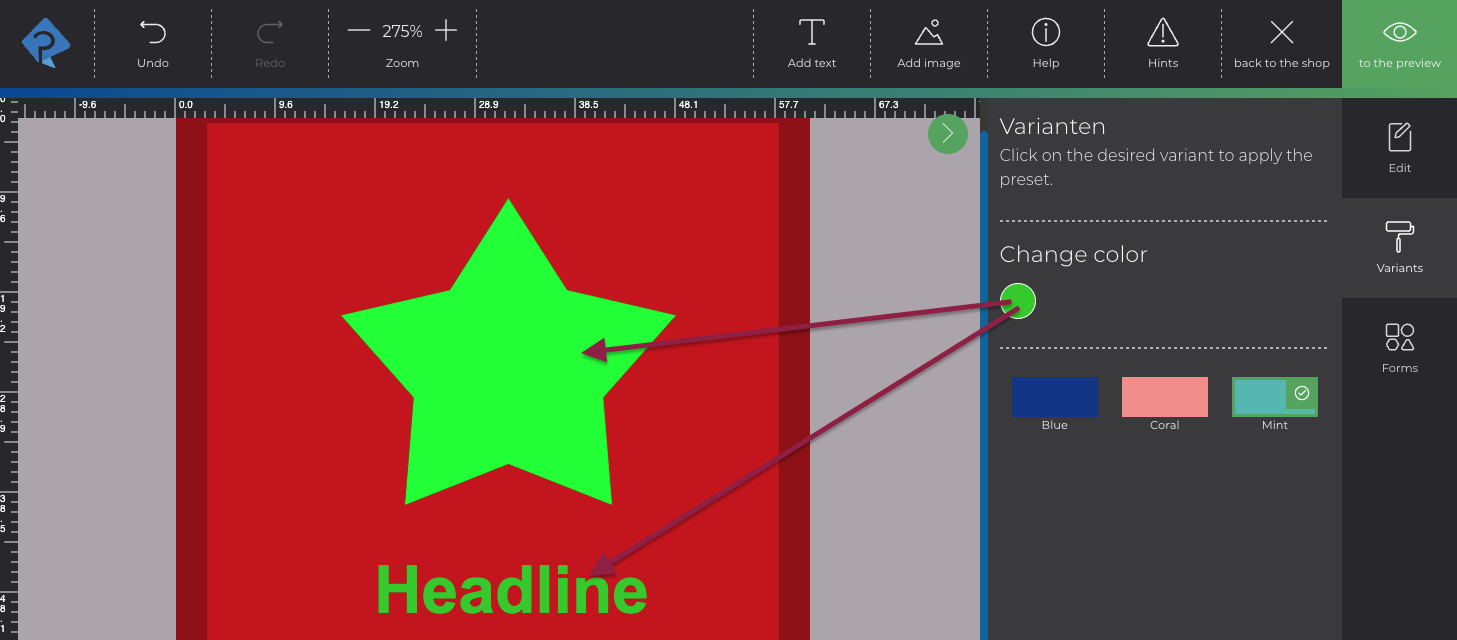
If this feature is activated, color swatches that can be overwritten appear in the variant menu in addition to the selection of variants. A new color selection affects all elements that match the conditions of this rule.
this function is only possible with texts and shapes (color change)
the user's adjustment (changed color) applies to all elements that match the conditions of the rule. If a different variant is subsequently selected in the editor, the colors are reset to the default and the user's adjustment is lost.
The checkbox must be activated for all global/local rules that are to be overwritten in the editor (even with the same conditions and/or actions).
Label in the editor
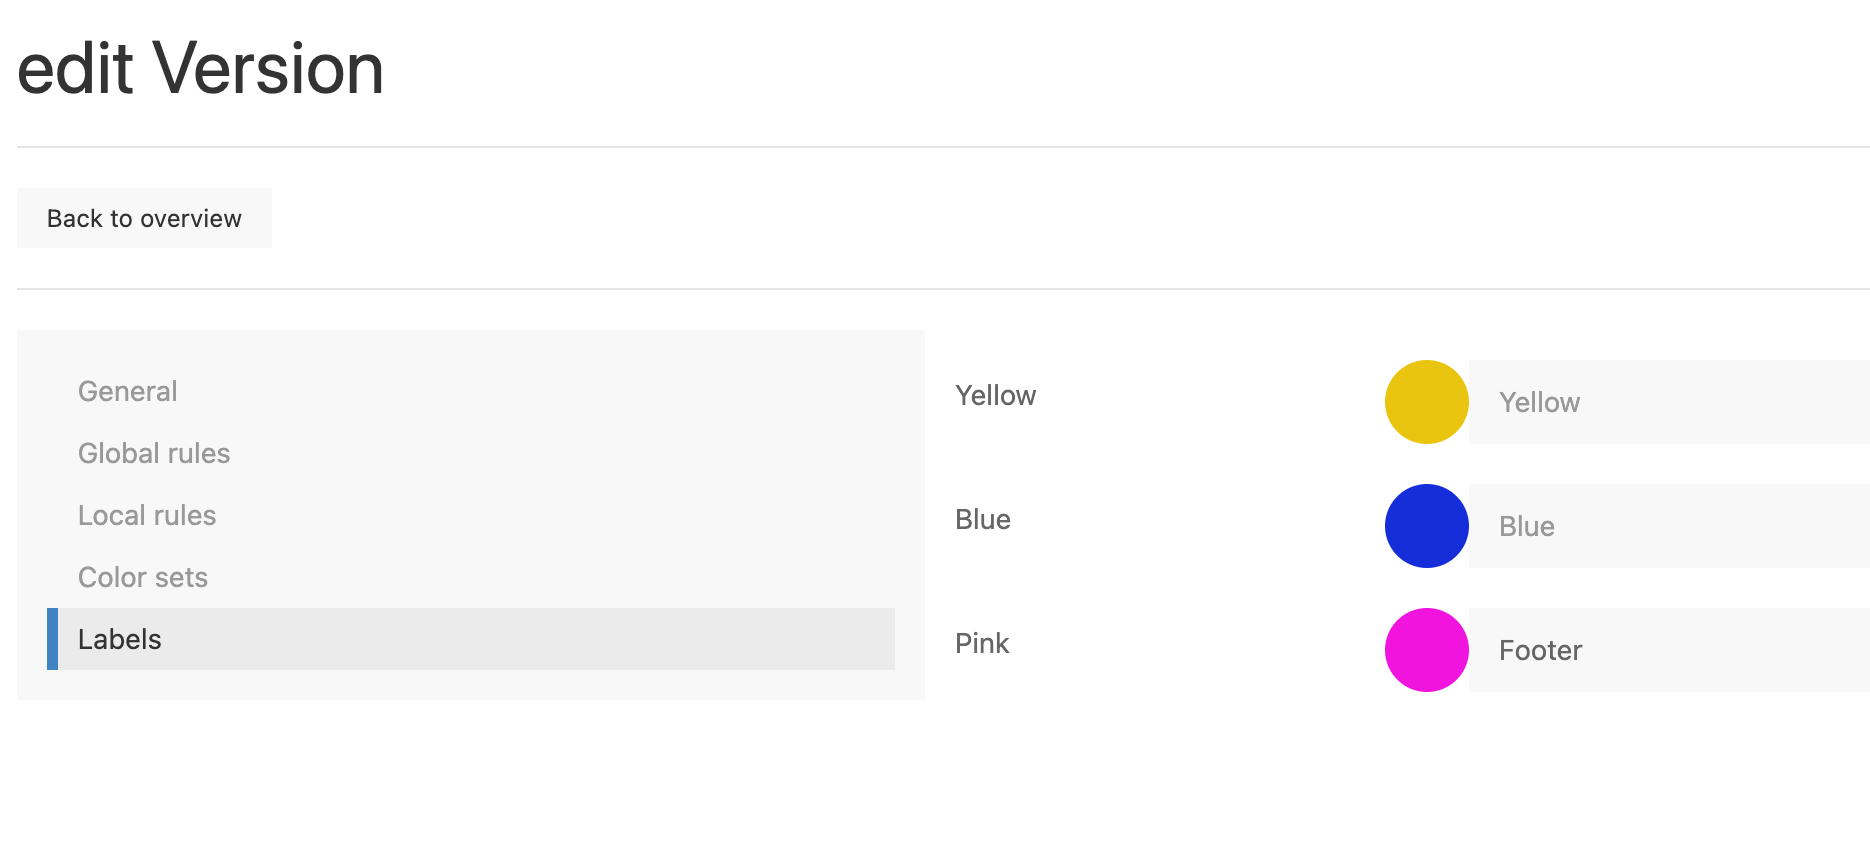
A label can also be defined for each individual color field:
(if no label is defined, the colour name is displayed)
