Color-Versions
This tutorial shows how to make several color variants available to users with just one InDesign template. To do this, we use the Variants Feature in the printformer.
An InDesign template with one image and two text blocks as well as three PNG files (logo color variants for uploading to the system media) are available as a sample document:
links.zip template_PF_color-version.idml
Create InDesign template
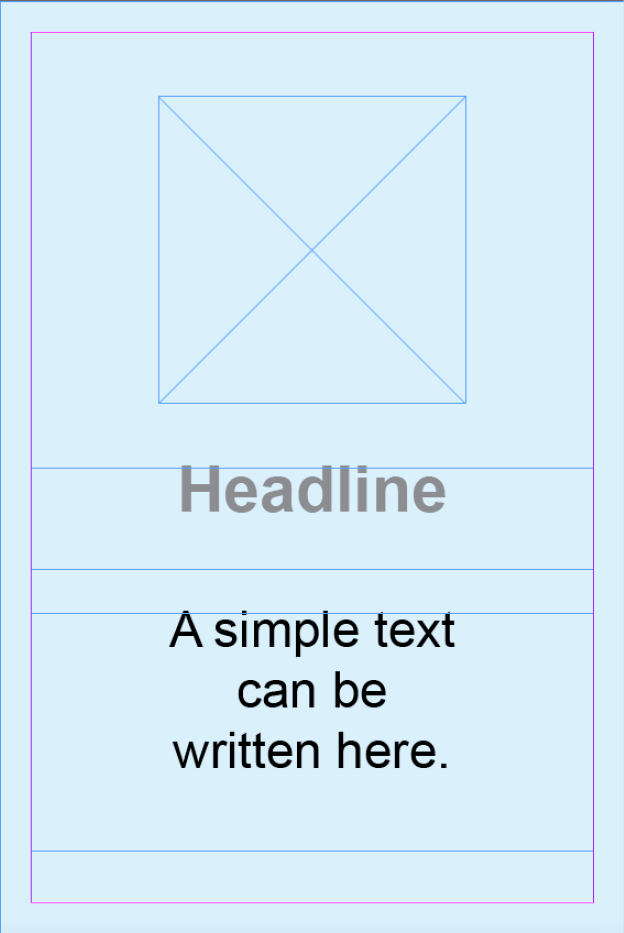
When opening the template in the printformer editor, the image block should be filled with a logo and there should be three color versions of logo and headline to choose from: Mint, Blue and Coral.
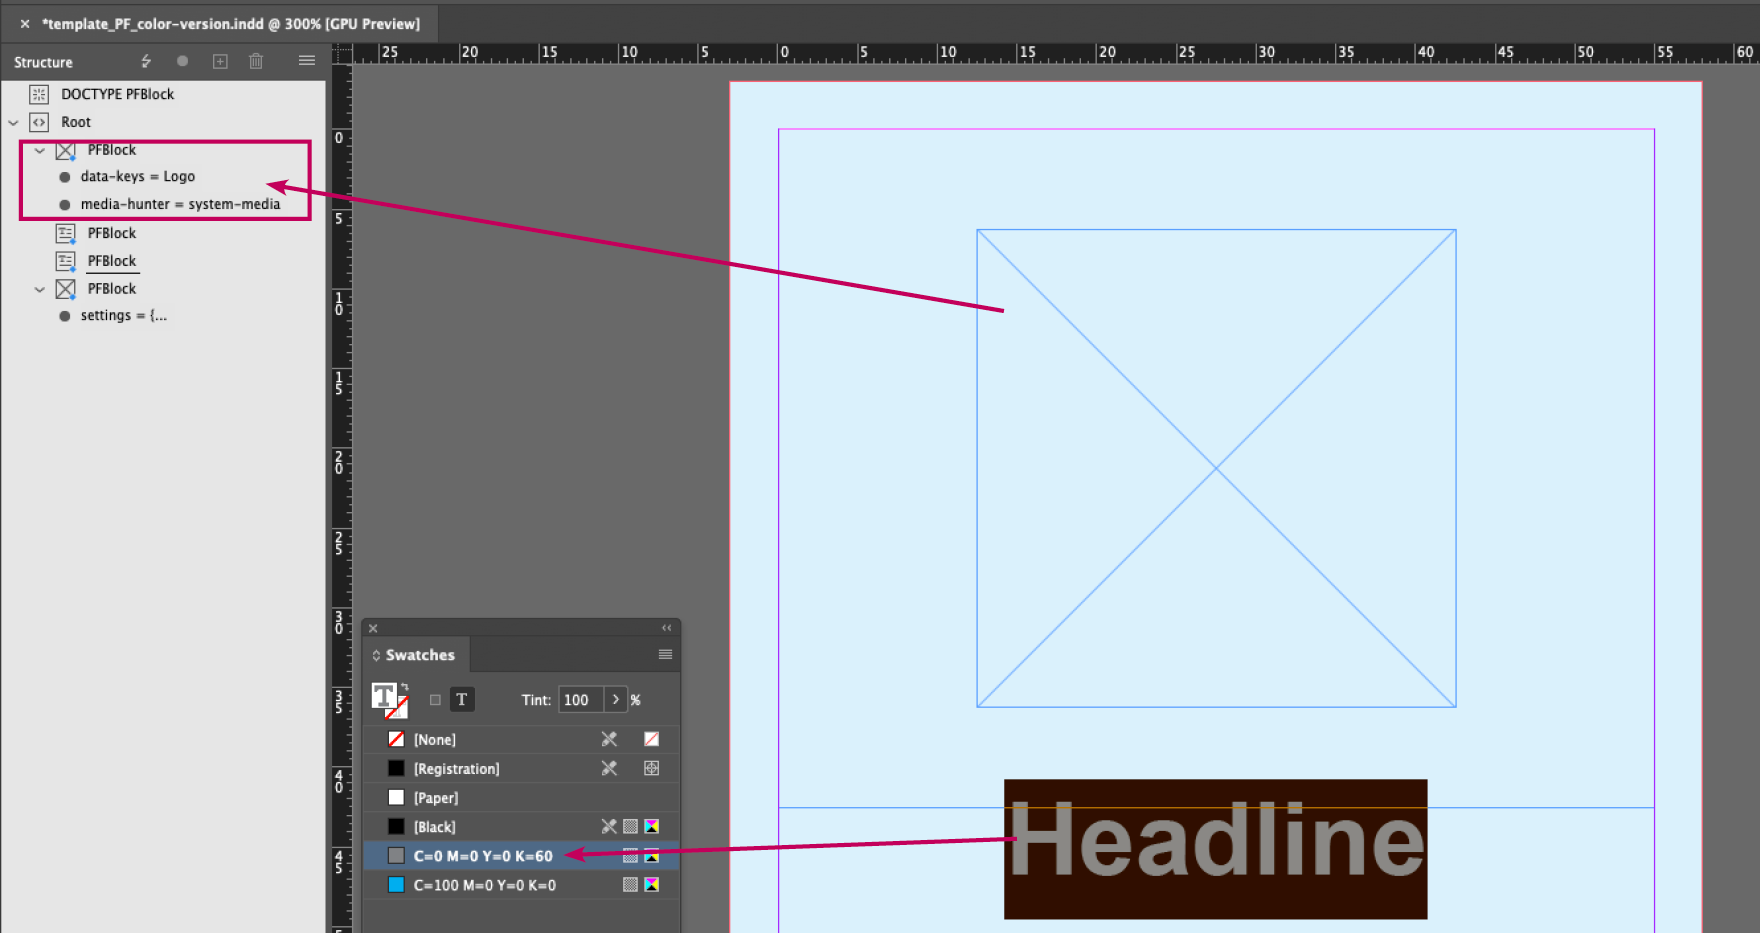
To do this, we add the following attributes to the image block in the InDesign template:
Attribute | ||
Name | Value | Usage |
data-keys | Logo | The name "Logo" was chosen to identify the block later. |
media-hunter | system-media | The Media Hunter defines the source of the image. We would like to store the images of our color variants in the system media of the printformer. |
The header text block does not require any attributes, as we can identify it via its color value (Text color C=0, M=0, Y=0, K=60).
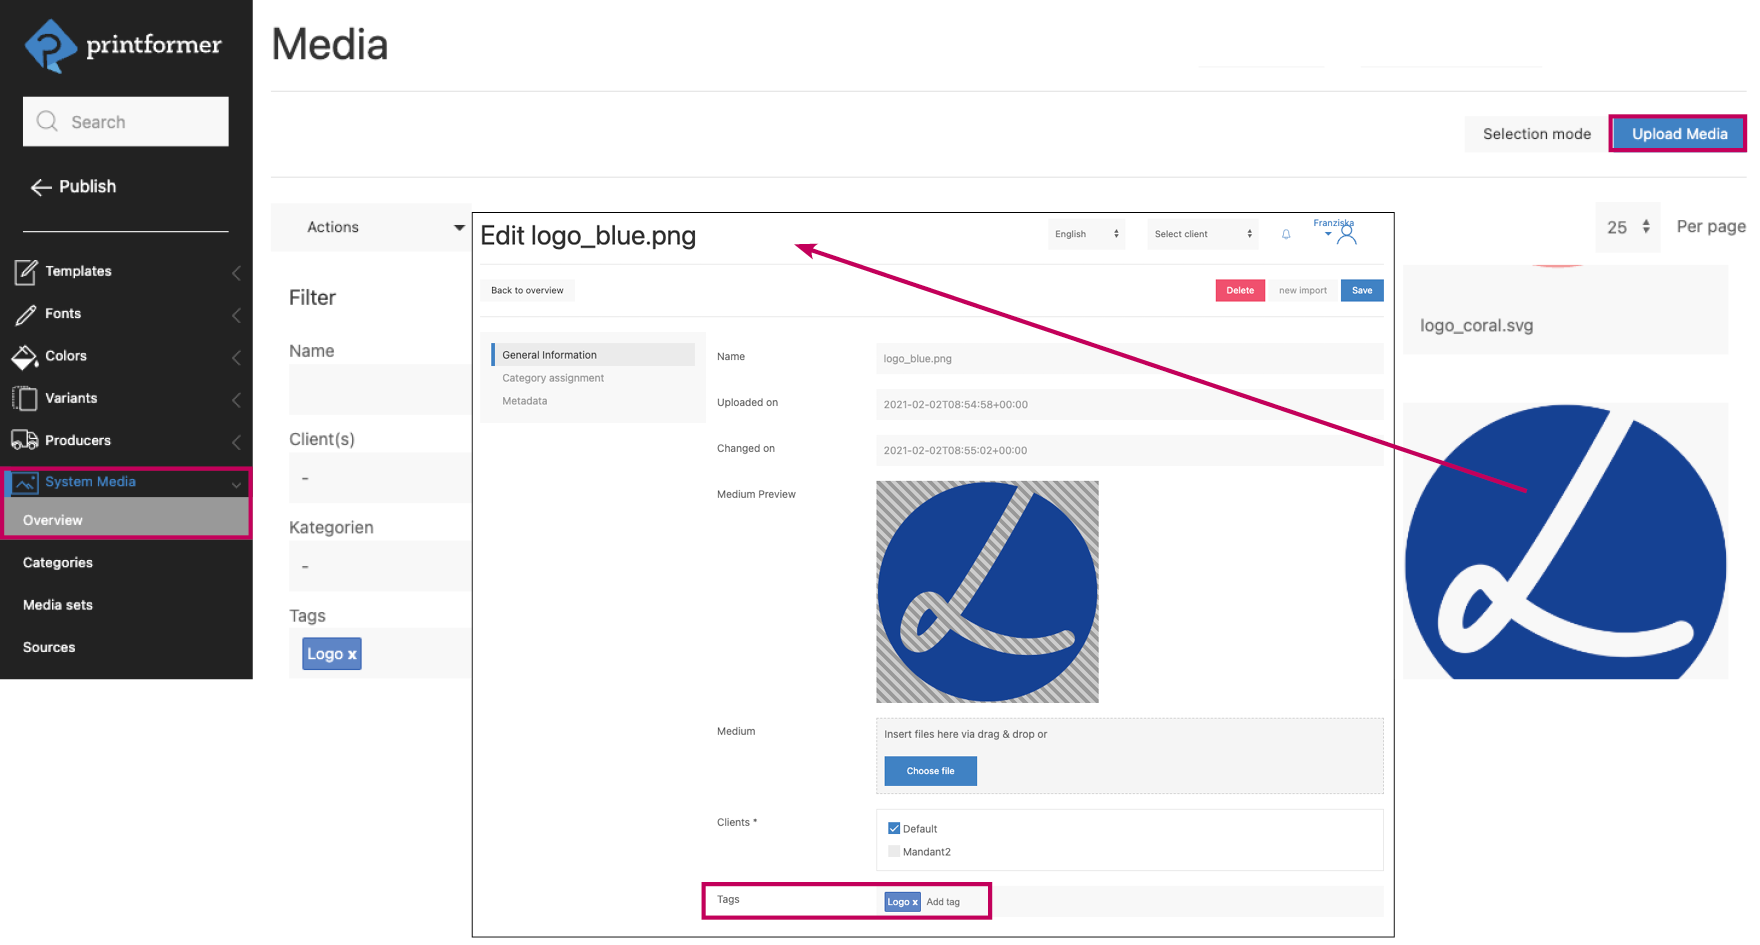
Upload System media
After the template has been set up in printformer, we load the three logo color versions into the system media (Publish > System media > Overview) and enter Logo as the tag in each case:
Create variants (versions and rules)
The first color variant for our template is now created under Variants (Publish > Variants > Overview > Add variant). The name "Mint" and the hex code "#5EBFB9" are used for this. These two values will be displayed to the user later in the editor.

A variant is divided into one or more versions. (Versions can be used to create multiple variations for a color. This is useful if other rules for other templates are to be created for one single color variant.) Usually, different versions correspond to a higher-level theme with minor differences. However, as each version determines its own rules, it is also possible to create different versions of a variant. Nevertheless, it should be noted that one template can only ever use one version of a variant.
After saving, we can define the rules for this Version:
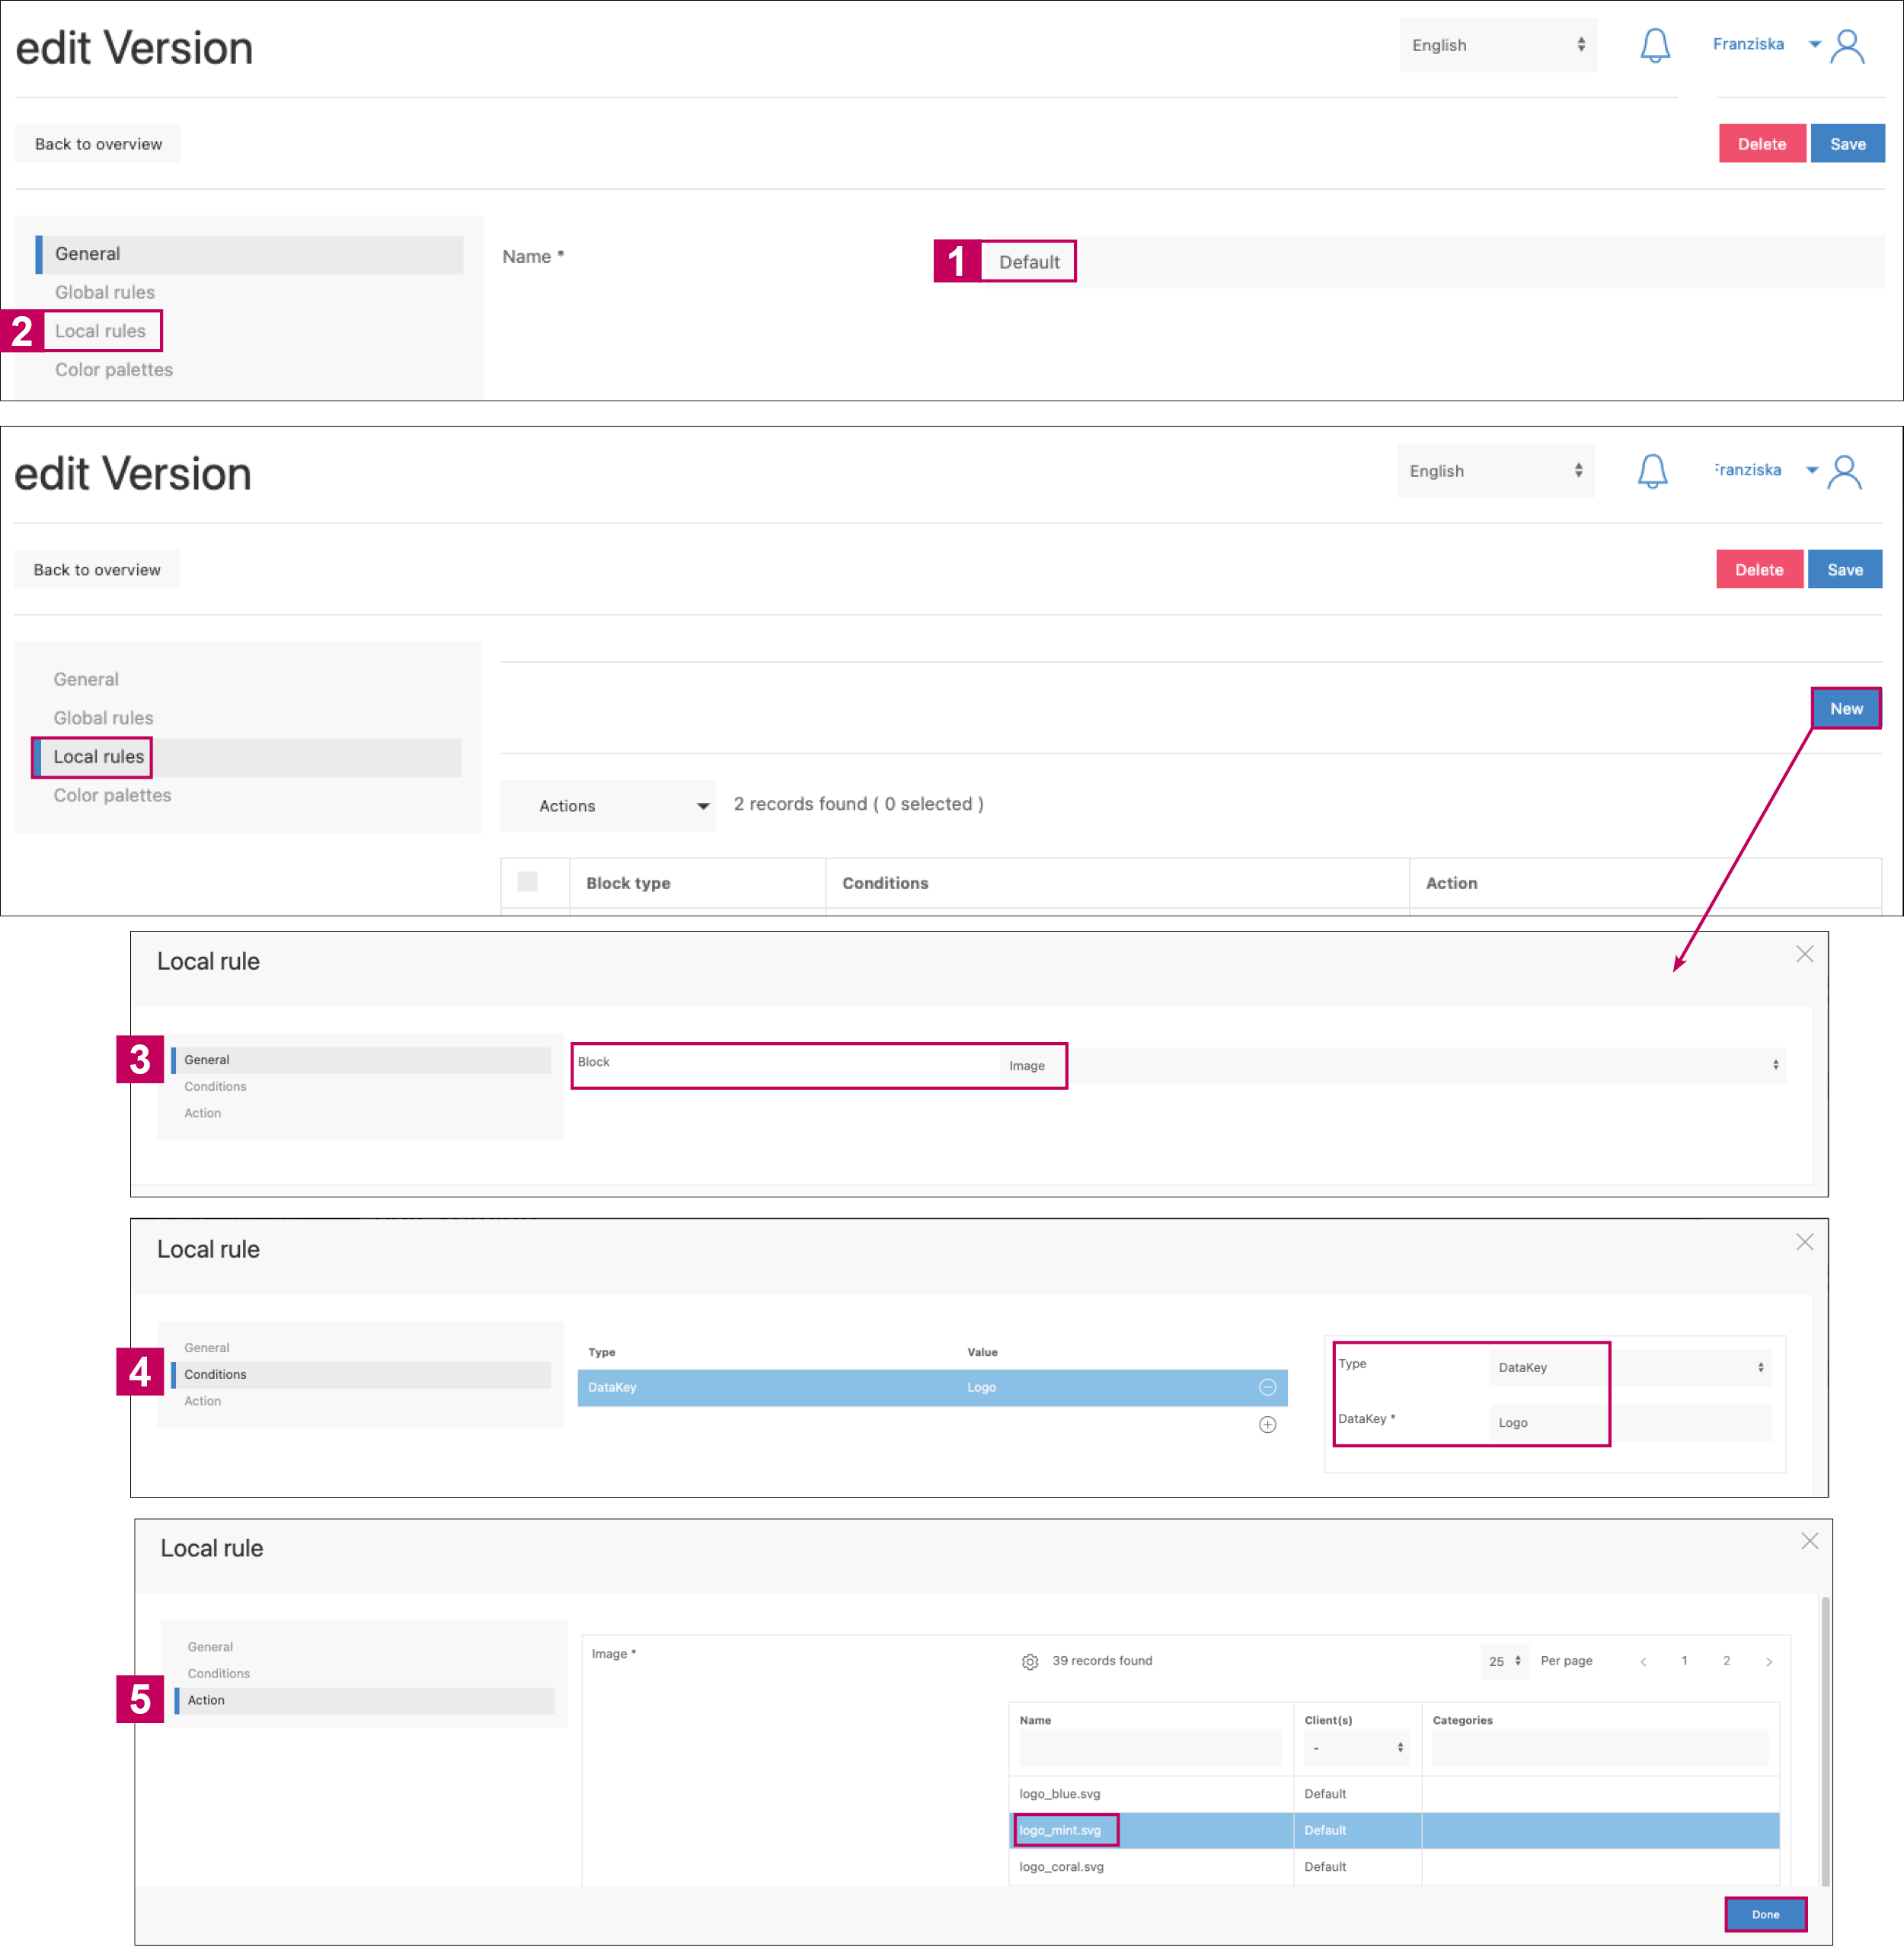
Under Versions, we first create a version with the name Default.
In our version, we first want to define a rule for our image block in the template.
To do this, we add a new local rule and select Image as the block.
To identify the image block from our template, we enter the DataKey Logo here again.
We then select the logo PNG in the color Mint from the system media and save our first rule.
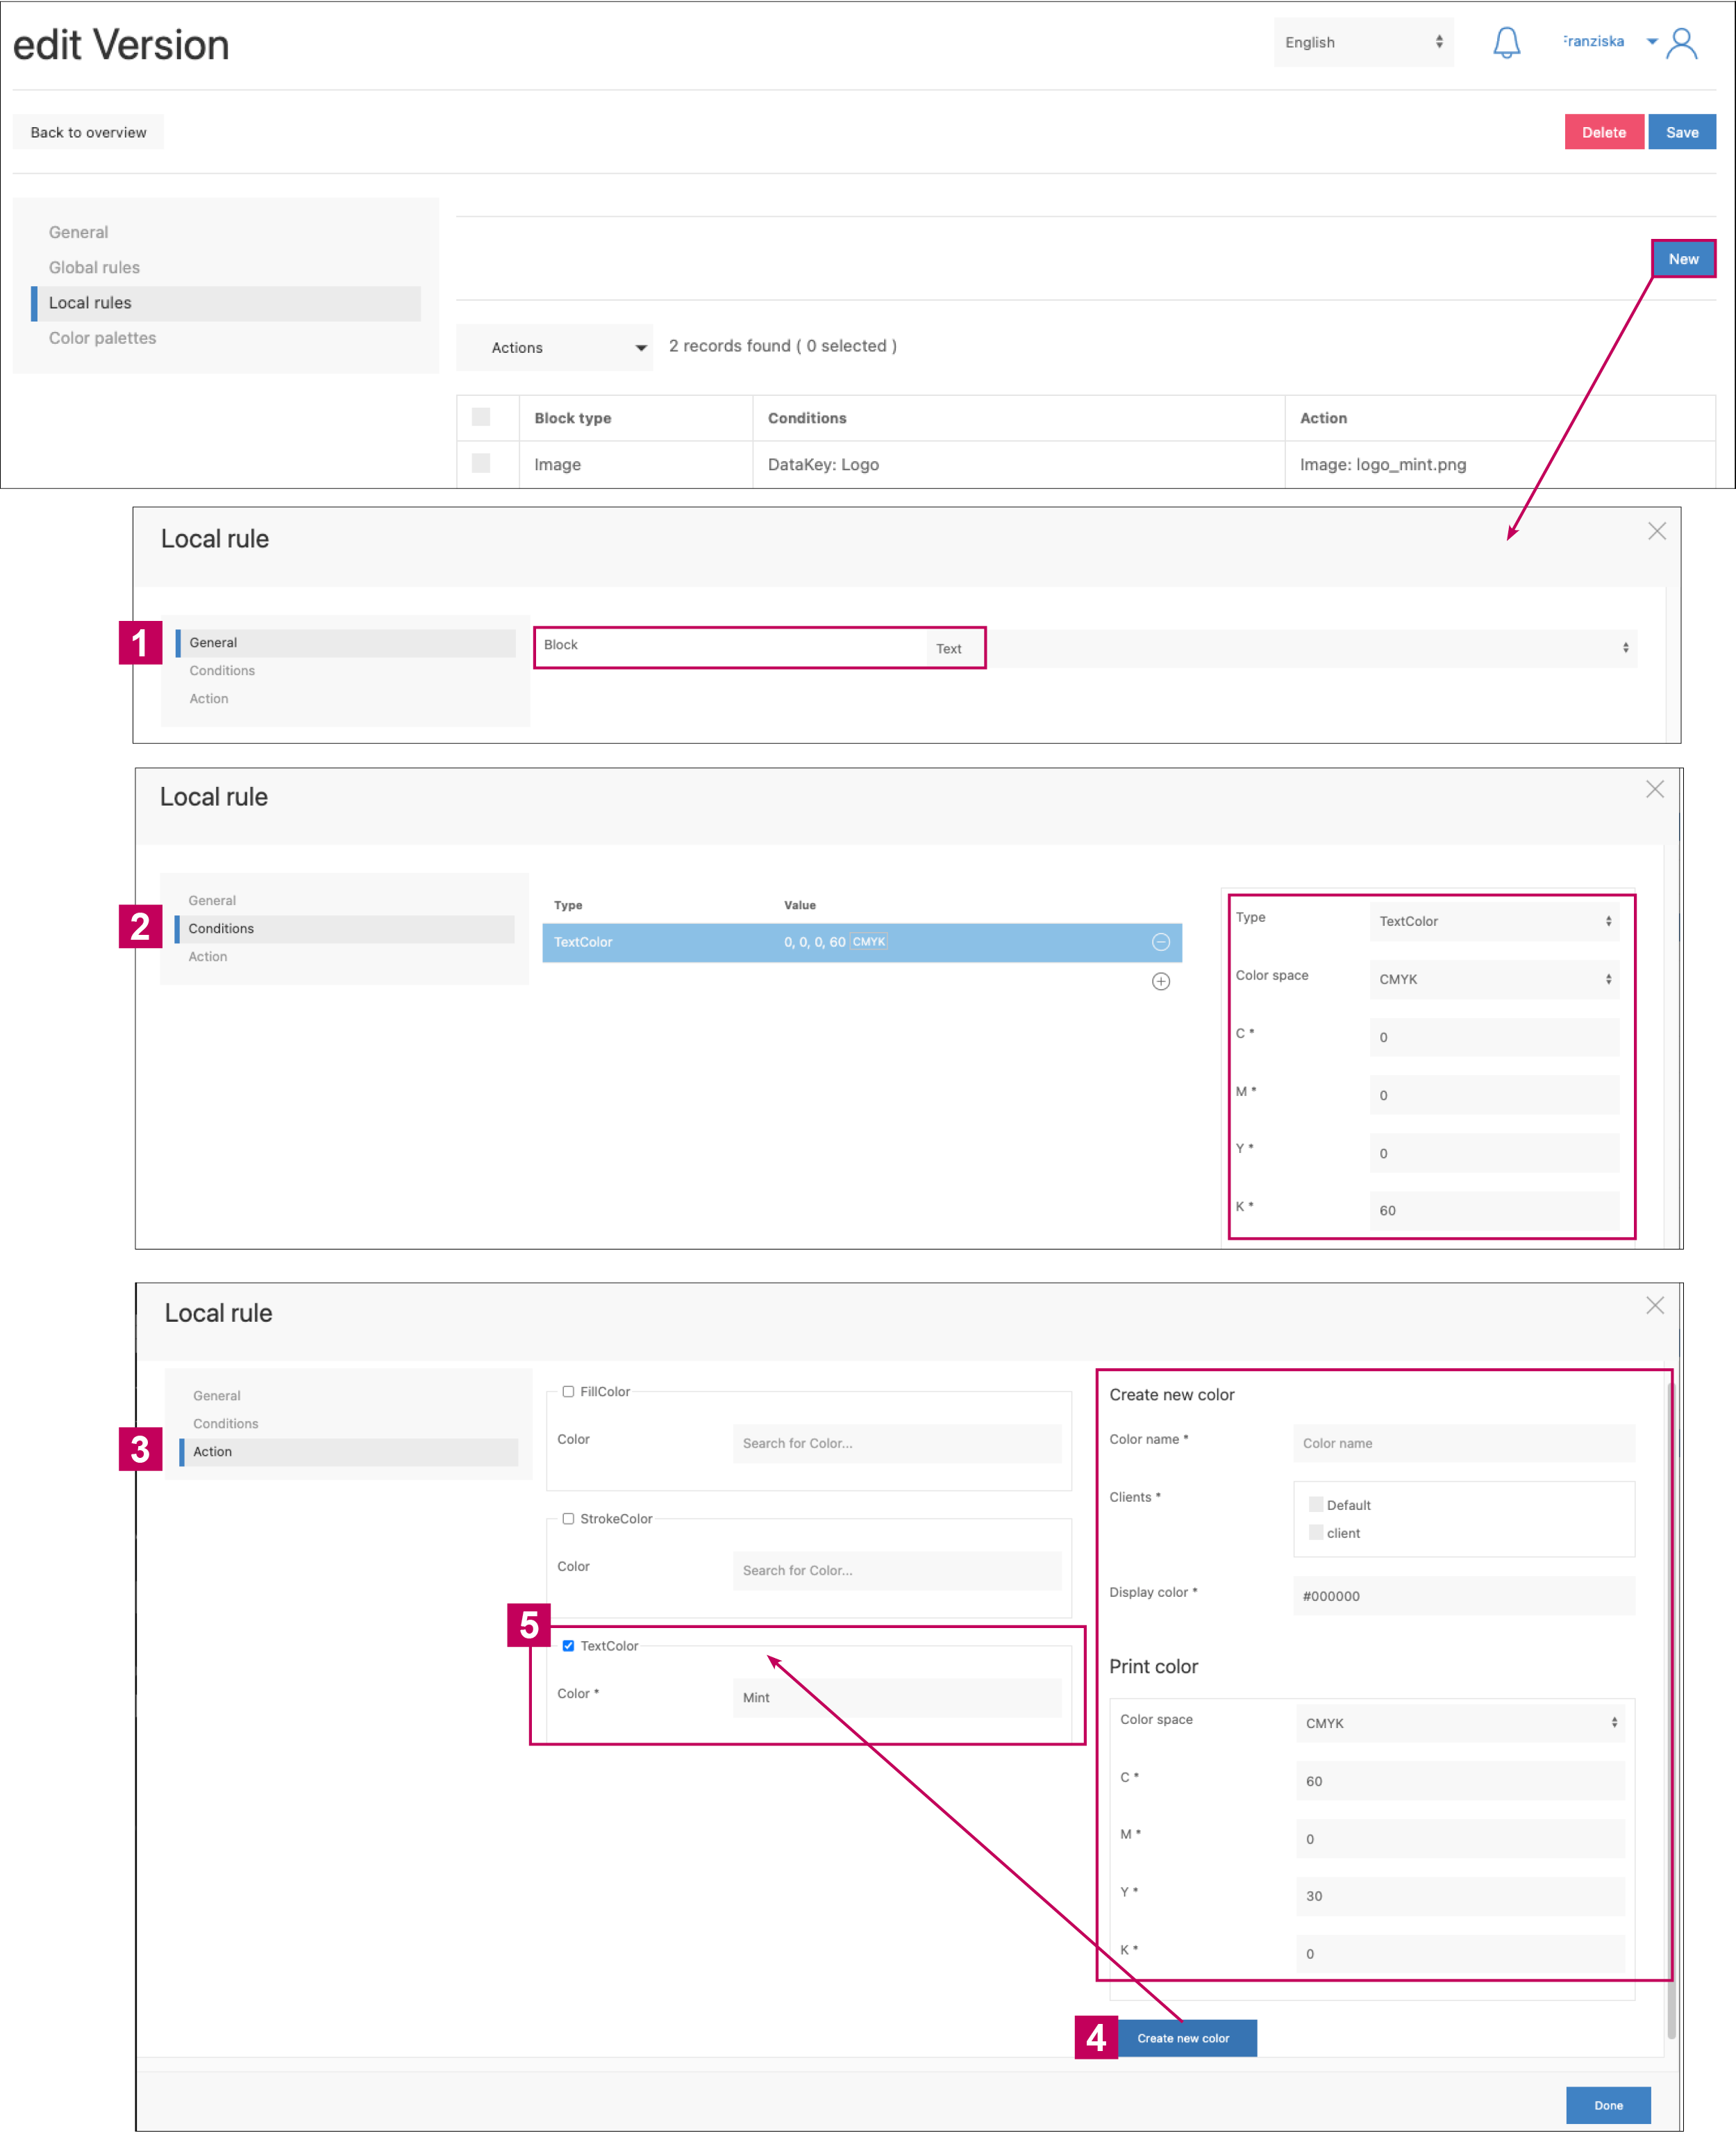
Um jetzt noch den Textblock "Überschrift" aus dem Template farblich zu ersetzen, legen wir eine weitere lokale Regel an:
We now select Text as the Block
As Condition, we specify the text color: C=0, M=0, Y=0, K=60 from the template.
As Action, we want to color the text in the color mint.
To do this, you must first create the new color on the right-hand side and define both a display and print color.
In our example, we have defined the color name: Mint, the display color: #5EBFB9 and the print color (color space: CMYK): C=60, M=0, Y=30, K=0. The color is created directly in the color management of printformer and can also be edited there later (Publish > Colors > Overview).You can then tick the TextColor checkbox on the left-hand side and select the color Mint that has just been added.
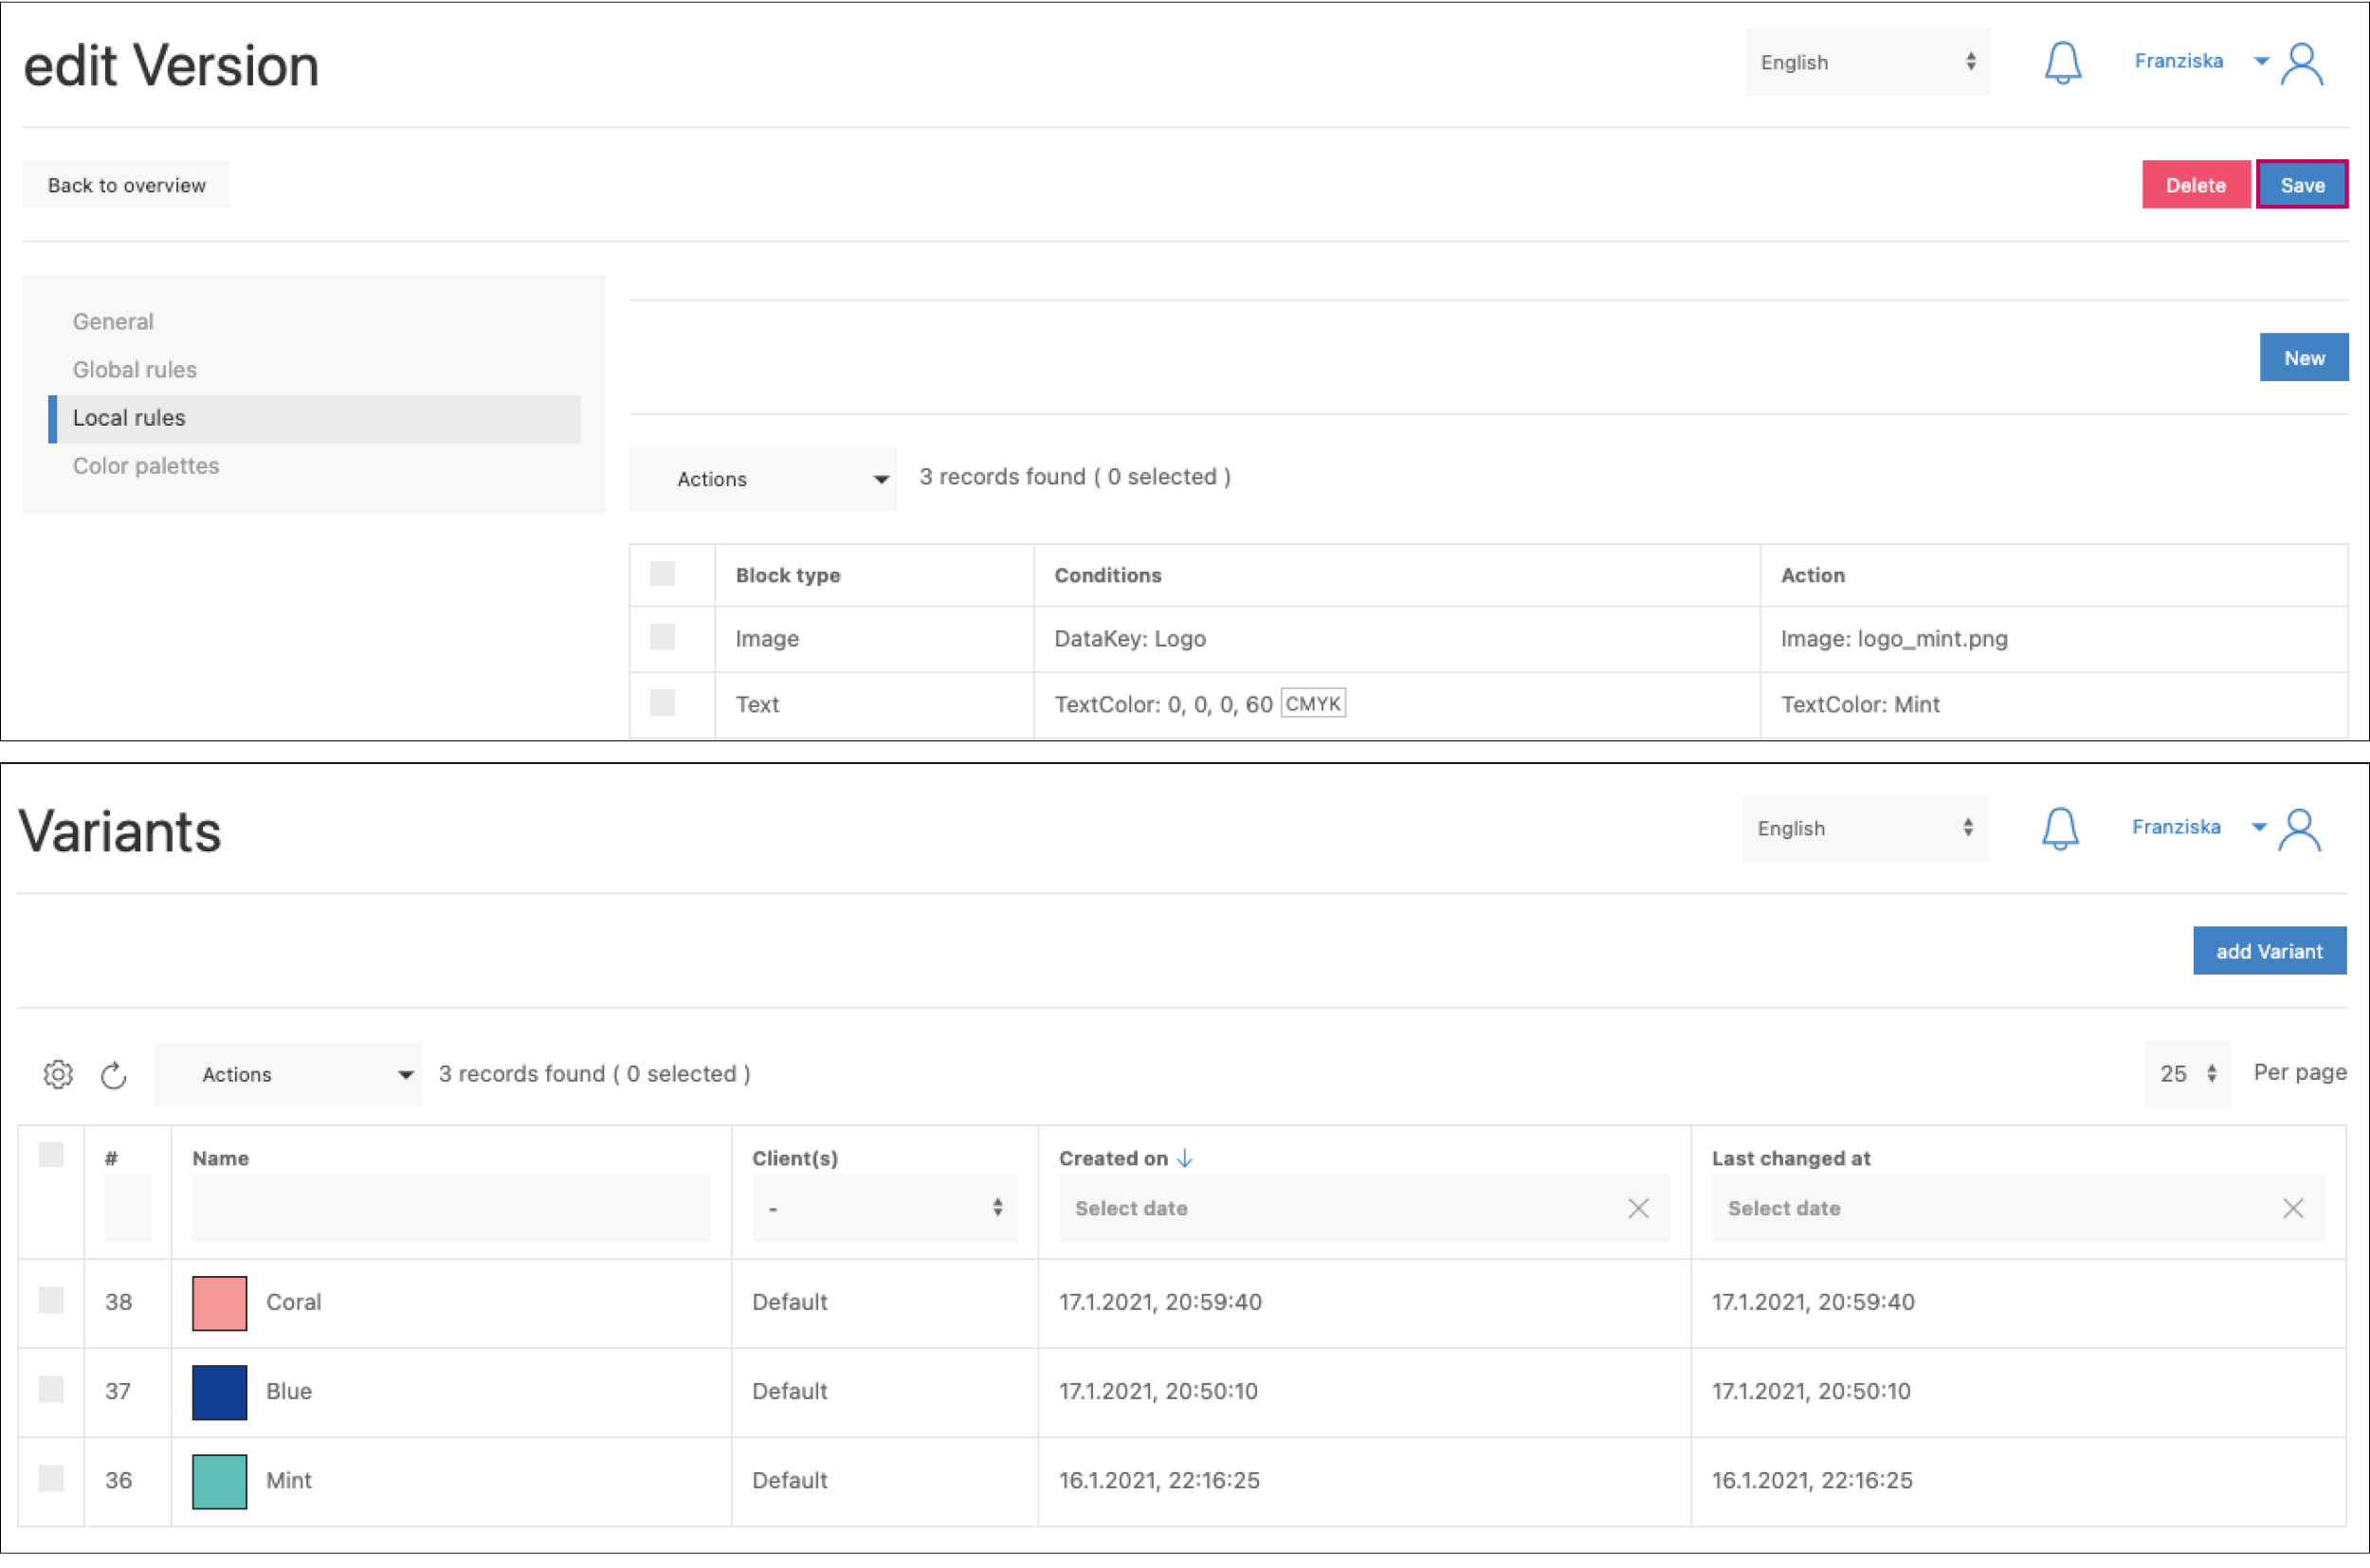
Now save the version and create the two other color variants in the same way
Blue (logo_blue.png): Display color: #123F93, print color: C=100, M=80, Y=0, K=0 and
Coral (logo_coral.png): Display color: #F39895, print color: C=0, M=50, Y=30, K=0 an.
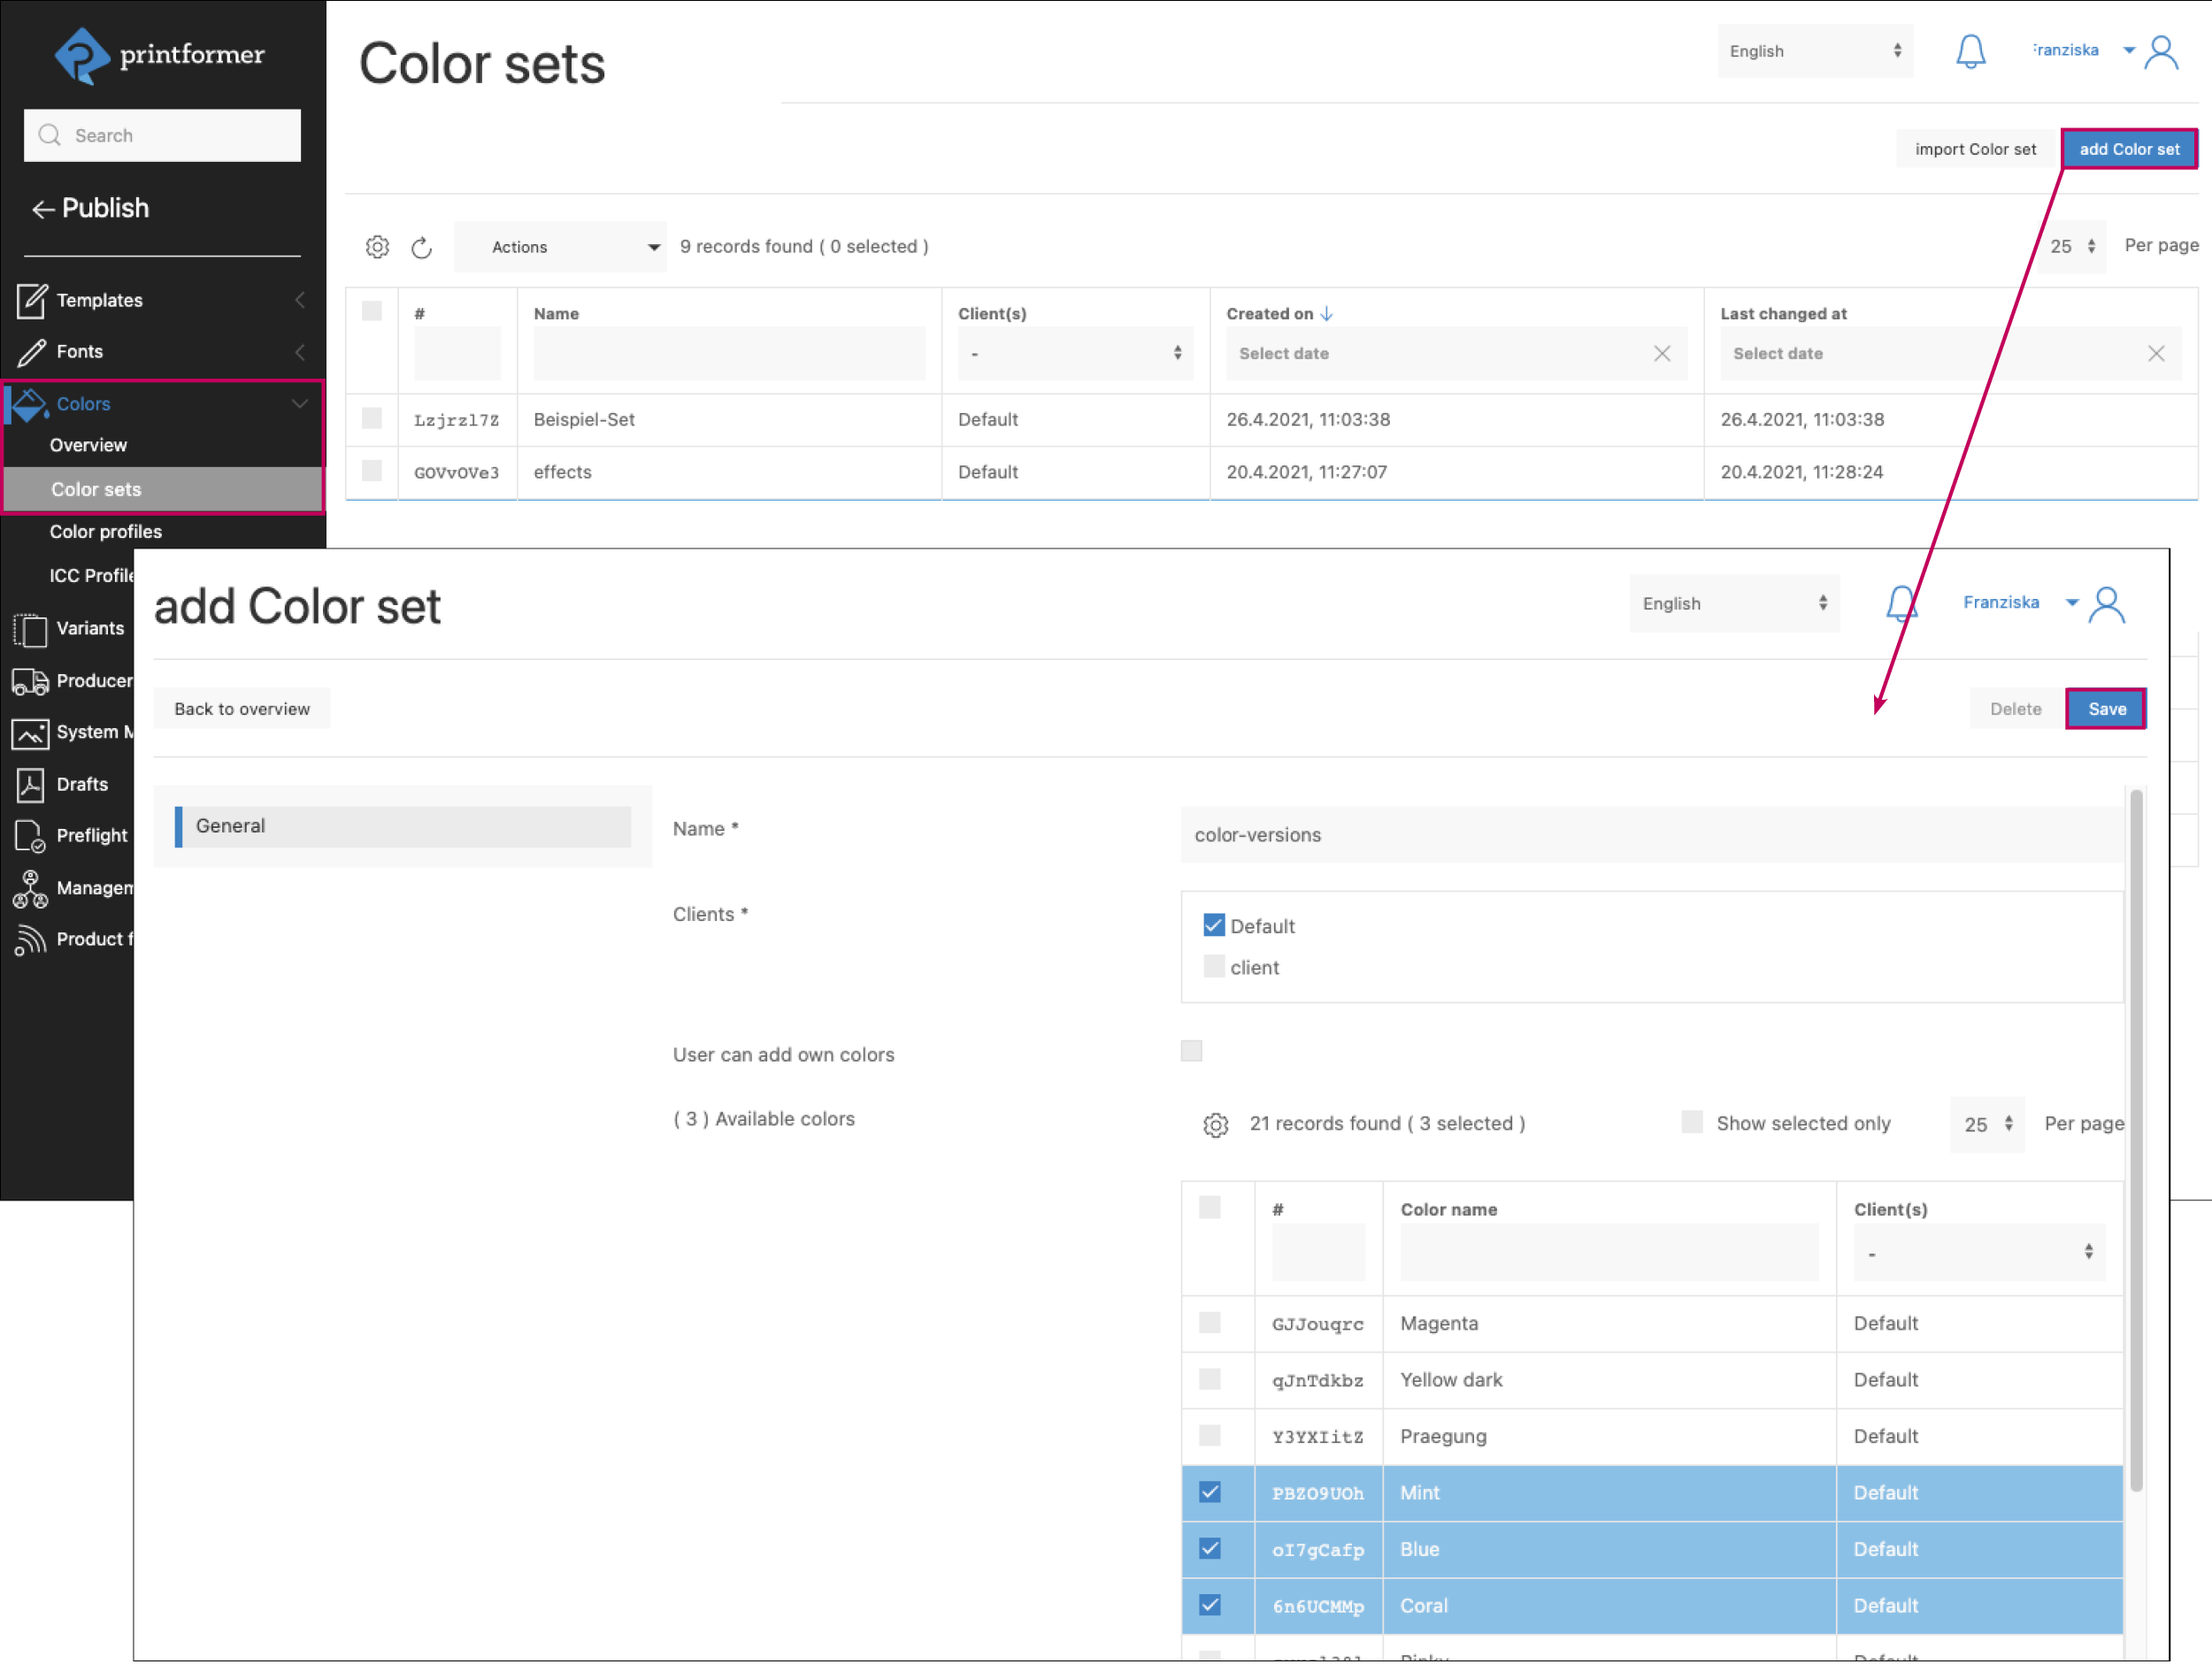
Create color profile
In addition to the variants, all newly created colors must be assigned to a color profile.
(Colors > Color sets > Add color set)
Any name can be selected for the color set.
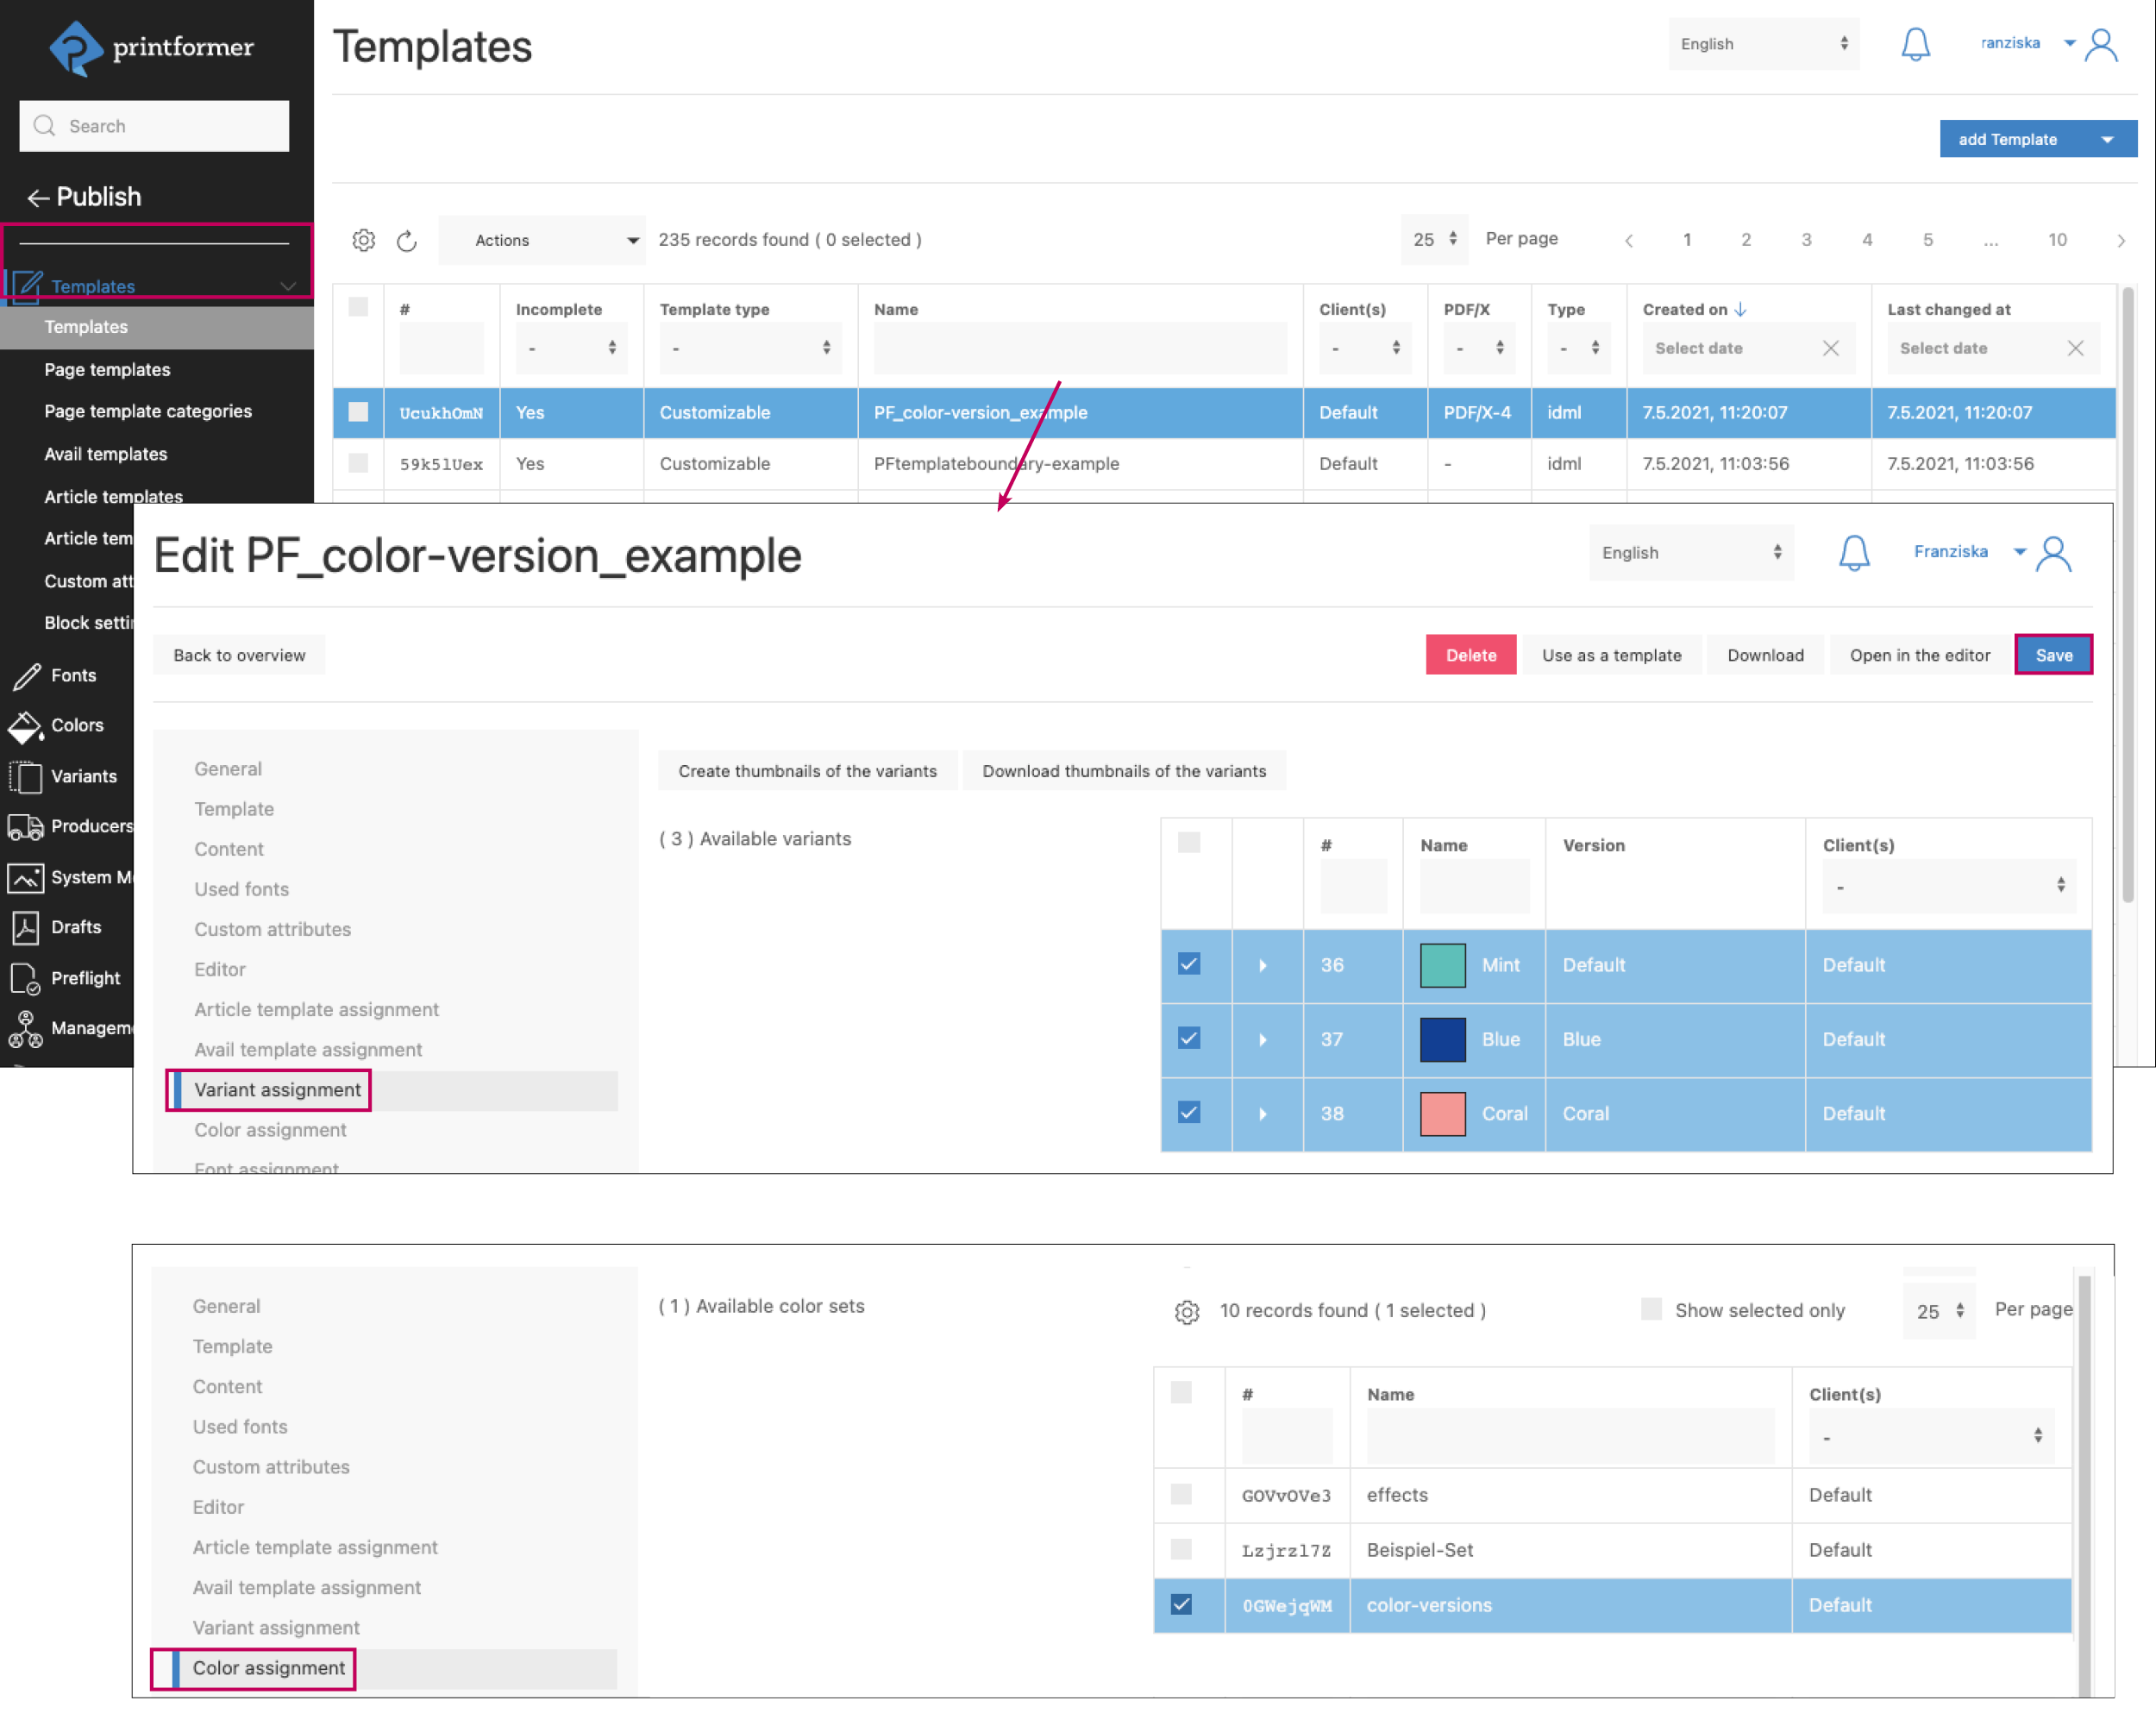
Assign variants and color profile
Once the variants and the color set have been created, they can be assigned to the template. To do this, select the template and assign the corresponding data records in the Variant assignment and Color assignment area.
Result
The Variants tab now appears in the editor and the rules created are applied depending on the selection.