Configure printformer templates in the backend
Overview of the functions for configuring templates in printformer.
Create new template in printformer
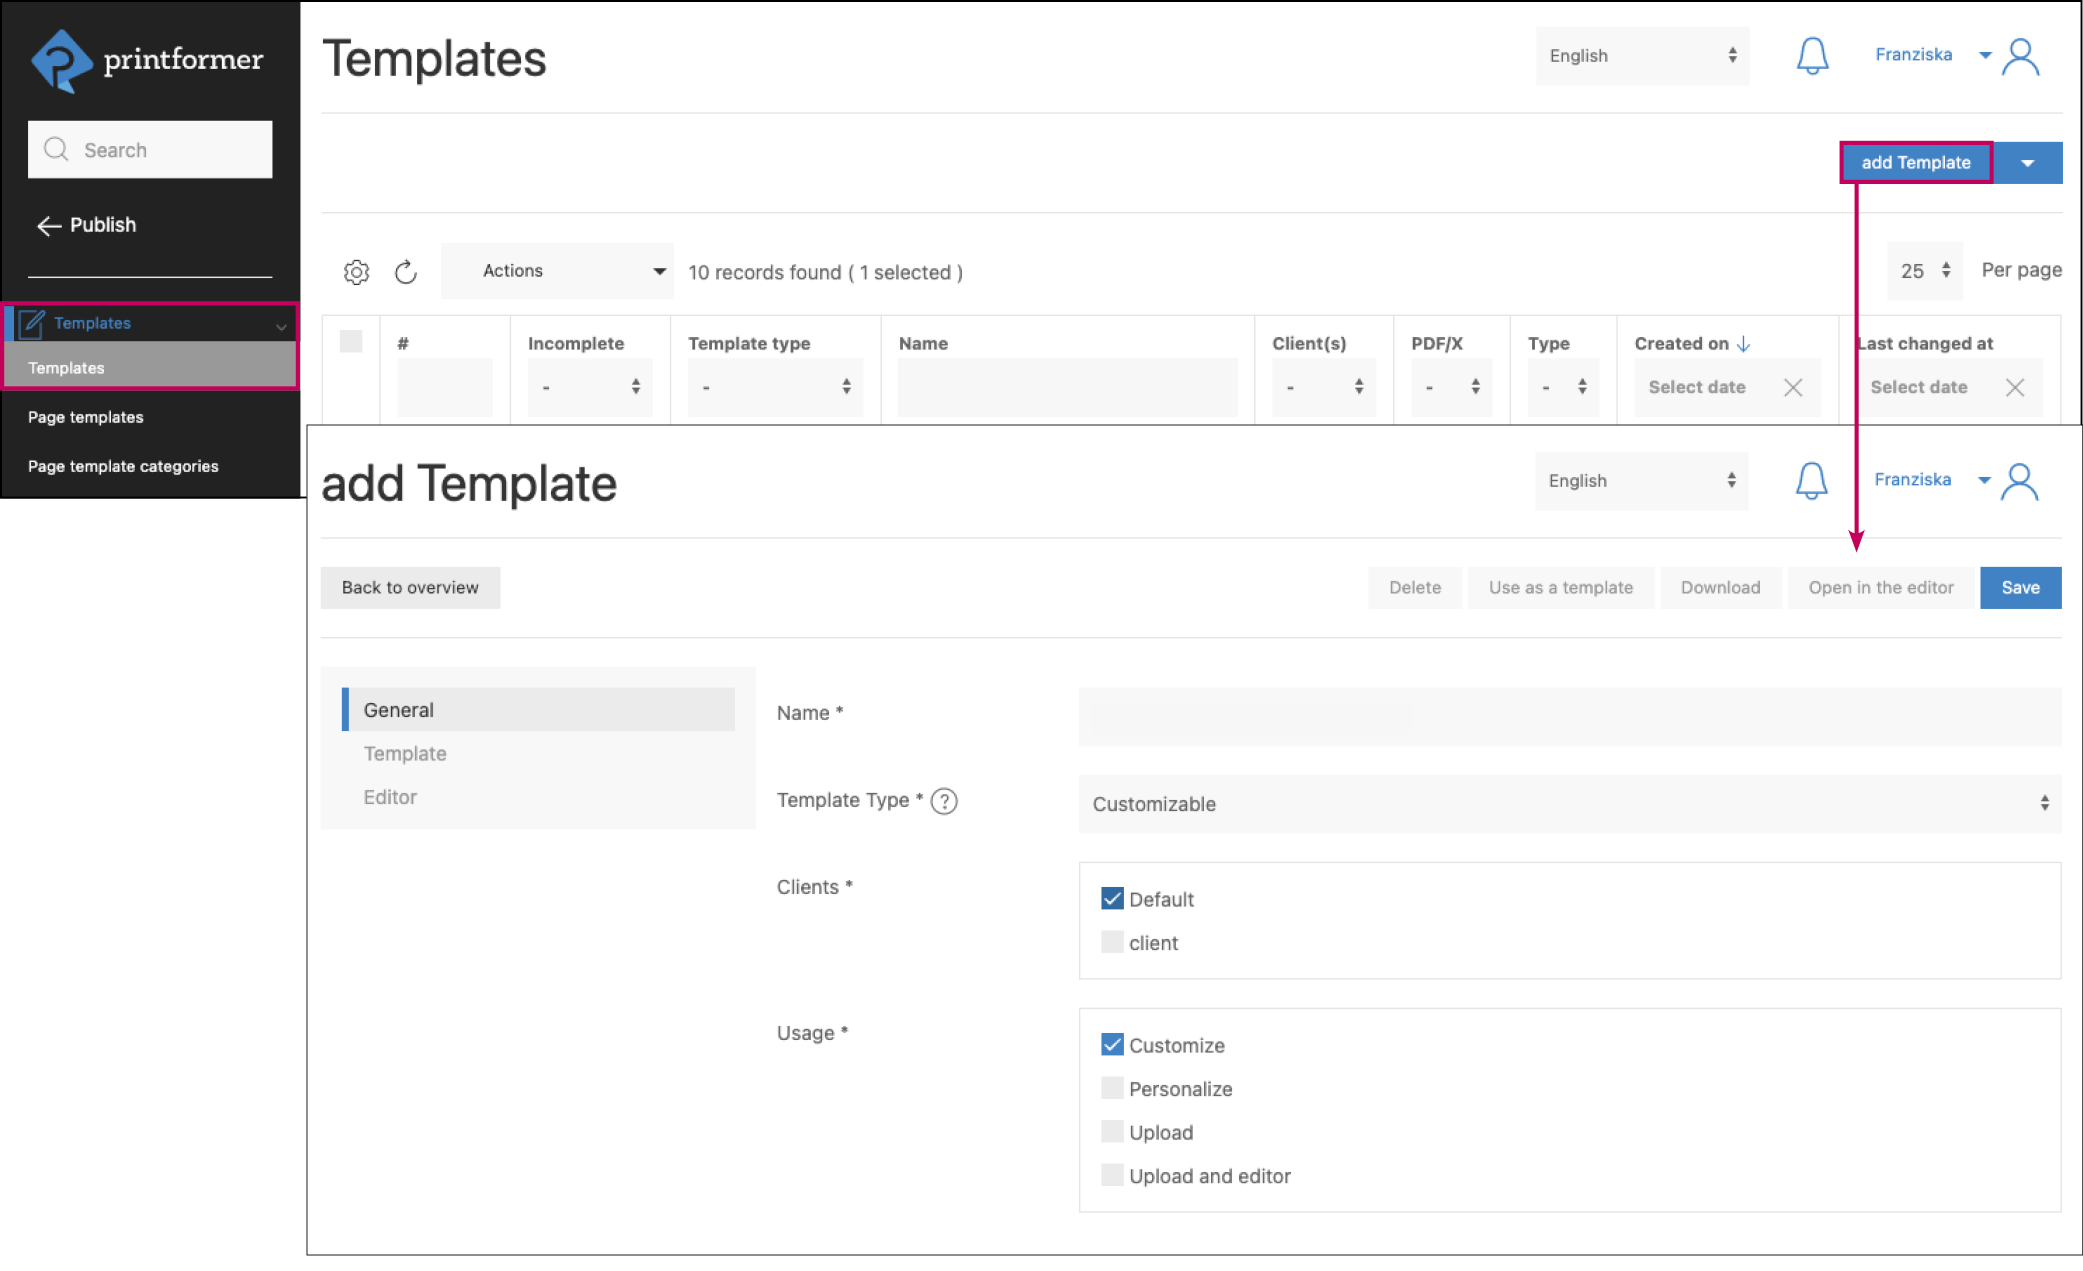
Settings
menu (* = mandatory field) | Description | |
|---|---|---|
General | ||
Name* | Template name | |
Anzeigename | Optional label that is displayed as a short name in the editor (e.g. for group templates) | |
Template Type* Note: the type can't be changed after the template has been created. | Customizable (default): Template with customisable areas | |
Customizable Bundle: "Empty template" that can be filled with page templates (e.g. for leaflets) | ||
Free format: Empty template with user-defined format, completely customisable | ||
Group: Several existing templates can be defined for a group (e.g. format or colour variants). When editing in the editor, it is possible to switch between these templates. (The attribute "content-identifier" in the IDML can be used to transfer adjustments of a block to all of these templates). | ||
Clients | If several clients exist in the system, the template must be assigned to at least one client. | |
Usage* | Customize: Editing and designing in the editor: Possibility to adapt or insert texts, shapes and images (depending on powers, see editor) | |
Personalize: By uploading a CSV table, a predefined field can be filled with different contents (e.g. wedding cards with different names). | ||
Upload: In combinations with template type Free format, own print data can be uploaded | ||
Upload and editor: Possibility of 2D and 3D preview of print data | ||
PDF/X Standard (only for Template Type Free format and Customizable Bundle) | Selection of the desired PDF/X standard | |
Template | ||
In the Template menu, an IDML or PDF file is uploaded as well as a background PDF. These are layered on top of each other so that the background remains static/unchangeable and only the areas defined in the .idml file can be changed. | ||
Photo | optionally, an alternative preview image (e.g. for group templates) can be uploaded (permitted data format .png/.jpg). | |
Template format | Selection PDF or IDML | |
x3dom model | optionally, an x3dom model can be uploaded to enable a 3D view later on | |
Contour SVG | Optionally (per page) contour SVG (CCA) can be uploaded (depending on the application, this includes a cutting die, hidden areas, overlays or cutting) | |
|
The Contour SVG describes the shape/outline (cutting die) of an object, which can consist of editable areas, folding areas as well as gluing areas. For example, in the case of packaging, the areas that can be edited are included. At the same time, the areas that are outside the cutting die or are intended for gluing the packaging or cannot be printed are excluded from editing. x3dom model is an open source JavaScript framework that is used to create descriptive 3D animations on websites. It is used in the editor to display 3D animations as a preview. | ||
the following menus vary depending on the template type | ||
Template Type: Customizable | ||
Template Format* | PDF: predefined, unchangeable design | |
Block rotation origin | Selection of the reference point (center of rotation) | |
Template* | PDF file selection via file manager | |
IDML: editable design | ||
IDML import settings | only_text: only text fields are transferred and can be edited (also untagged) (all other elements outside the background layer will be deleted) | |
none: the file is transferred completely, all existing elements (outside the background layer) can be edited without restriction | ||
xml_tags: everything that is tagged in the IDML file is taken over (incl. the predefined attributes) | ||
Template*: | IDML file selection via file manager | |
Background PDF*: | Selection of the corresponding background PDF file. | |
Template Type: free format | ||
Bleed* | Here the required bleed is assigned to the pages (left, right, top, bottom). | |
Template Type: Group | ||
Group templates* | Selection of the relevant templates, definition of the preselected template (in the editor). | |
Content | ||
Content | Selection of menus available in the editor sidebar. | |
catalog | preview/selection of the article templates (assigned to the template) | |
userMedia | preview/selection of all media that the user loads into the editor | |
systemMedia | preview/selection of all media available for the template via a media Set | |
Media sources | Set media sources for DataKeys found in the template. | |
Container Prefilling | The containers contained in the template are listed here (page by page), as well as the article templates assigned via catalog-template-identifier, if applicable. | |
DataKeys | View and order the DataKeys contained in the template | |
Single product page planning | Selection of data sources for single product page planning | |
Used fonts | ||
Displays the fonts contained in the template. (If one of the fonts contained in the IDML is not included in the system, this is indicated as an error. Via the link to the Fonts menu, the font can then be loaded directly into the system). | ||
Used colors | ||
Overview of the colors used in the template. (If one of the colors contained in the IDML is not yet available in the system, it can be created via the link to the Colors menu and assigned to a color set or color profile). | ||
Custom attributes | ||
Overview of the available (template-) user-defined attributes. The defaults for filling the placeholders can be individually adapted here for the template. | ||
Editor | ||
In the Editor area, configurations for the editor layout can be defined, such as allowing or restricting functionality | ||
Preview | If this checkbox is deactivated, it is not possible to view and download the draft as a preview PDF. | |
3D model | Here you can activate the 3D view and determine whether it should appear automatically or be opened via the toolbar in the editor, as well as other settings for activating Overlays and highlights of the 3D controls and paper colour. | |
Toolbar | Here you can define which functions are available to the user (button to save the template, possibility to add texts, assets and forms) and the layout (width of the sidebarx, page info, media providers). | |
Standardtab in sidebar* | Here you can select which sidebar menu is to be activated by default (when opening). | |
Sidebar columnsx | Here you can set the number of columns for the respective menus of the sidebar (and thus define the size of the thumbnails displayed there): 1-4 columns. | |
Form editor | If the form editor is activated, placeholders contained in the template (PFPlaceholder) can be filled in or overwritten (by activating "Activate formatting in the form editor", locked text blocks can also be formatted). | |
Additional data keys in the form editor | If DataKeys from custom attributes that are not contained in the IDML are to be displayed in the form editor, they can be inserted here (Enter + Enter). | |
Block settings | Here you can activate BlockSetting presets and set a maximum number of blocks (per page). | |
Article templatesx | Display and filter options for templates with assigned article templates. | |
Page planningx | Always create a page planning: Here you can optionally define if the template should always be opened with a standard feed (also selectable). | |
Single product page planning: This checkbox displays the feed (list of all titles) in the form editor. A single data record can be selected in the editor to fill the appropriate placeholders. (Containers and article templates are then not necessary in this template). | ||
The selection of visible control elements is predefined in the general Settings (depending on the client, if applicable), but can be adapted here for the current template. | ||
Edit pages | Here you can define whether the user can edit (change order or duplicate), delete or add pages. In addition, a divider for the amount of pages and a limiting number of pages can be specified. | |
Rulers and guide linesx | Show rulers and guides in the editor | |
Media typesx | Limit allowed file formats (PDF, EPS, JPEG, PNG, SVG, TIFF) | |
Image qualityx | Set minimum and recommended image resolution (dpi). | |
The following menu points only appear if the corresponding items (e.g. article template, variants, ...) have already been created or the template has already been saved. | ||
Page template assignment (only for template type: customizable bundle) | ||
Select the Page templates and adjust the page order if necessary. (The plus symbol determines the number of pages the template should contain. The page templates available below can then be assigned to the individual pages by clicking on them). | ||
Article template assignment | ||
Selection of article templates that are provided for filling the containers. | ||
Avail template assignment | ||
Selection of avail templates from which the combined form is to be generated. | ||
Variant assignment | ||
Selection of (available) variants (colour variants or rules) to be applied to the template. | ||
Color assignment | ||
Selection of (available) colour sets (predefined colour fields) and colour profiles to be available in the editor. | ||
Font assignment | ||
Available fonts | one or more records of Font group can be selected to limit available fonts for a template | |
Available font sizes | one or more records of Font sizes can be selected to limit available font sizes for a template | |
Page preview overlays | ||
Upload a PNG file to be placed on top of the template for viewing in the editor (visible in the editor and preview, but not included in the print data). | ||
Preflight plan | ||
Only the Preflight plan for the template usage Upload and Upload & Editor and the Workflow can be selected here. (The preflight for PDF uploads in the editor can be selected in the general settings). | ||
Block effect assignment | ||
Via the plus symbol, (already created) block effects can be assigned to the template. The checkbox Assigned automatically can be activated for an effect. In this way, the asset(s) newly inserted in the editor receive this effect. (For existing image blocks, the attribute block-effects-active must be set in the IDML file). | ||
Derivatives | ||
Selection of derivatives (output of the draft in the editor as PDF, JPG or PNG) | ||
Meta data | ||
Creation of metadata fields, which are filled by custom attributes, data sources or DataKeys (editor). | ||
Versioning | ||
Active version | Selection of the wanted template version (default latest version) | |
Reorder blocking version | By selecting a version, the drafts created in ClosedShop with an older template version are blocked for ordering (Order overview: Repeat order button; Projects: Use as template and Edit buttons are disabled). | |
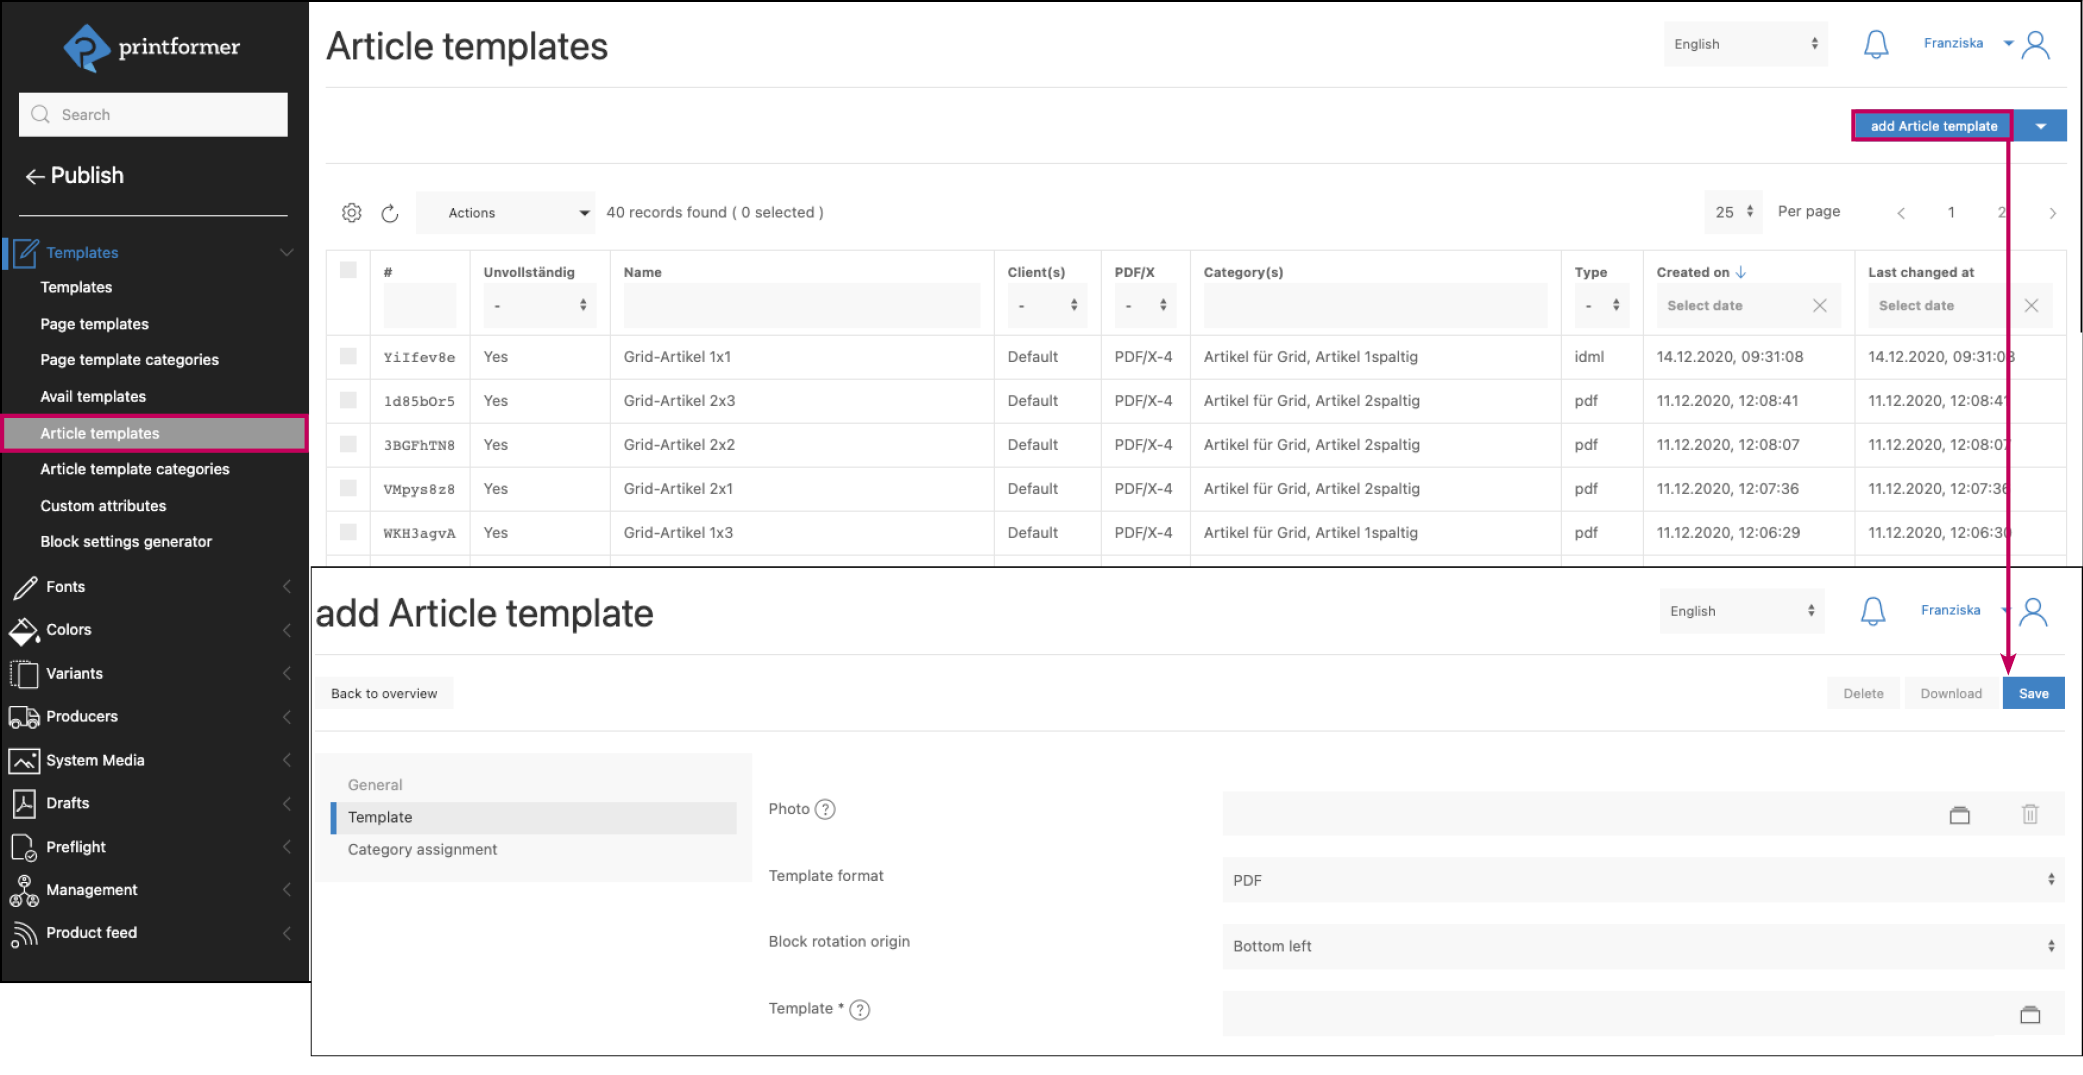
Create Page, Avail or Article templates
The creation of a page, avail or article template is done in the same way as Upload and configure default templates (the files can be uploaded as a ZIP archive or individually into the printformer).
In the General menu the name is given and files are uploaded and assigned under Template.
Tags can be entered that can later be used for article template search or to specify which article templates may be inserted into which container.
To get a preview of the template later in the editor, a PNG or JPG file can be uploaded under Photo.