Clipped Content Areas (Hidden areas)
If certain parts of the template are to be clipped or covered in the editor (e.g. adhesive or finished areas that are not printable), the so-called Clipped Content Areas (CCA) can be used.
To use this feature, a Contour SVG is required, which is then uploaded via template editing after the template has been created in printformer.
General functions
Clipped Content Area
A (graphic) frame is used to define the non-hidden part of the template. All areas outside the CCA are hidden or cut off (also in the print PDF), with the exception of elements that are on the PFNonPrint layer, which are also visible outside the CCA in the editor/preview.Bleed
With Bleedpath (free form) a cutting path can be created. Everything outside this path will be cut out.
A Bleedform can be used to mark the bleed area in the template.
Overlays
This layer can be used to place notes or markers, for example, to help the user edit the template in the editor. All elements of the overlay are not printed (but are visible in the editor and the PDF preview).Cutting
If a 3D model exists for the template, a path can be defined here that defines the area of the template that is to be mapped on the 3D model. (If this path is not within the CCAs, elements outside the clipped content areas will not be displayed).
Create contour SVG
The CCA belonging to the template must be saved in SVG format and can be created with Adobe Illustrator, for example.
The SVG file must be created in the same format, including bleed, as the related InDesign document.
It may be useful for templates with contour SVG to create the page format in the InDesign document including bleed to avoid that there are two bleed shapes in the editor later. (In the printformer preview everything outside the page format is cut off).
The required elements of the contour SVG are assigned to defined layers, depending on their function.
The structure of the layers looks as follows:
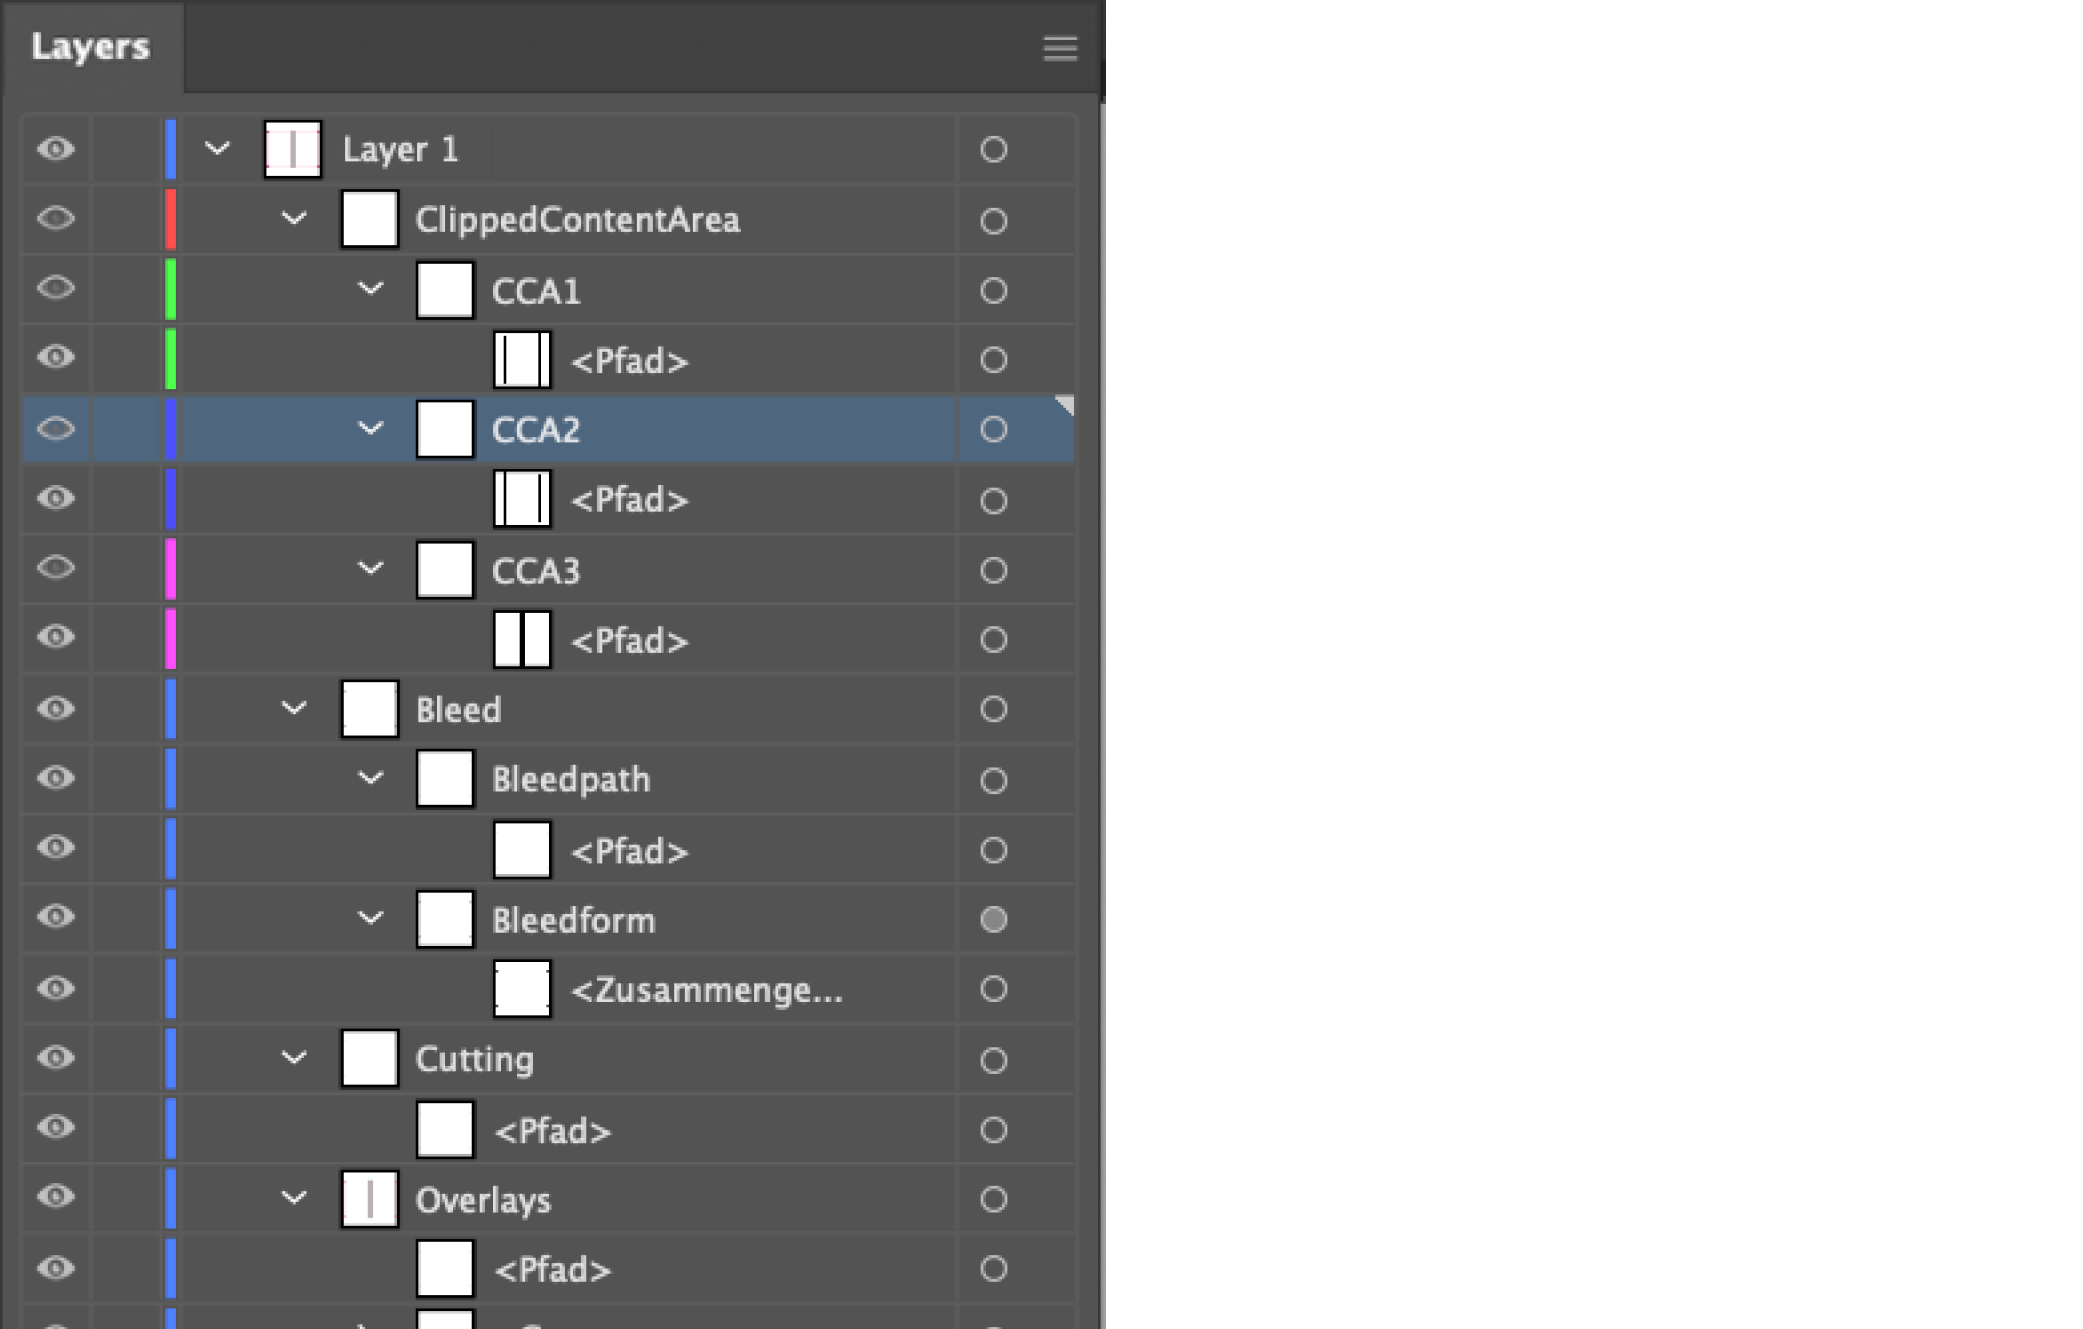
Since SVG is not a native file format of Illustrator, the files for the contour SVGs should additionally be saved in advance as Illustrator file (.ai). Later changes should not be made in the SVG file but in the ai file.
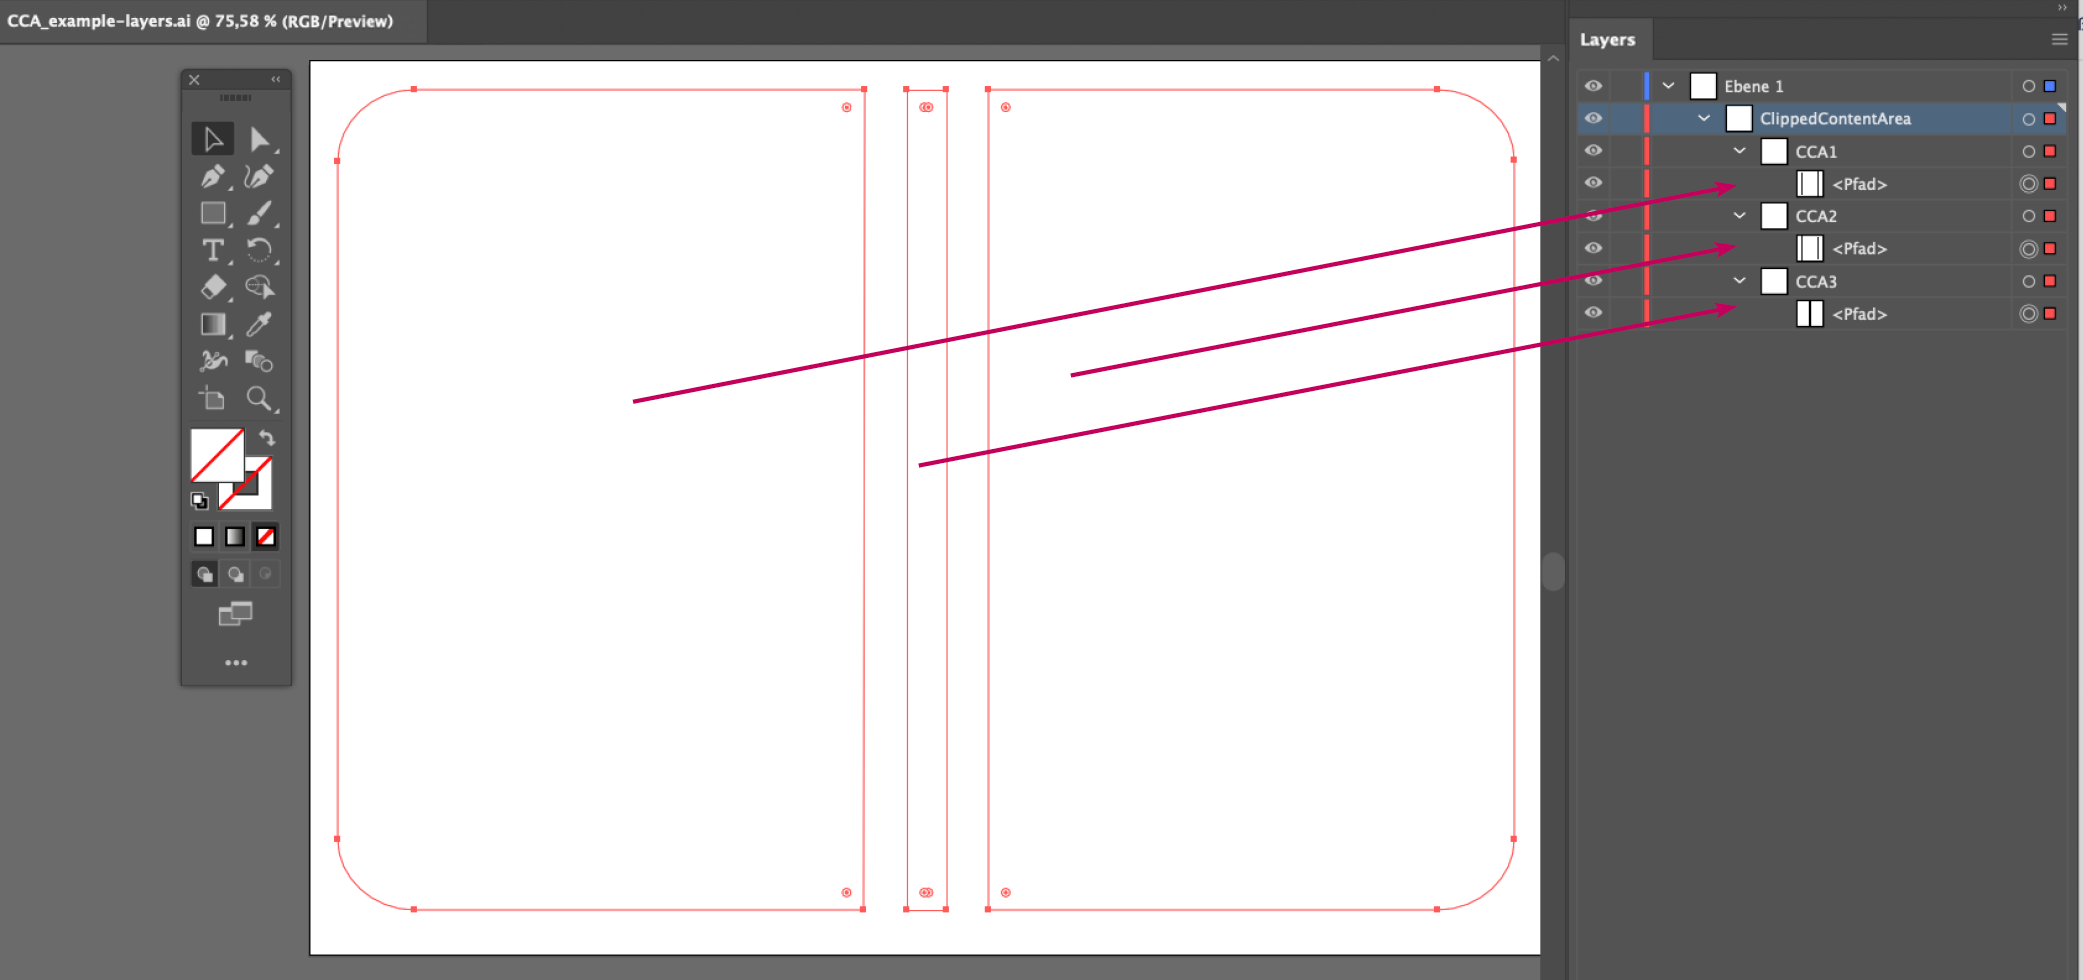
Clipped Content Area
This layer defines all the areas that should not be cut or hidden later in the template.
The visible area can be created by one or more forms (paths).
Each path is created on a sublayer of the ClippedContentArea layer. These sublayers must be named and numbered CCAs as shown in the screenshot below. The paths of the CCAs must not have any area or outline color.
Note that this area must also contain the later bleed, otherwise it will be cut off in the print PDF. (Areas of the CCA that are outside the bleed path will not be displayed in the printformer editor).
Example view:
Bleed
Elements for the cutting line (Bleedpath) and the bleed area (Bleedform) are located on sublayers of the Bleed layer.
Both forms (paths) can be created freely.
To make the bleed shape highlighted in the editor (and preview), it can be filled with any color. To keep the elements inside the bleed shape visible in the template, the opacity of the fill is reduced (transparency).
The bleedpath must be created outside (or at the edge) of the bleed shape, otherwise this area will be cut off. A Die Line for production must be created in the IDML file.
Overlays
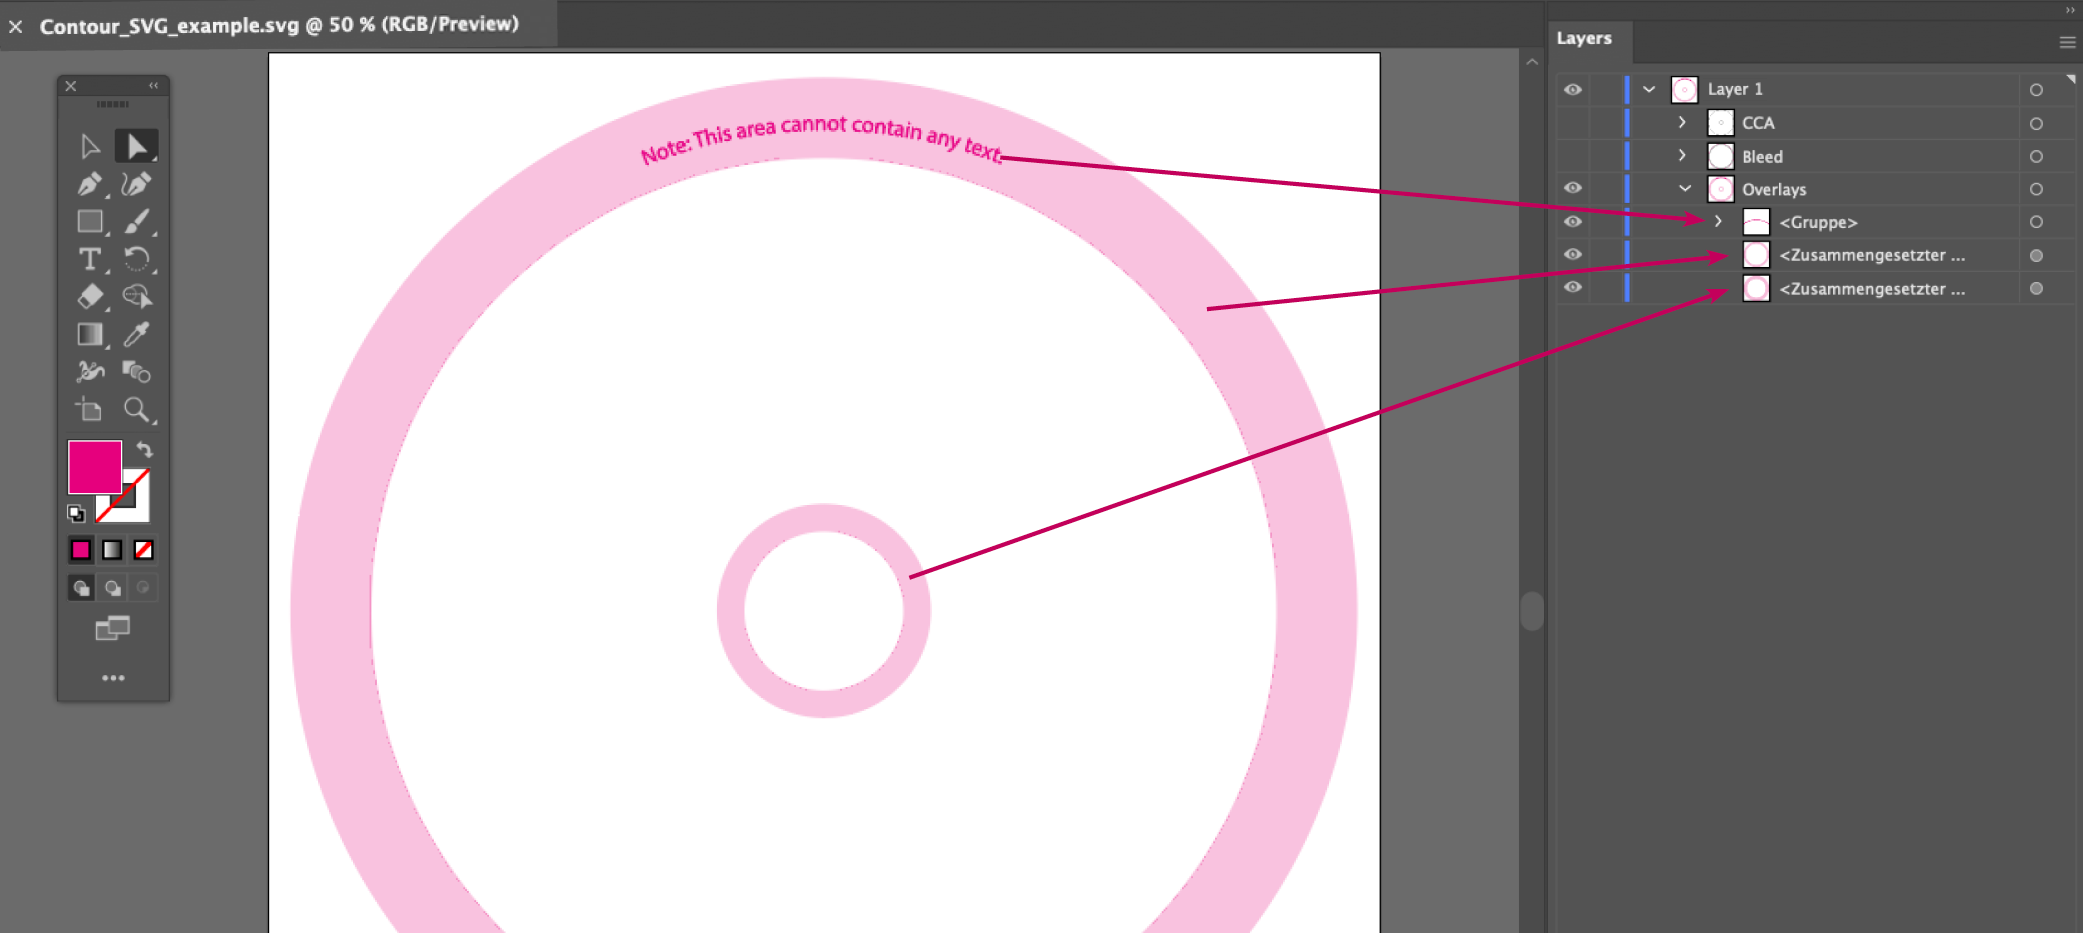
The Overlays layer can be filled with any elements (visualization of hidden area, Die Line, fold lines, hints, aso). (These are visible in the printformer editor and the preview, but are not printed).
All elements can be created with transparency if needed.
Texts must be converted to paths.
Example view:
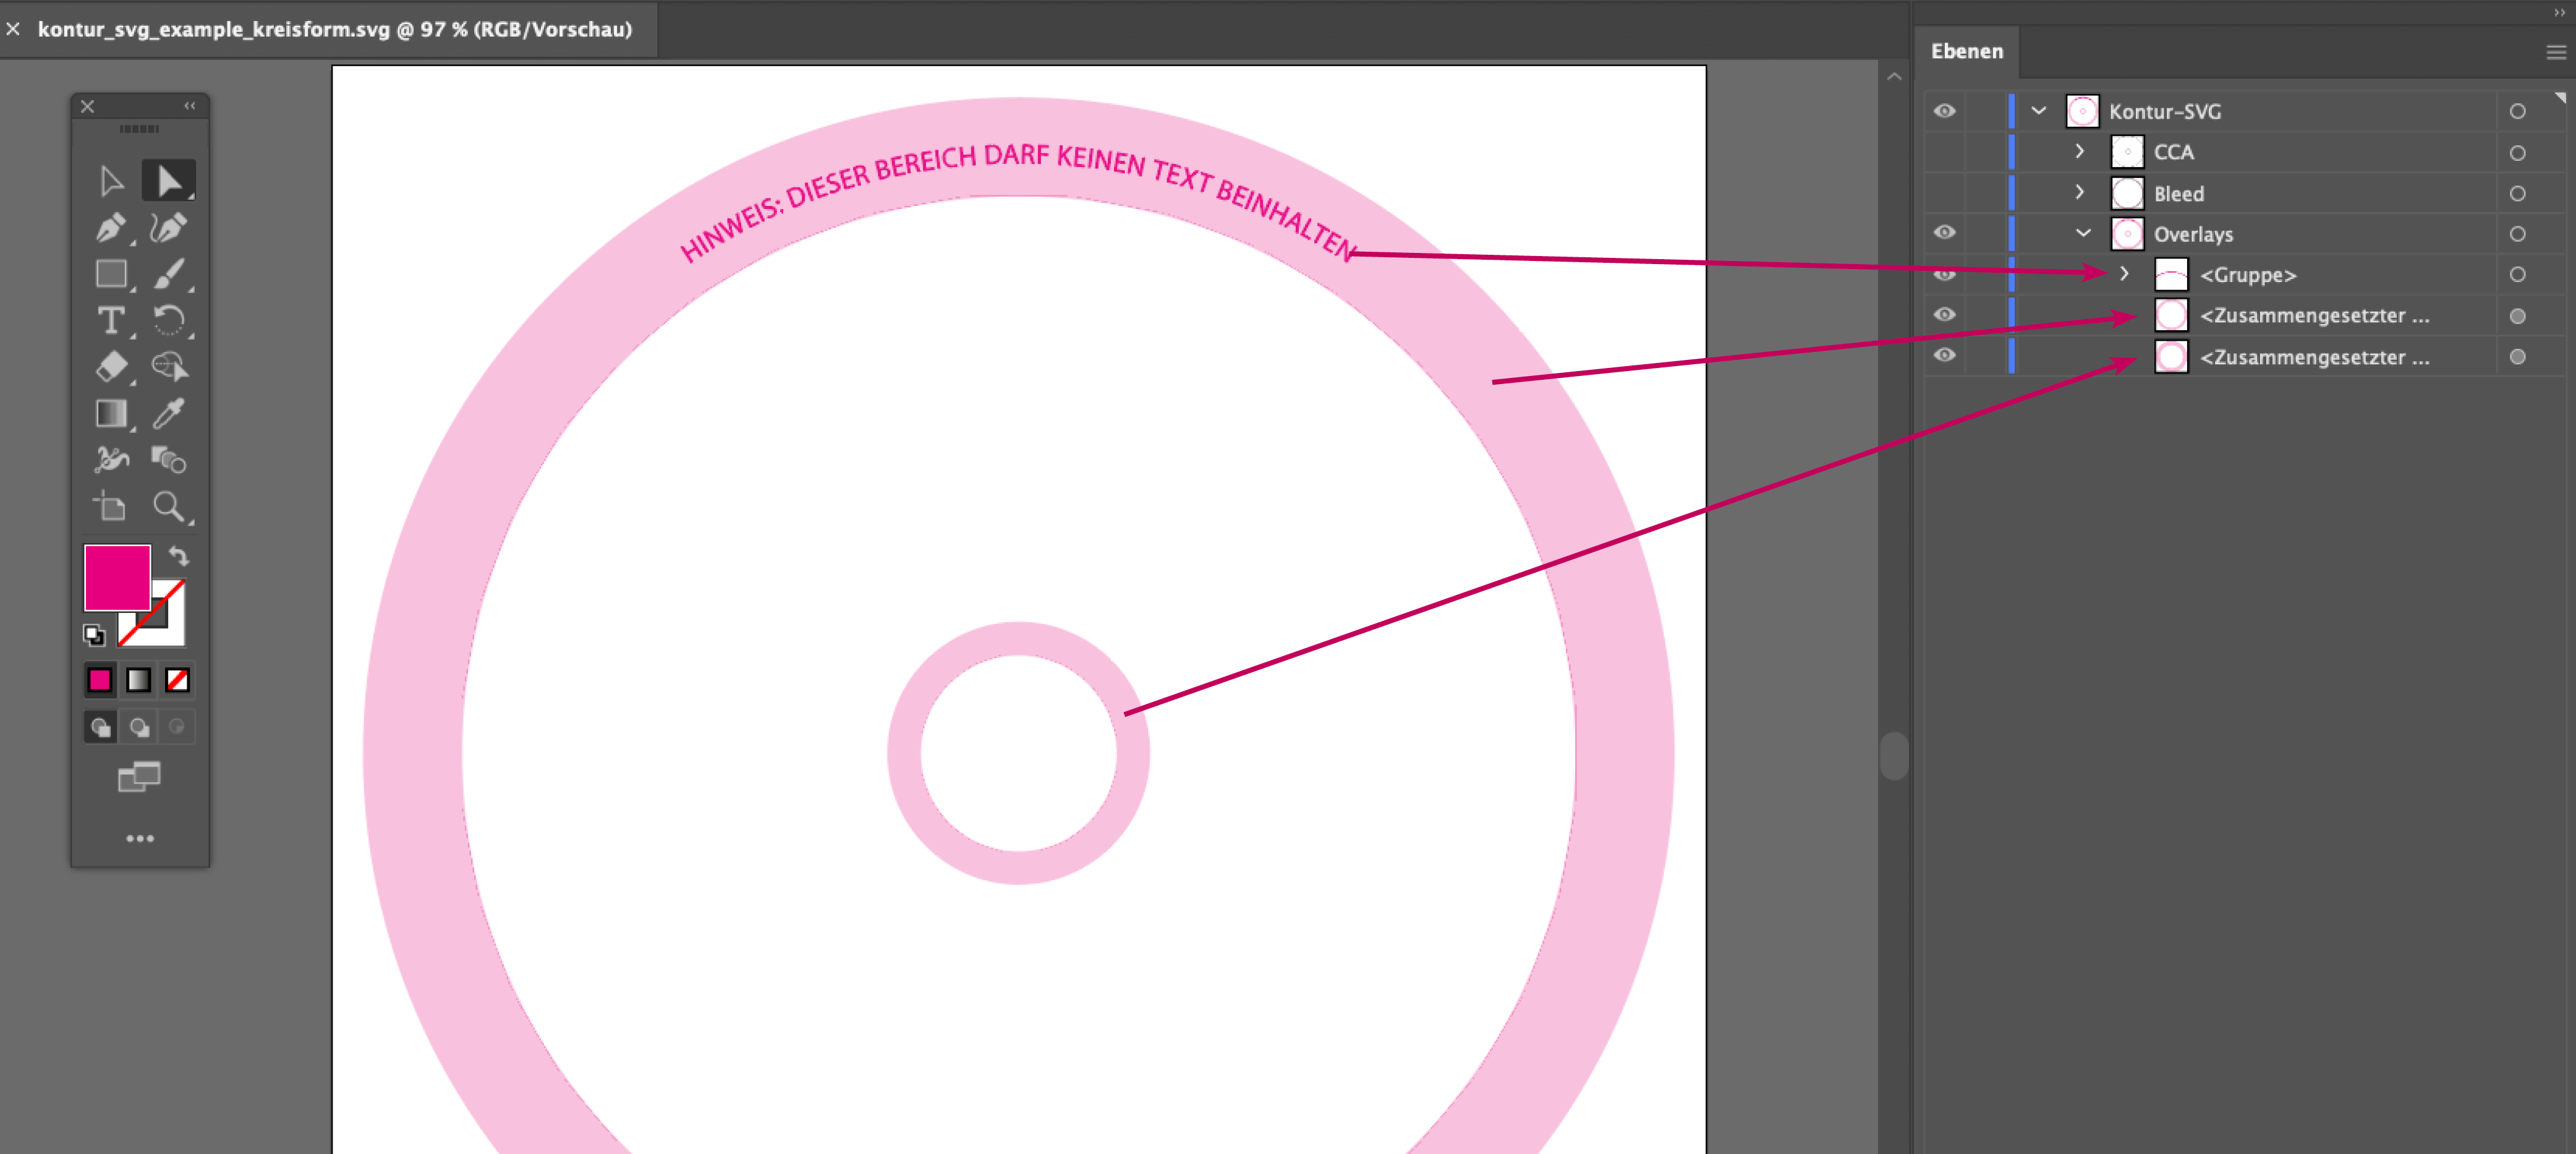
The Template Settings can be used to select whether the Overlays should only be displayed in the Editor or also in the 3D model or in the PDF preview.
(Template > Editor > Preview > Show overlays in preview;
Template > 3D model > Show overlays and highlights in 3D model)
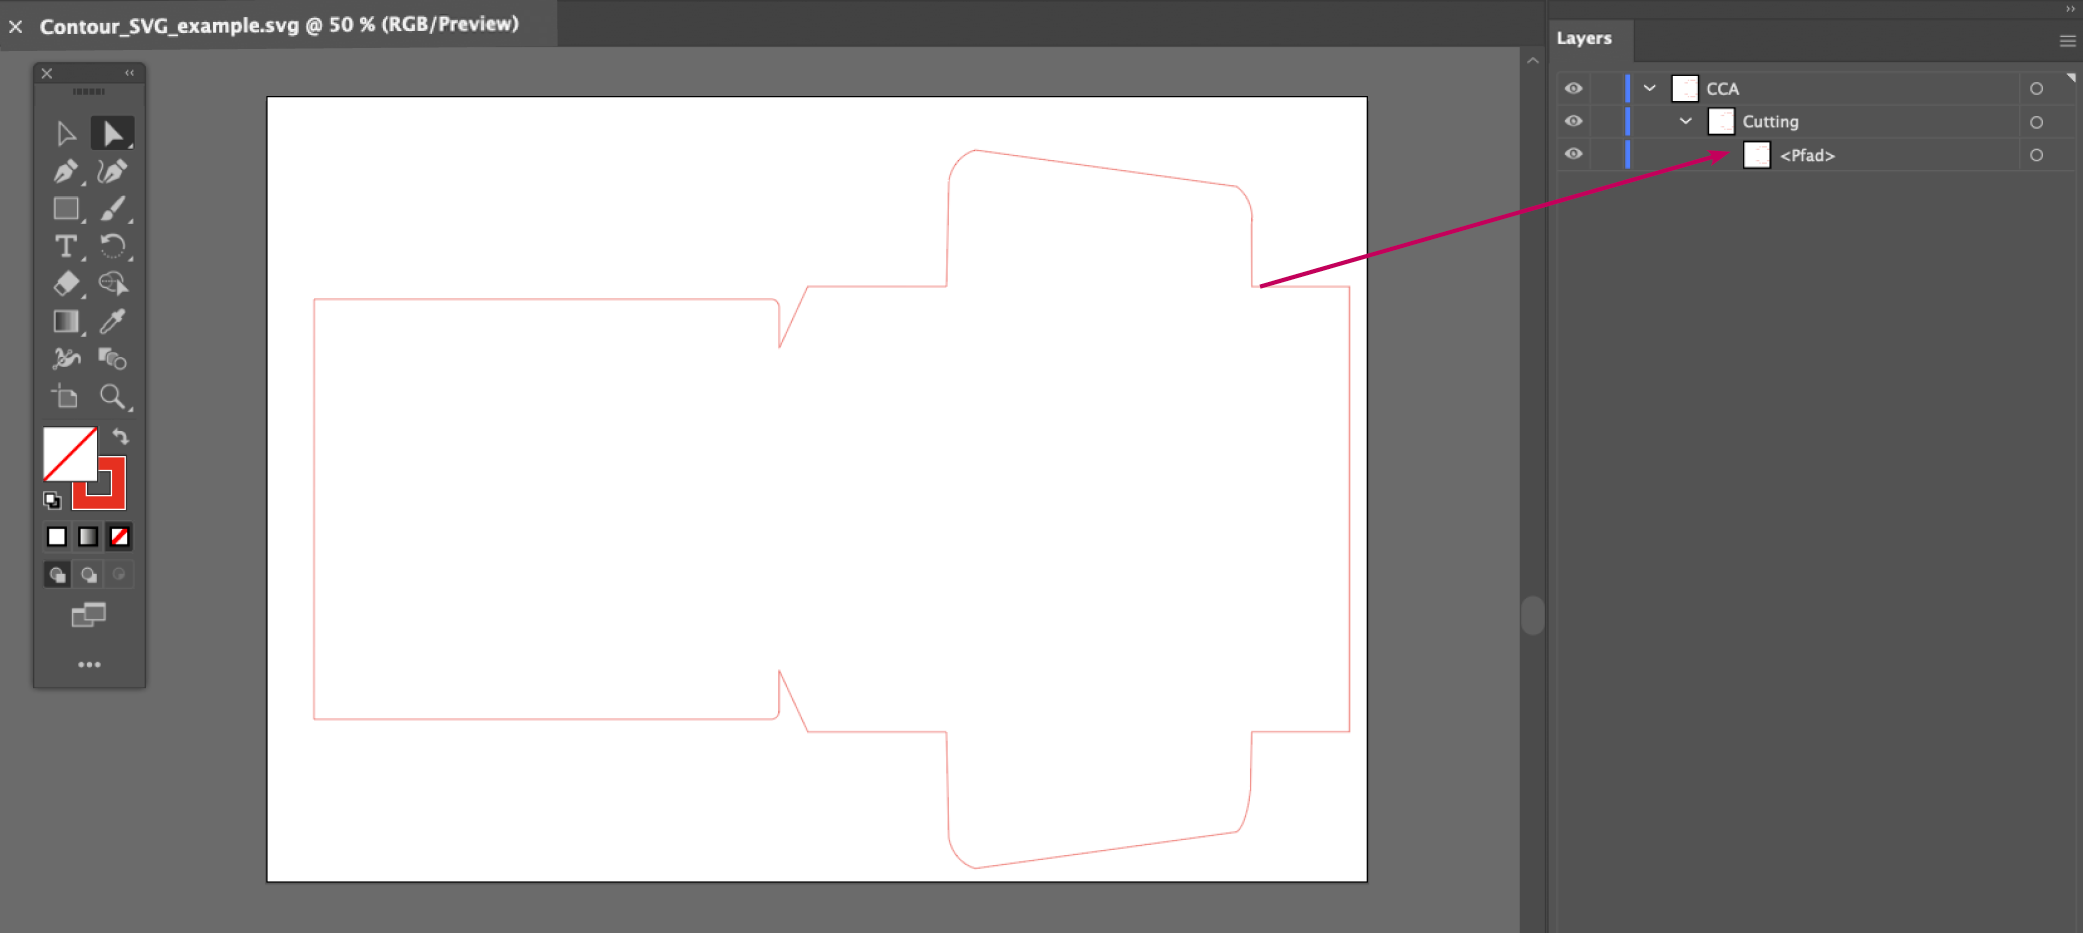
Cutting
To define a clipping path for the area of the template that will later be placed on the 3D model, it is placed on the Cutting layer.
Example view:
Save SVG file
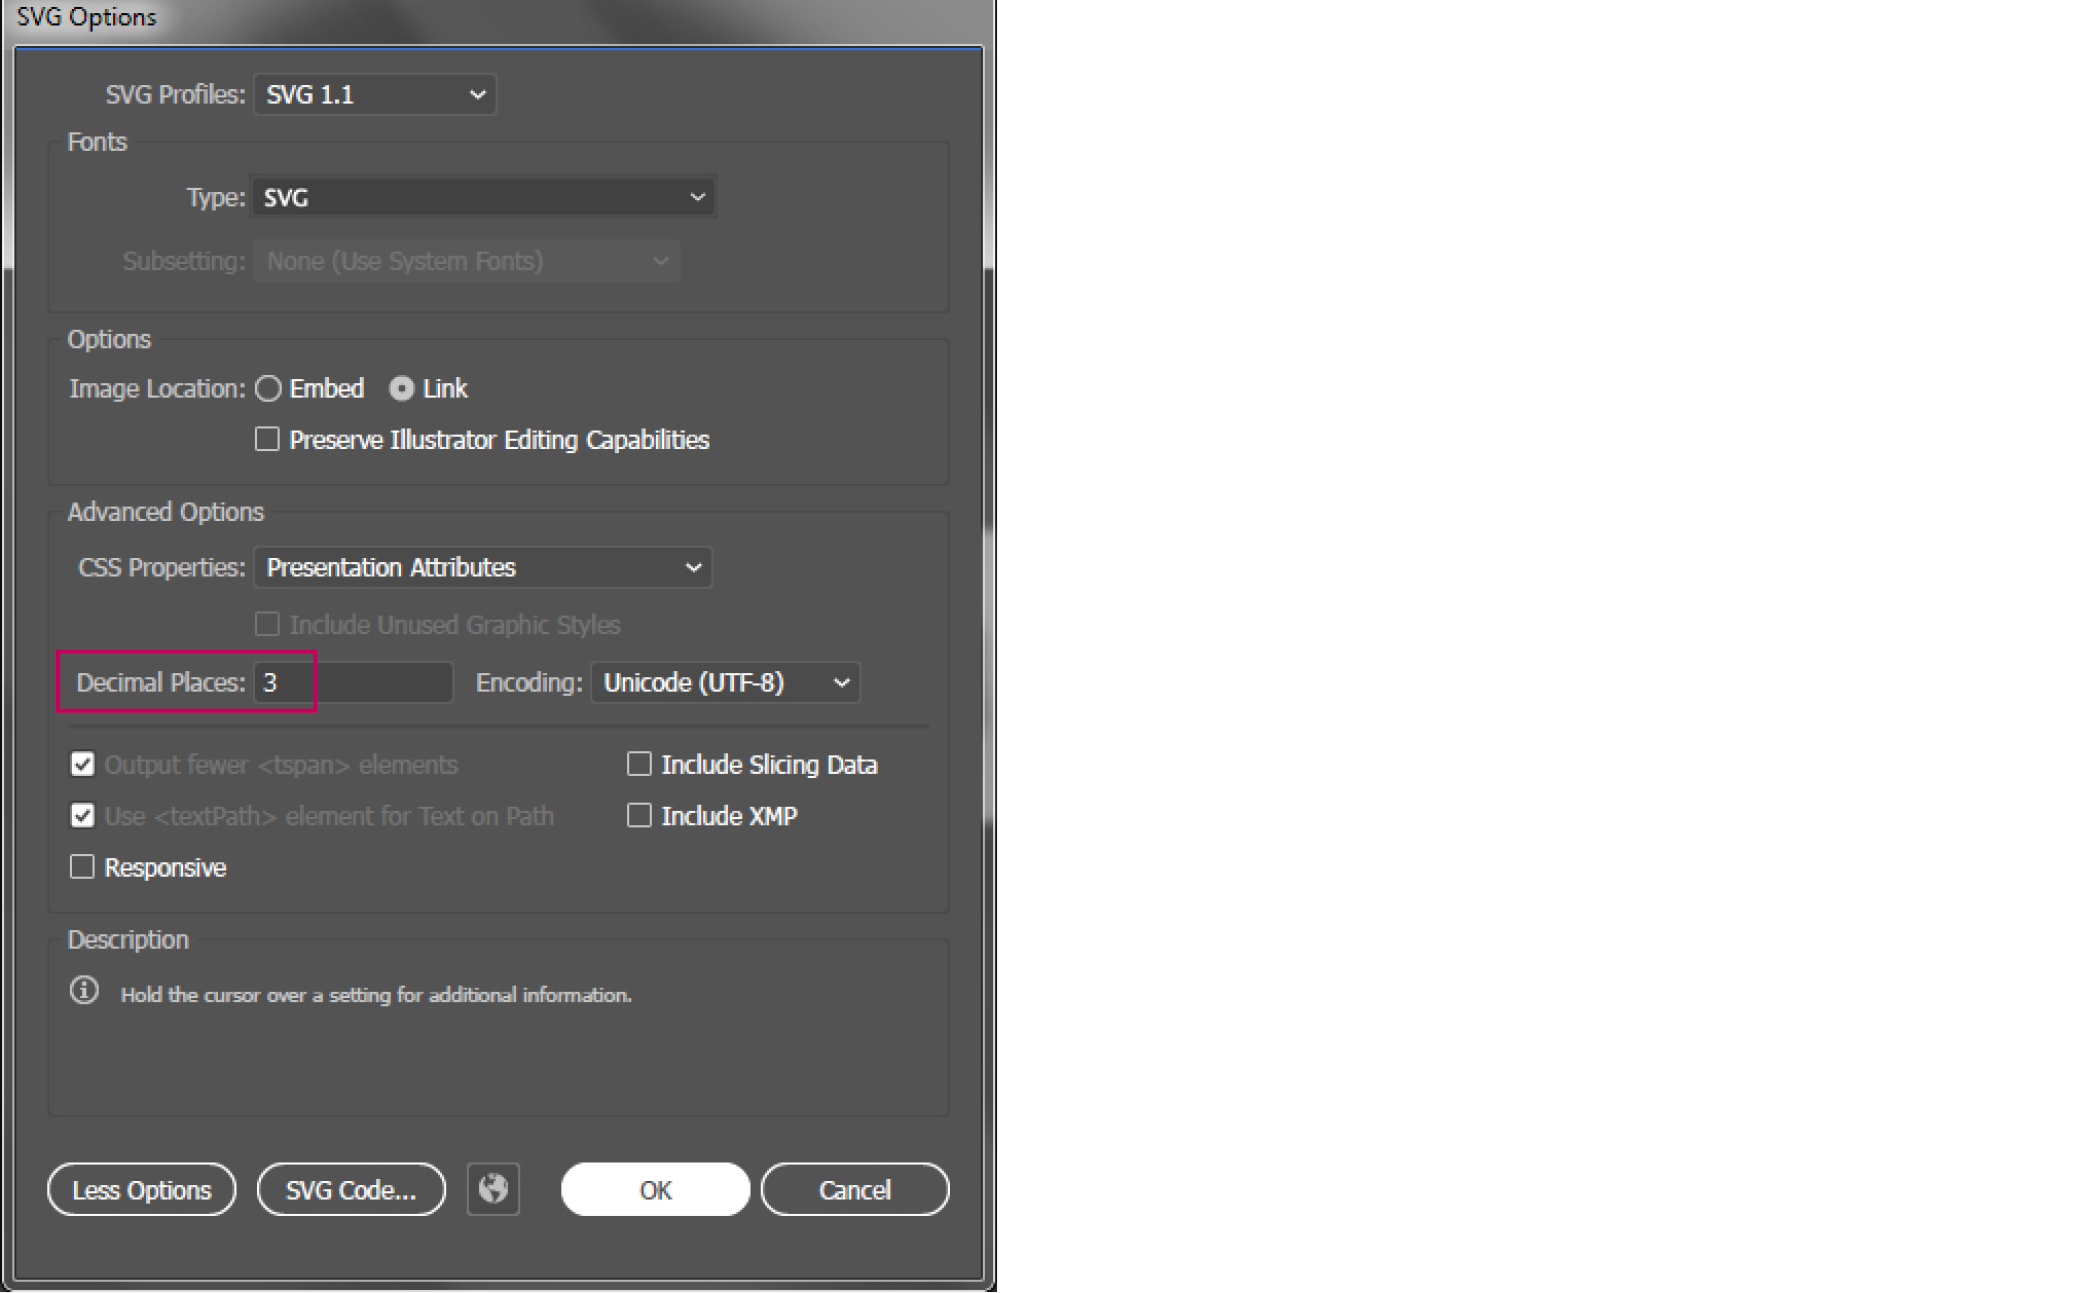
The SVG format converts the document format (unit) when saving. To avoid differences in the conversion, 3 must be entered under Advanced Options > Decimal Places when saving. (The Checkboxes Preserve Illustrator Editing Capabilities and Responsive checkboxes must be deselected.)
From Illustrator version 29.0 (2025), the unit mm is transferred when saving SVG. (This can lead to shifts in the printformer editor).
For a valid Contour-SVG, the unit must therefore be changed to point when using the newer Illustrator versions (Document Setup > Unit: Point).
Paths are also saved differently in the SVG from Illustrator version 29.0 (2025); if a path error occurs when uploading the Contour SVG, this can be corrected using Pathfinder in Illustrator: Merge path
Create and edit template in printformer
Once the InDesign template has been set up in printformer (configure Templates), the contour SVG can be uploaded:
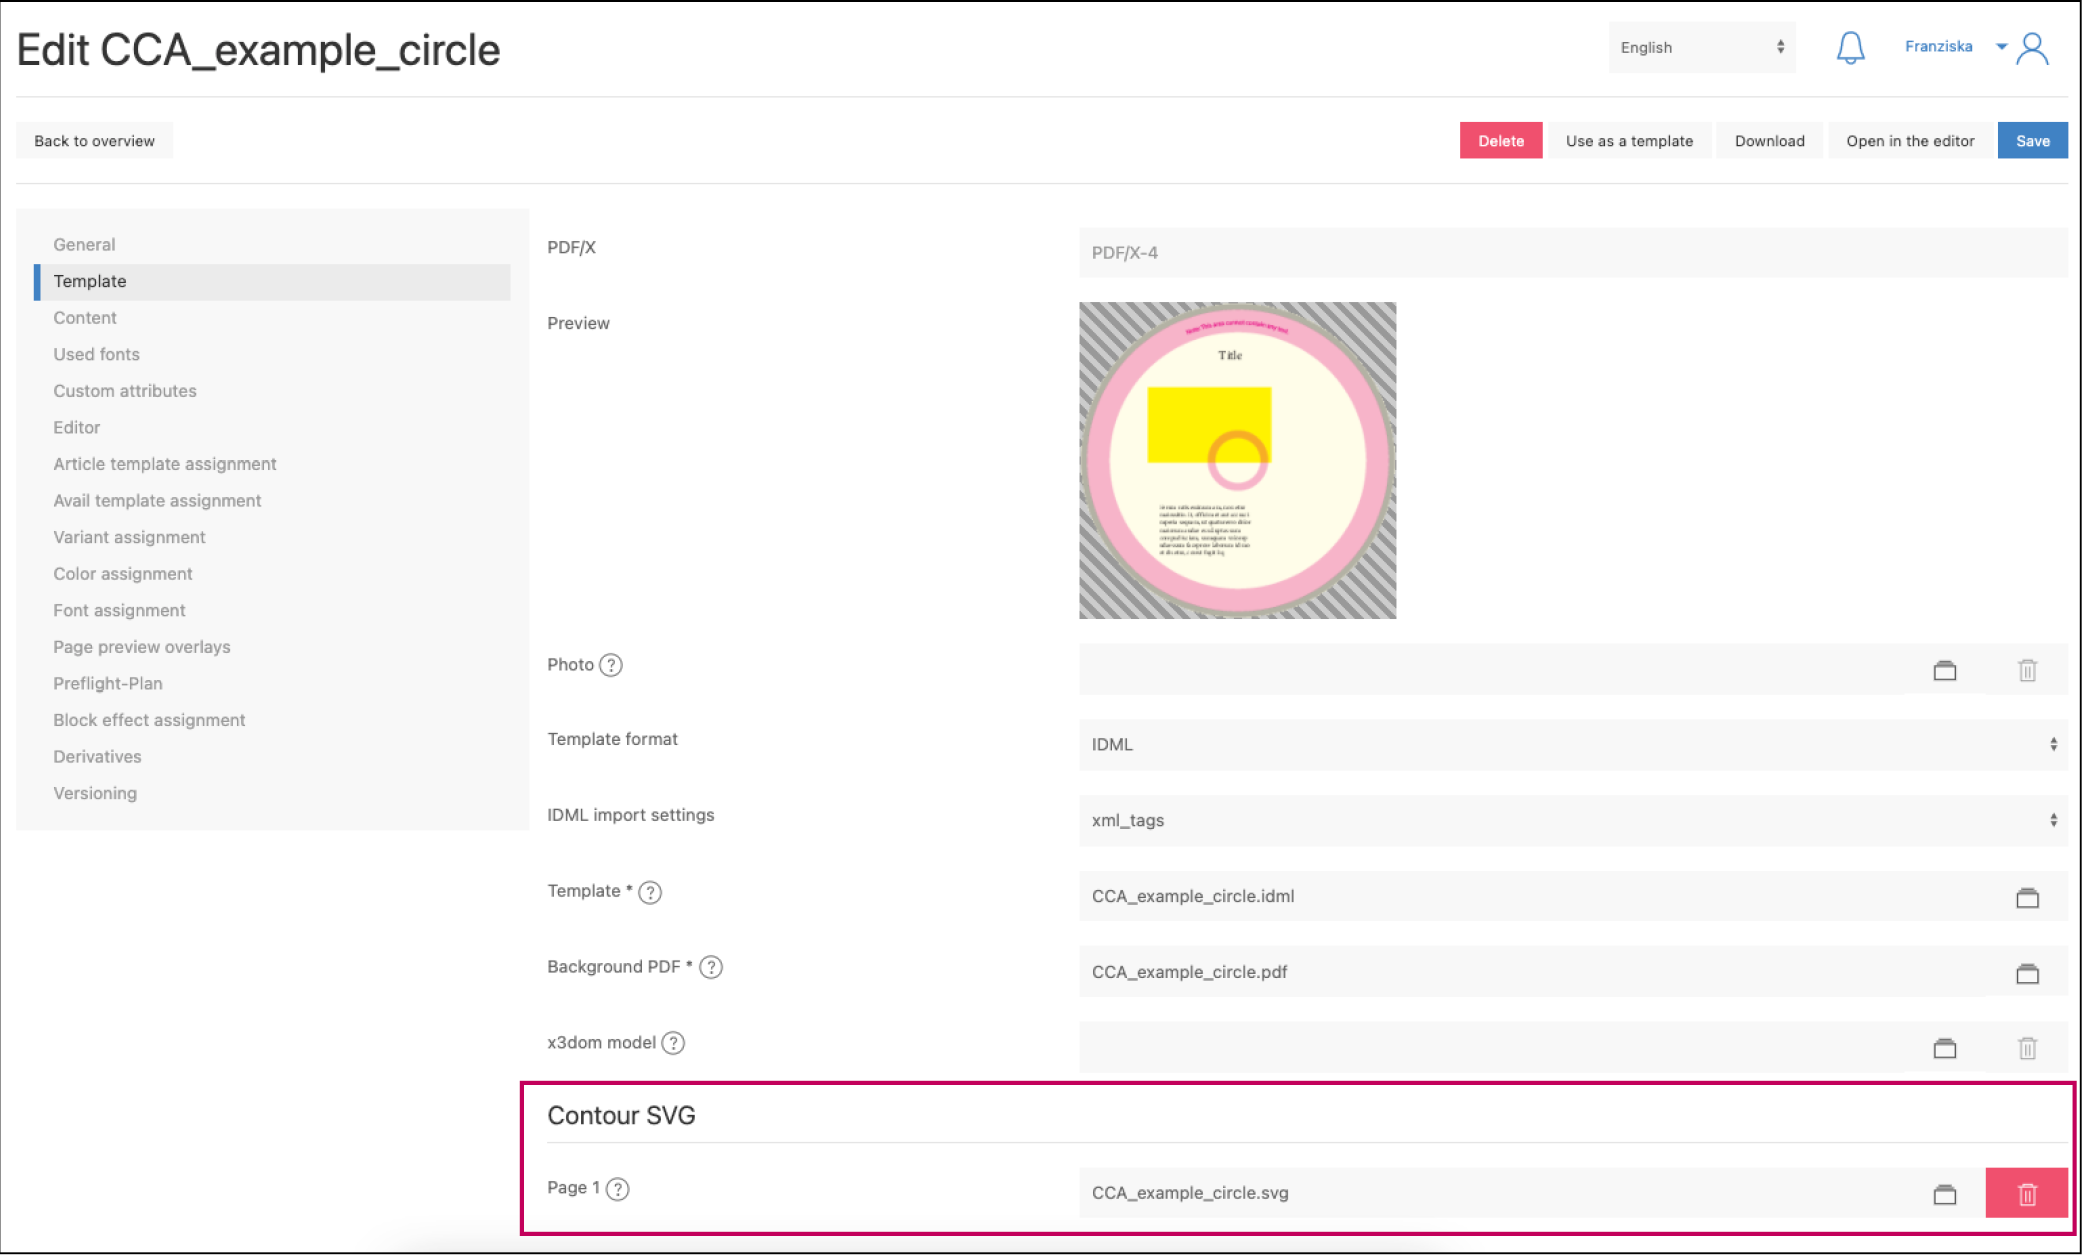
When opening the template in the editor, the defined areas of the contour SVG are now stored. If elements are moved outside the CCA area, they are automatically covered or clipped.
In addition, the block-prevent-clipping attribute can be used to determine whether an element must necessarily be placed completely within the CCA.
If this attribute is assigned to an element, it will automatically jump back to its original position when moved outside the CCA).
Screencast and sample file
Example of a template with contour SVG (CCA) in the printformer editor:
Sample file:
Attributes | ||
Name | Value (Limits) | Usage |
block-prevent-clipping | true or false | This block setting determines whether an element must be completely placed inside the CCA. If it is assigned to an element (true), the element will automatically jump back to its original position when moved outside the CCA). |
