
Tags and Attributes
Tag | Attribute |
|---|---|
A tag is a label of a dataset with additional information (it identifies the particular content types or objects in your document.) | Each tag can be assigned further properties (permitted attributes). These define, for example, which adjustments may be made to the element or how the element behaves in different situations. |
Tagging elements and adding attributes
To make it easier for you to work with tags and attributes, we recommend the InDesign Presets and Layers tutorial in advance.
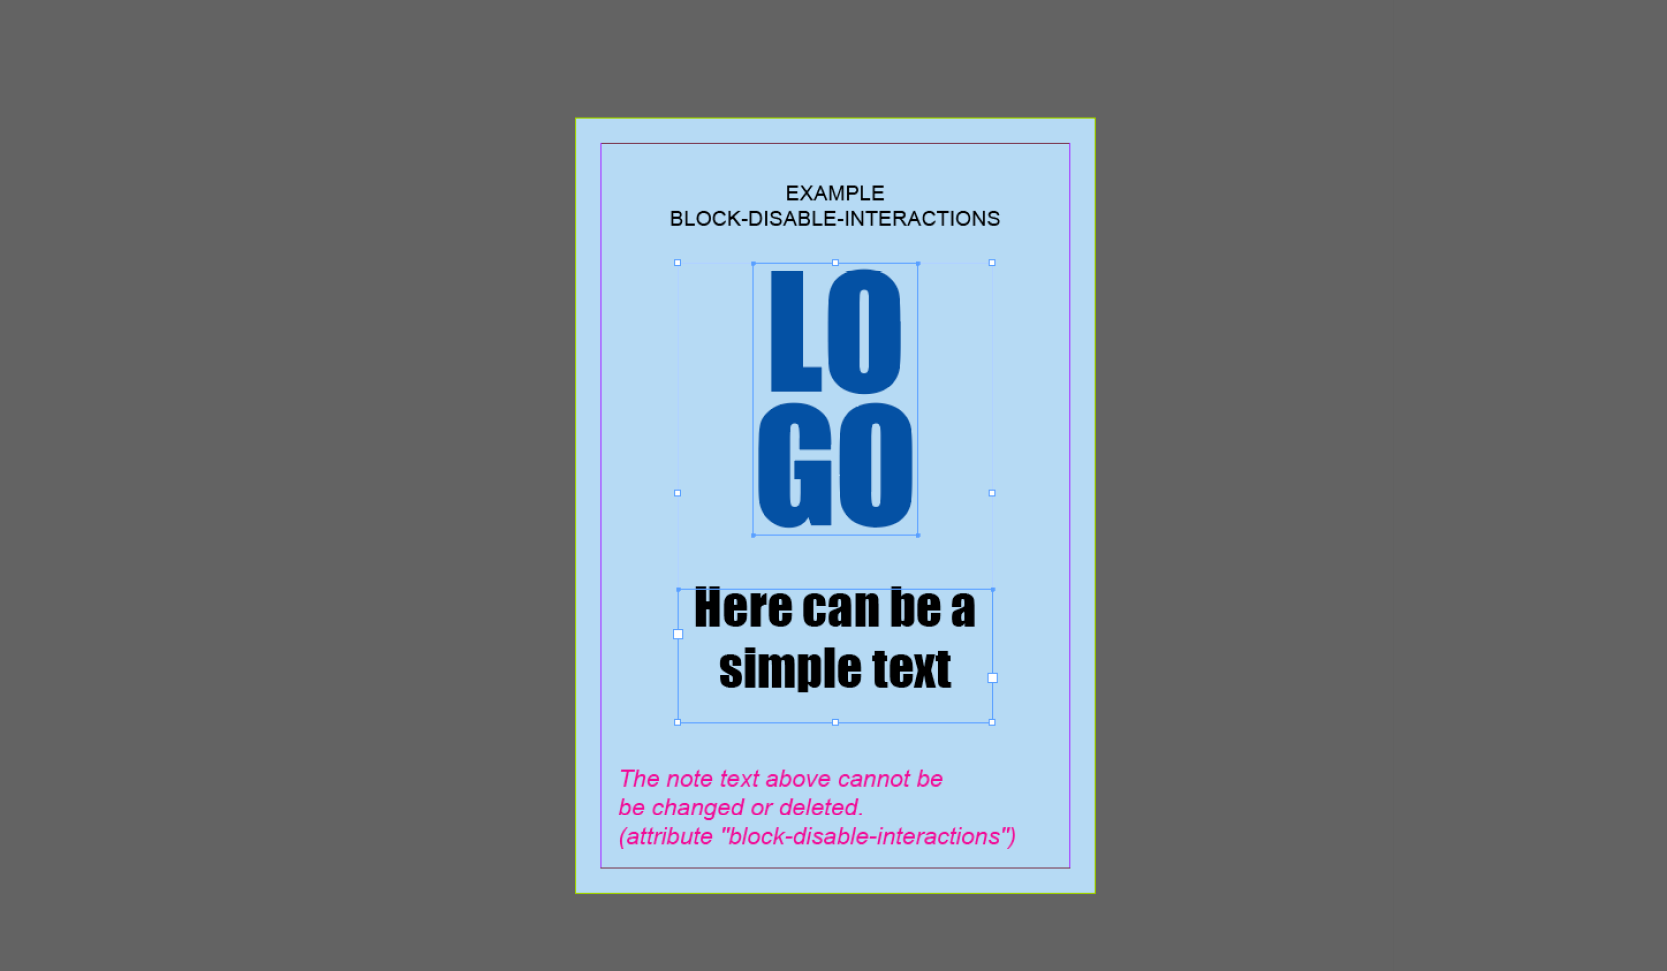
Our example file has two editable elements: an image frame with logo (SVG file) and an already filled text frame. In addition, there is a predefined coloured background that should not be changed and a locked text block with an associated info line that is only visible in the editor and the preview and should not be printed later.
Make sure that the elements to be edited are on the »PFUserContent« layer.
Now select the first area in your layout. Right-click on the element to open the submenu where you can assign the required tag via Tag Frame > PFBlock. You can also select the frame and tag it by clicking on PFBlock in the »Tags« menu window.
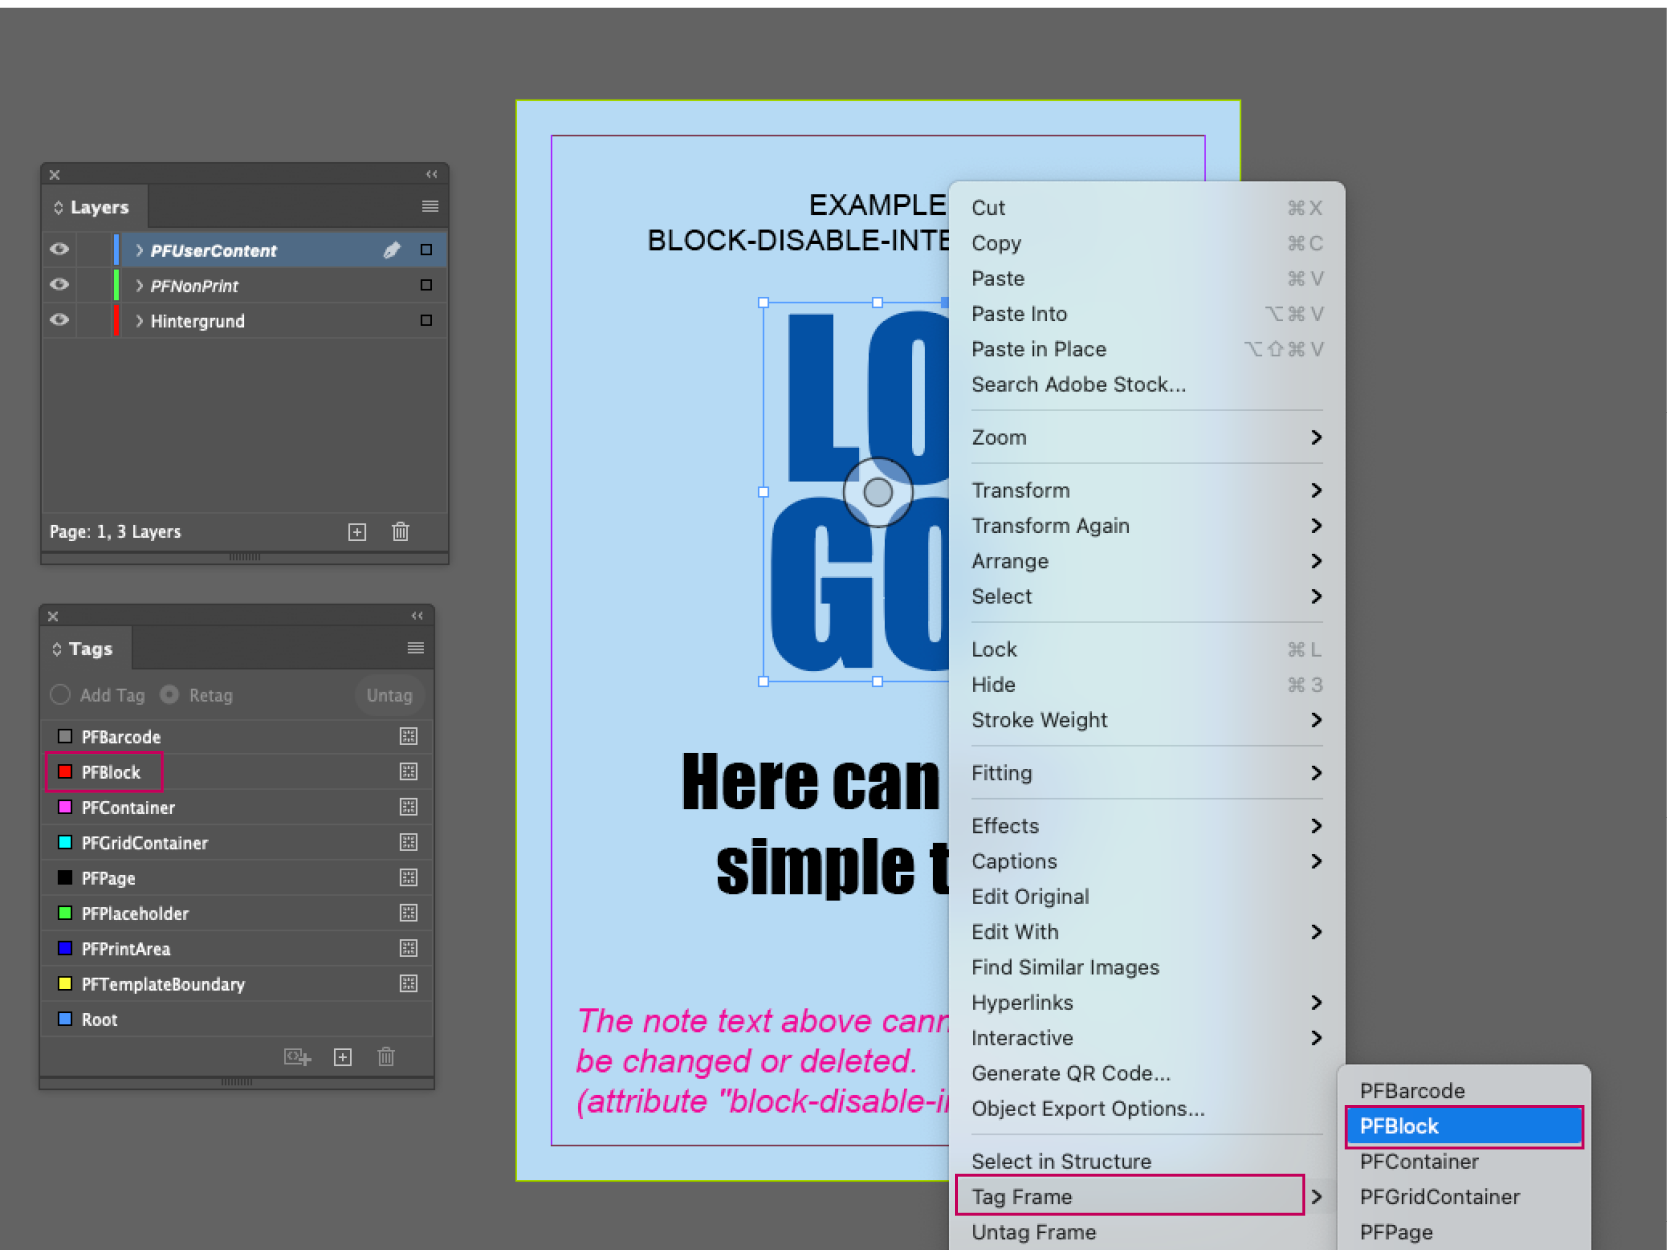
After the first block has been tagged, we proceed in the same way with the second block (text frame). The text which is to be locked as well as the note text at the bottom are also tagged as PFBlock. For the editable elements, attributes can be created later in the structure view.
Now the elements assigned to the tags are visible in the structure overview (to the left of your workspace).

Attributes (additional properties) can be created for the editable elements (in the structure view).
In our example, we want to specify that the upper text block may not be changed or deleted. With a right click on the text element we select New Attribute... and enter the name settings in the following option window and the corresponding JSON code for value.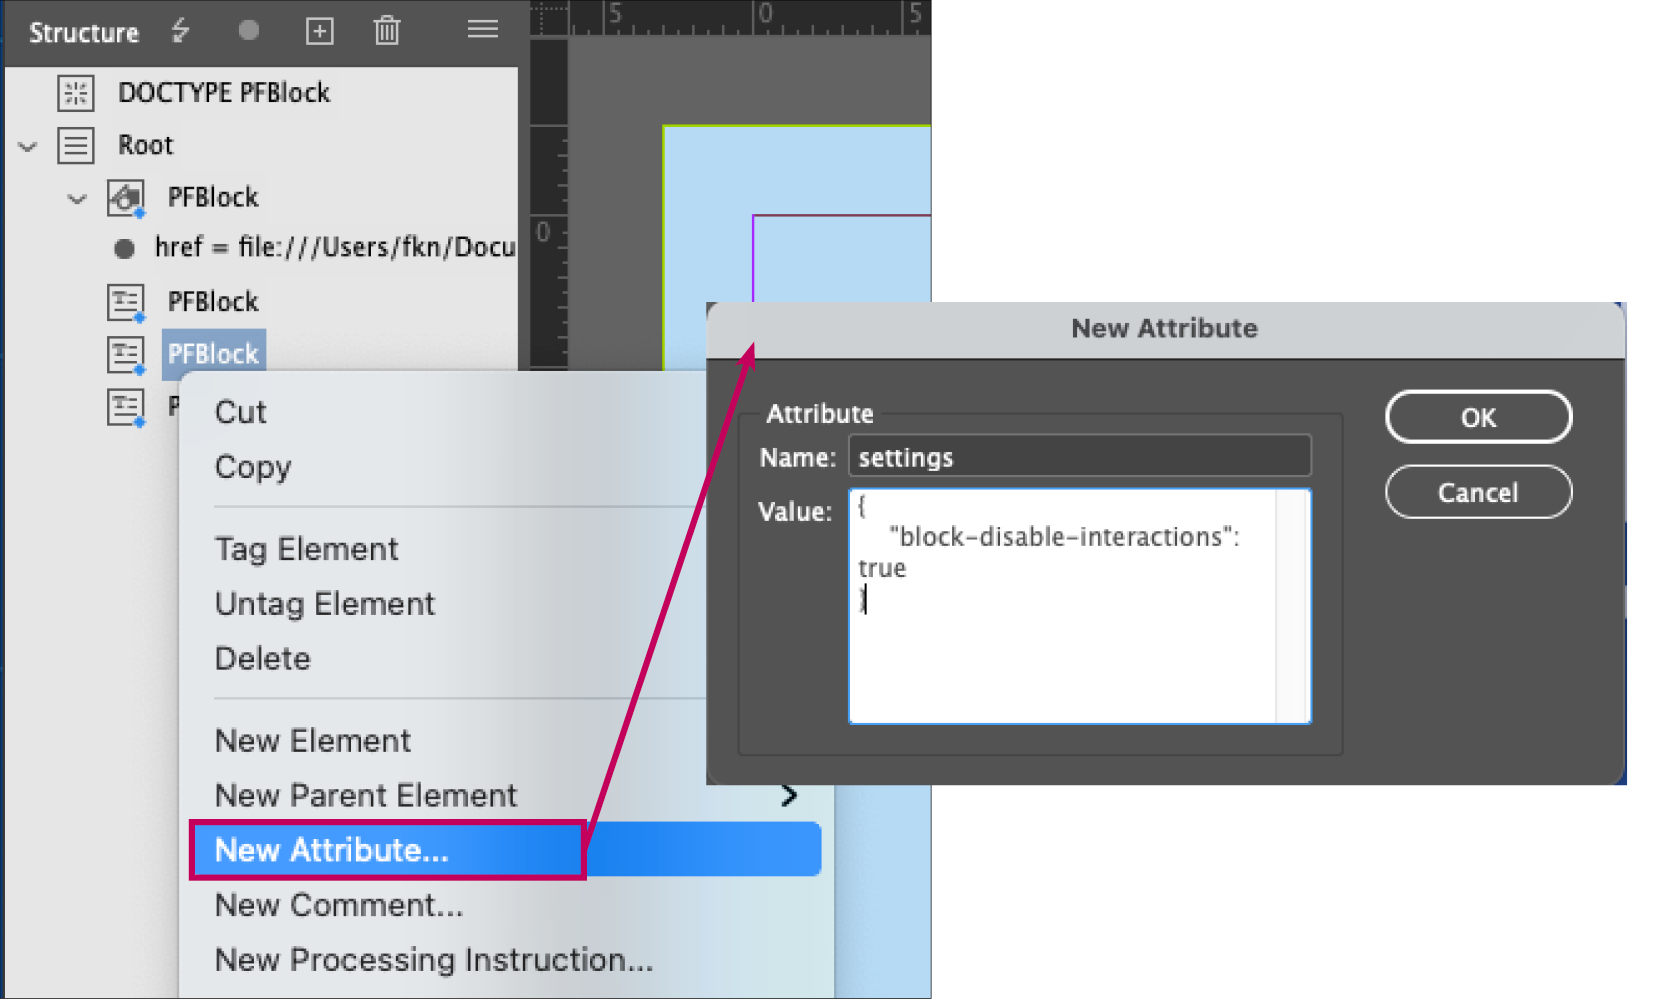
So as to ensure that the information text for the print file is not taken into the print file later, we create a new layer with the name »PFNonPrint« and move the text frame to this layer.
Now our InDesign template is prepared, can be packaged and uploaded into the printformer.
Note: Delete tags
If tagged objects (graphic frames, text frames, shapes) are deleted in InDesign, the tag remains in the structure (visible only through the change of the symbol). This can lead to problems, therefore the "empty" tags should always be deleted. Via the function »Delete« in the structure window (bin icon) tag and layout content can be deleted at once.
