Effects
Through the block effects, the printformer allows to vectorize any assest in real time, reduce colors or perform a color space conversion. The created vectors can also be saved in the asset manager.
The printformer contains four effects, each of which can be configured individually:
Embossing (Print finishing: blind embossing or stamping)
Vector (Vectorization and color reducing)
Color Space Conversion (CMYK, Greyscale, ICC-Profile)
Monochrome (one-color, without gradations)
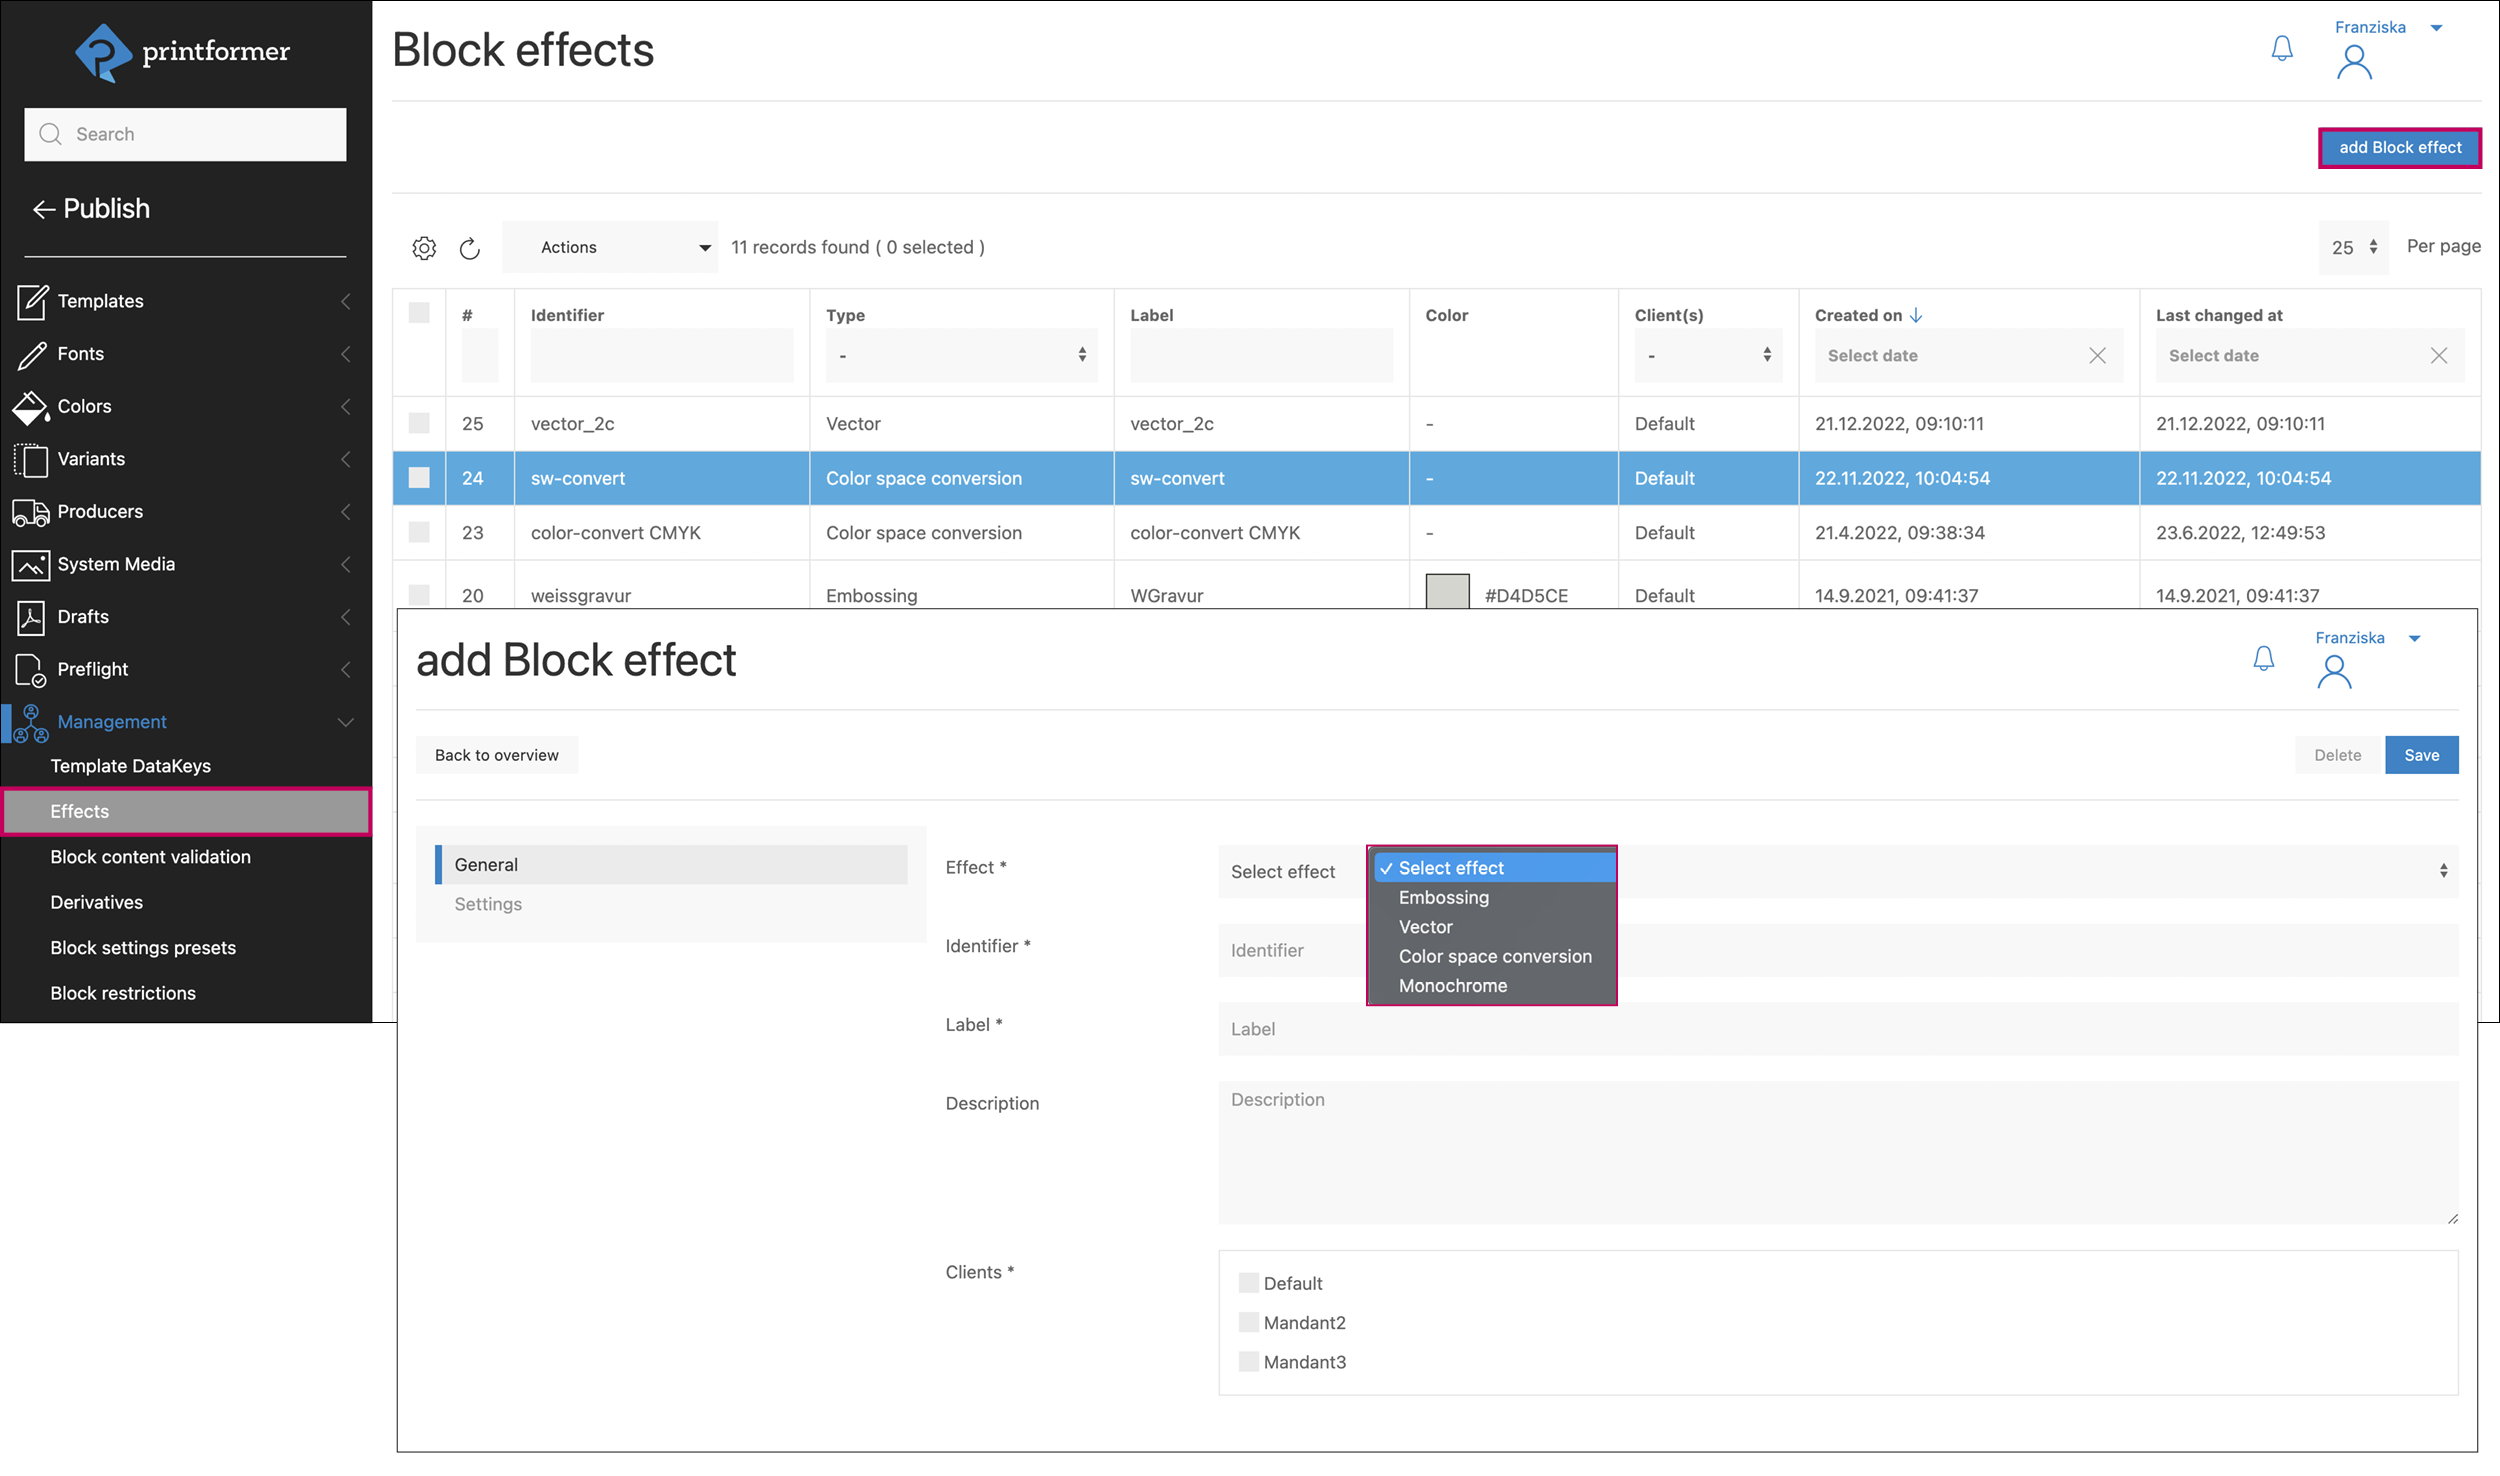
Add Block-Effect
First, the desired Effect (Embossing, Vector, Color space conversion or Monochrome) is selected.
The general settings are same for all four effects:
Identifier (to be used in the block of IDML) and Label (name) must be given, as well as client assignment must be made. In addition, a description (to be displayed in the editor when editing the asset in the tracer) can be defined.
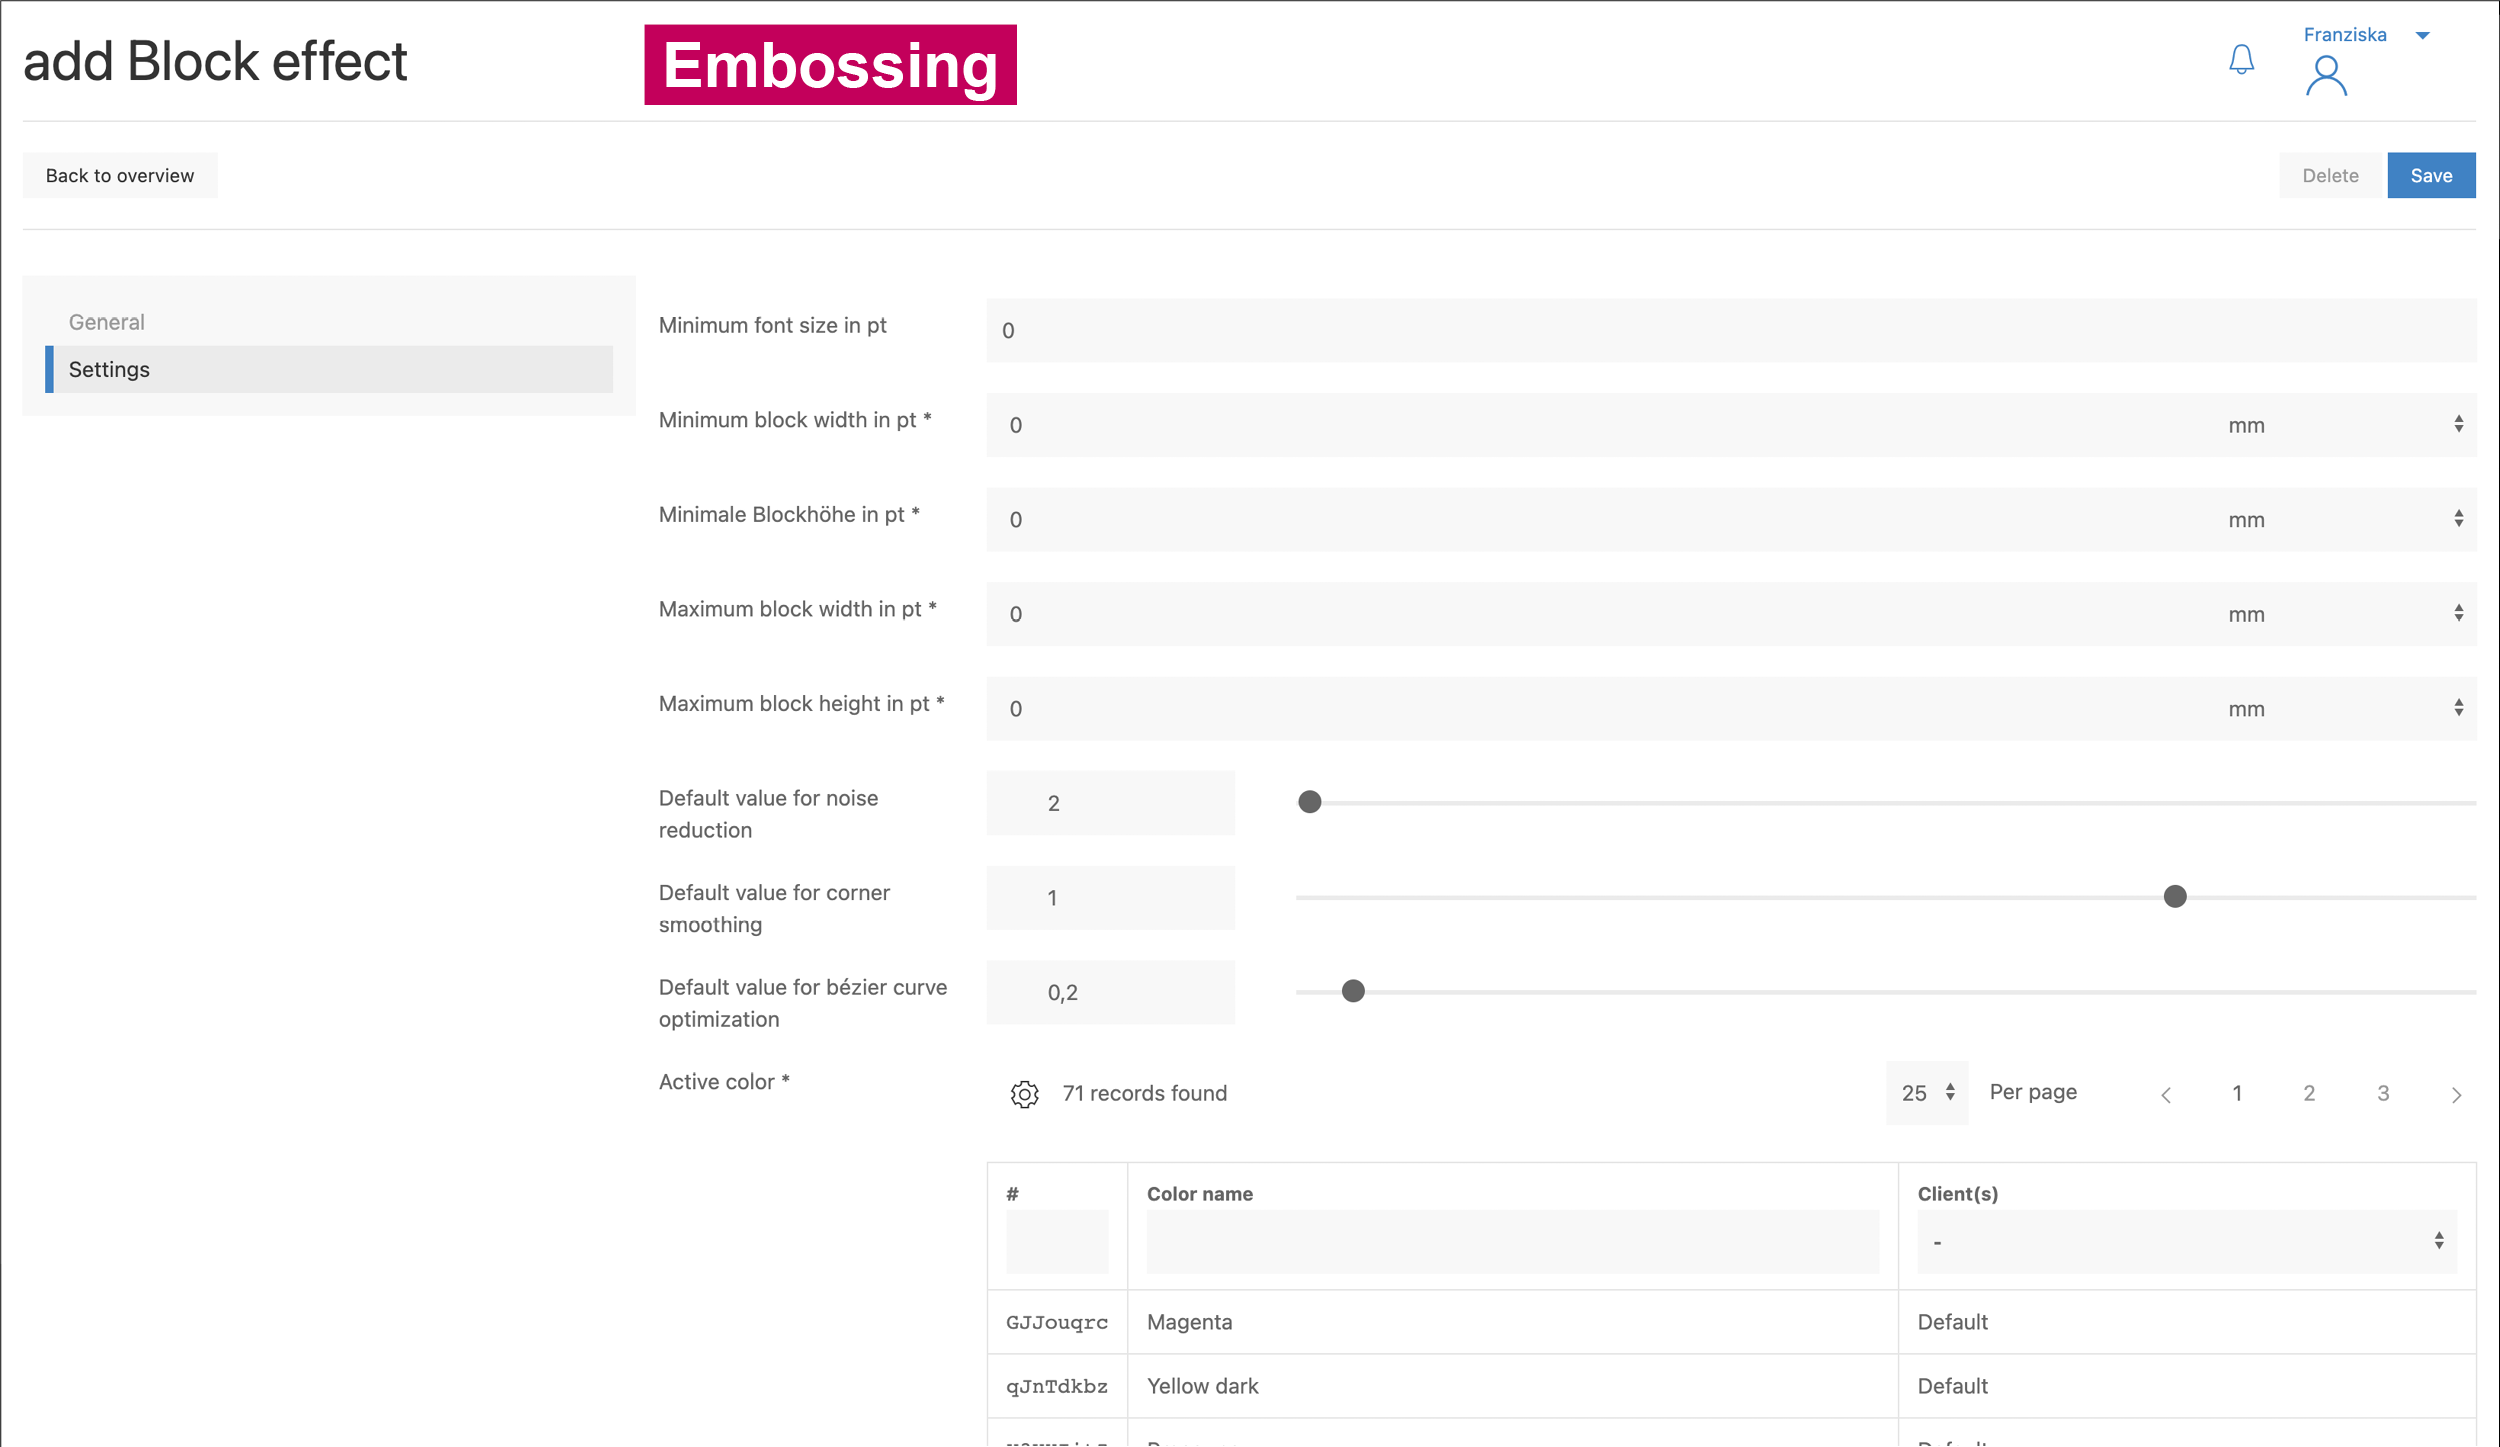
Settings Embossing
Minimum and maximum sizes for font and block can be specified for this effect, as well as the default vectorization settings (default value for noise reduction, corner smoothing and Bézier curve optimization). These can be overridden when using the block-effects-active block attribute in the editor.
Settings Vector
Here the maximum number of colors for the later vector graphic is defined as well as the default vectorization settings (default value for noise reduction, corner smoothing and Bézier curve optimization). These can be overridden when using the block-effects-active block attribute in the editor.

This effect can be applied only to image blocks.
Settings Color space conversion
Selection of the desired output color space (gray-scale or CMYK), if needed an ICC profile uploaded under Colors can be added. (Publish > Colors > ICC Profile).
Note: the CMYK conversion is only visible in the print PDF.
This effect can be applied only to image blocks.

Settings Monochrome
Currently, no adjustments can be made for this function. The effect creates a pure black and white conversion of the original motif.
This effect can be applied only to image blocks.
Template Settings
An adjustment has been made to simplify the assignment of effects and to enable them for image blocks across systems or clients. This has been published with version 3.75.
Effects that were previously assigned to a template via the “old” effect configuration “Assign automatically”, were automatically transferred to the new configuration and adjusted accordingly as part of the changeover.
There are two ways to assign the effects in the editor.
Assign effect on block (IDML)
If different effects are to be used in the template or the effect should only apply to (a) specific block(s), these must be assigned accordingly in the IDML.
To do this, each block that is to contain an effect is provided with the block-effects-active attribute (including the identifier defined in the effect):
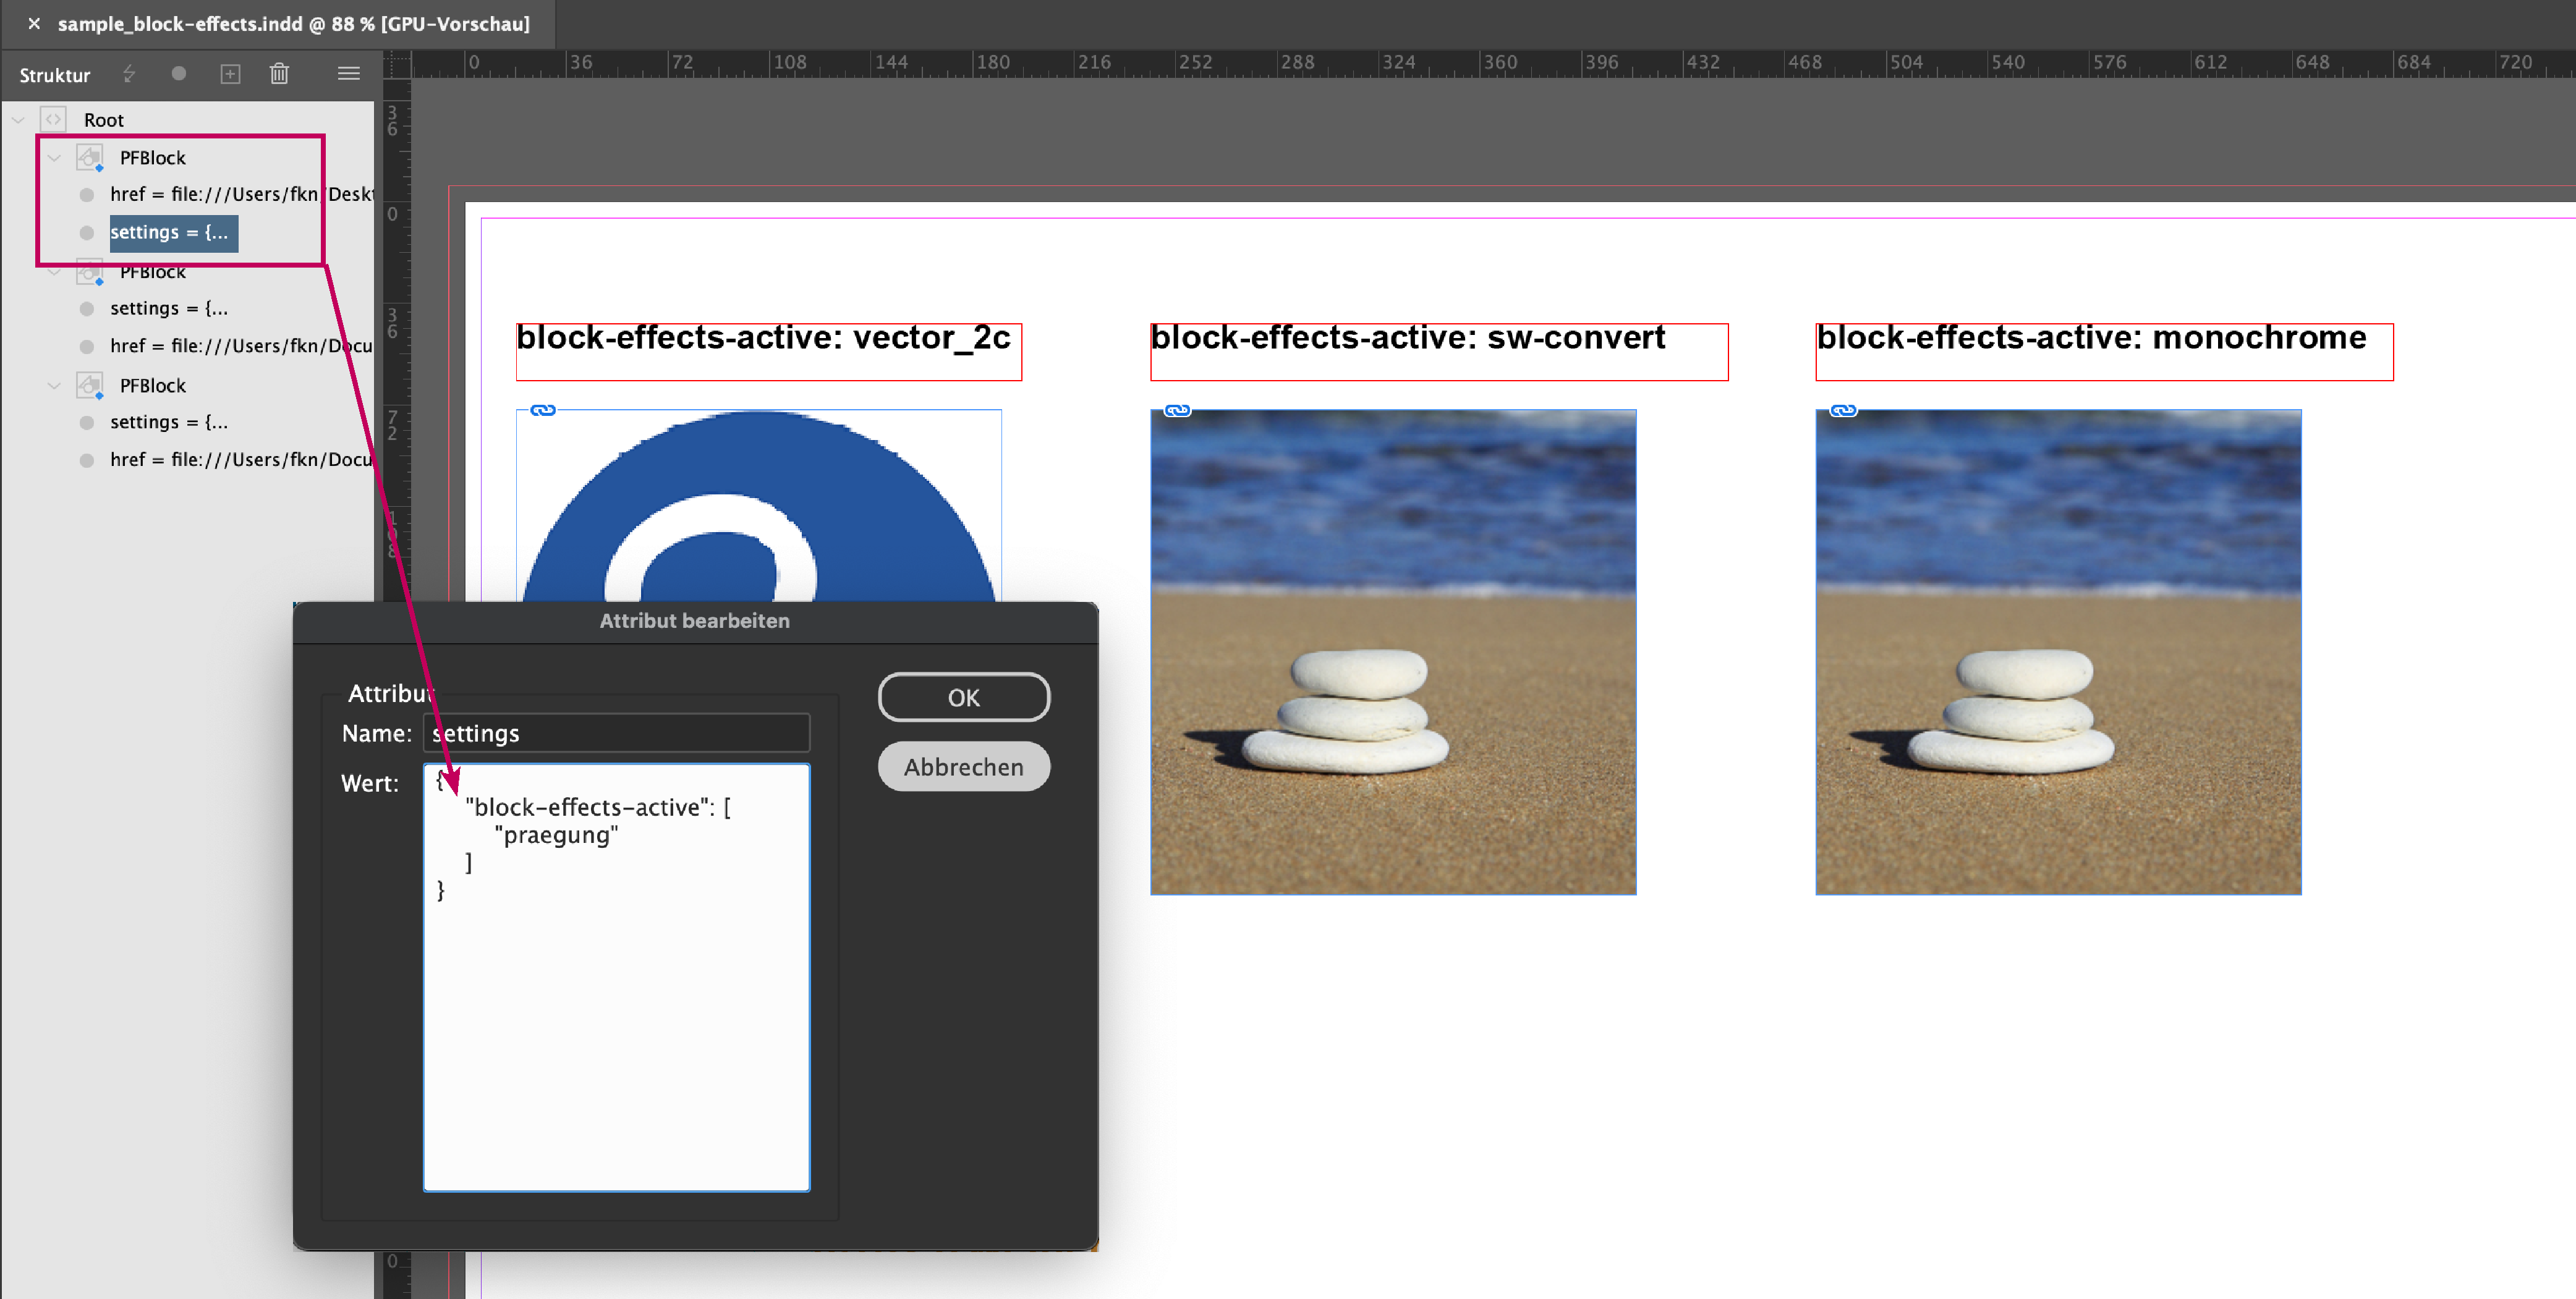
(Note: the block must not contain a linked image and the effects specified via the attribute cannot be removed by the user in the editor).
Assigning effects across
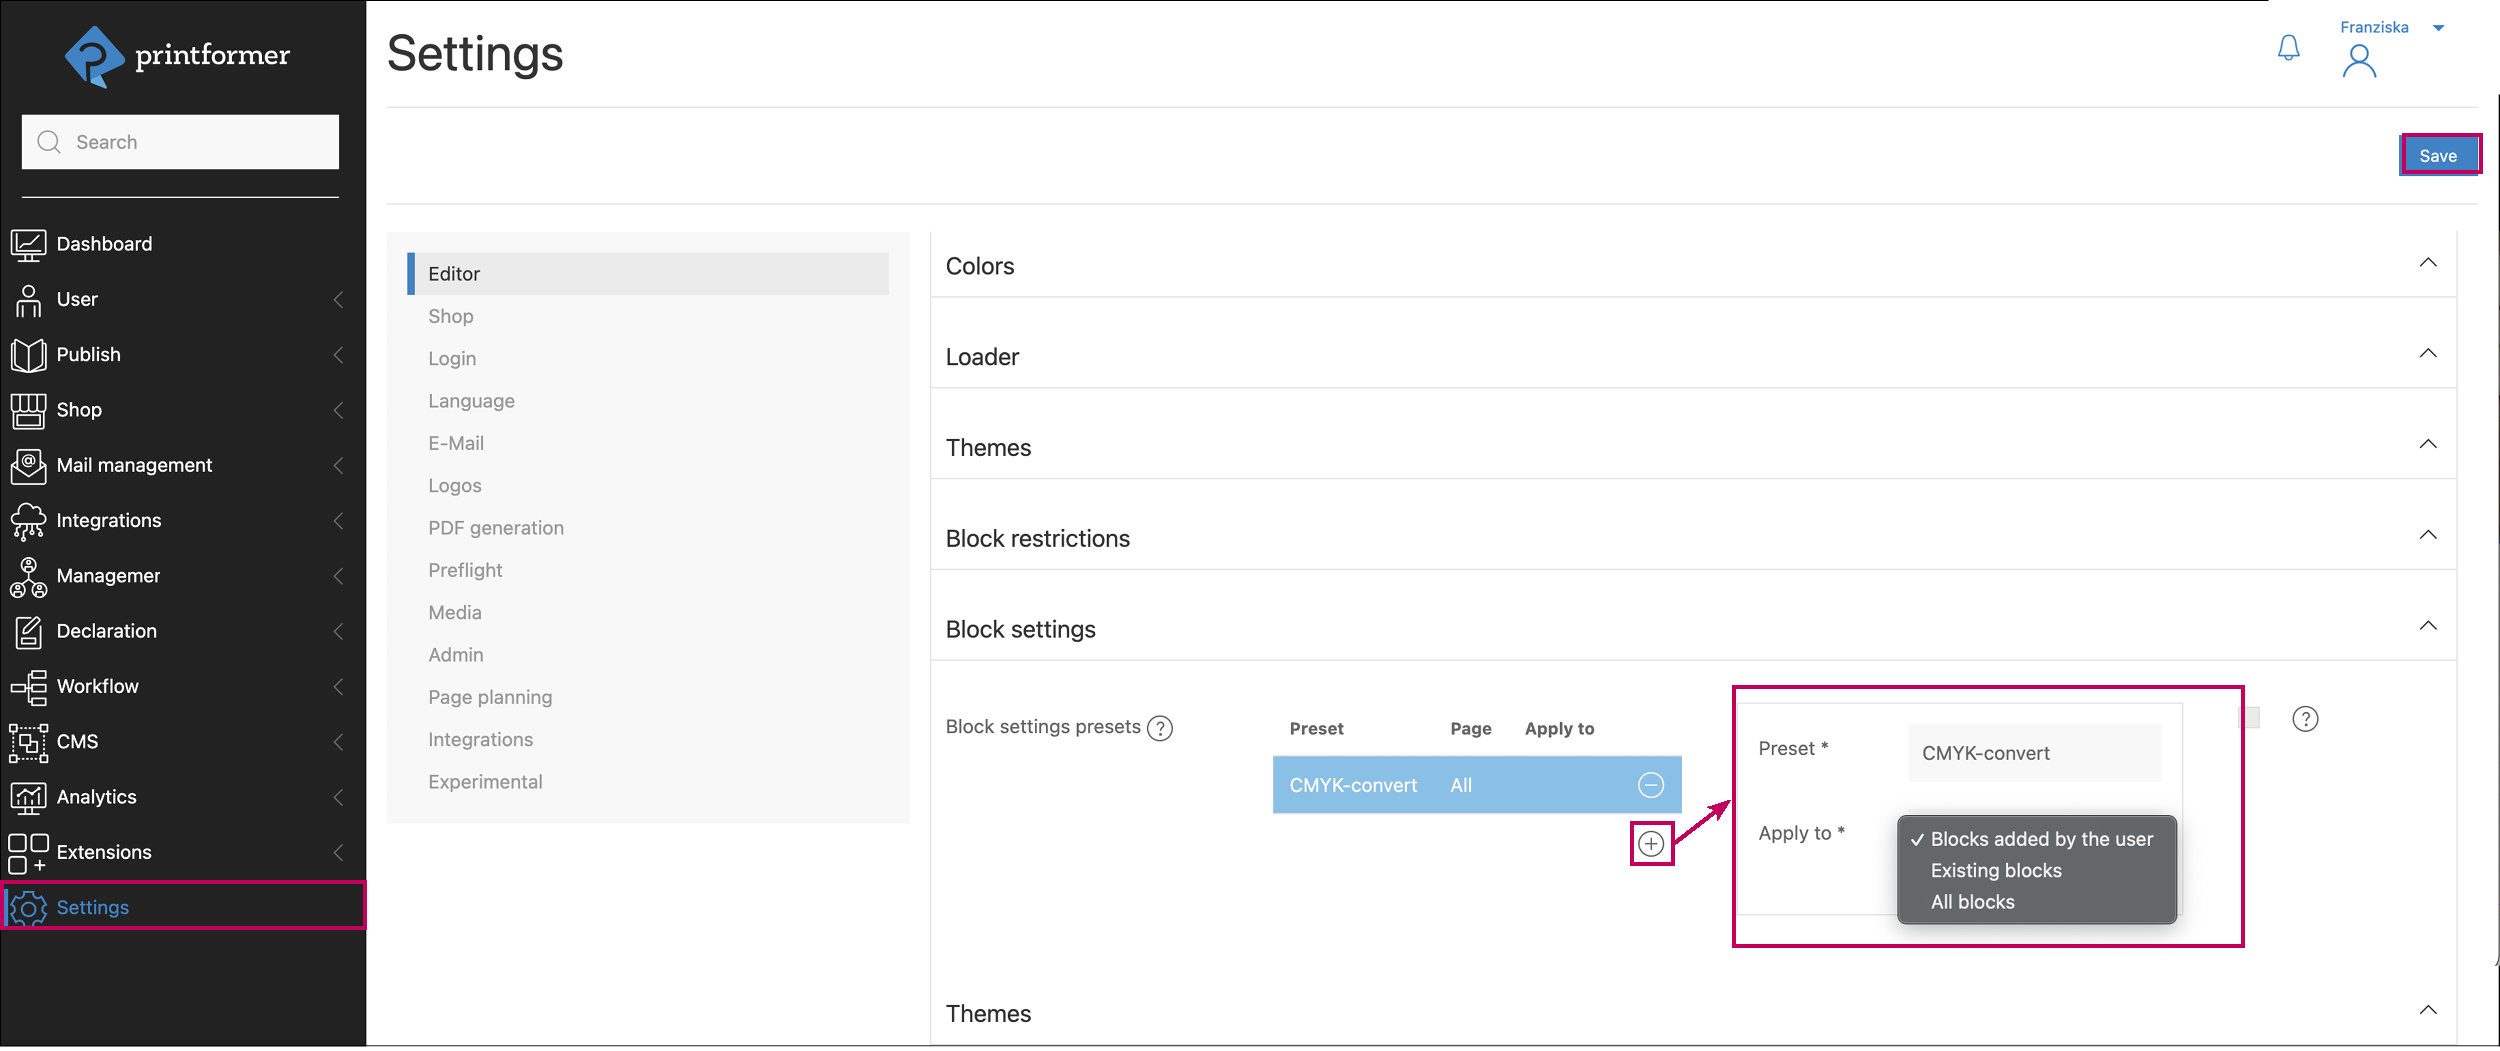
If a single effect is to be applied to all blocks (texts or images) in a template, this can be assigned to the template via a preset. A cross-system or cross-client assignment is also possible - for example, a general CMYK conversion of all images in the editor.
A block setting preset with the desired effect is created first:
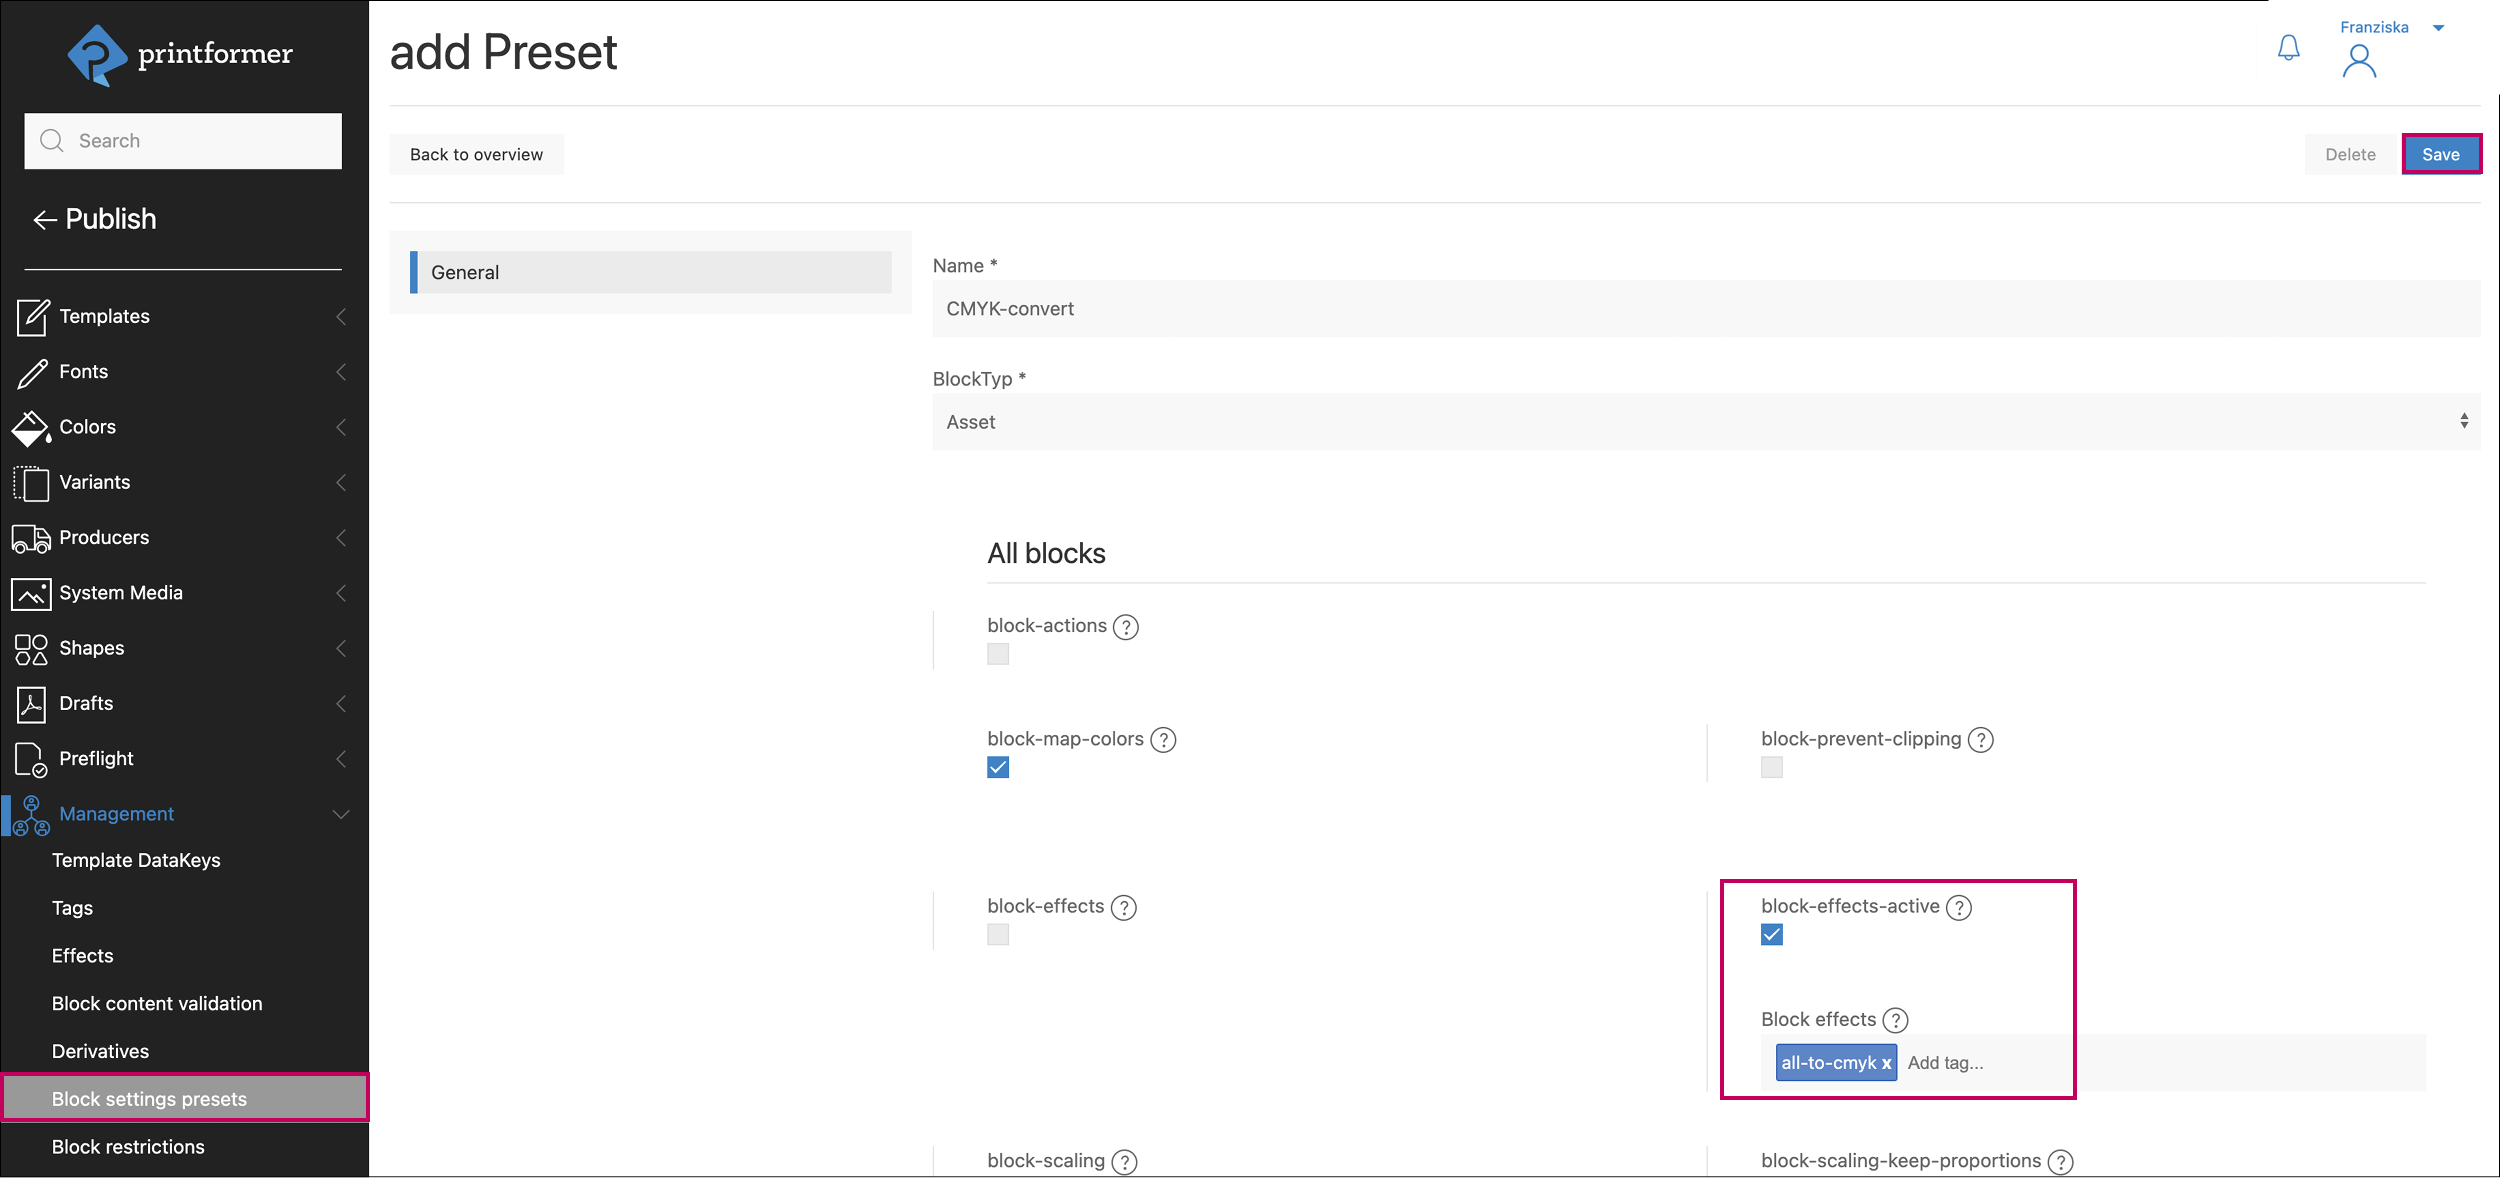
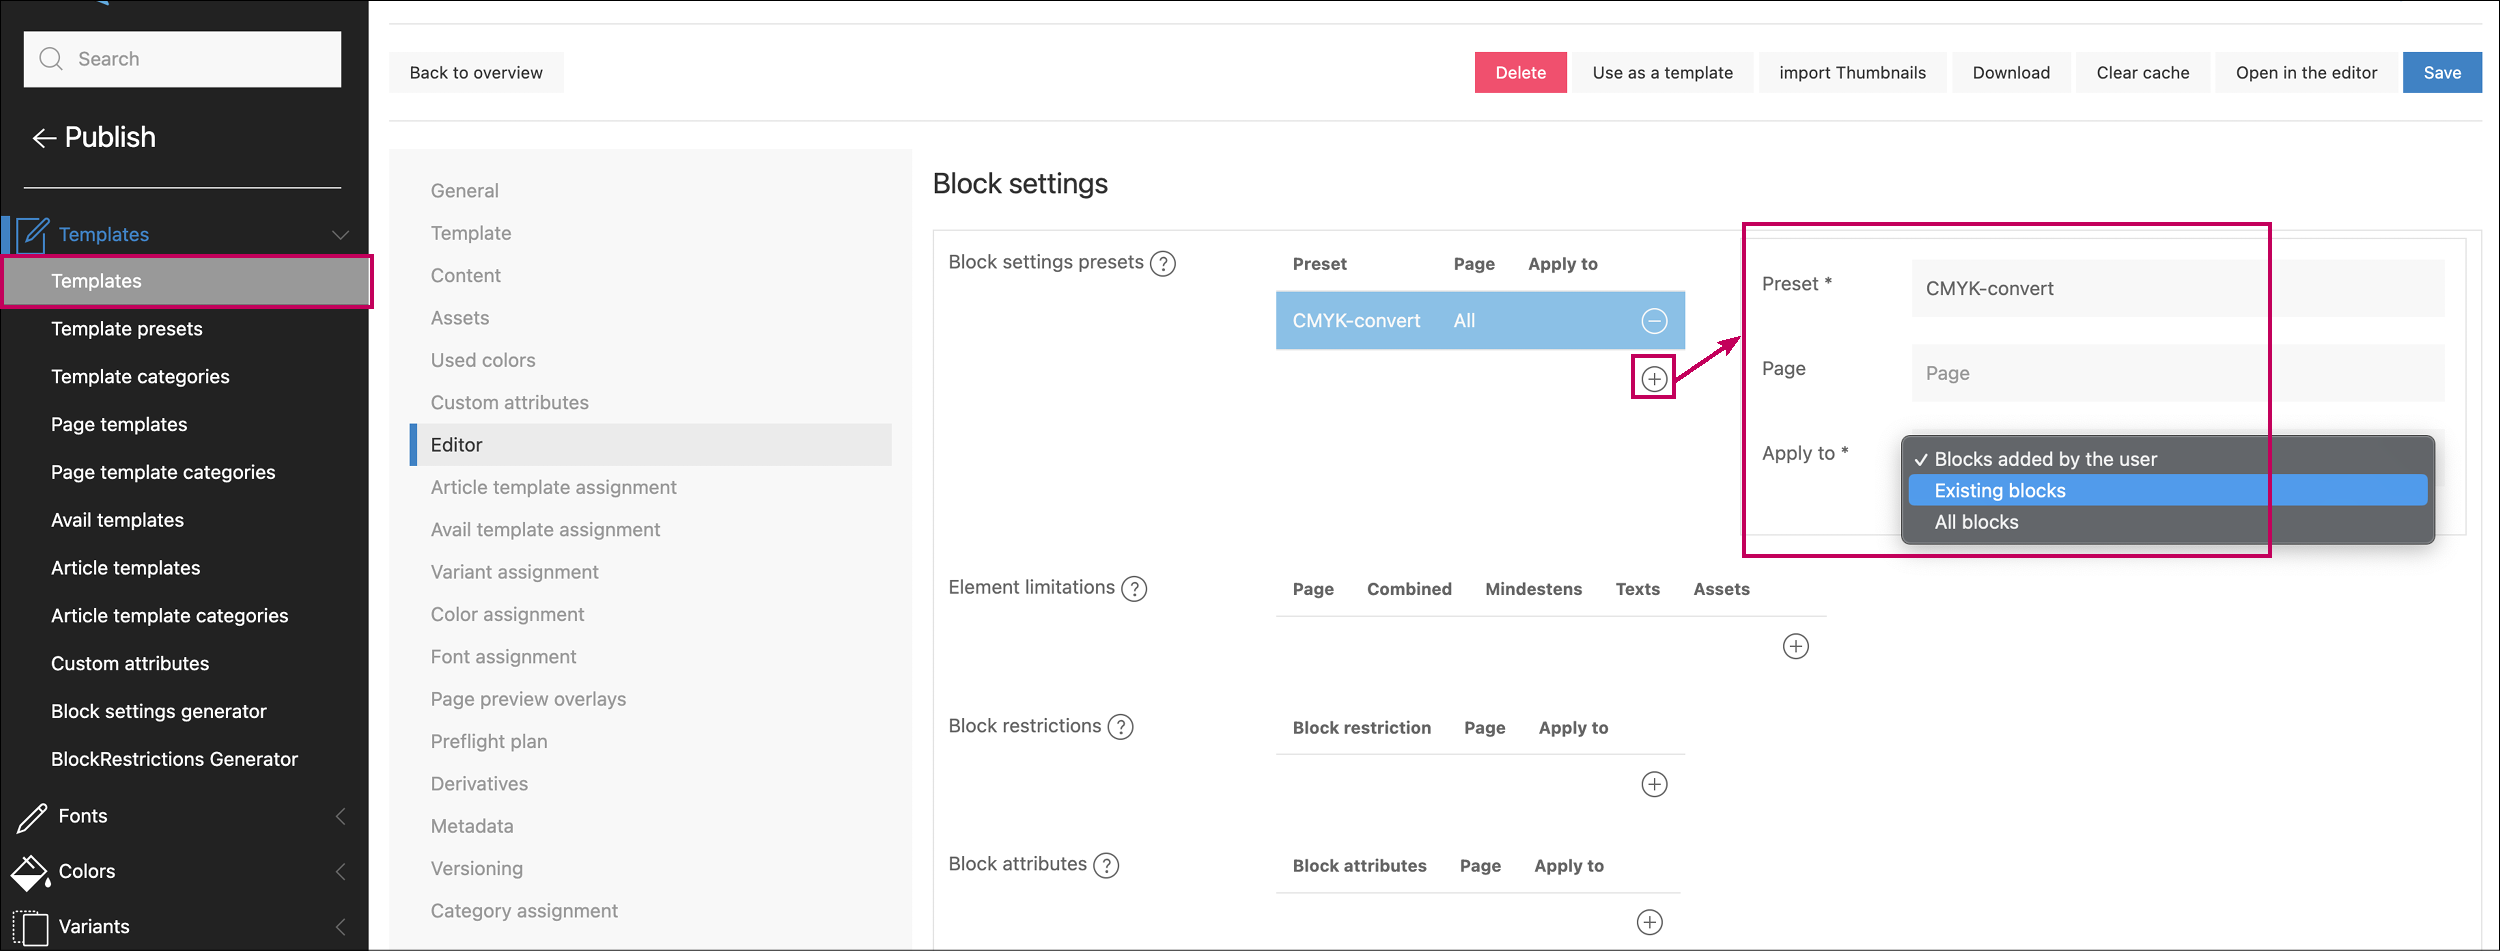
The name of the preset can be freely selected. The block-effects-active checkbox must be activated. As soon as the first three letters of the desired effect are entered, a dropdown with existing effects appears, from which the desired effect can be selected.
The preset can either be assigned to an individual template or across systems/clients.
You can specify which blocks the effect should be applied to:
All blocks
Only existing blocks from the IDML
Only blocks added by the user
Assignment to the template:
General assignment:
Effects in Combination with PDF/X Standards
If PDF/X standards are to be used for the print file in the template, no effects may be applied to asset blocks that are intended to contain PDF files.
(The PDF file may no longer comply with the PDF/X standard after conversion, which is why the standard is removed during color conversion. For example, if a PDF/X-4 file is inserted into an X4 template and then converted in the editor, the final print PDF can no longer be generated.)
Finishing the effect in the printformer editor
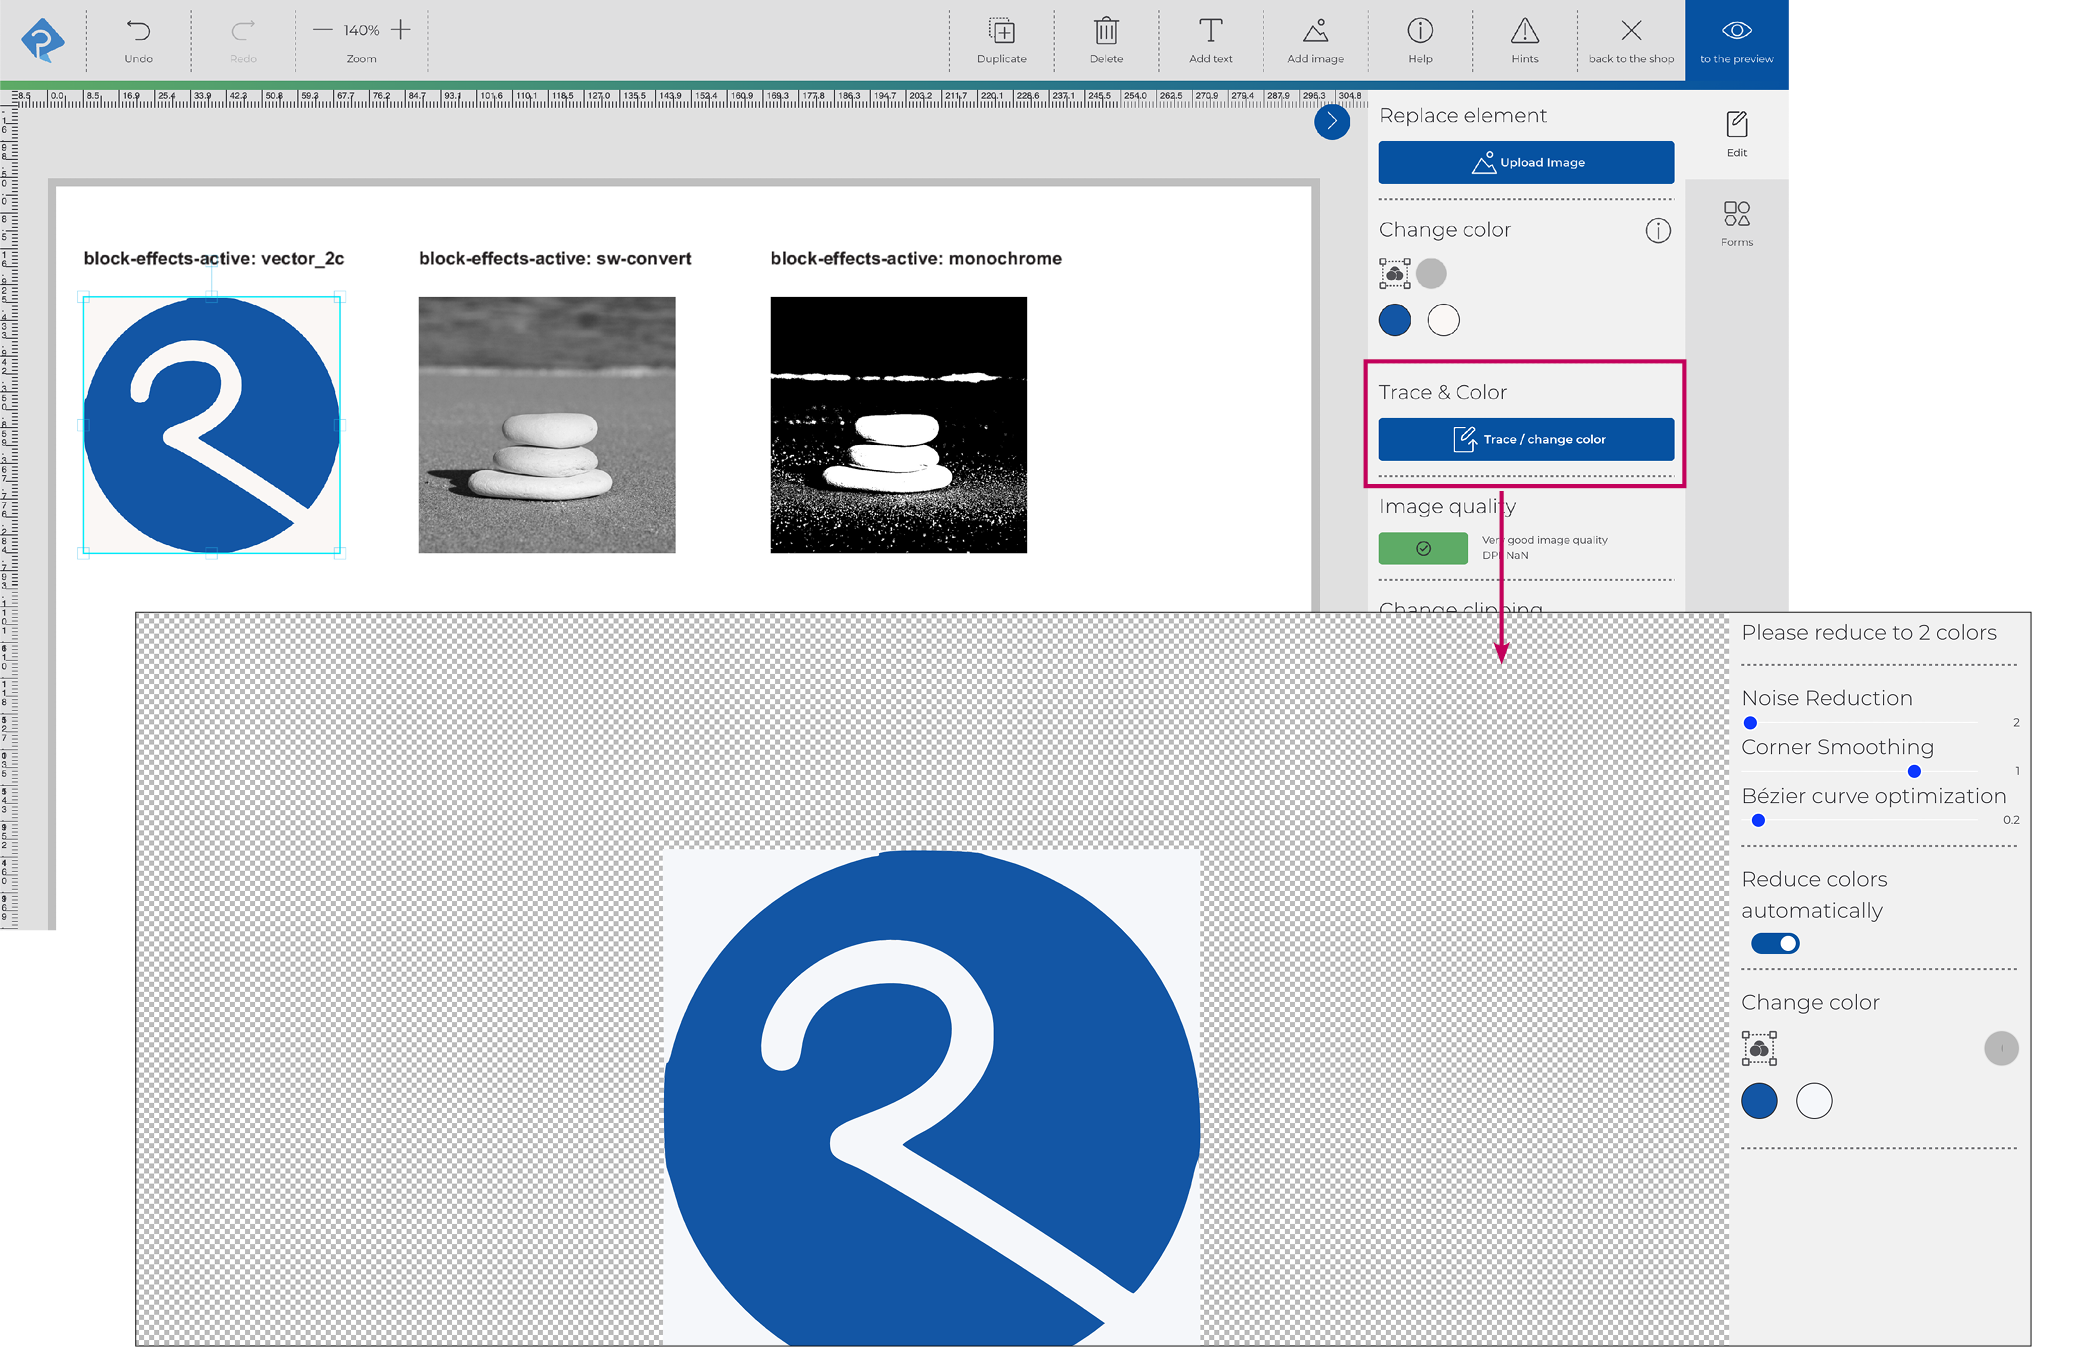
The particular effect is applied in the printformer editor directly as soon an asset is imported. For the embossing and vector effects, the settings mask opens automatically. Later, adjustments can be made again using the Trace/Change Color button. Via Save vector in Mediamanager the vectorized assets can be saved (also for other templates).
Notes
If the block-effects-active attribute is set in the image blocks or if the effect is assigned automatically for new blocks (via the template configuration), it cannot be removed by the user.
Currently, only one effect can be assigned to each block.
If the template is to contain several blocks with different effects, this is currently only possible via the block-effects-active attribute in the IDML. The image block must be empty (must not contain a default image).
Vectorized assets can be saved in the system media.
The conversion to CMYK is only visible after the print data has been created.
If the Emboss effect is applied, the object is always knocked out.
