Fonts
In addition to adding further fonts, font groups can be created in the printformer font management.
These can be used to limit the selection of fonts and font sizes for the user.
A Server-Lizenzis required to use fonts on the printformer.
Alternatively, fonts from Google Fonts (free of charge) can be used.
The Fonts menu item is used to manage the fonts. All available fonts are listed in a table in an overview.
In general, a distinction is made between system fonts (grayed out in the overview) and user-defined fonts. The system fonts can only be used, but not managed.

It is also possible to adjust the Metrics (ascender/descender length and versal/x-height) of a font (after uploading).

Add new Fonts
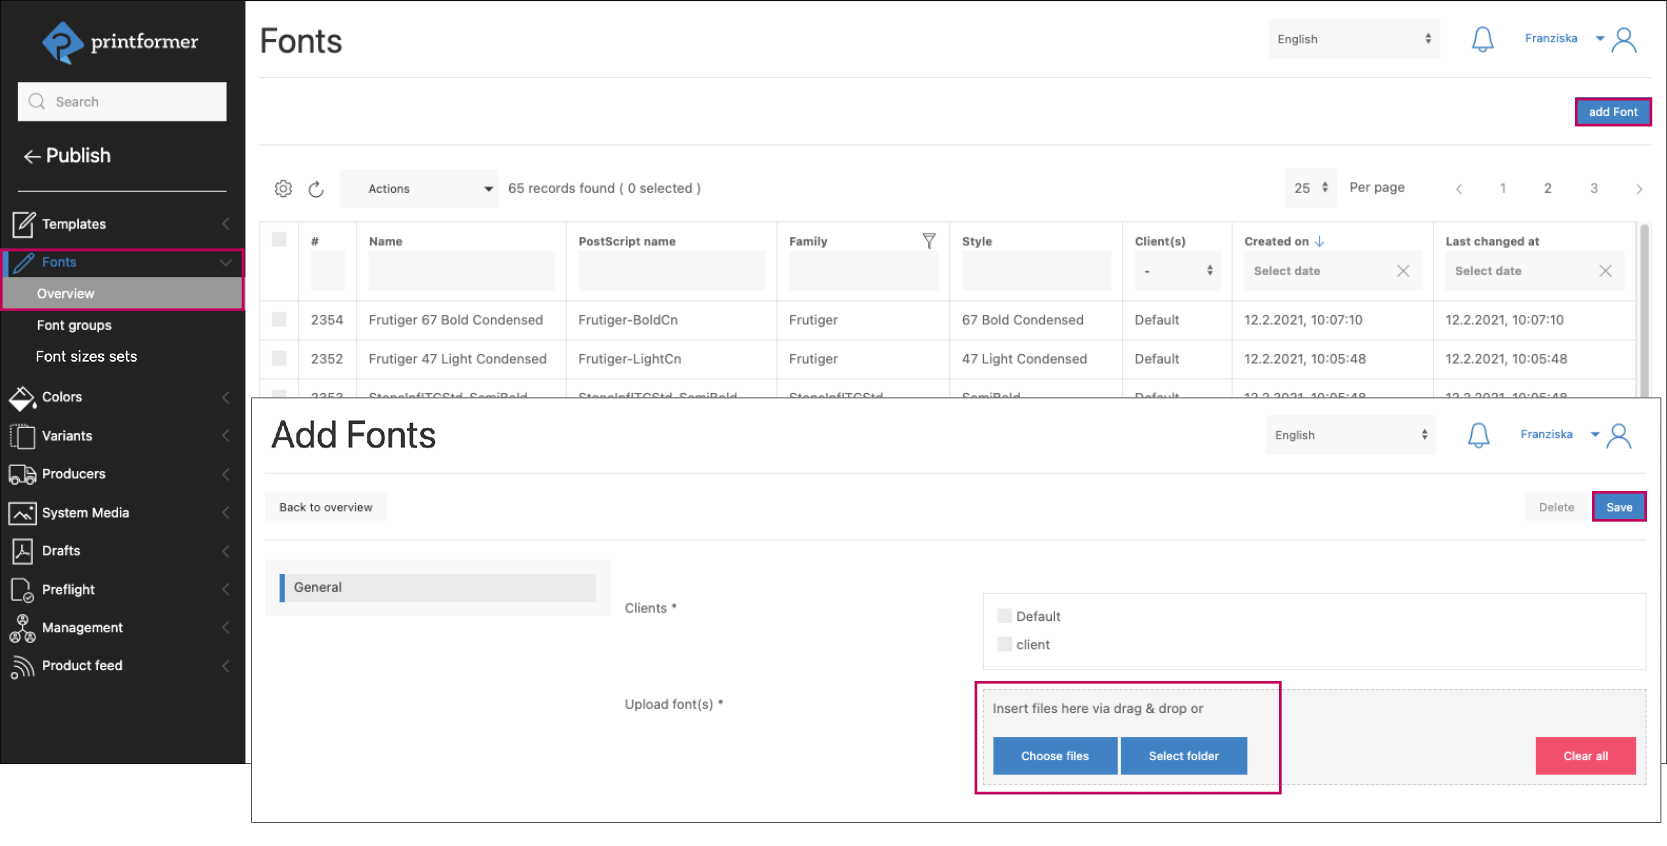
Use add Font to select ans install one or more fonts (via Drag&Drop or via Select files and Select folder).
The font formats TTF and OTF are possible.
After choosing all fonts click on Save and they will be added in the system.
Font groups and font sizes
It is often necessary to create font groups to limit the selection of available fonts for a template.
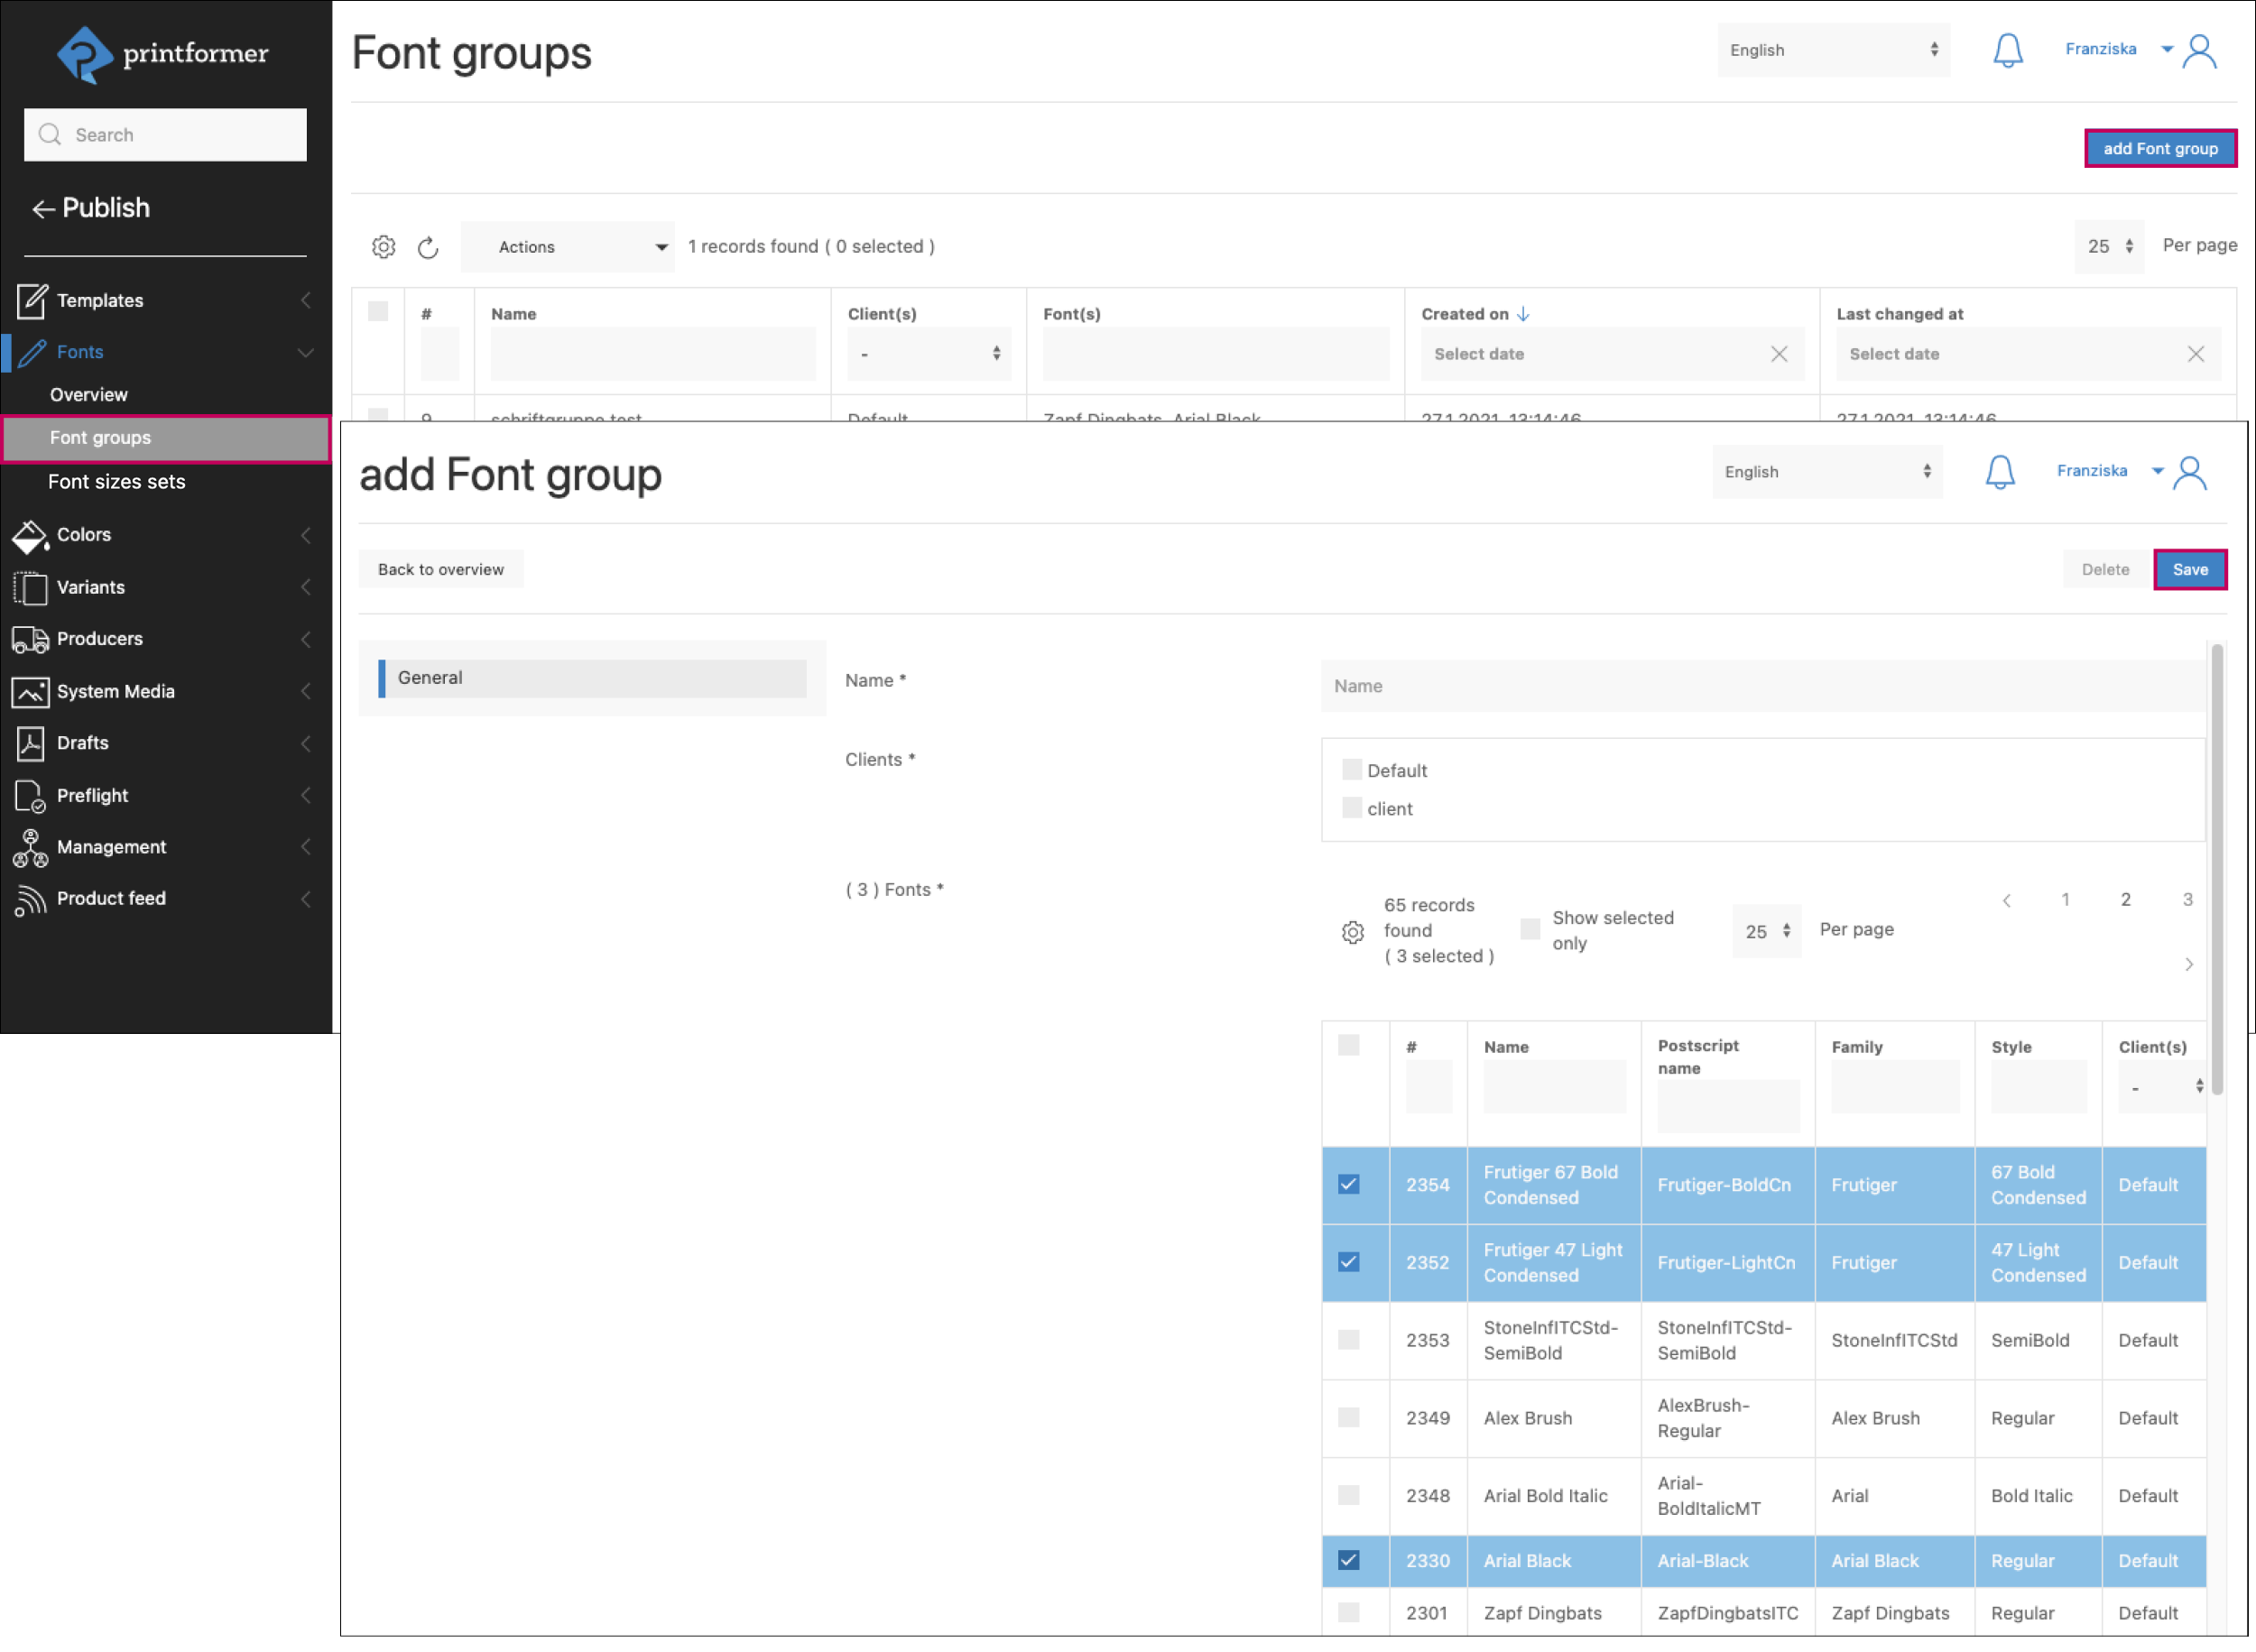
This is done under the menu item Font groups. Clicking on Add font group takes you to the edit screen. Here you can choose a name, select the desired fonts from the displayed overview and create the font group using Save.

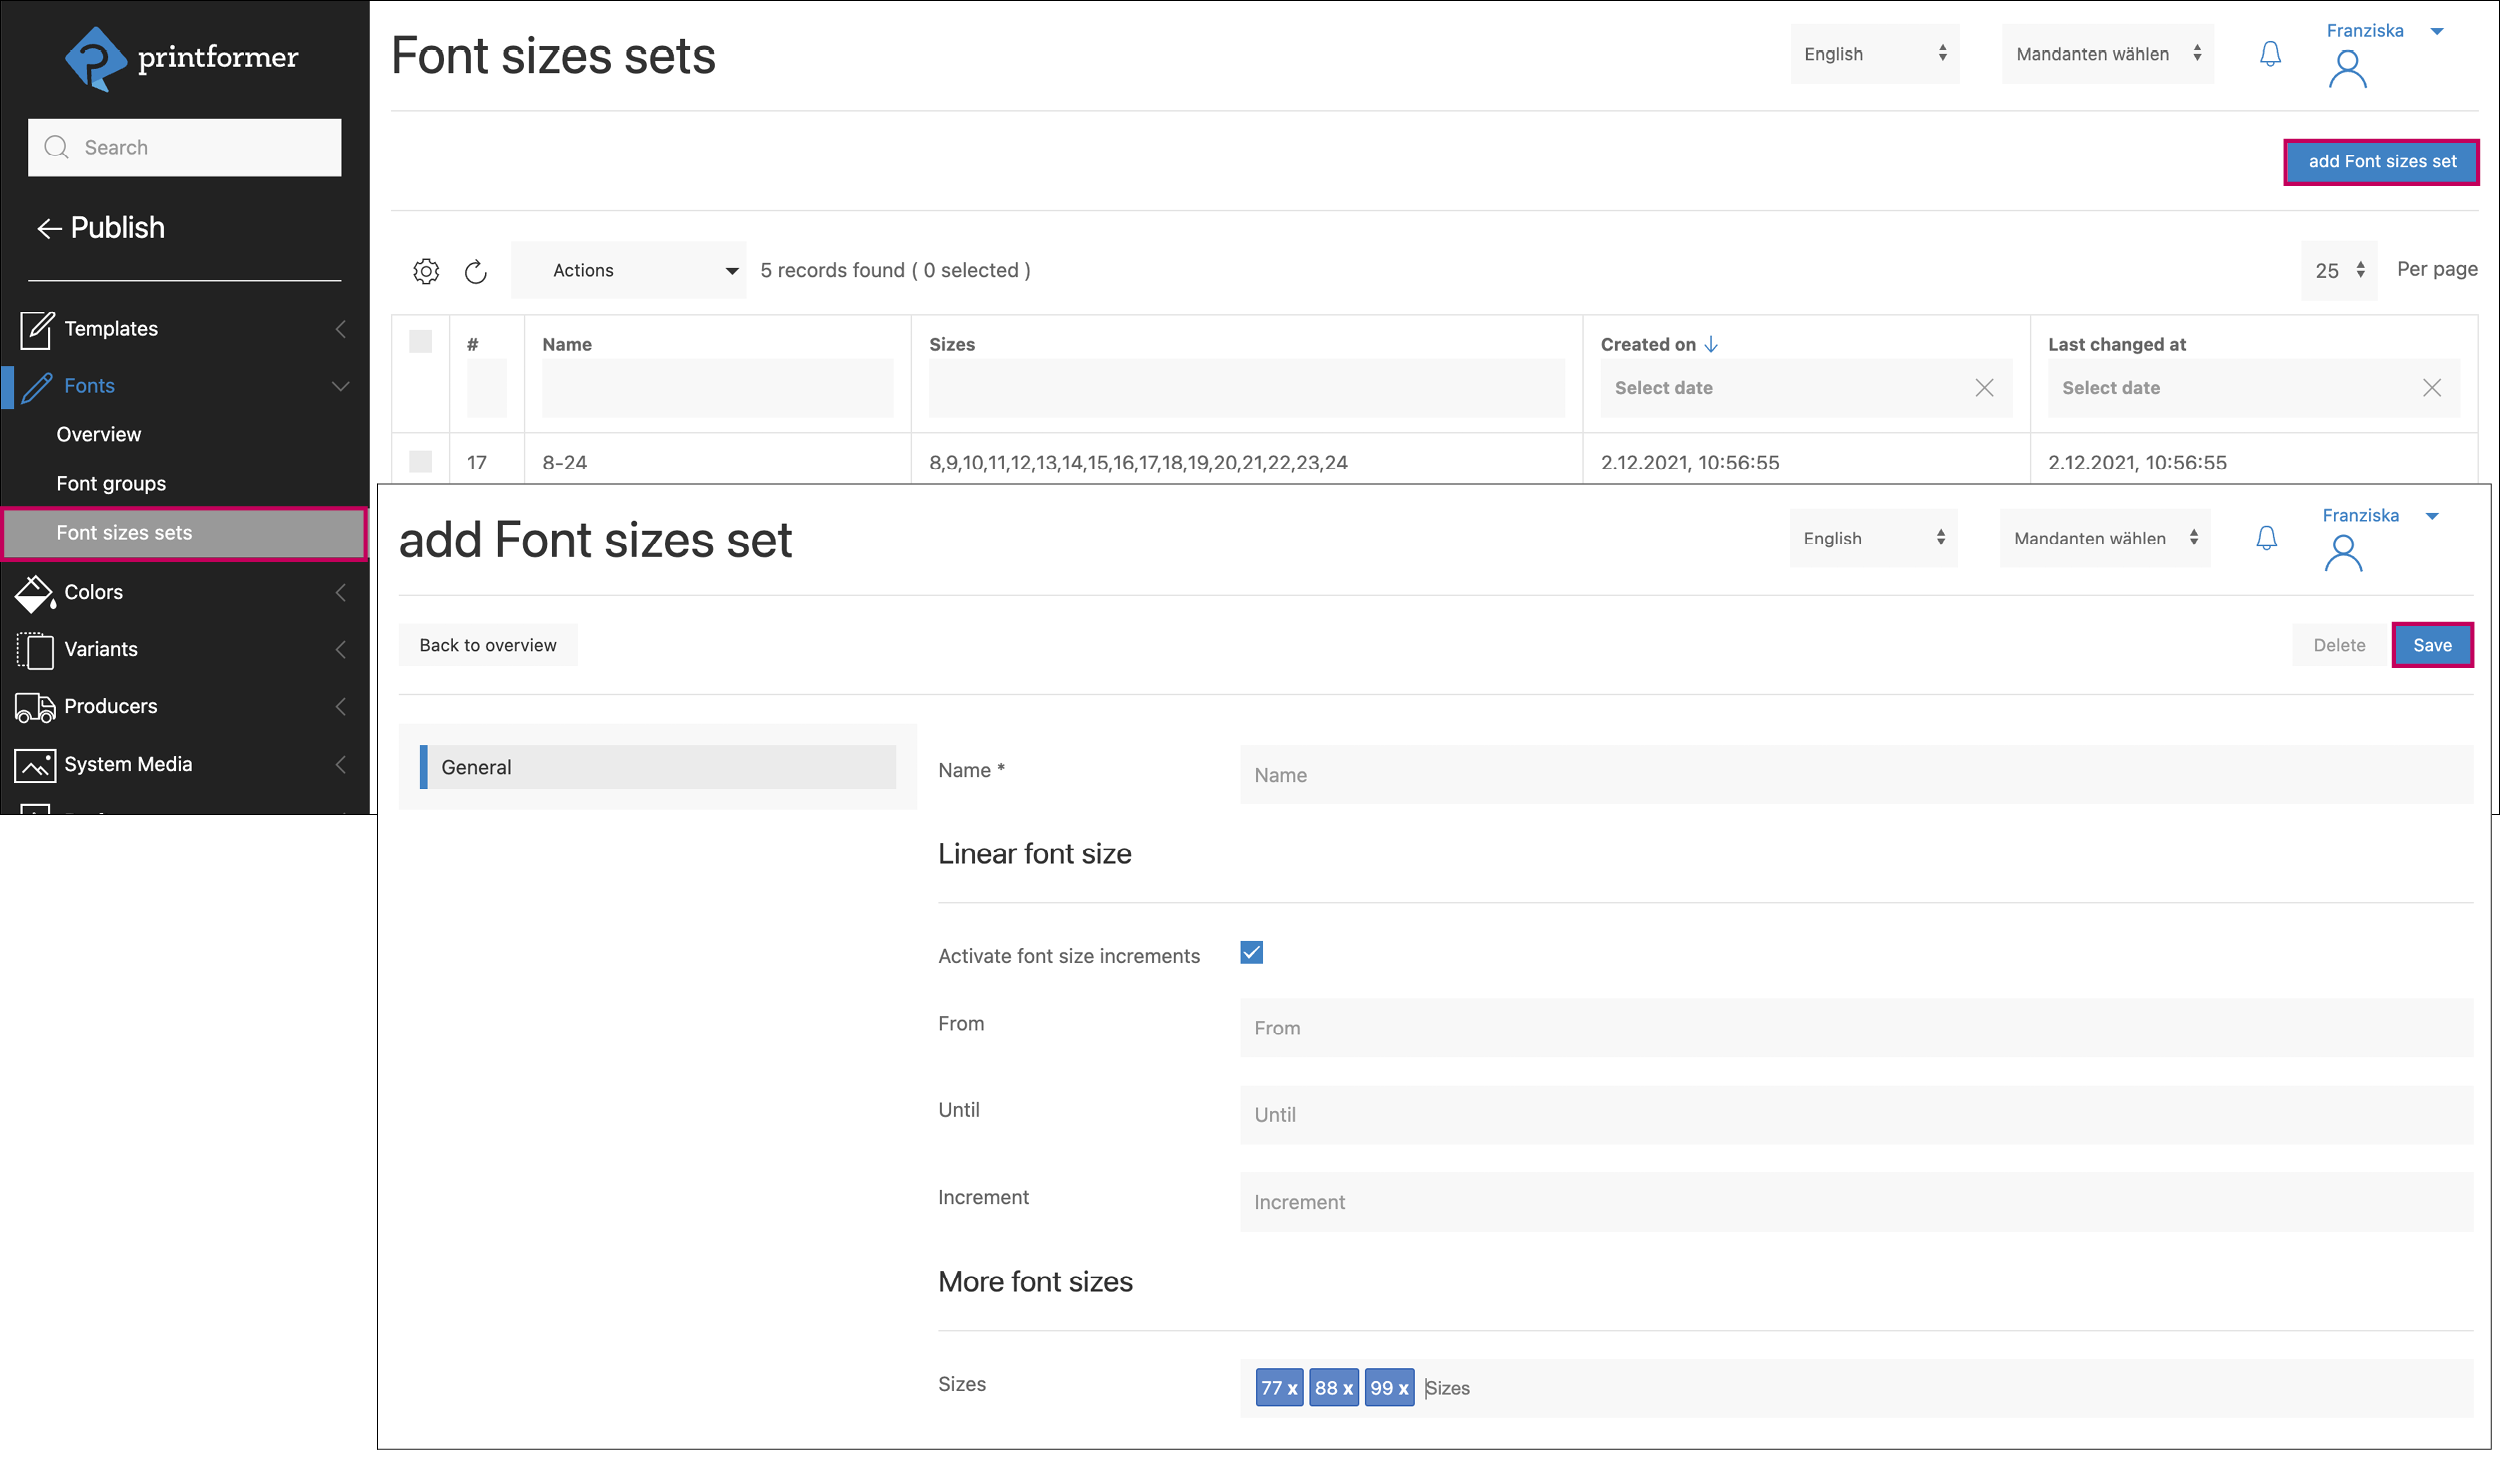
In the same way, a certain selection of specified font sizes can be saved under Font sizes sets. The desired sizes can be entered linearly (input from/to) and/or individually.

The sets must then be assigned to the intended templates in the template configuration (font assignment).
Font files and text styling
If possible, TrueType or OpenType fonts should be used for the templates. Currently, PostScript Type 1 fonts also work, but Adobe will stop supporting these fonts in January 2023.
A font can only be loaded into the system once, regardless of whether it is assigned to one or more clients.
The templates or drafts always access the font stored in the system via the postscript name (this can lead to irritations, as the font name often differs from this).
If the Bold and Italic font styles of a font family are stored in the system and released for use in the template, a button for activating/deactivating them will appear when editing the texts in the editor (in addition to the selection field for the font style).
Glyphs
Fonts do not always contain all glyphs. These are still displayed in the editor because the browser falls back to substitute fonts. In the Settings, it is possible to treat missing glyphs as an error or replace them with a default font.
Supported text styles
Font Family
Font Style
Font size
Leading
Color
Text alignment
vertically allignment within a text frame
Bullets and numbering (limited available)
Superscript / Subscript
Capital letters*
Underlined*
Crossed out*
Horizontal scaling*
Tracking*
Baseline options: (offset) ascender length* and offset height*
No Break (via character control panel or in the submenu of the control panel; use case: automatic scaling of texts using text-fit setting)
*this formatting cannot be activated or deactivated in the editor.
(The formatting is adopted from the IDML, the texts can only be extended or shortened.) Small caps as well as all settings regarding kerning, offsets, indents, spacing afterwards etc. are generally not possible.
Usage Notes Feature Tracking:
Adjustments to the tracking are not visible in the editor with the Safari browser (but in the preview in all browsers).
In order to use the feature, the checkbox Assume tracking (letter space) from IDML must be activated under Settings > Experimental.
If the template contains empty text blocks (for filling in the editor) whose font style is predefined, a paragraph style must be assigned to the text and an object style to the text frame. (Otherwise, the default formatting is used in the editor).
Automatic hyphenation is not possible in printformer (i.e. continuous texts may run differently in the editor than in the IDML file). For fine typesetting or to define desired word separations, a discretionary hyphen must therefore be inserted in the texts (Choose Type > Insert Special Character > Hyphens And Dashes > Discretionary Hyphen.).
Font assignment in template
When uploading a template as a zip archive, the font (if the fonts were copied when the InDesign file was packed) is automatically installed in the system and assigned to the template.
If the template is created manually or only the IDML file is exchanged and the fonts used in it do not yet exist in the system, a note appears after saving. The font file can be uploaded via the blue button (links to the Fonts menu).

In a system with several clients, it can happen that the font already exists, but is assigned to another client. (E.g. template is created with client A, but the font is only assigned to client B).
In this case, the blue button appears, which is directly linked to the Edit Font menu. Thus, the font can be assigned directly to other clients.

In the template configuration under Used fonts, only the clients to which the template is assigned are listed.
Assigning font groups and font size sets
In the template configuration, all existing font groups and font size sets are listed under Font assignment and can be assigned using the checkboxes

Text frames
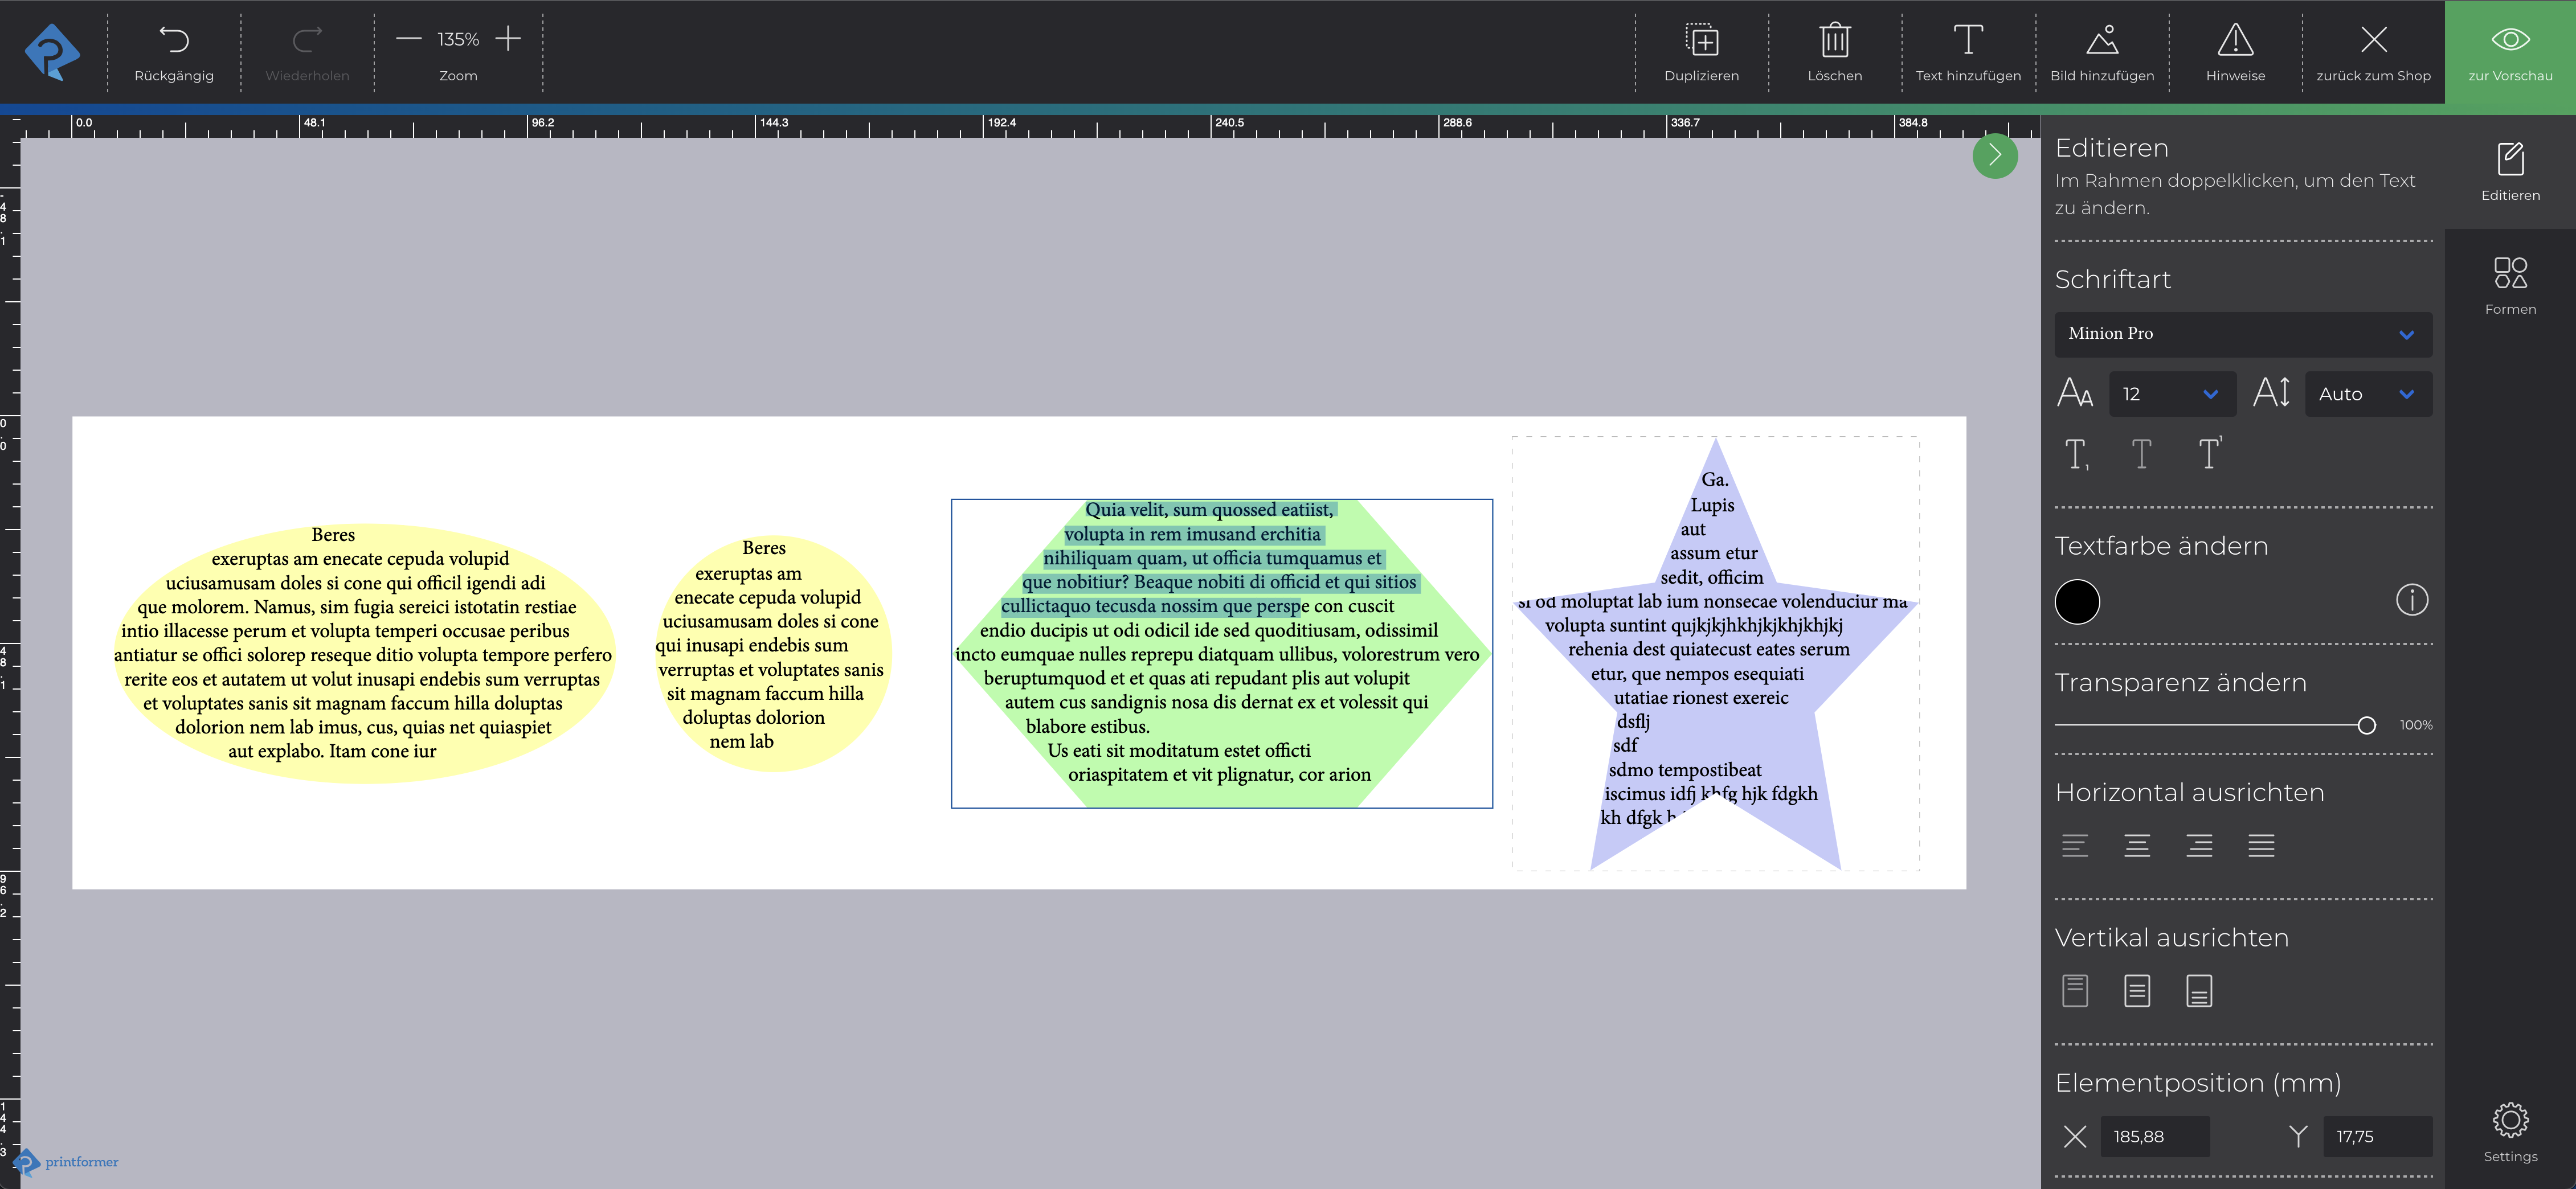
Free shapes can be selected for text frames. There are limitations if the text is interrupted by the path (e.g. with a star shape the text is then cut off), see also example. Or if the text frame tapers downwards (e.g. triangle with a point at the bottom).
Since shapes cannot be scaled in printformer in general, this also applies to text frames with free shapes (rectangular text frames can be transformed freely).
The vertical alignment in the text frame must be set to top for a free text frame, otherwise there will be deviations when editing text in the editor.

Text frames must be set with the Simple text frame object style (or the object style should be based on it if it is customized). When using the Text tool it is set automatically, converting a shape to a text box will cause errors in the system.
