Upload and configure
To ensure that all necessary files are available, the template should be packed in InDesign and the folder zipped afterwards.
Open the dashboard of the printformer in your browser and switch to »Publish«, which you will find on the left side in the navigation bar. This will automatically take you to the »Templates« section.
Afterwards, the following steps must be taken:
Upload ZIP archive
Click on the submenu to the right of »add Template«. By clicking on »ZIP archive import« you can select your previously packed and zipped InDesign package (»Choose file«). Now click on »Save« and wait until the files have been uploaded and the editing screen for the new template opens automatically. (The upload runs in the background, so the user interface of the printformer does not change at the beginning).
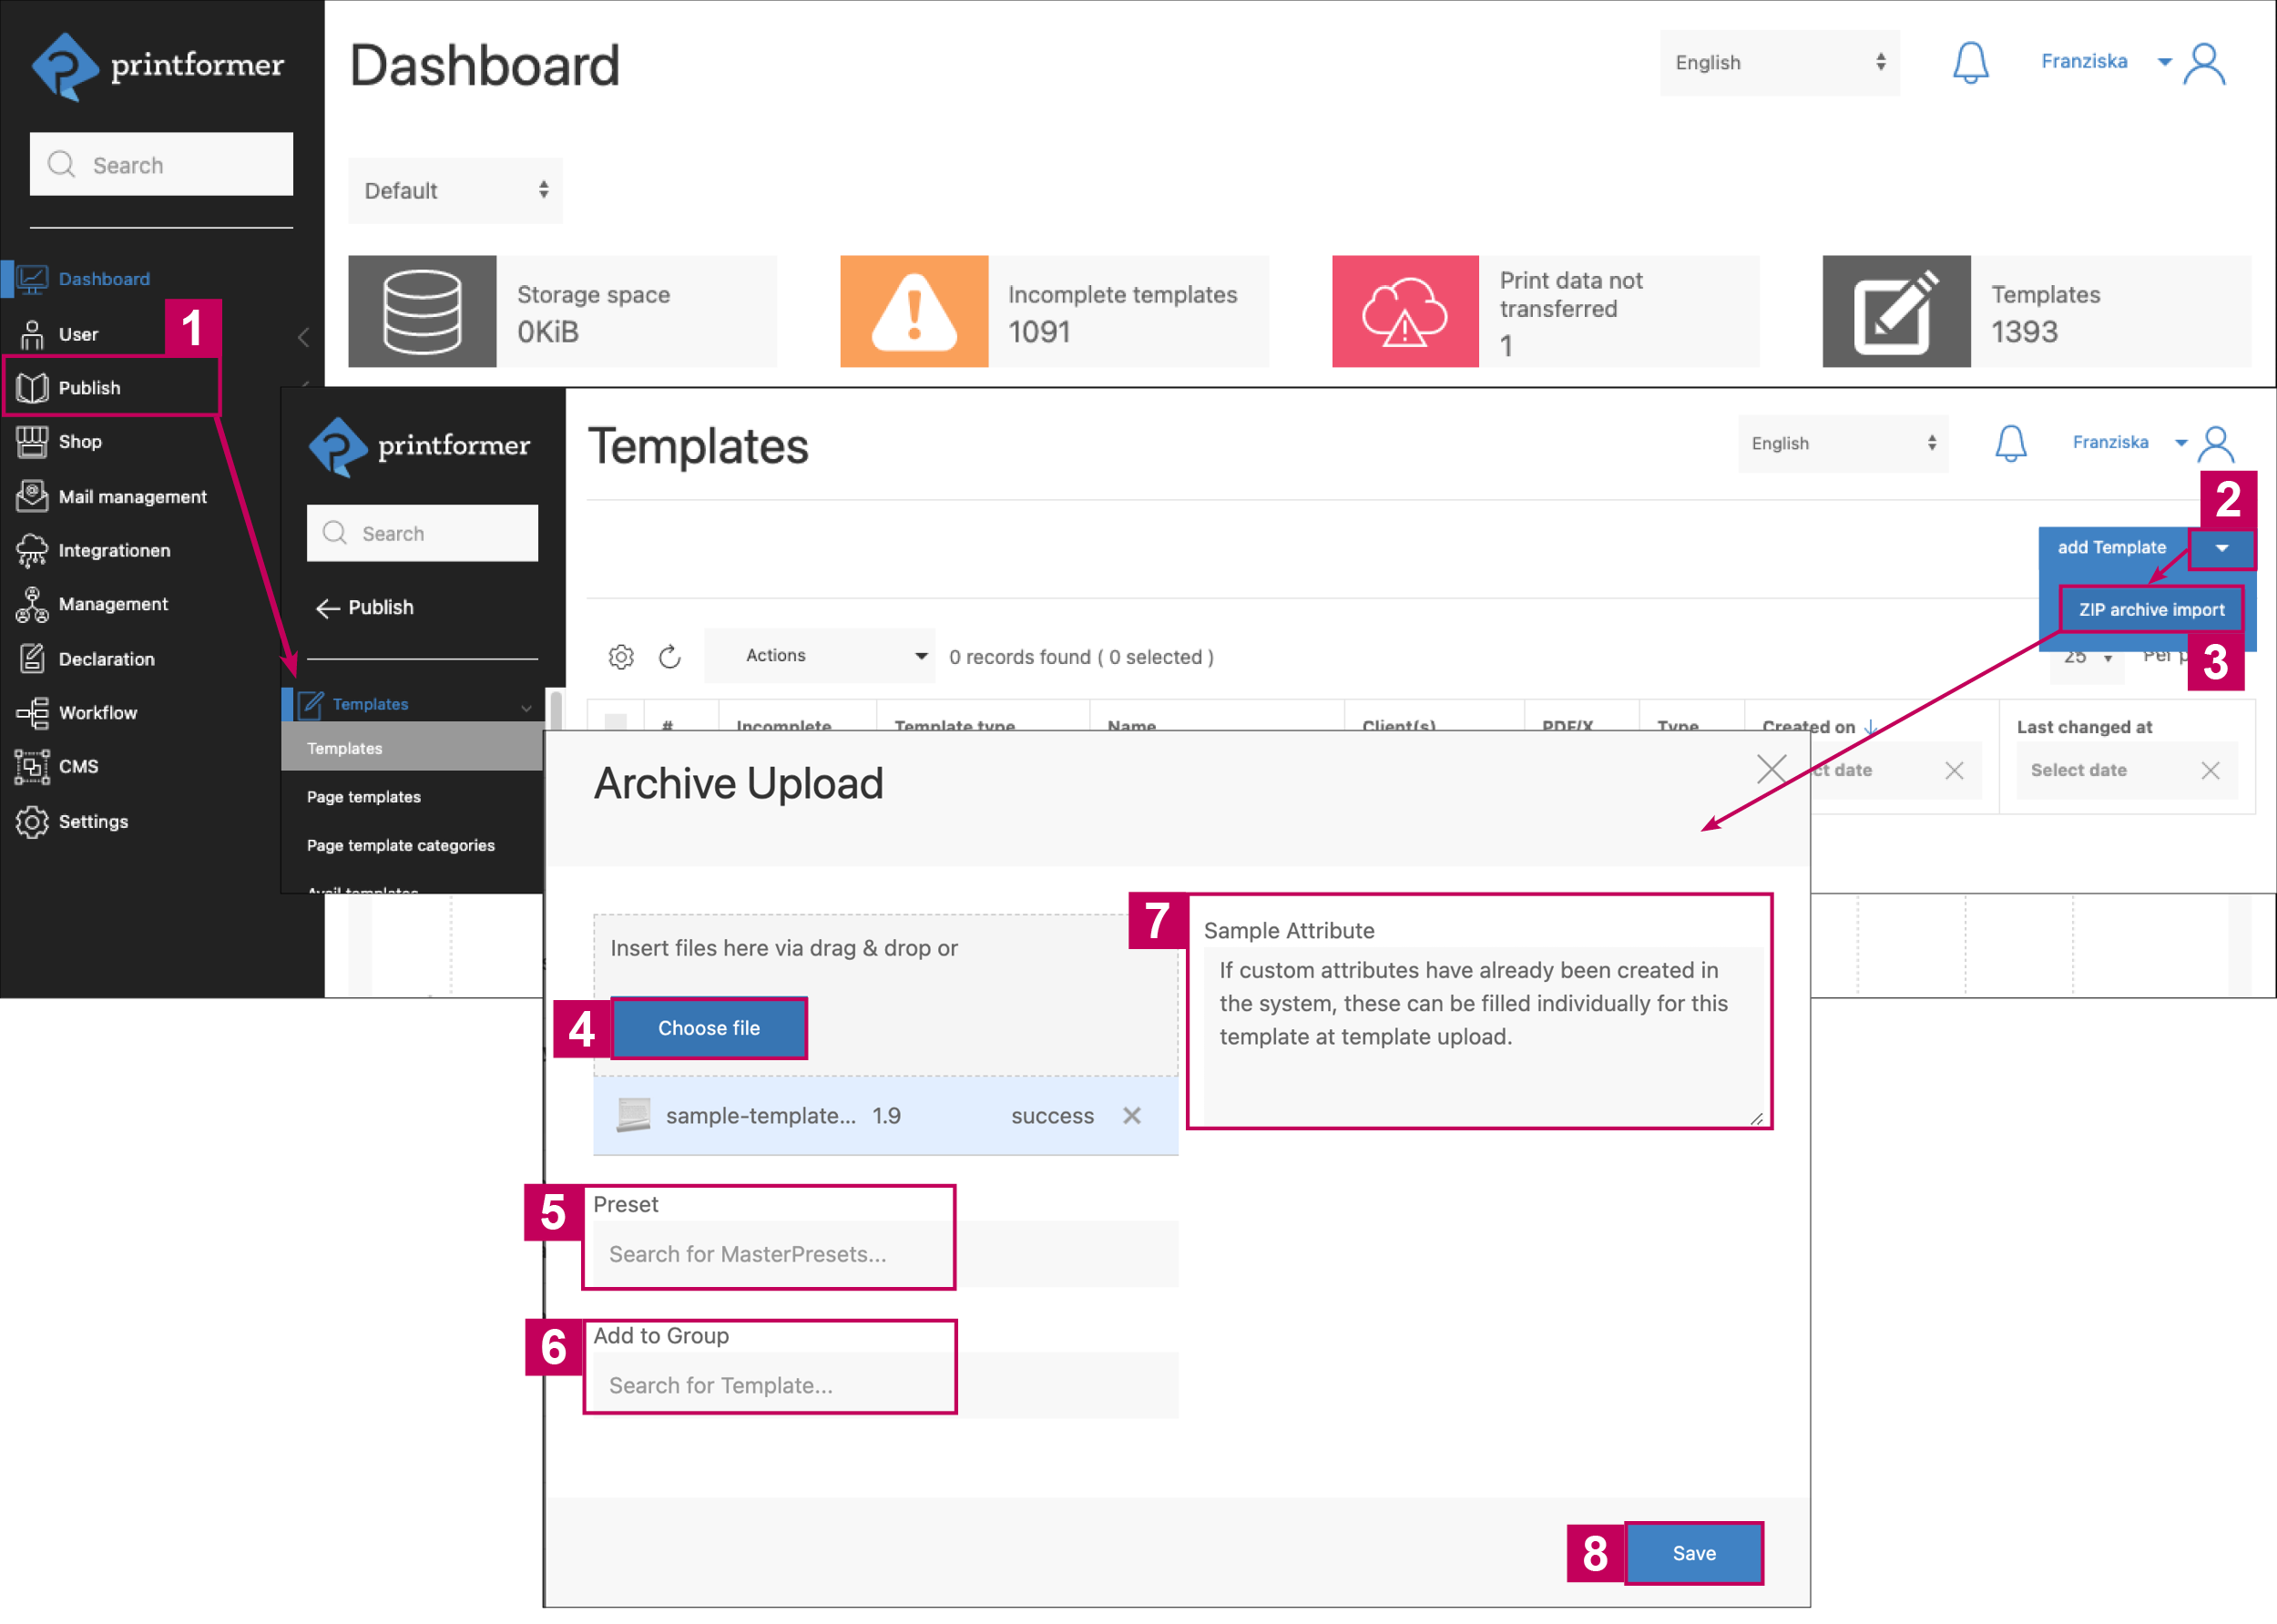
Publish > Templates menu
Select the submenu and
ZIP archive import
Under Choose file, select the zipped InDesign package (or drag & drop onto the gray field)
Using Preset, a (previously created) template preset can be selected for the configuration of the template. (By entering the first three letters of the preset name, a drop-down list of all existing presets appears for selection)
If desired, the new template can be assigned to a template group
If custom attributes already exist, these can be filled with individual values for the template
Saving
As soon as processing is complete, the newly created template is displayed.
If nothing happens after a longer wait and also after updating the printformer, the ZIP archive may contain faulty or unwanted file formats (e.g. EPS files). An error message is then briefly displayed in the top right-hand corner.
Alternatively, the files can be uploaded and assigned individually:
Upload files individually
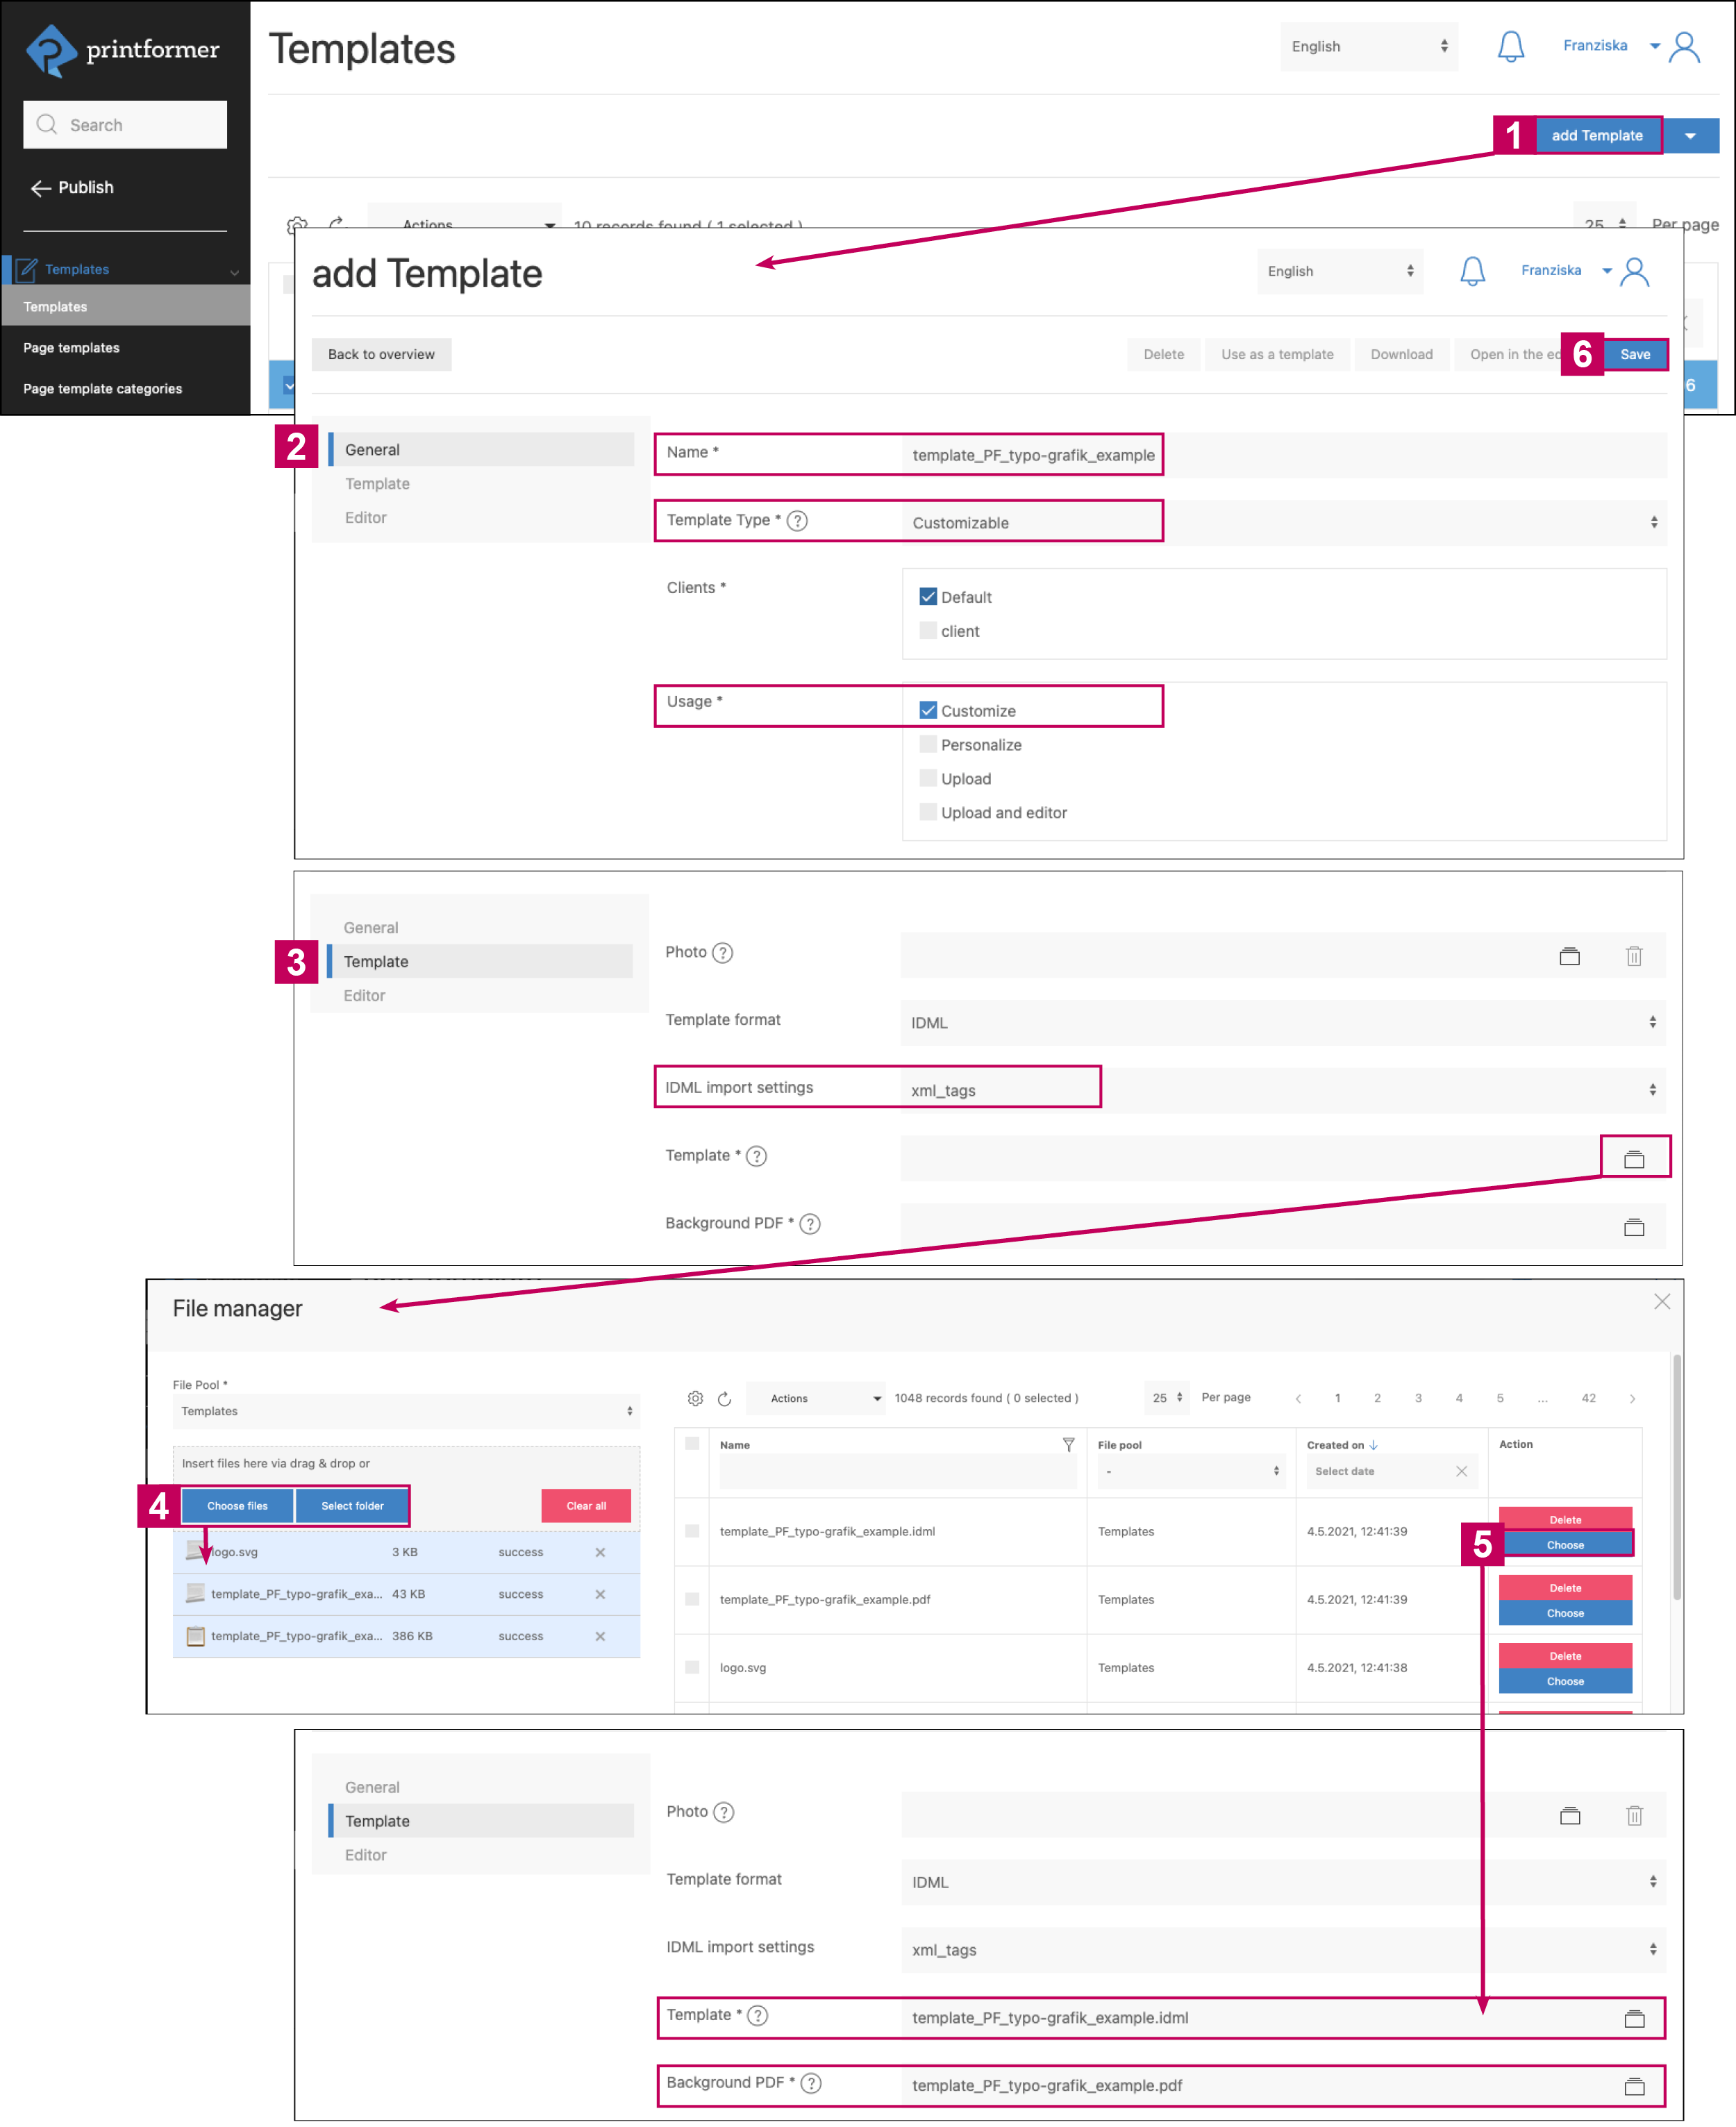
A new template is created by clicking on the button »add Template«.
In the following screen under General you now assign a unique name under which you can later find your template in printformer. Since both the graphics and the text will be editable in this tutorial, select »Customizable« under Template Type. Also, choose »Customize« under Usage.
Now switch to the Template section in the left menu and change the Template Type to »IDML«. Now you can open the file manager by clicking on one of the folder icons (right).
Since you have already created a folder using the »Package« function in Indesign, now select the created folder by clicking on »Select folder«. (Alternatively, you can also choose files individually and upload them separately or insert the files via »Drag&Drop« for uploading). If there are file formats included in the folder that are not supported, printformer automatically excludes them, continues with the rest of the upload and a notification appears (e.g. .indd and DS_Store, which are automatically created through packaging).
Now link the files uploaded in the previous step (Template = IDML file, Background PDF = PDF file) by clicking on the respective folder symbol of the corresponding line.
Then click on »Save« to start the printformer validation.
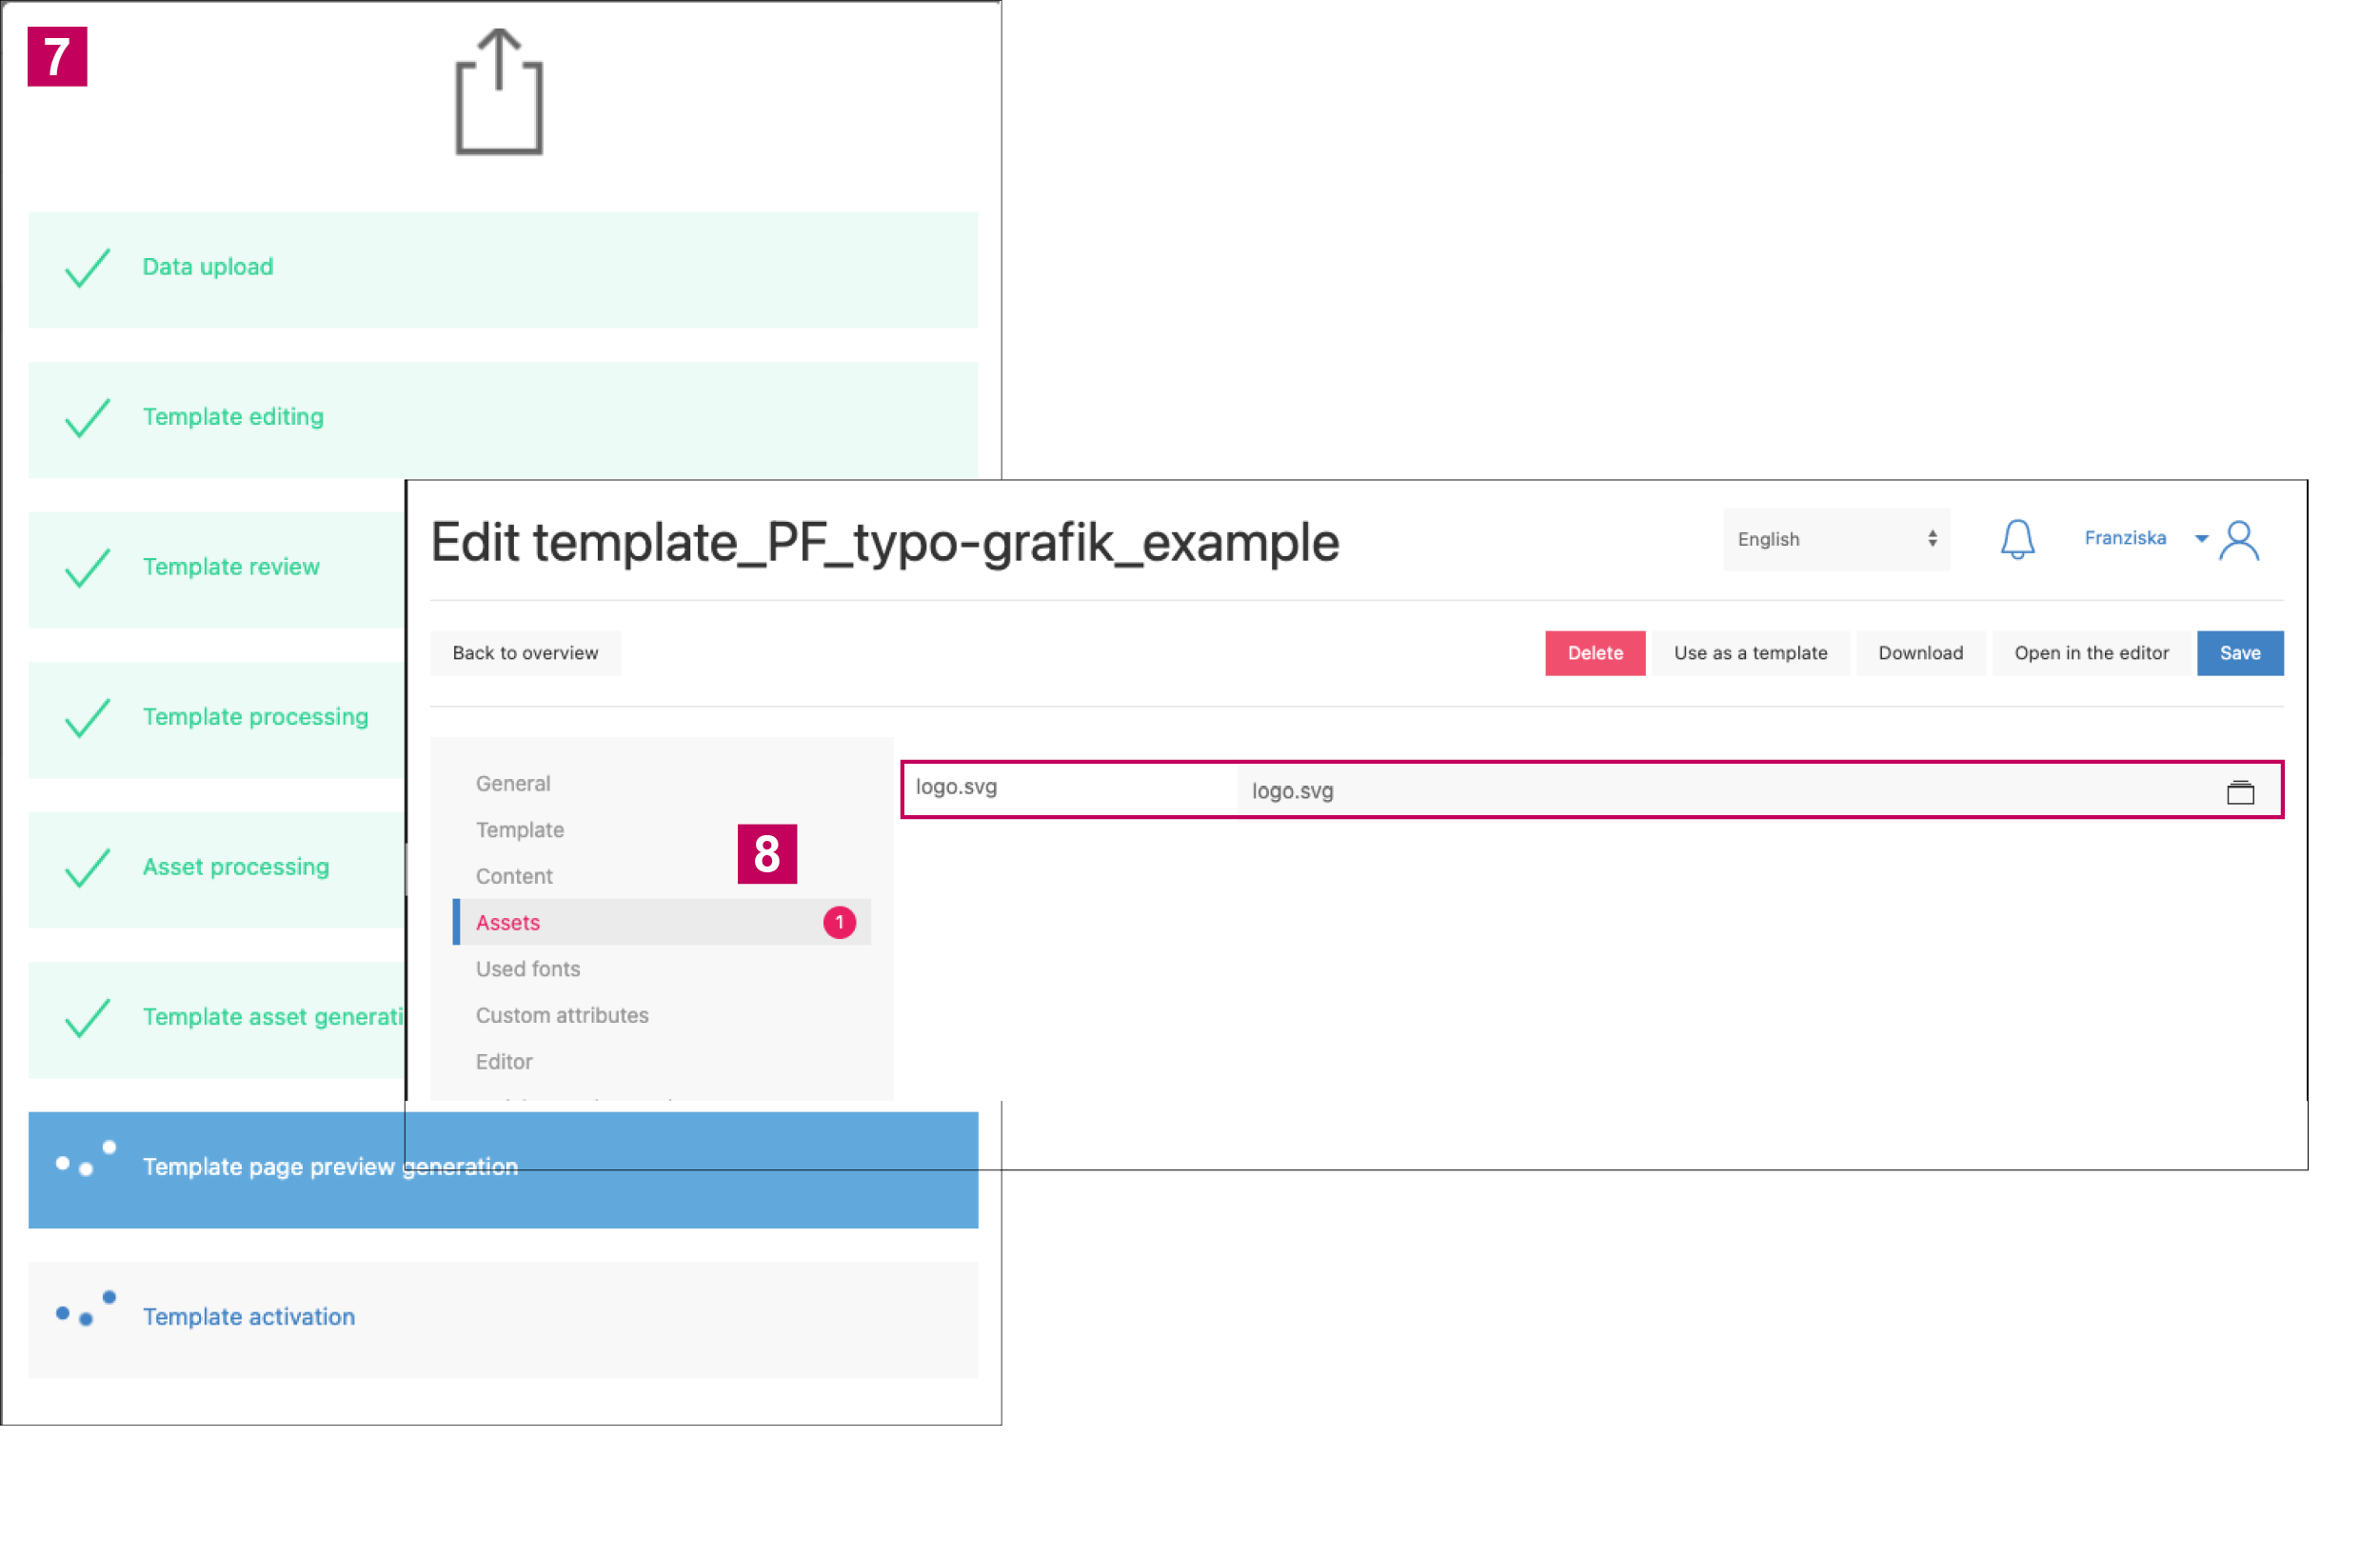
The printformer now checks all files and information for completion and usability. Afterwards, the editing mask of the new template opens automatically.
If errors occur here, this is indicated accordingly in the left menu area. In our case, the missing assignment of a file (logo). This can then be linked as before in the corresponding menu via the folder symbol, the file manager and then saving. (Another example is missing fonts used in the document, which can then be uploaded later).
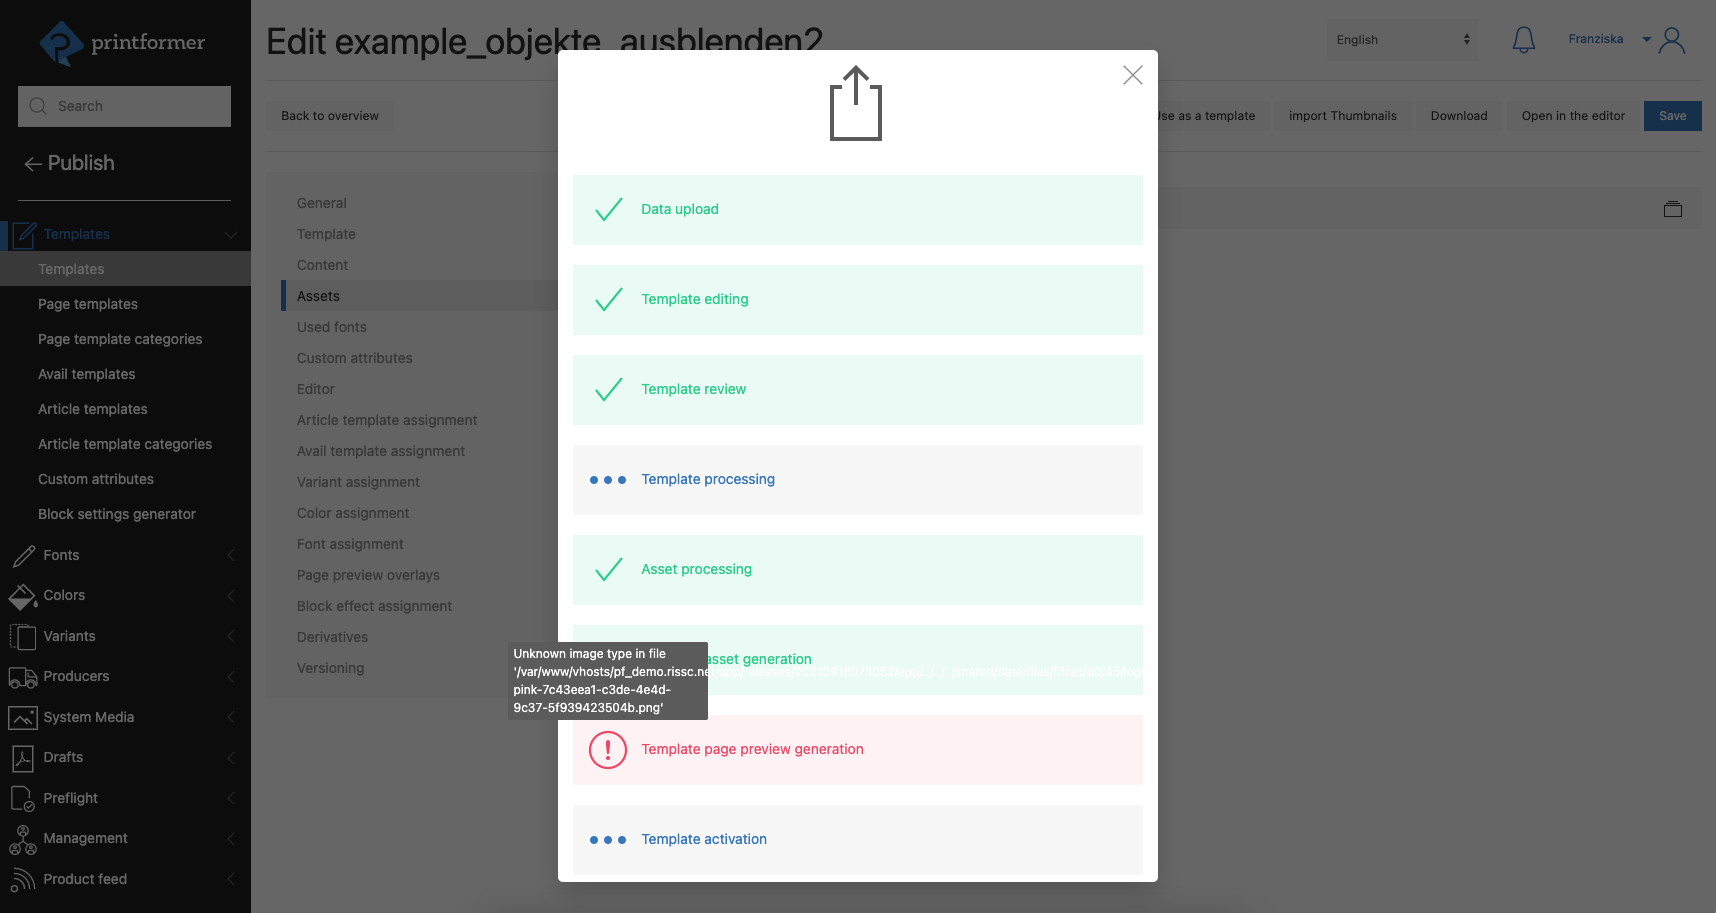
Errors during upload
If errors occur during the upload, this is indicated by an exclamation mark in the template processing.
An error description appears when the mouse is moved over the exclamation mark.
Template configuration
The following screenshots only show a selection of settings for our example template; further functions can be found under Template Specifications.
By clicking on the respective template in the template administration (overview), subsequent changes can be made to the configuration.
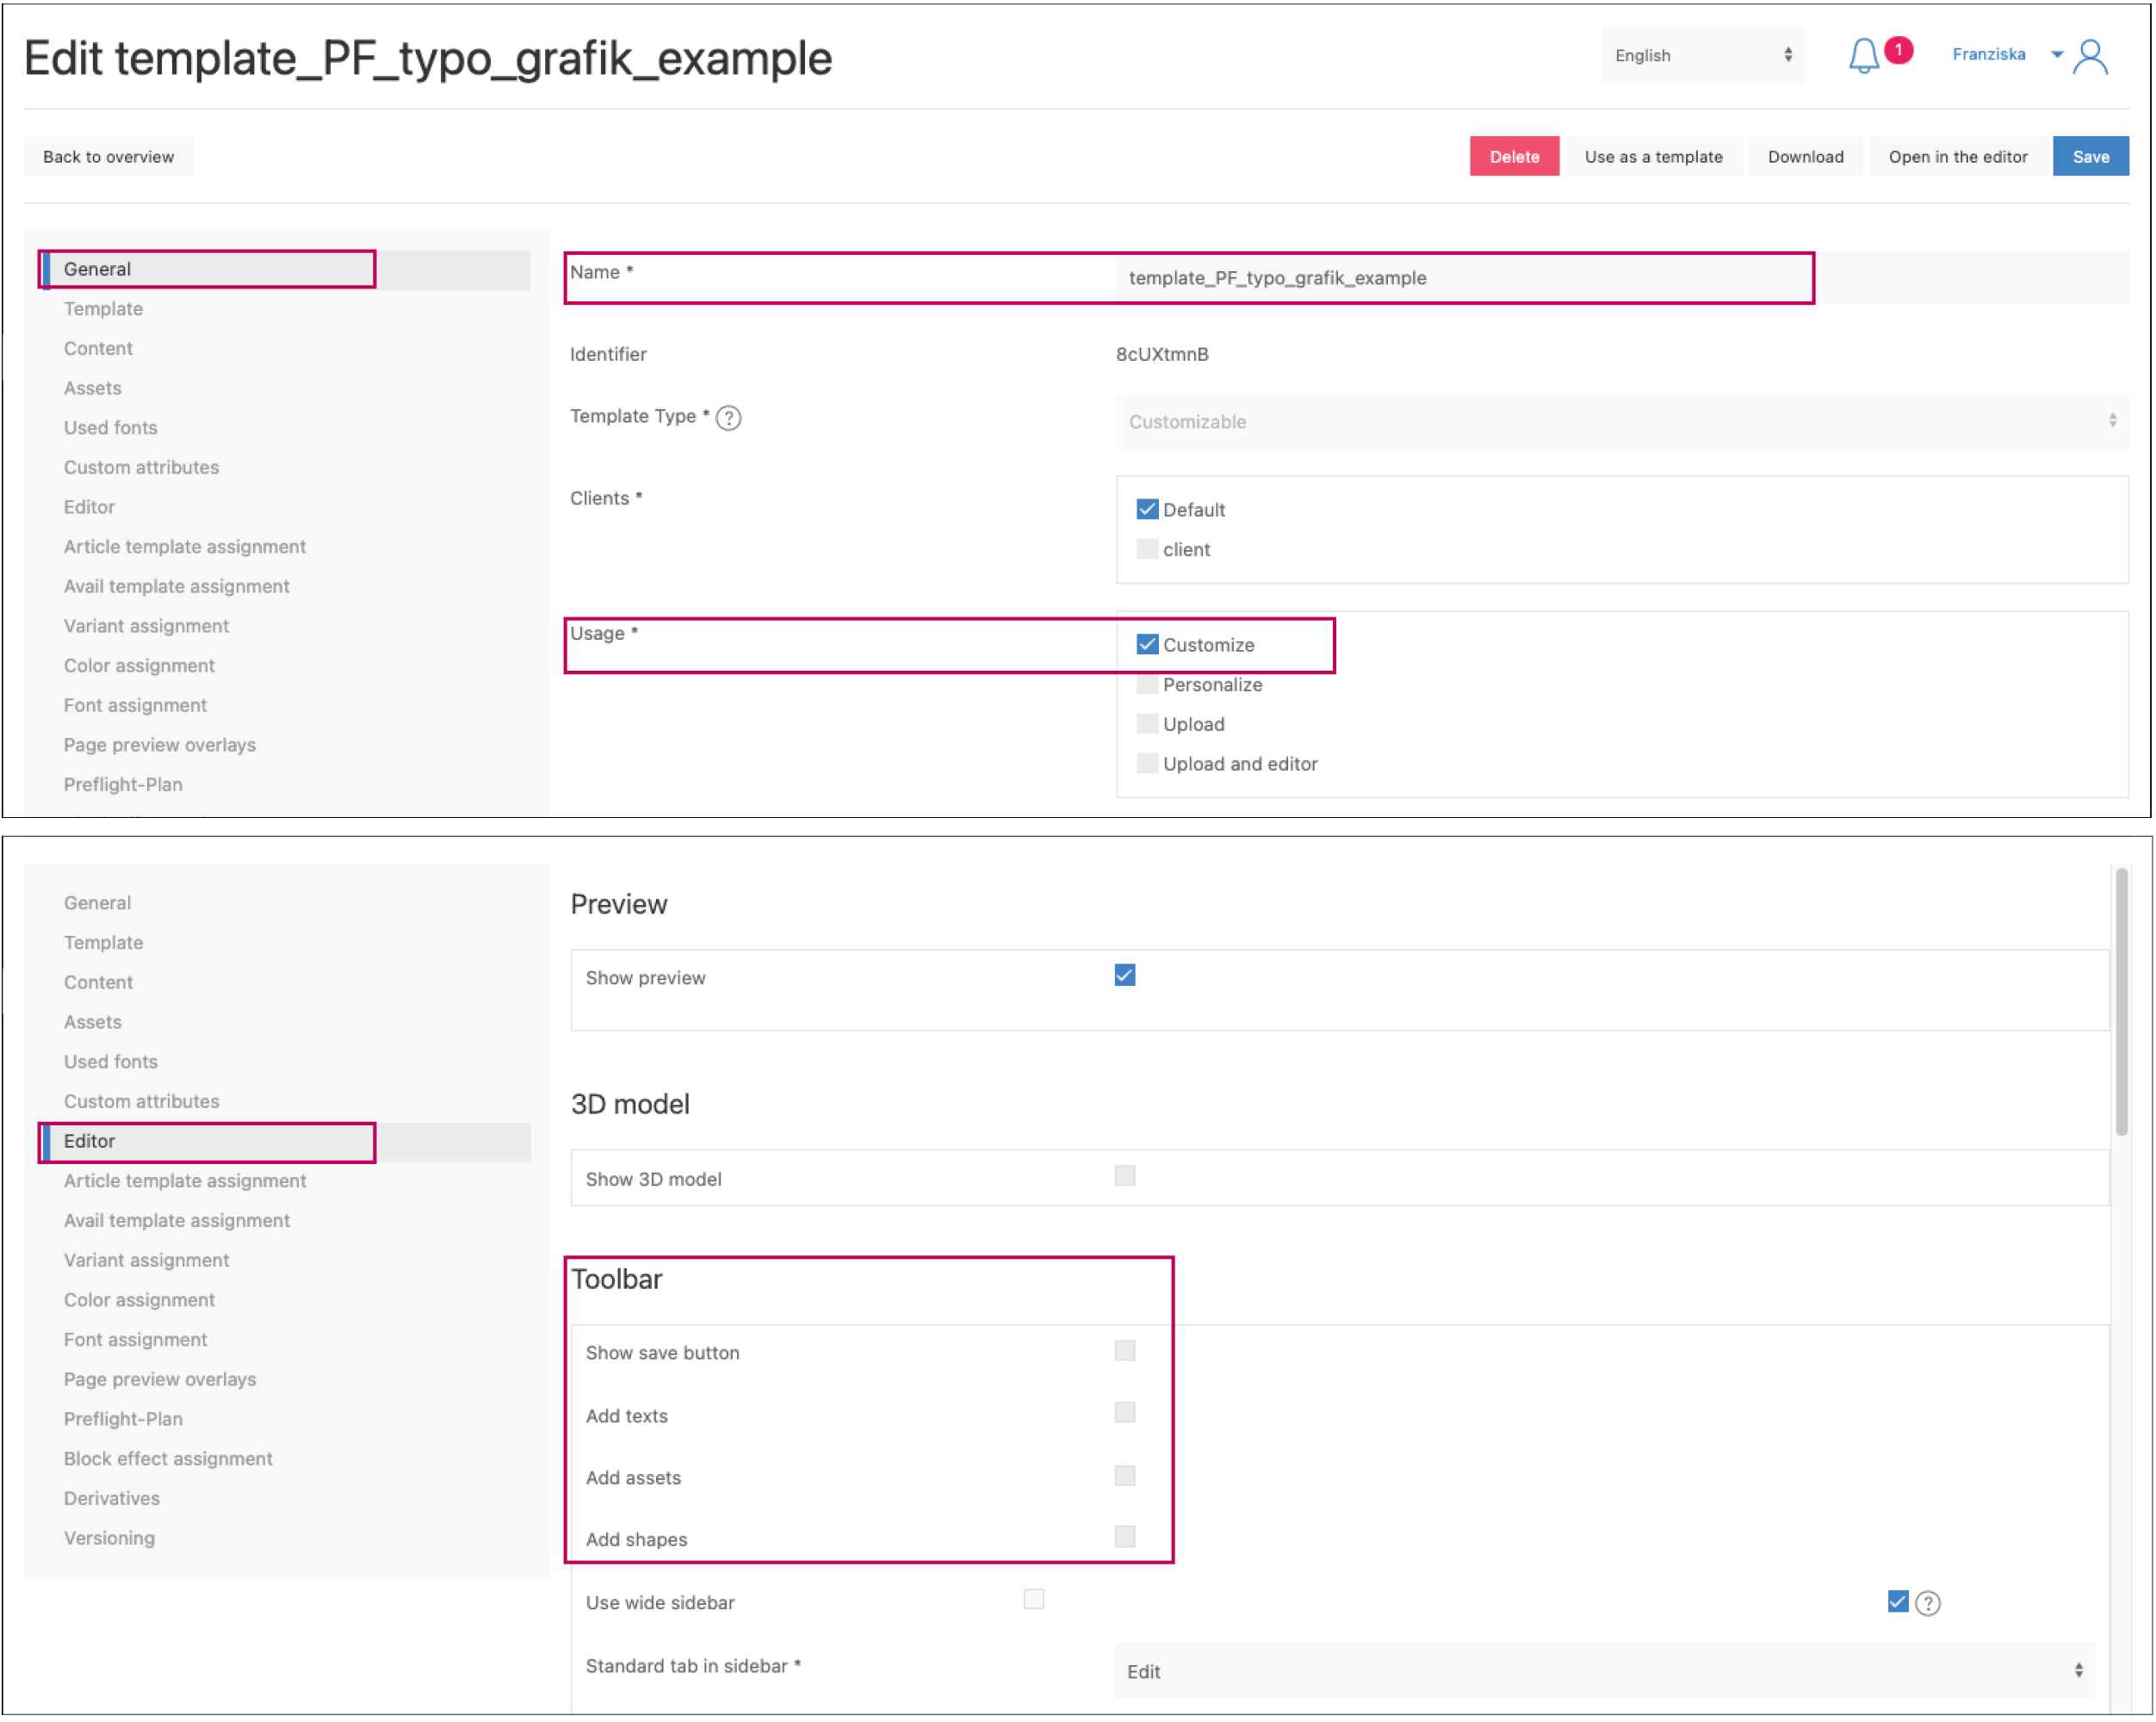
General settings:
Since both the graphic and the text will be editable, we select »Customizable« (Template Type) and »Customize« (Usage).
Editor settings:
As no further elements are to be added to our template, the corresponding "ticks" in the Toolbar area are removed.