Templates (Admin)
This is where the administration of all Templates takes place.
In the submenus Templates, Page templates, Avail templates, Article templates, the corresponding IDML templates are uploaded and configured, also existing templates are adapted (see configure printformer templates).
Templates edited in the editor can also be exported again as an IDML file (if the feature is activated in the system).
Template Overview (Grid)
In the overviews, all existing (page/avail/article/) templates are listed and, depending on the grid settings, the most important information (e.g. identifier, client assignment or template type) is displayed.
A click takes you to the corresponding template configuration.
In addition to the template settings, there are the following buttons in the upper area:
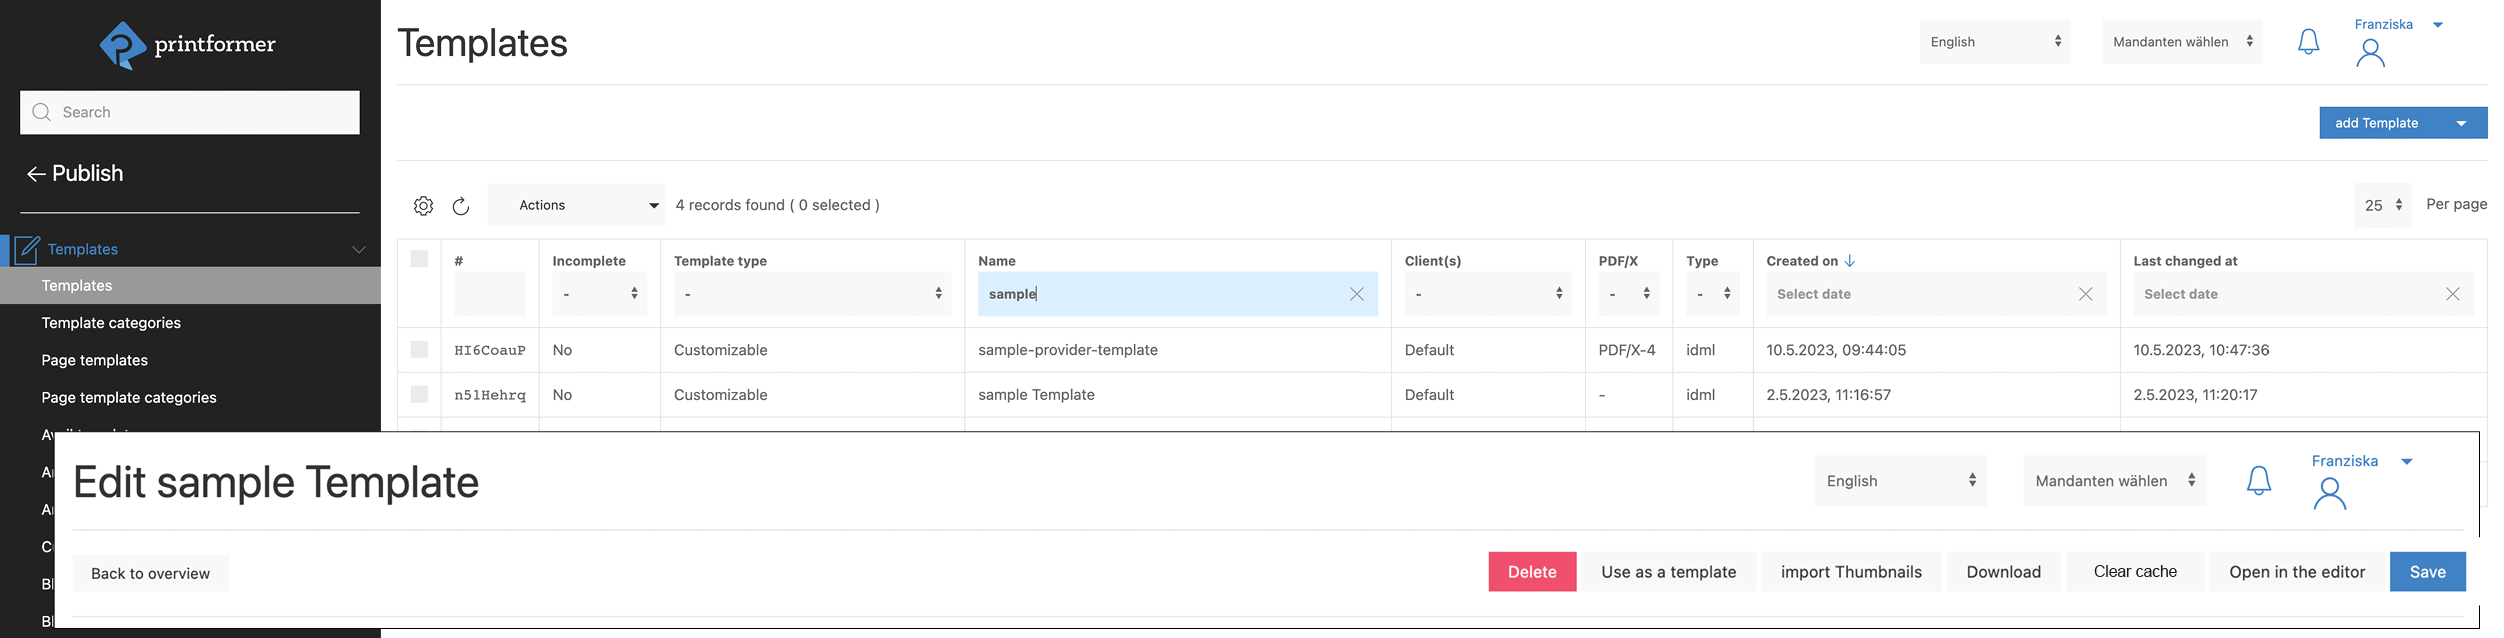
Delete
Use as a template
All printformer settings of the template configuration are taken over, the IDML file and background PDF are not copied but have to be uploaded and assigned).import Thumbnails
Here you can upload different language versions of template preview thumbnails (picture) as a zip file. This way the system assigns the photo preview to the respective language if the file name is provided with the country code (e.g. preview_en.png). The country codes to be used can be viewed under Settings > Language > locale. (The download button in the template configuration also downloads these thumbnails. So you can check if all desired language versions are stored correctly).Download
Download a zip file including all files (IDML, PDF, images, thumbnails) and the template settings (YAML).Clear cache
So that adjustments in the template are directly visible live, the cache can be cleared once after the adjustment.Open in the Editor
Creating a draft in the printformer editorSave (all changes made must be confirmed)
The page and article templates are limited to the Delete, Download and Save buttons.
Template Presets
In this menu, all template settings can be defined and saved as a template.
(BlockSettings and Use as template button are not yet implemented).
Click on add MasterPresets to open a screen that is identical to the template configuration (only without the upload function). All desired settings for future templates can now be made here and saved as a template for the zip upload:
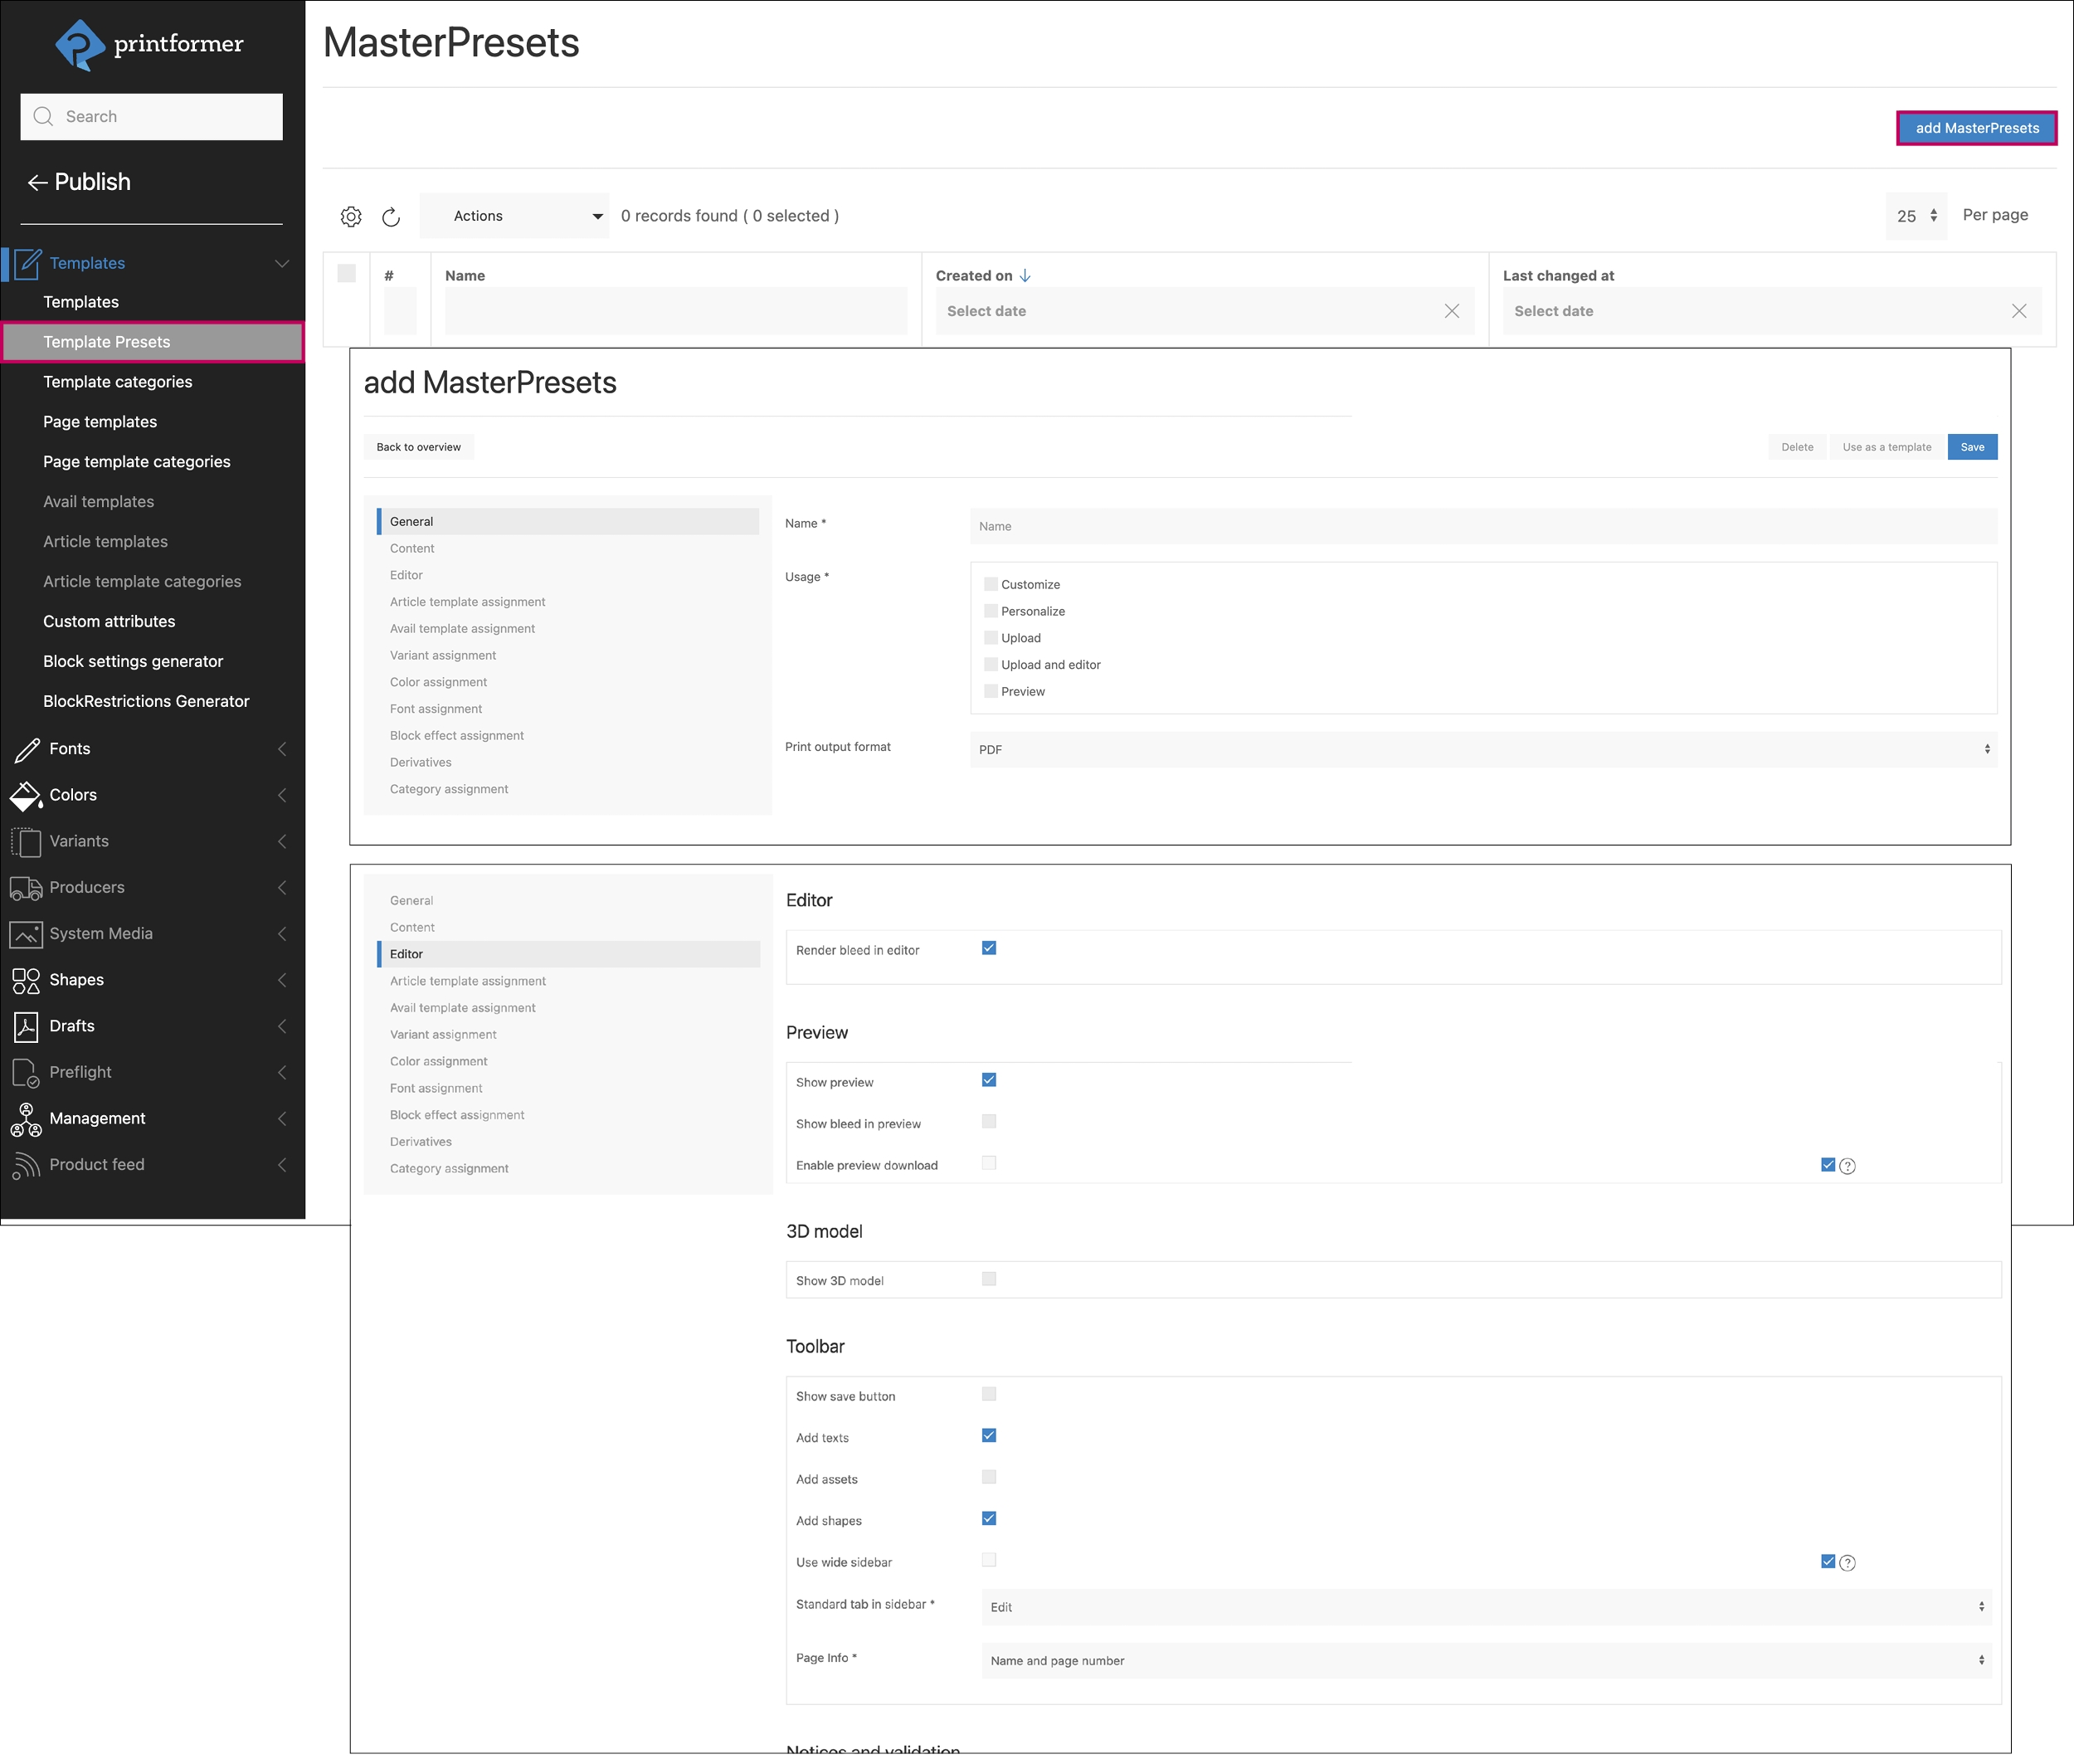
During the archive upload, the preset is then assigned via a form field (enter the name):

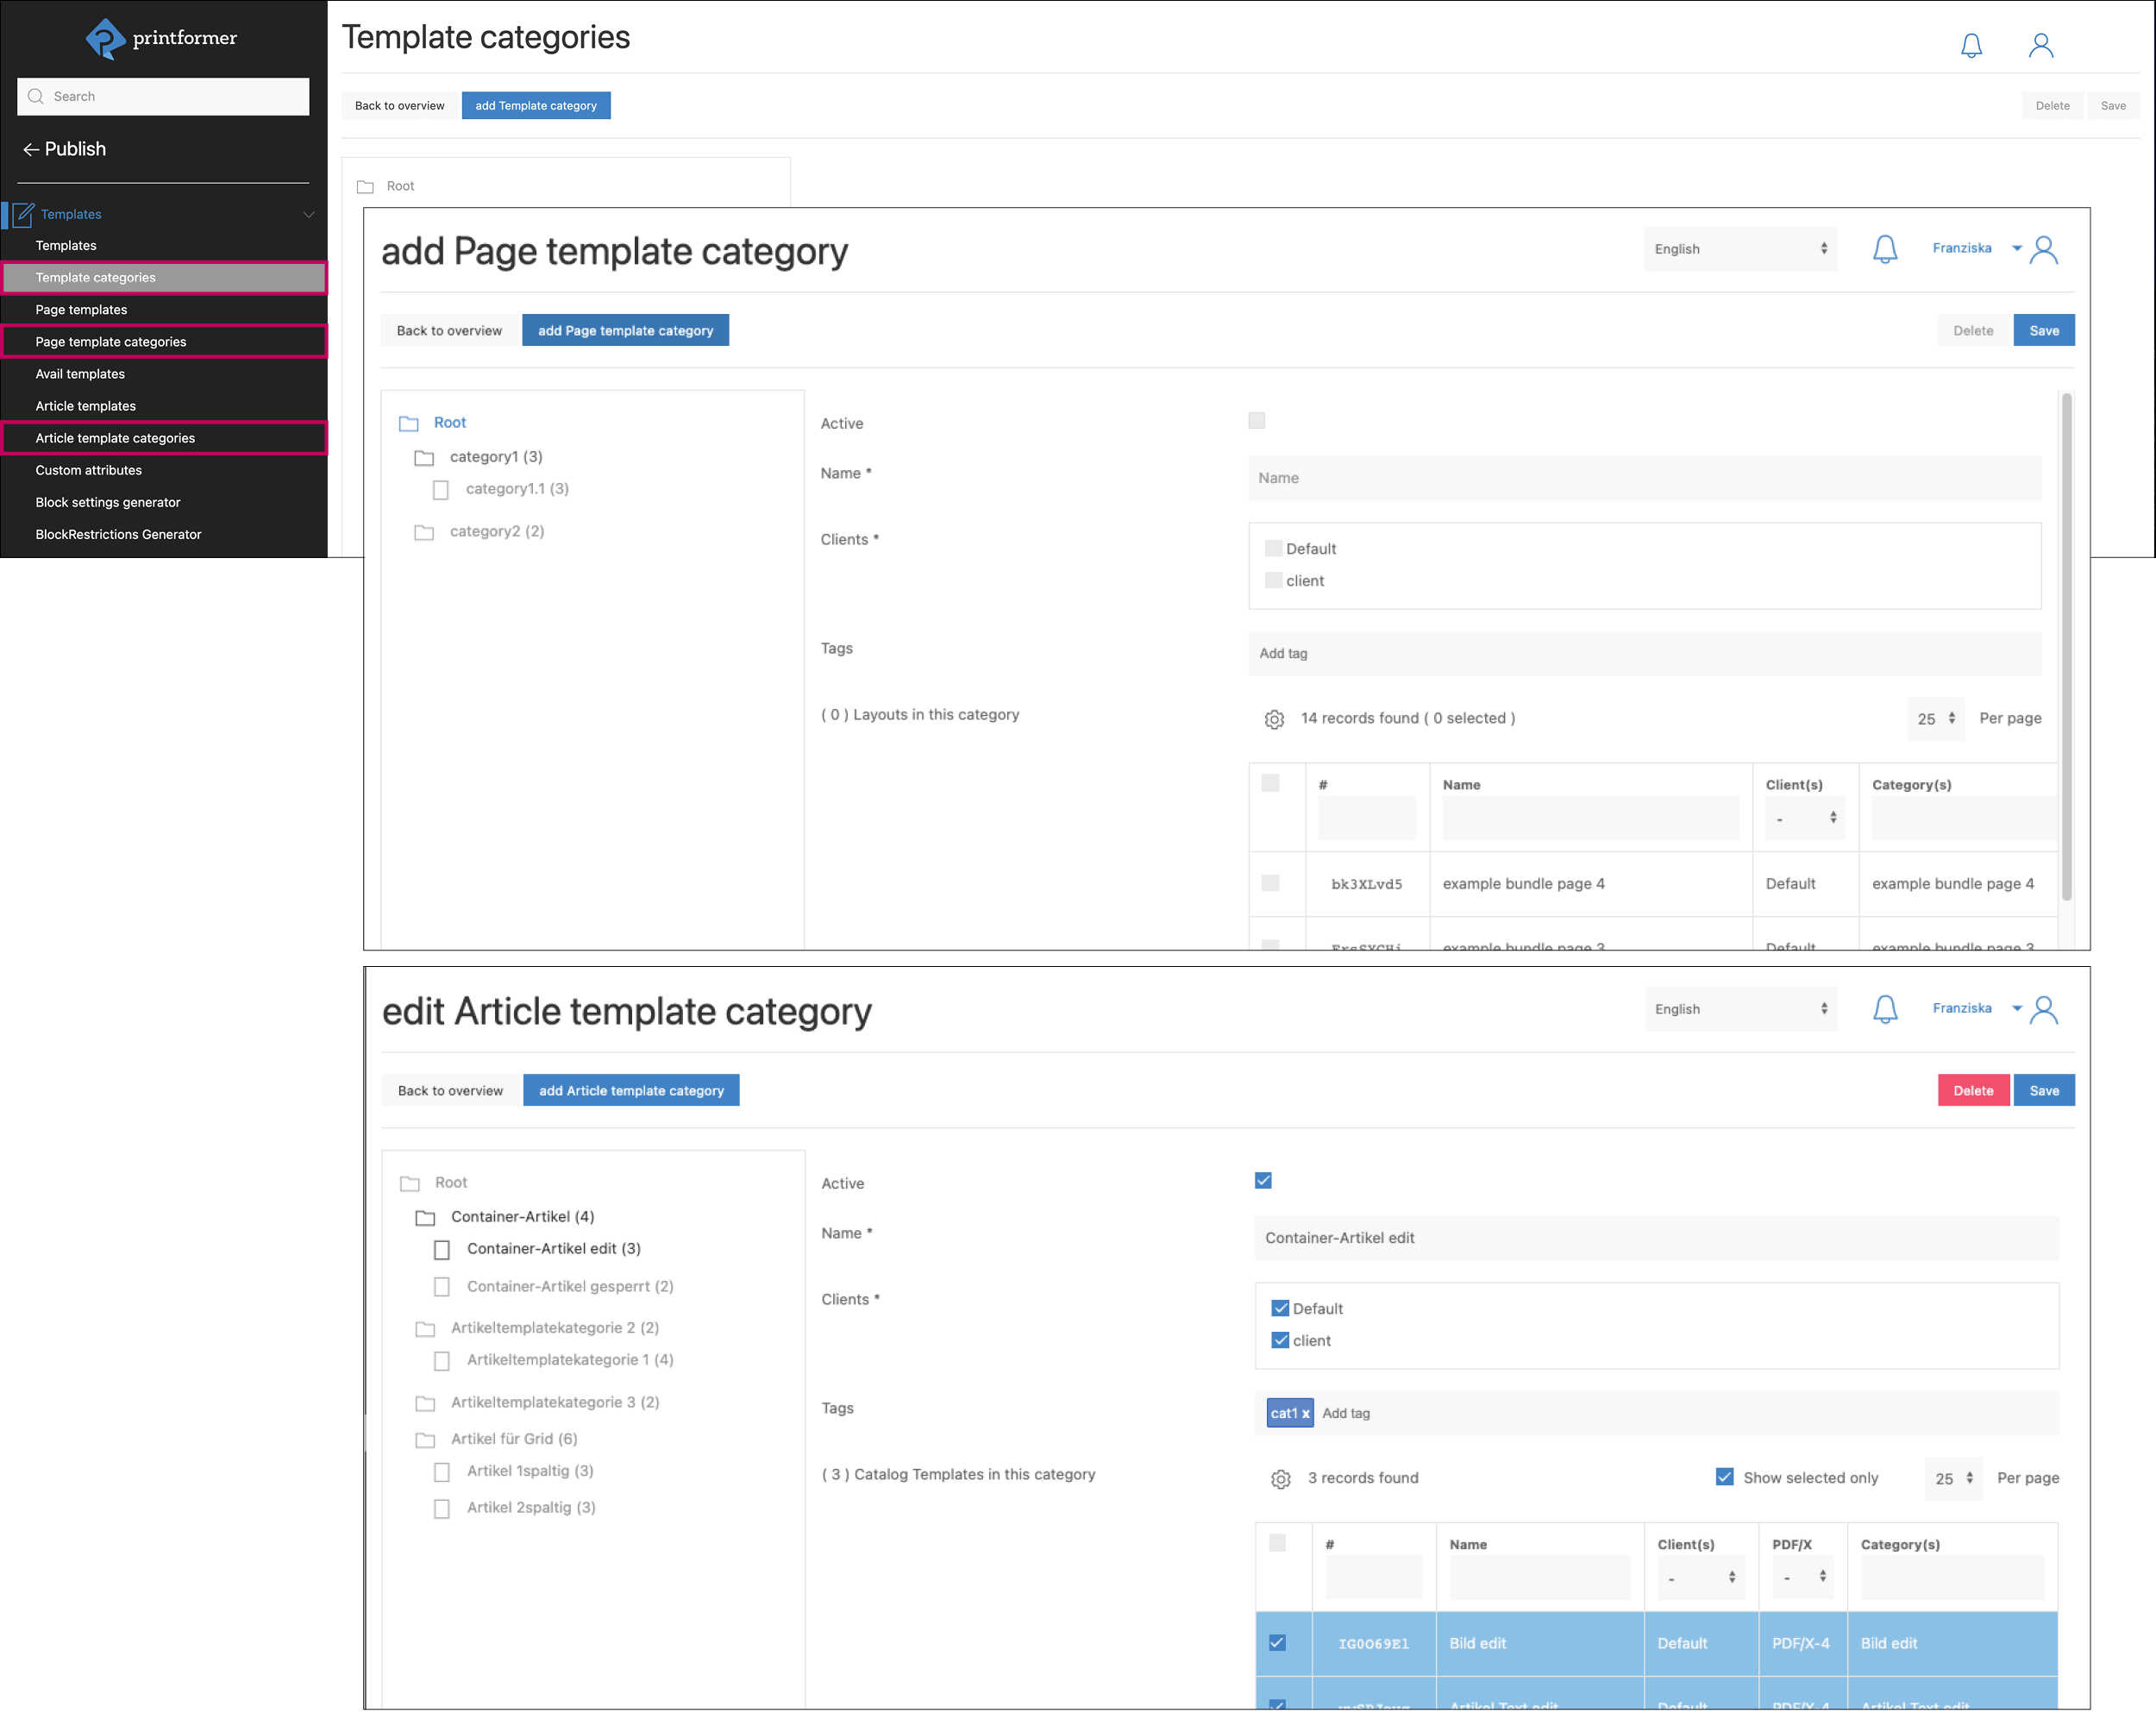
Templatecategories
This area allows a hierarchical categorization of group, page or article templates.
In the three menus (template categories, page template categories, article template categories; functionally structured in the same way) single templates can be assigned to different categories. In the printformer Editor, they are then displayed in the sidebar in the Group Templates, Layouts or Catalog Templates menu, structured according to categories.
Via Add page/article/template category a new category is created.
In addition to the mandatory fields Name and Client (assignment), the status (Active) can be selected.
Additionally, tags can be added (as a search option).
Below this is a list of all existing page/article/templates that can be assigned to the category by activating the particular checkbox. (When editing a category later, the view can be made clearer by activating the Show selected only checkbox). Click on Save to apply the settings you have made.
Via Back to overview only the categories already created under Root are displayed. These can be edited by click and the order and hierarchy can be adjusted by drag&drop.
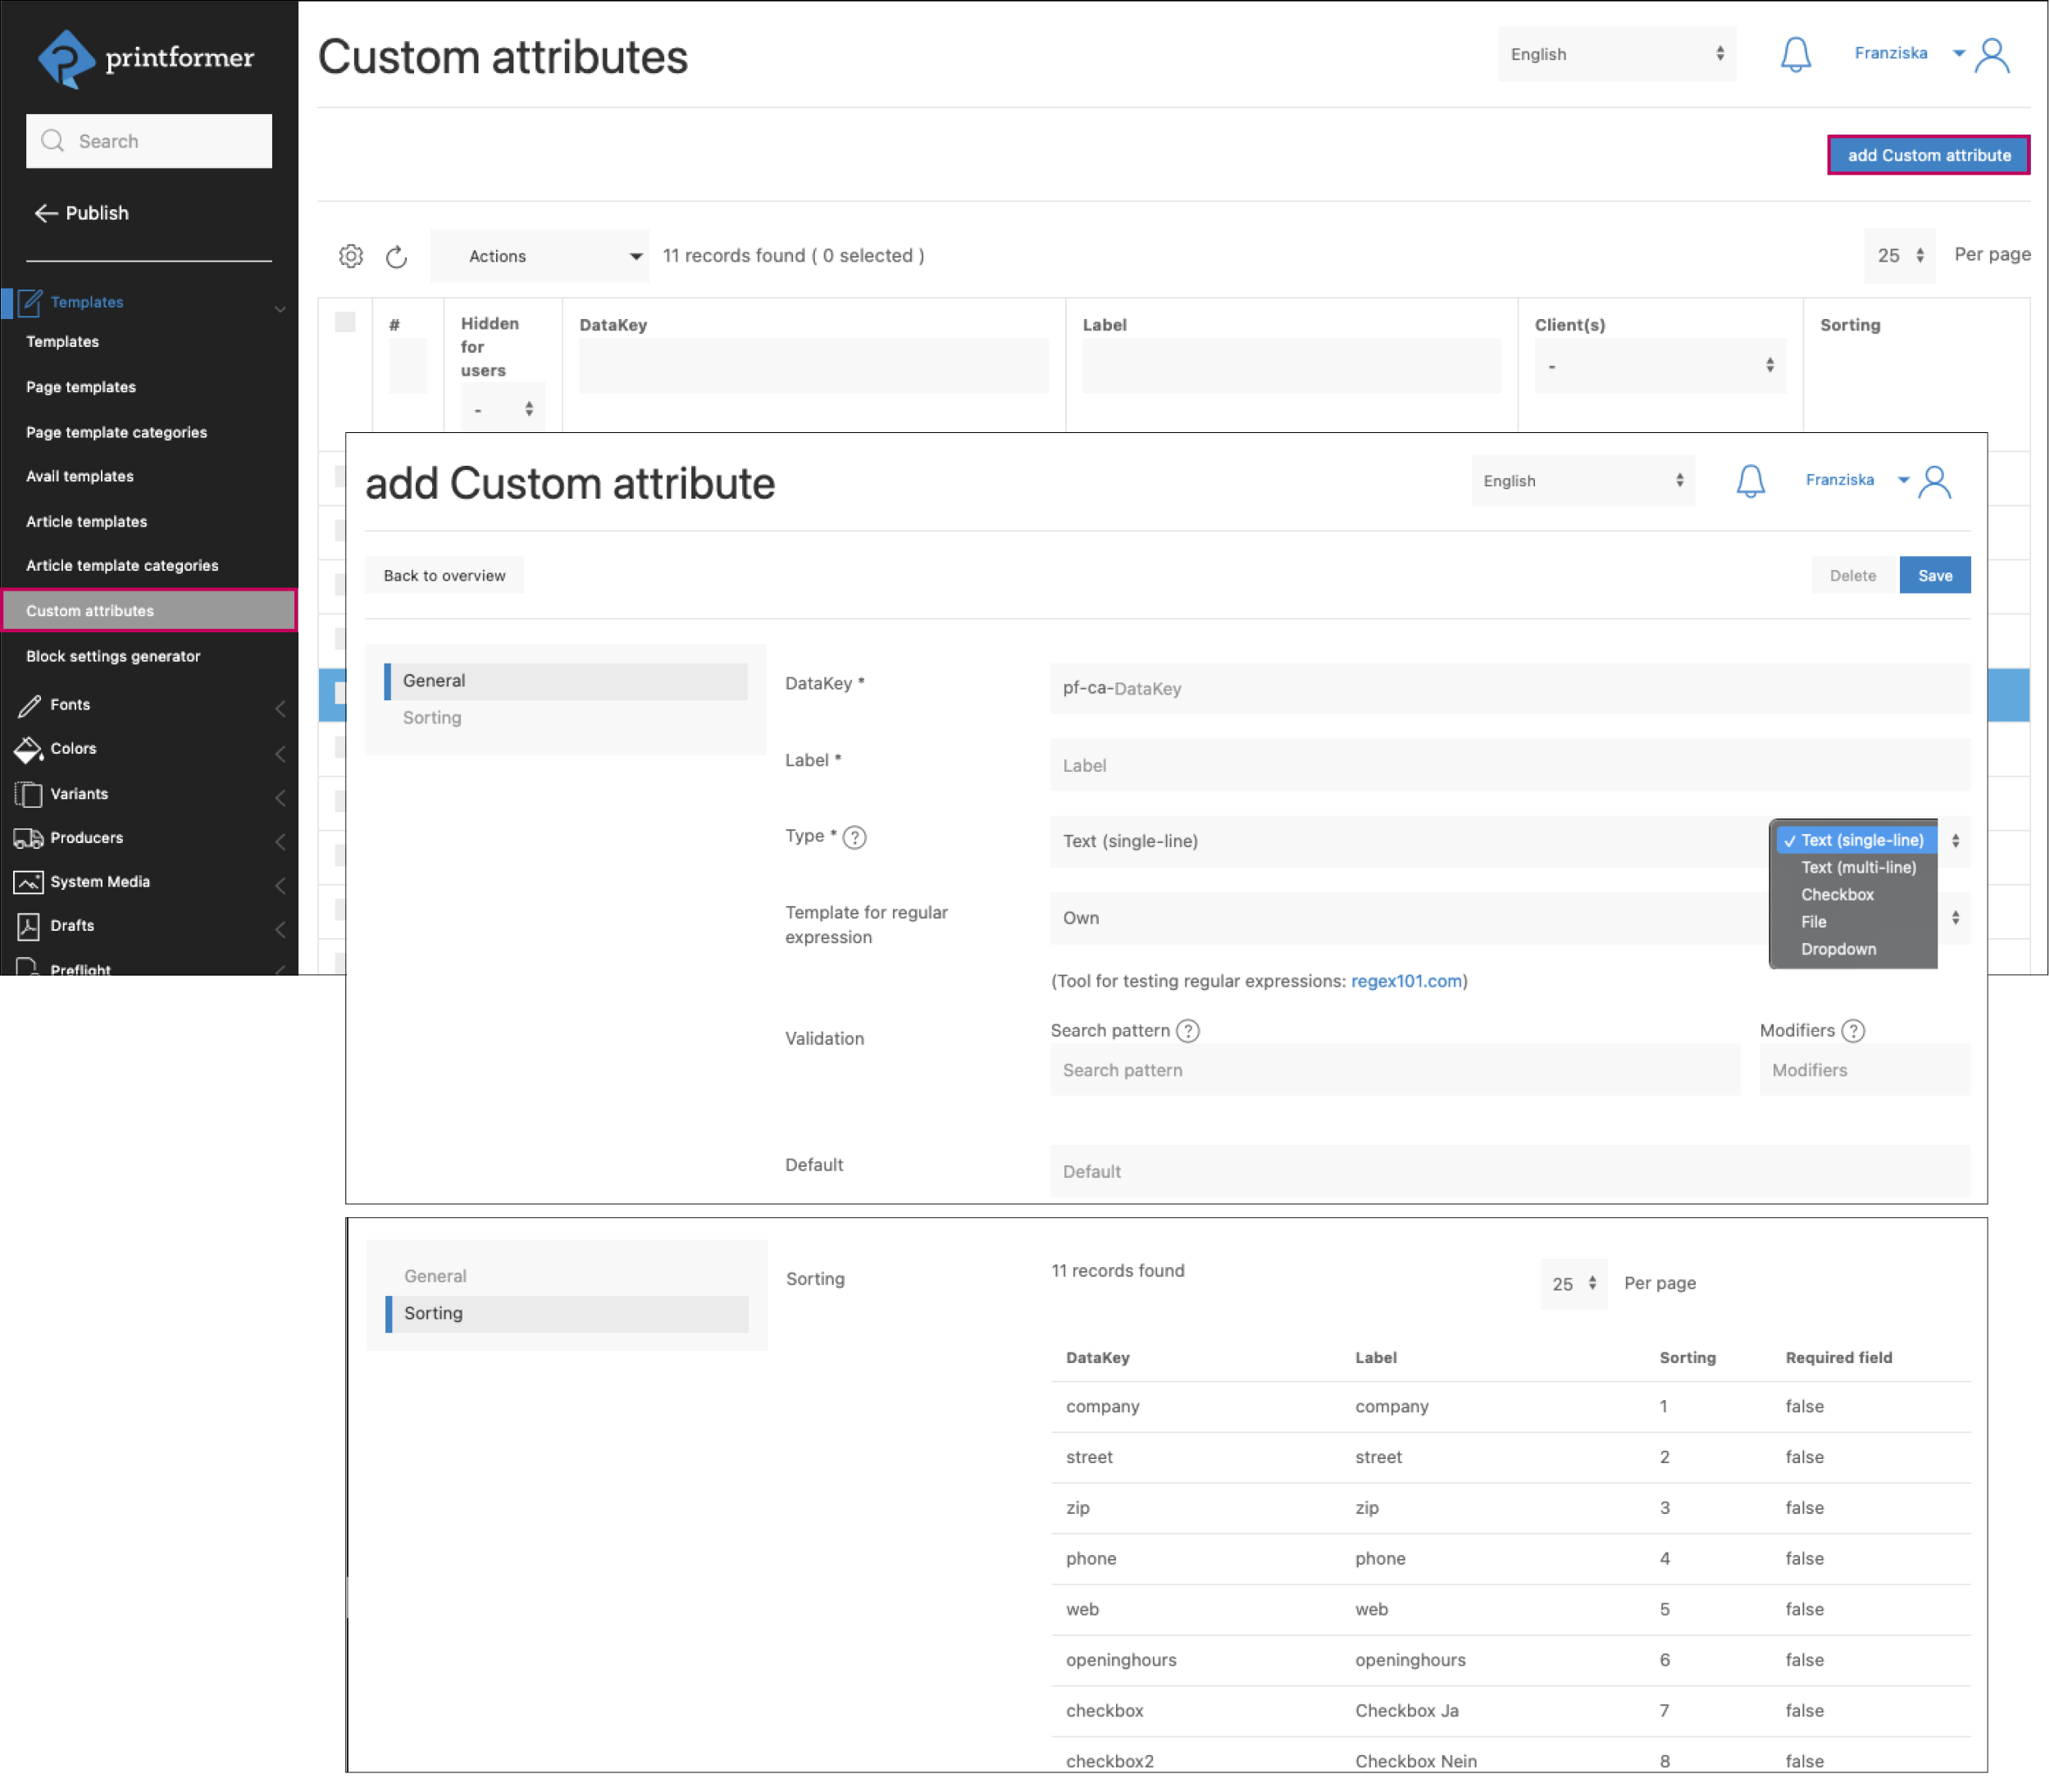
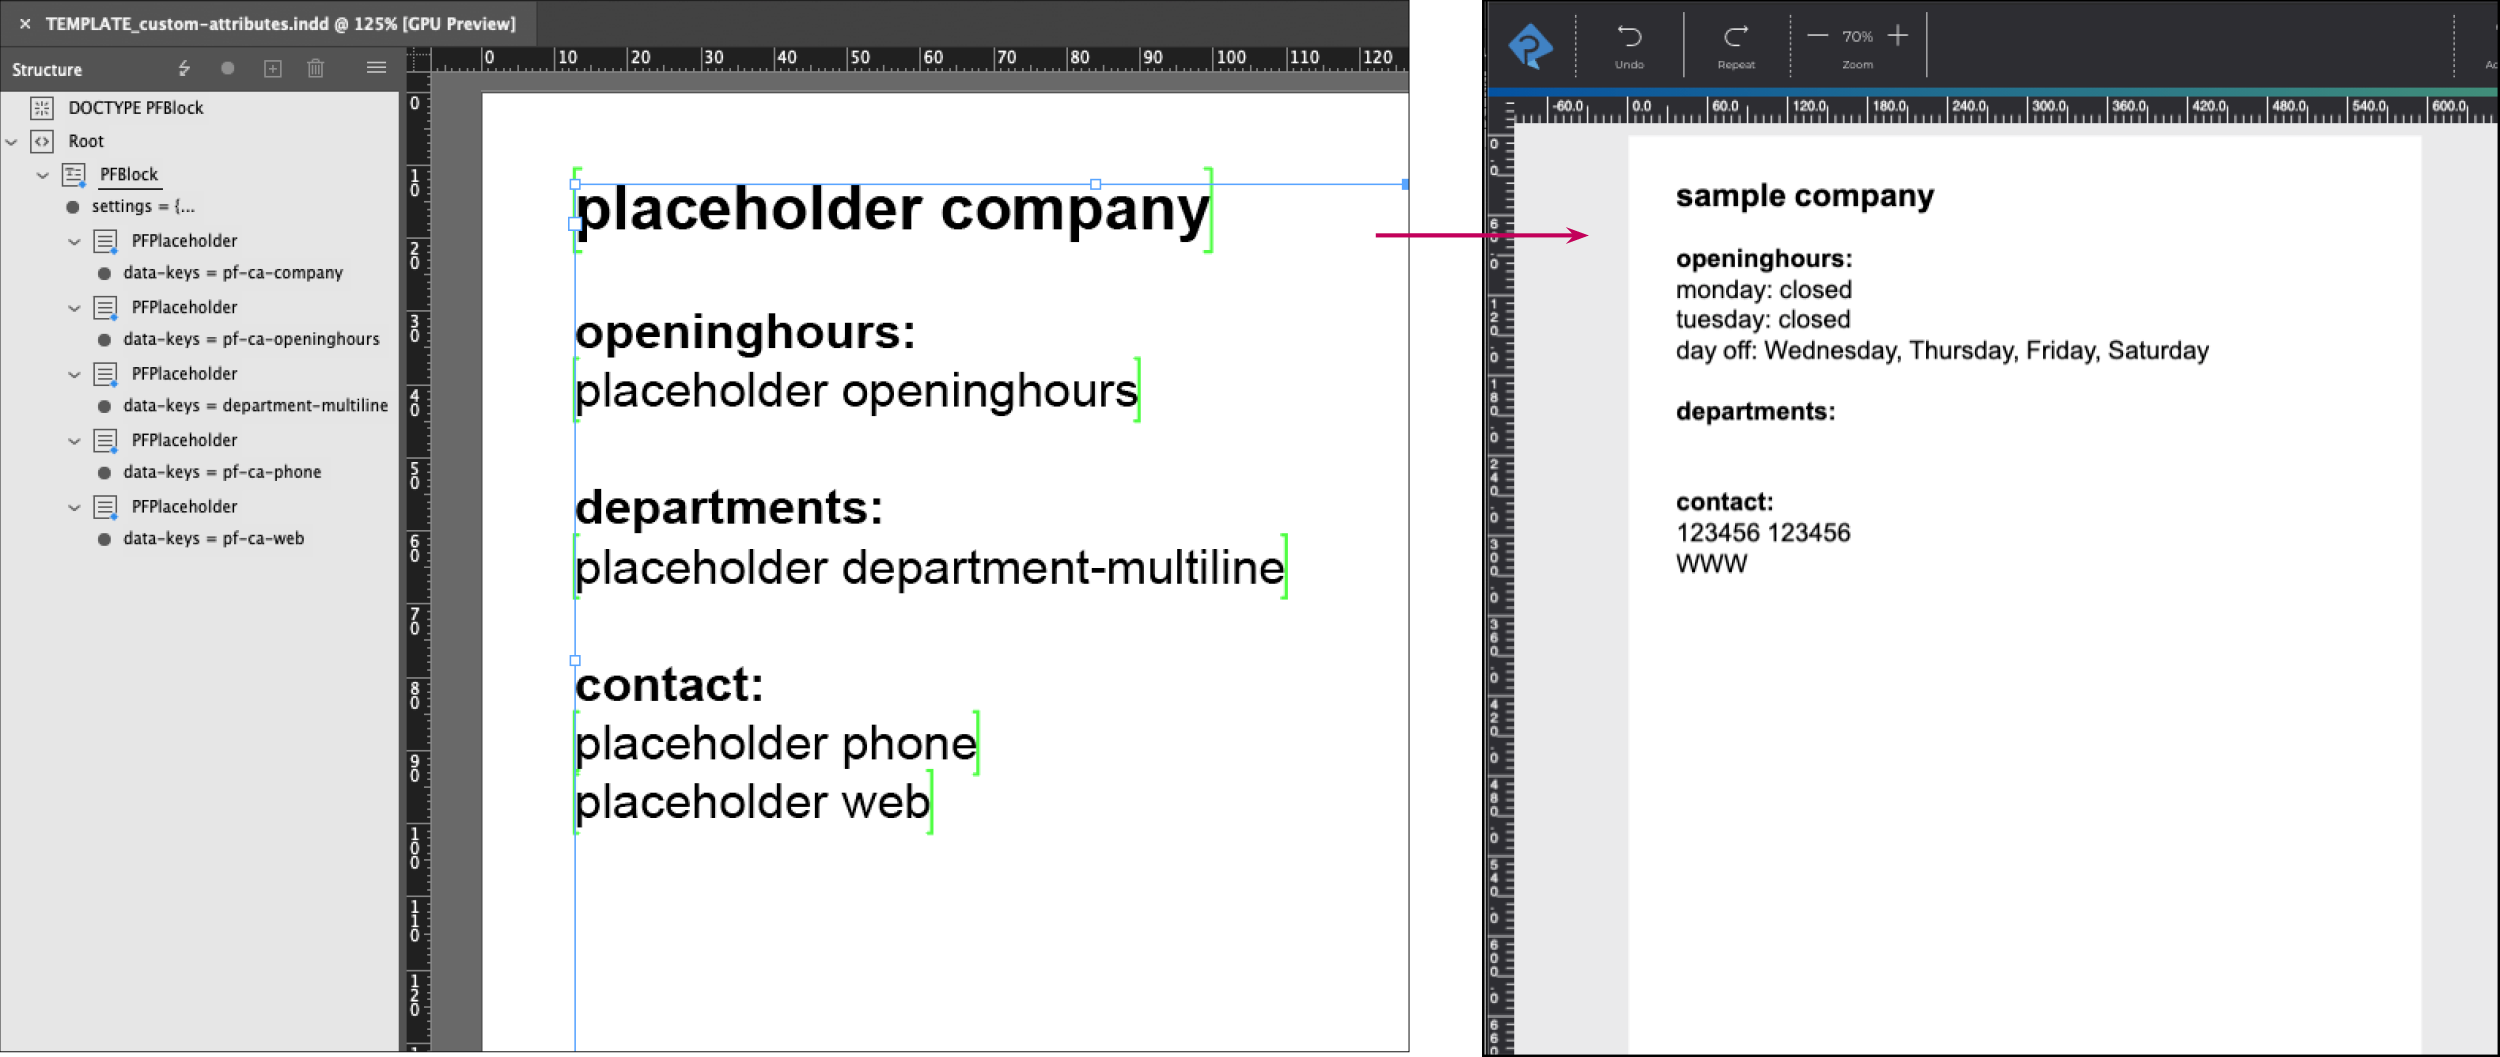
Custom attributes
A custom attribute is a placeholder that can change its value depending on the assignment (user, template, draft, store), e.g. company location, department, etc.
For this purpose, a DataKey incl. default value (content of the placeholder as long as it is not overwritten) is created under Templates > Custom attributes.
If the IDML file contains placeholders with these DataKeys, the tagged text of the file is replaced by the default value in the printformer editor.
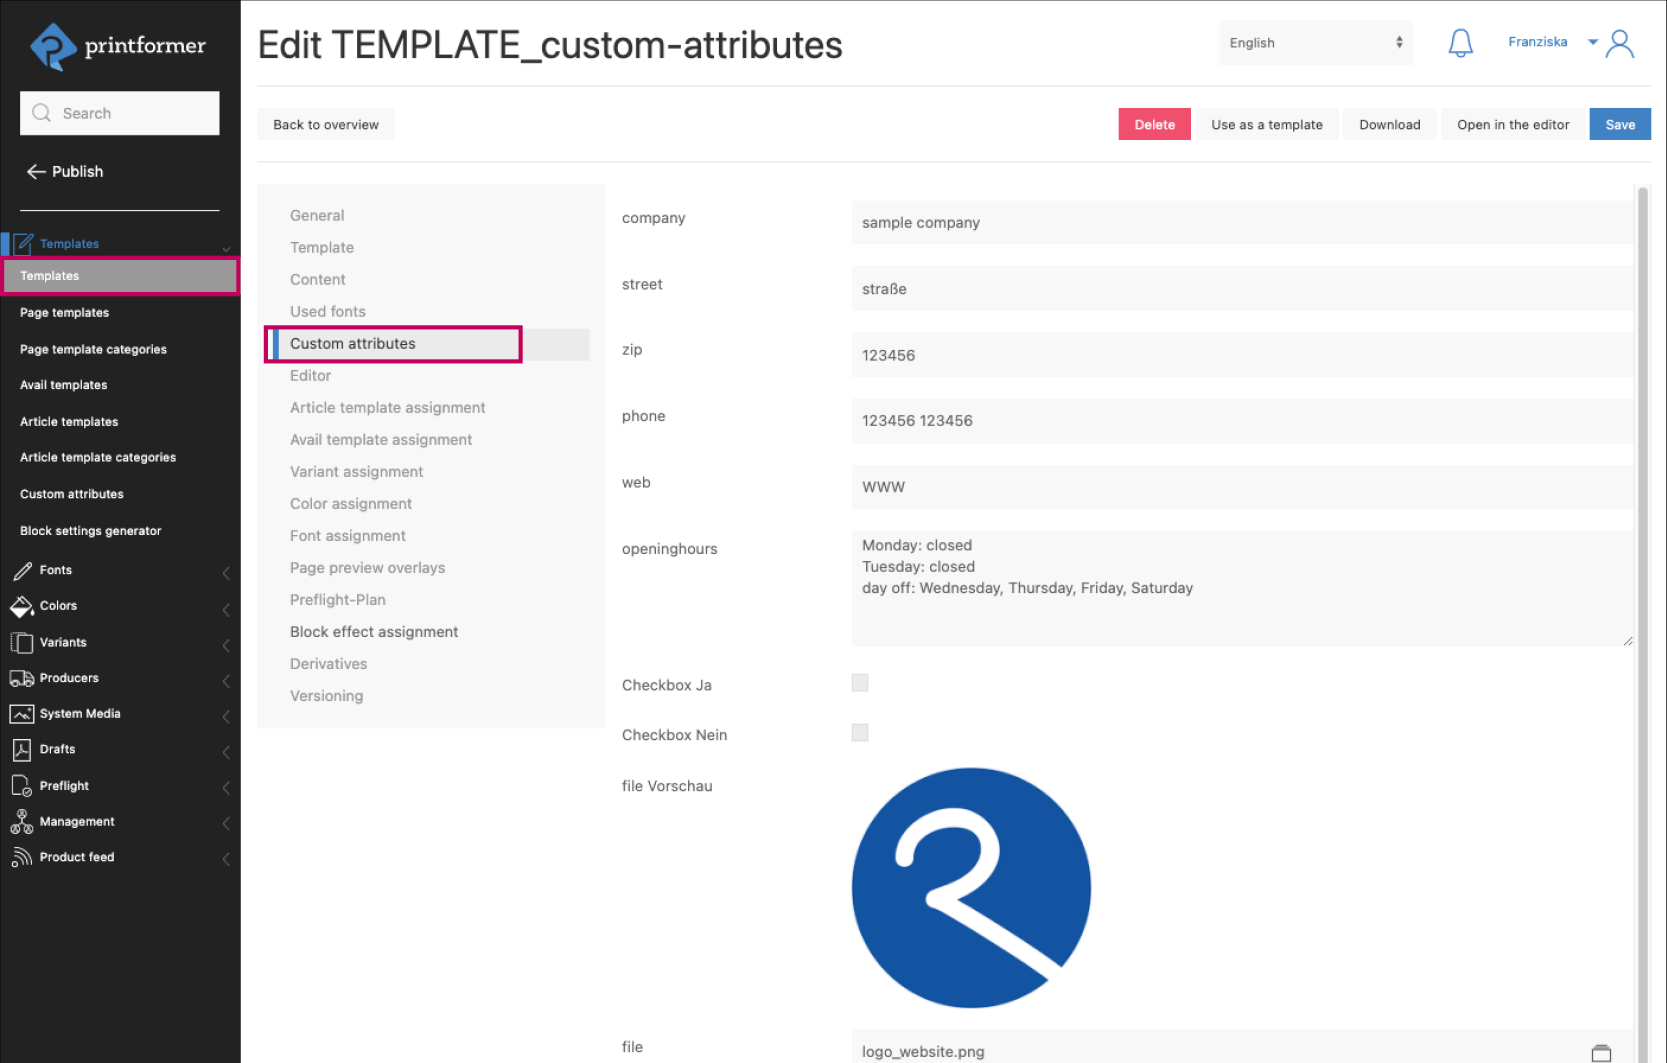
The attributes can be overwritten individually for each template:
via the template configuration Custom attributes
by activating Form editor
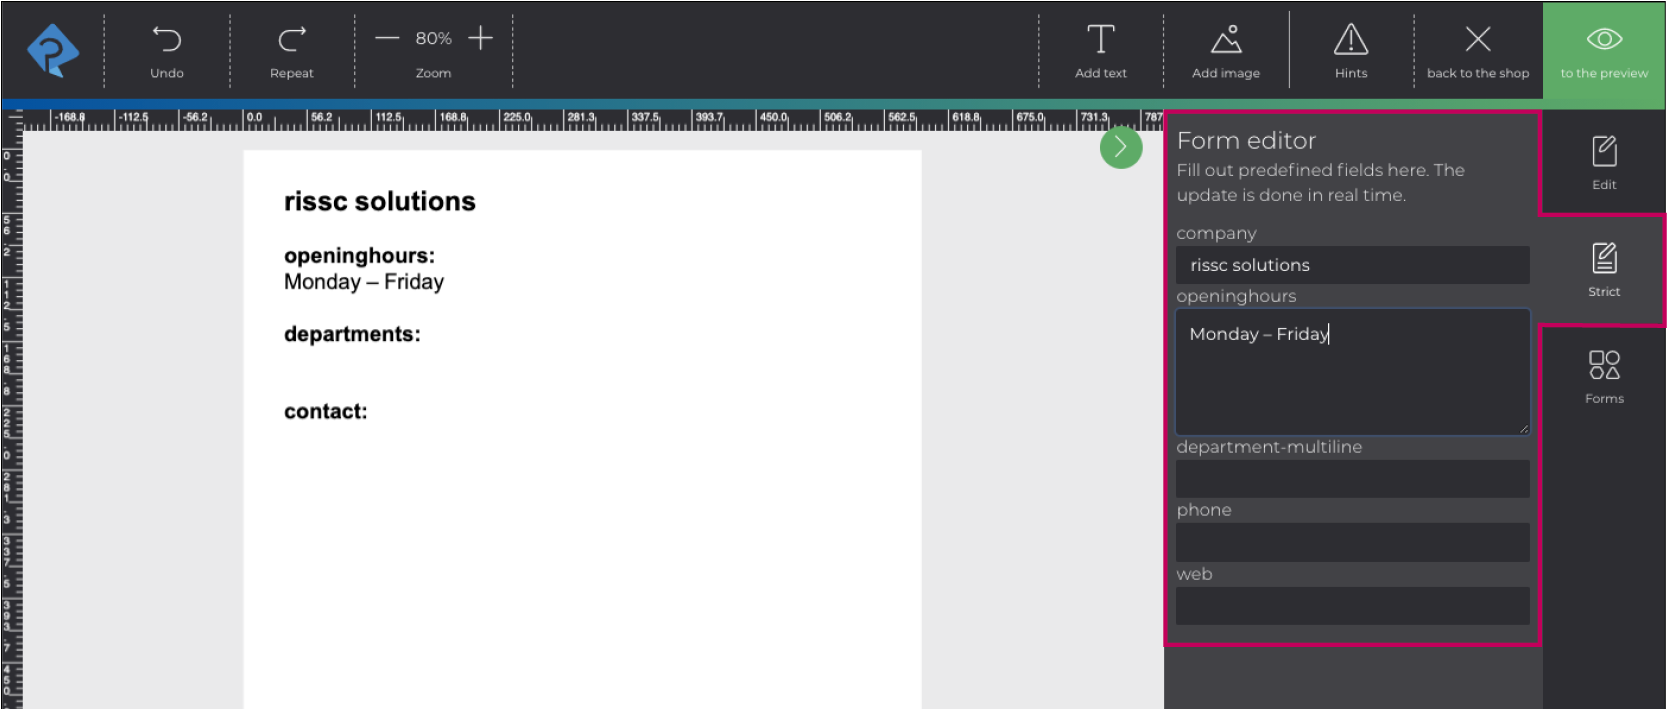
the values can be entered manually.
Add Custom Attribute