
PrintArea
The PFPrintArea and PFSourceView tags can be used to create a print sheet (panel template) on which predefined areas (or objects) of a template can be placed as desired.
So the user of the template can edit single elements in the printformer editor as usual and the print sheet will be generated automatically. (For example, a business card which is placed several times one sheet).
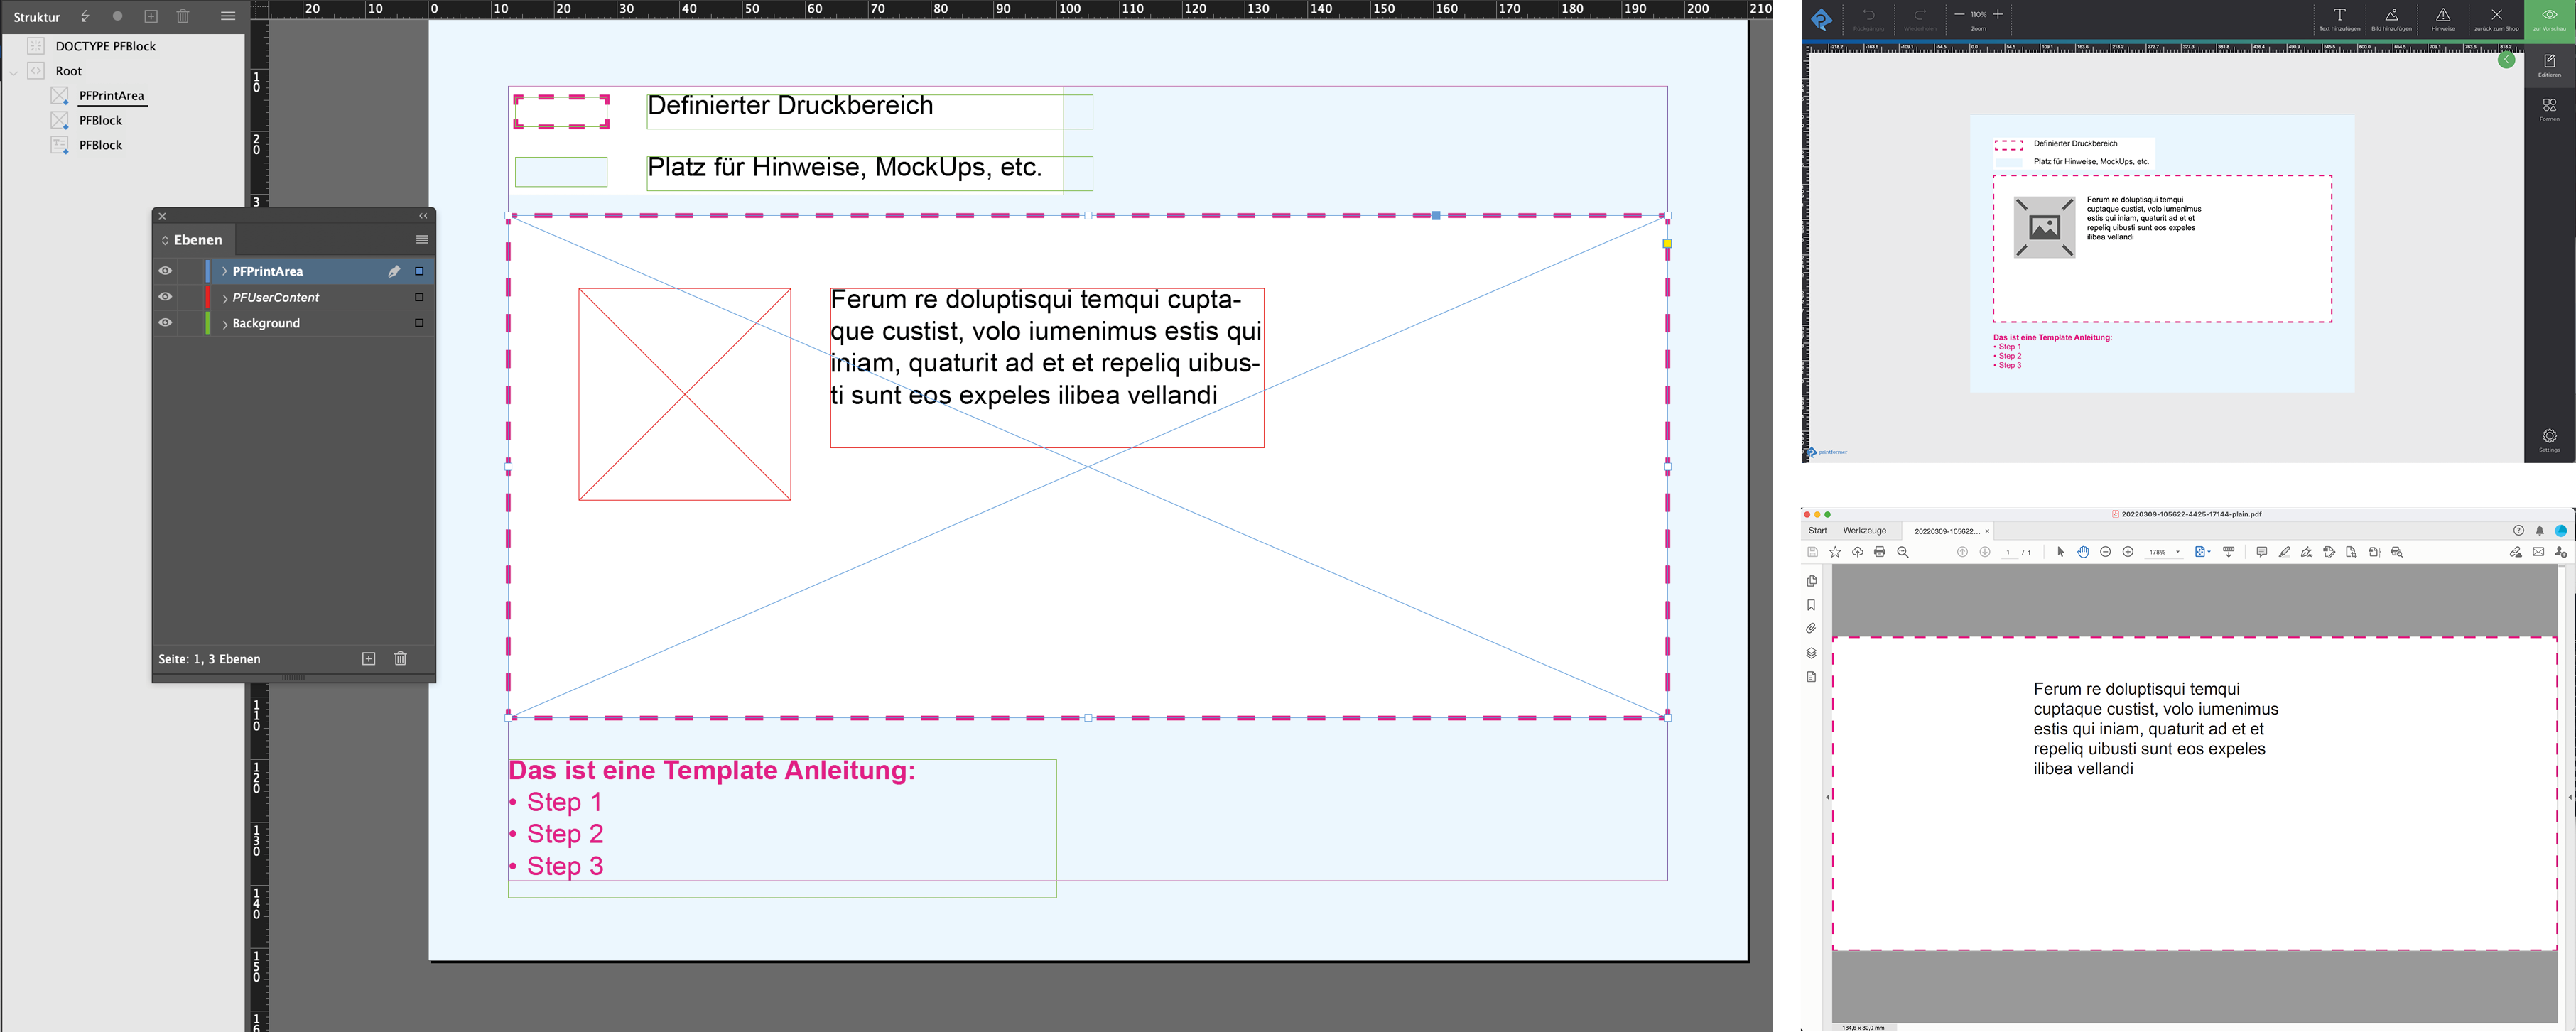
The PFPrintArea tag can also be used if the format of the print file has to be different from that of the template. (For example, notes for editing the template should be listed at the bottom edge in the editor and this area should be cut off for the print file). For this purpose, a rectangular frame is drawn in the IDML in the desired size and positioning and provided with the tag PFPrintArea. (The area outside of the PrintArea will then be cut off in the print PDF)
Note: no identifier may be added to the tag, this use of the PFPrintArea tag is only possible in the (master) template, not in the avail template.
Example: IDML, editor view and print PDF
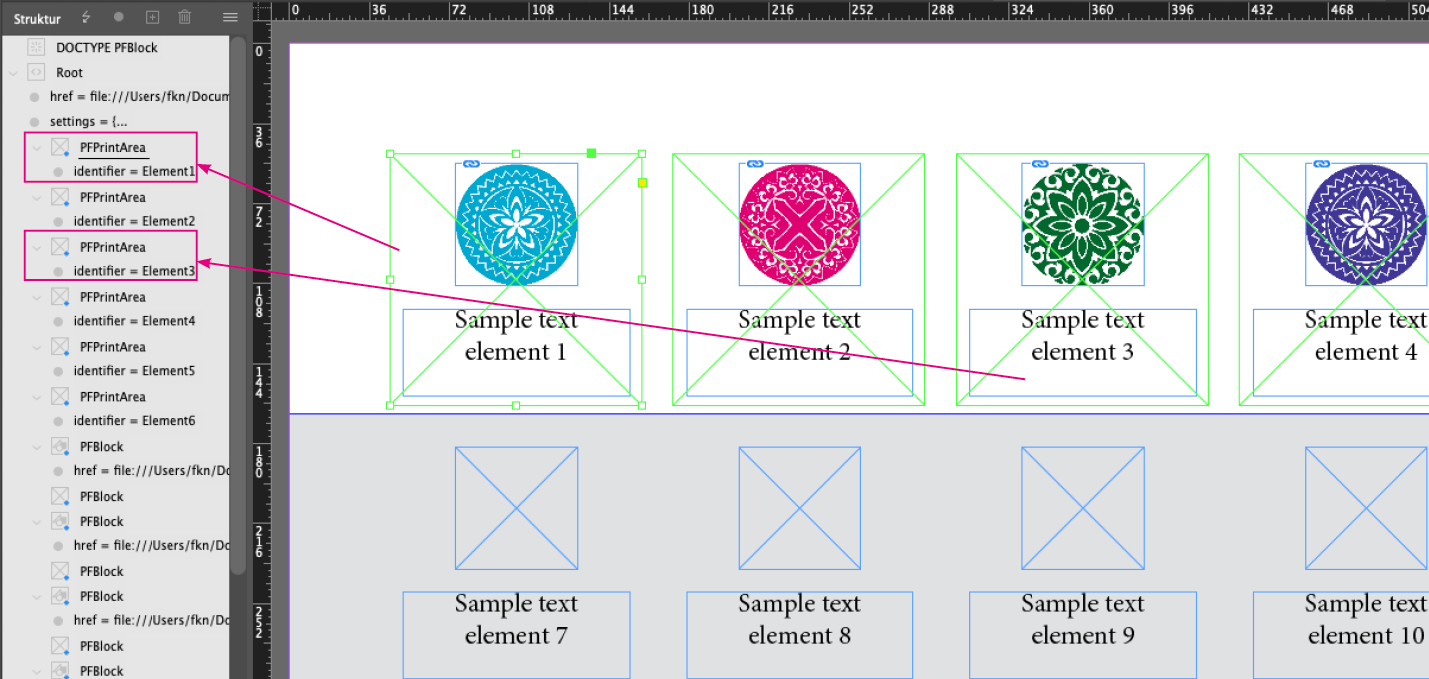
In order to assign print areas of any (master) template to a panel template, the desired areas must be identified using the PFPrintArea tag and the identifier attribute.
Placeholder (rectangle) frames are then tagged with PFSourceView and the content is defined by the attribute print-area-identifier.
Alternatively, the rect attribute can be used to define an area from the master template (using coordinates and size), which is then inserted into the placeholder frame. In this case, no PrintArea has to be created in the master template.
This tutorial describes as an example the creation of a print sheet whose contents (areas of the master template) each consist of an image block with text.

The InDesign documents of the master template to as well as the related avail template are available here as sample files:
Master-Template_PFPrintArea.zip availemplate_PFSourceView.zip
Instruction master template with PrintArea(s)
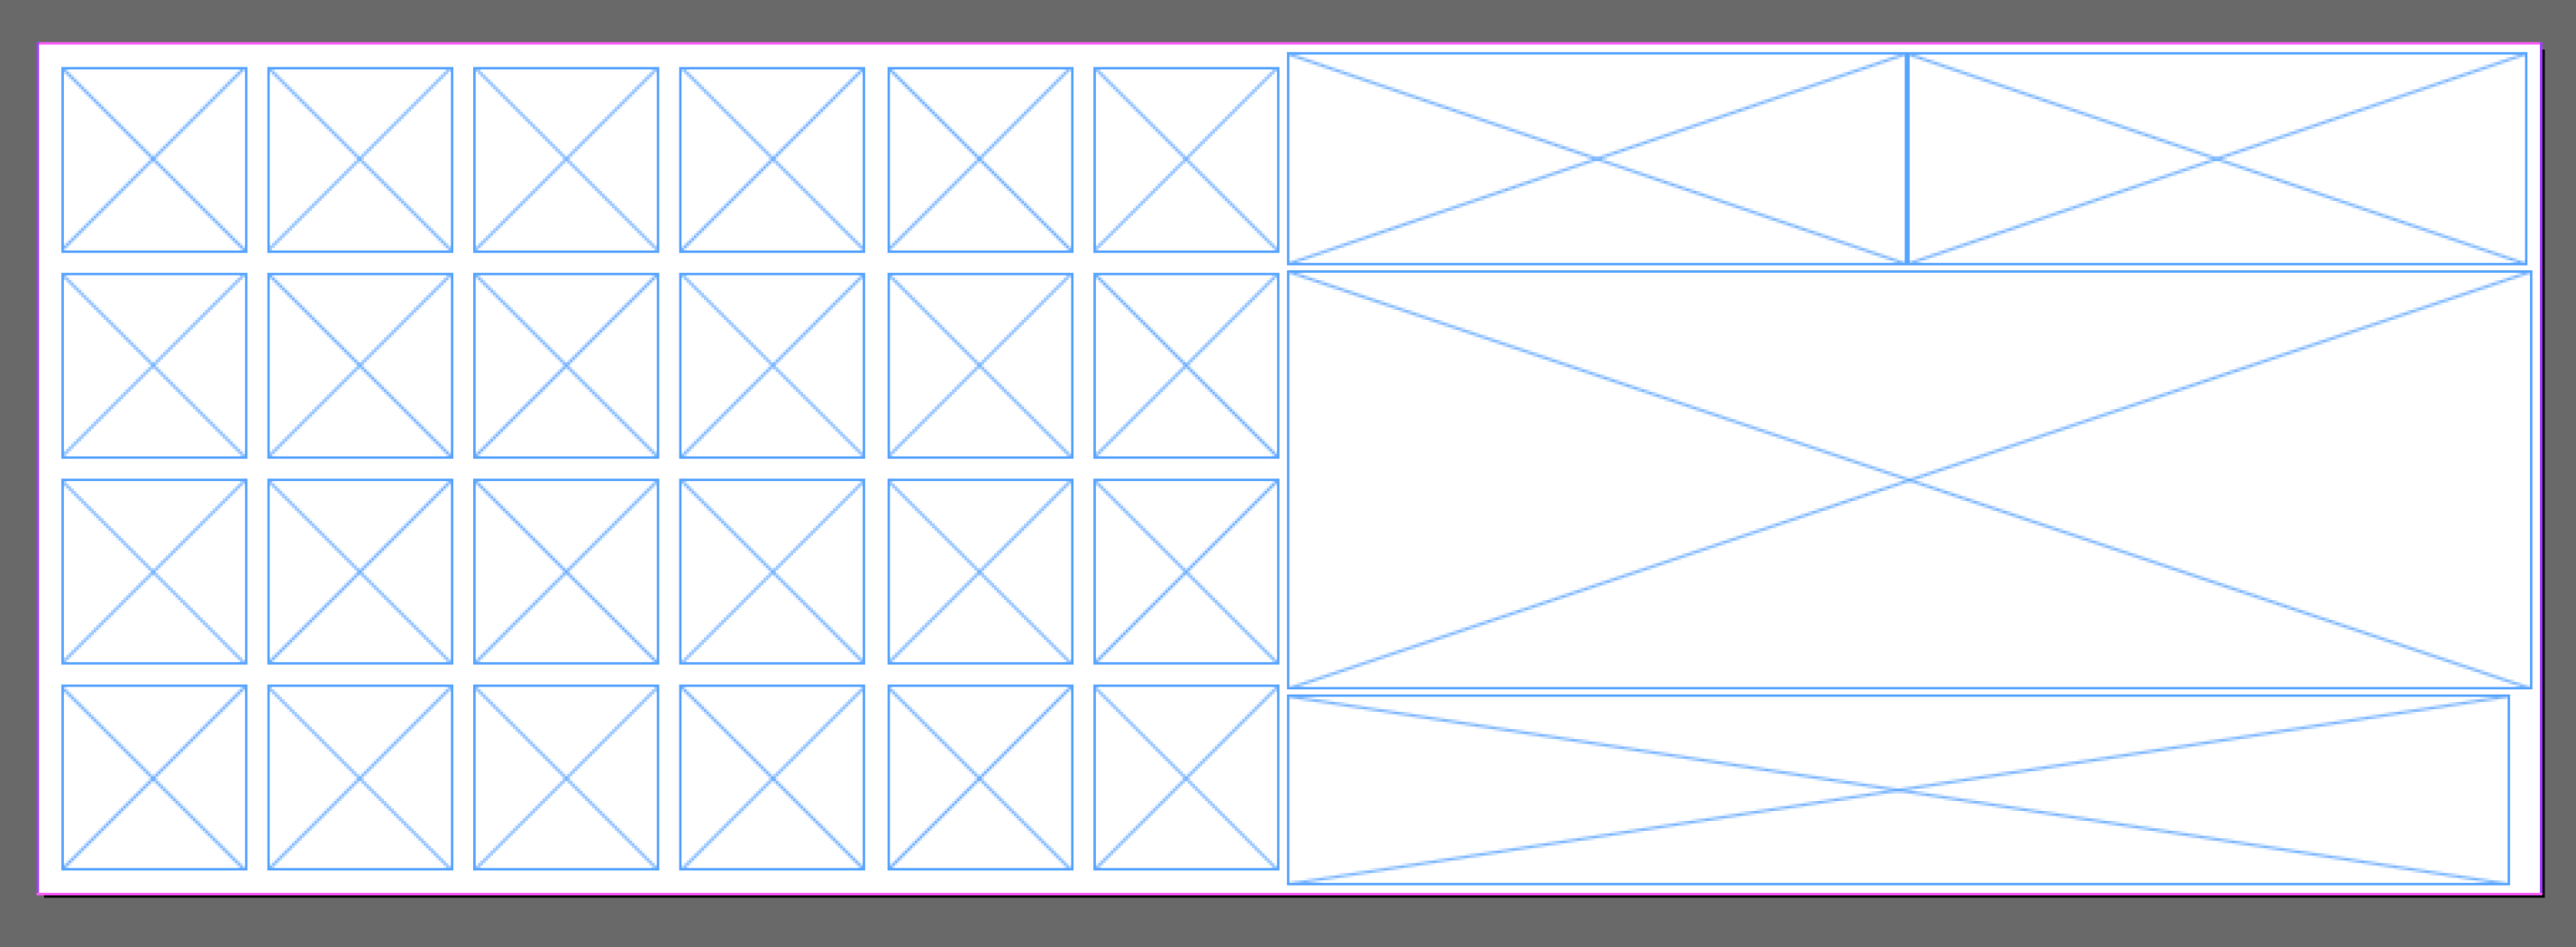
First, an InDesign template is created for the editor. This contains an individual number of fields with placeholders for images and texts (if desired also several pages).
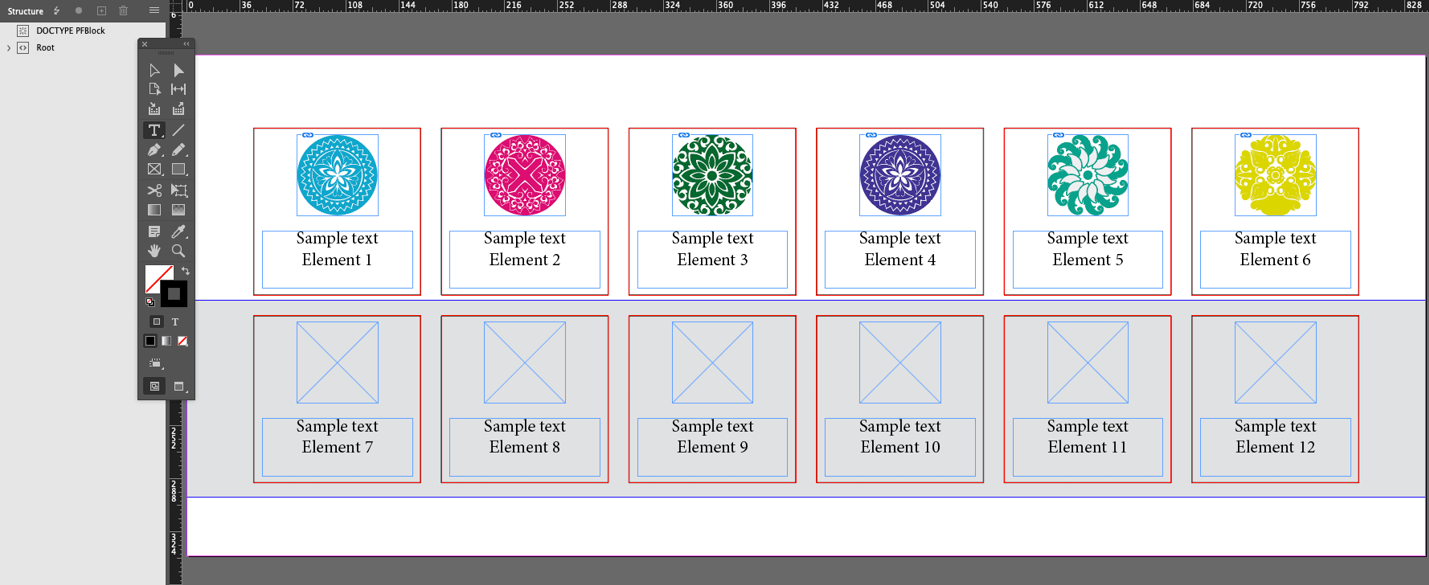
A new graphic frame is drawn for each of the areas that are later to be placed on the printed sheet as copies.
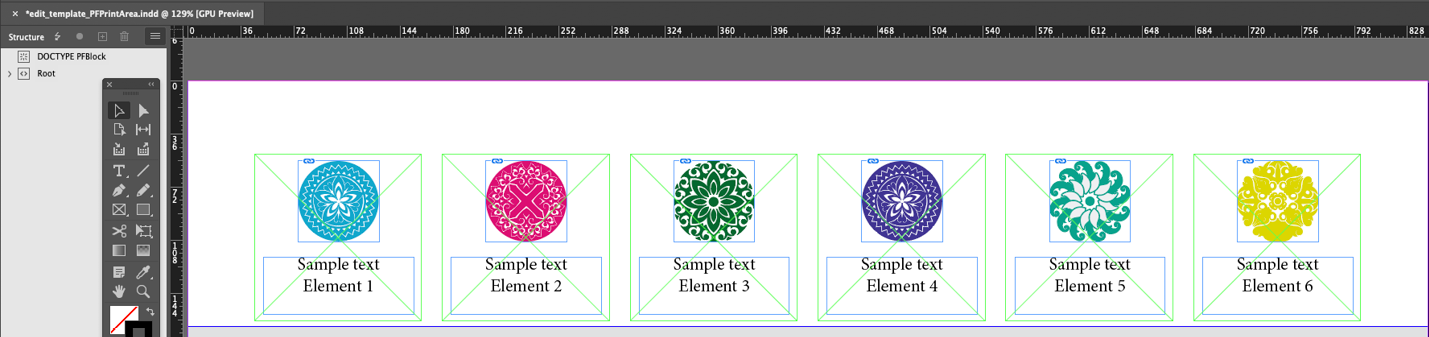
These frames are then identified with the tag PFPrintArea (right-click > Tag for Frame > PFPrintArea or via the Tag menu window) and additionally uniquely named with an identifier attribute.
Instructions avail template using PrintAreas and PFSourceView
A print sheet is created with an optional number of graphic (rectangle) frames as placeholders.
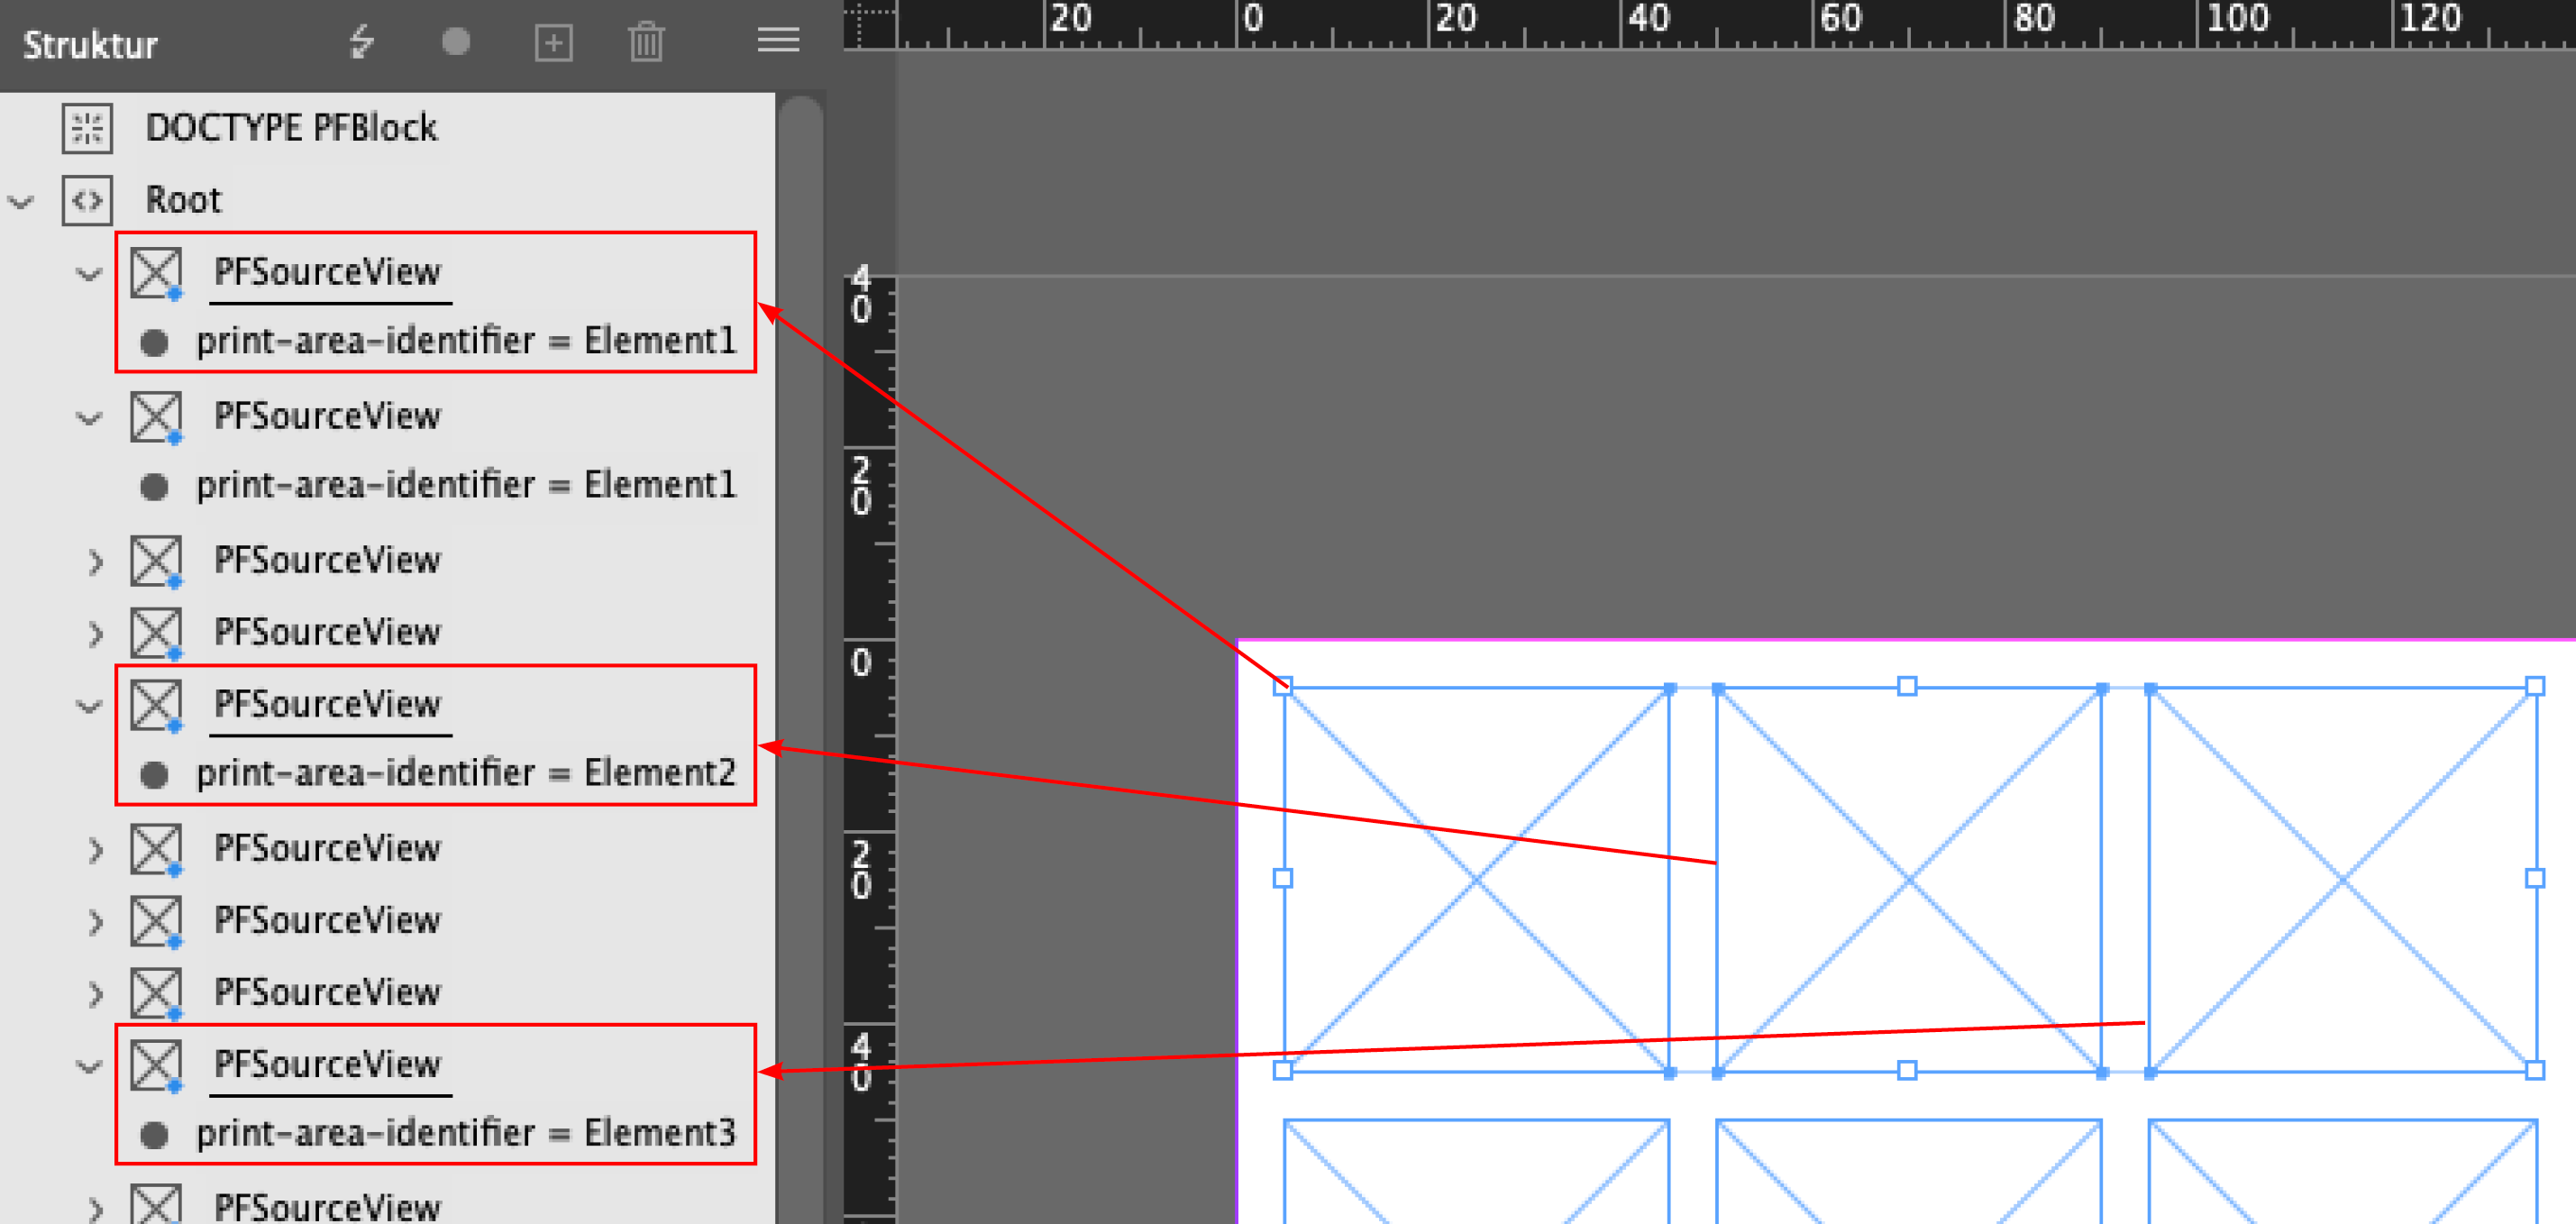
The frames are then tagged with PFSourceView (right-click > tag for frame > PFSourceView or via the tag menu window).
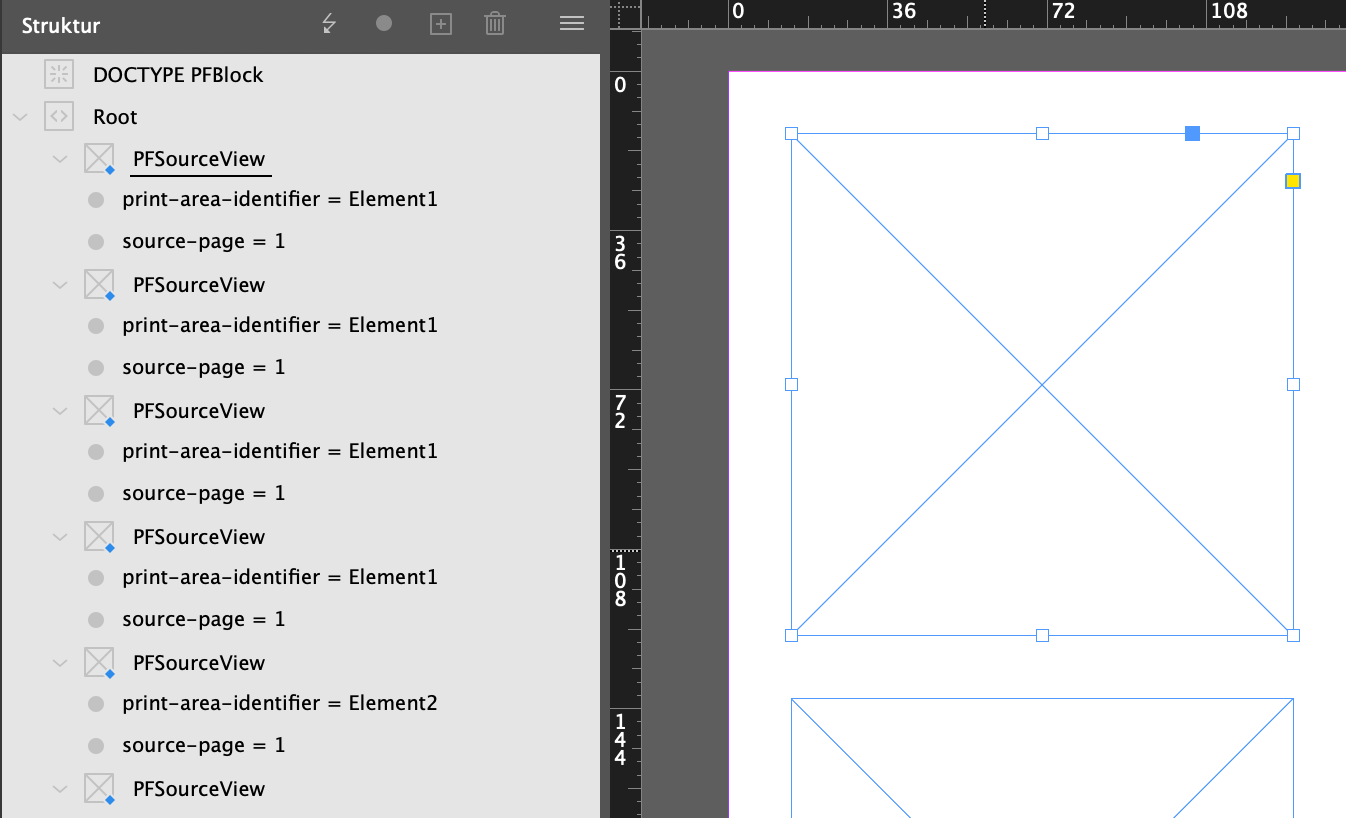
And the attribute print-area-identifier must then be set to define which content is to be placed in the frame (value = identifier of master template).
If there are several pages in the master template, the source-page attribute must also be added with the corresponding page.
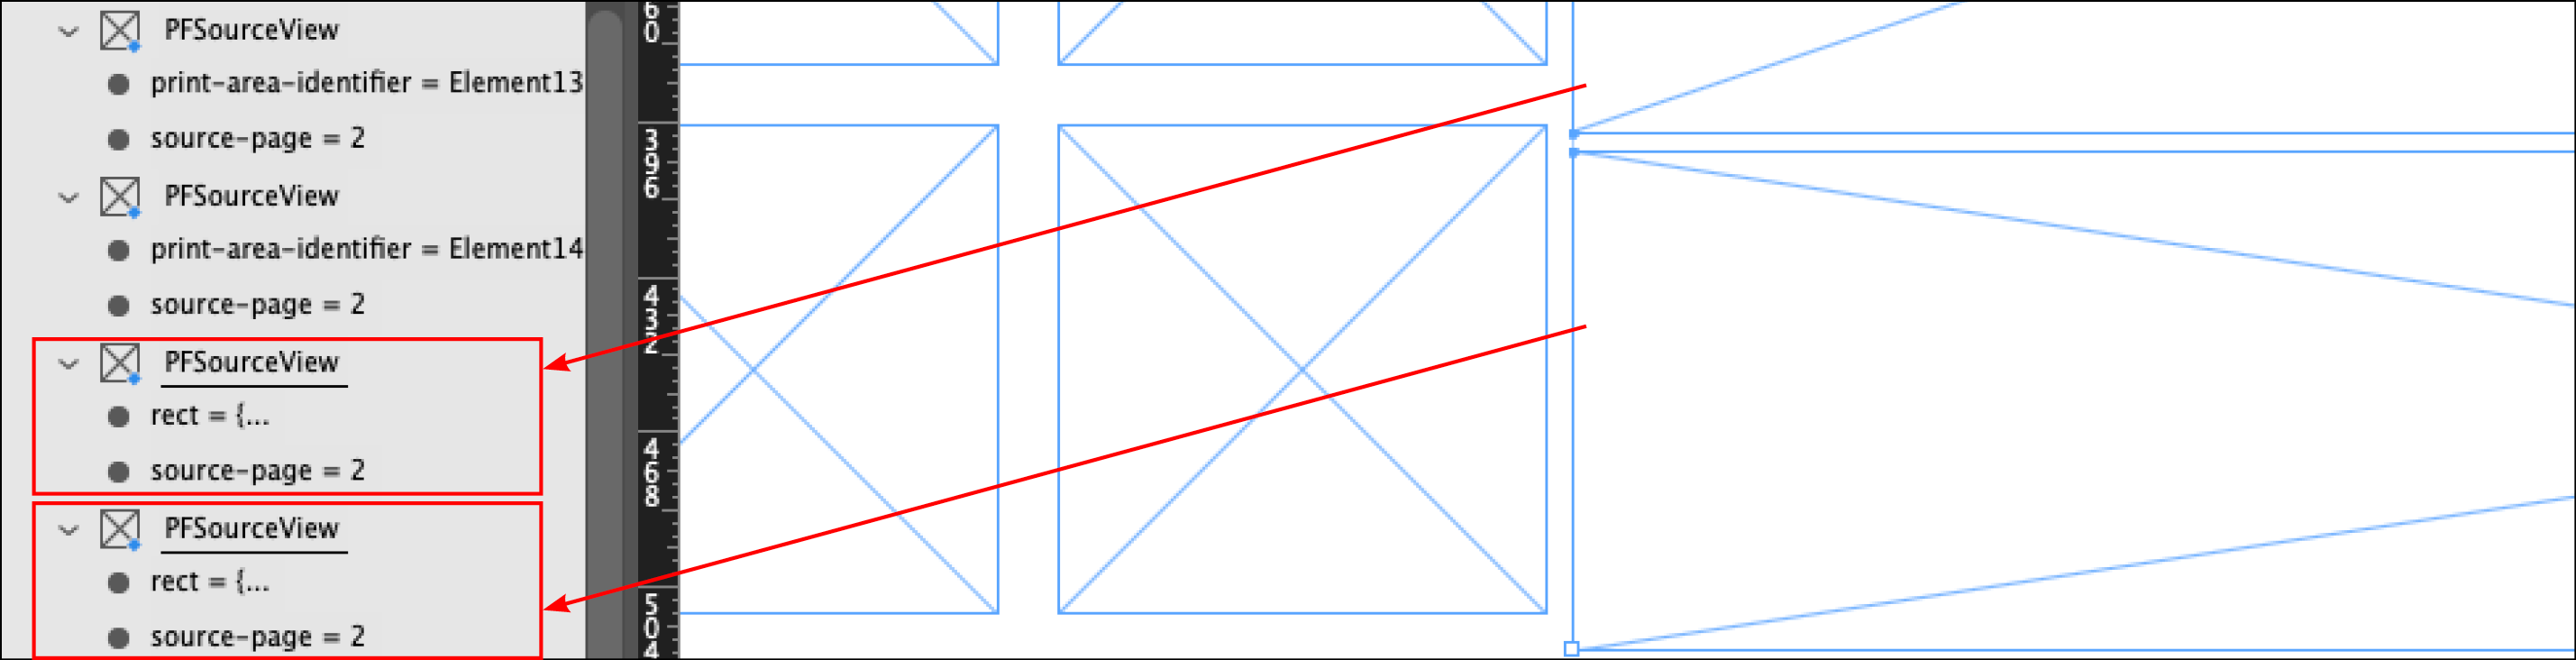
Instructions avail template without PrintAreas and using the rect attribute
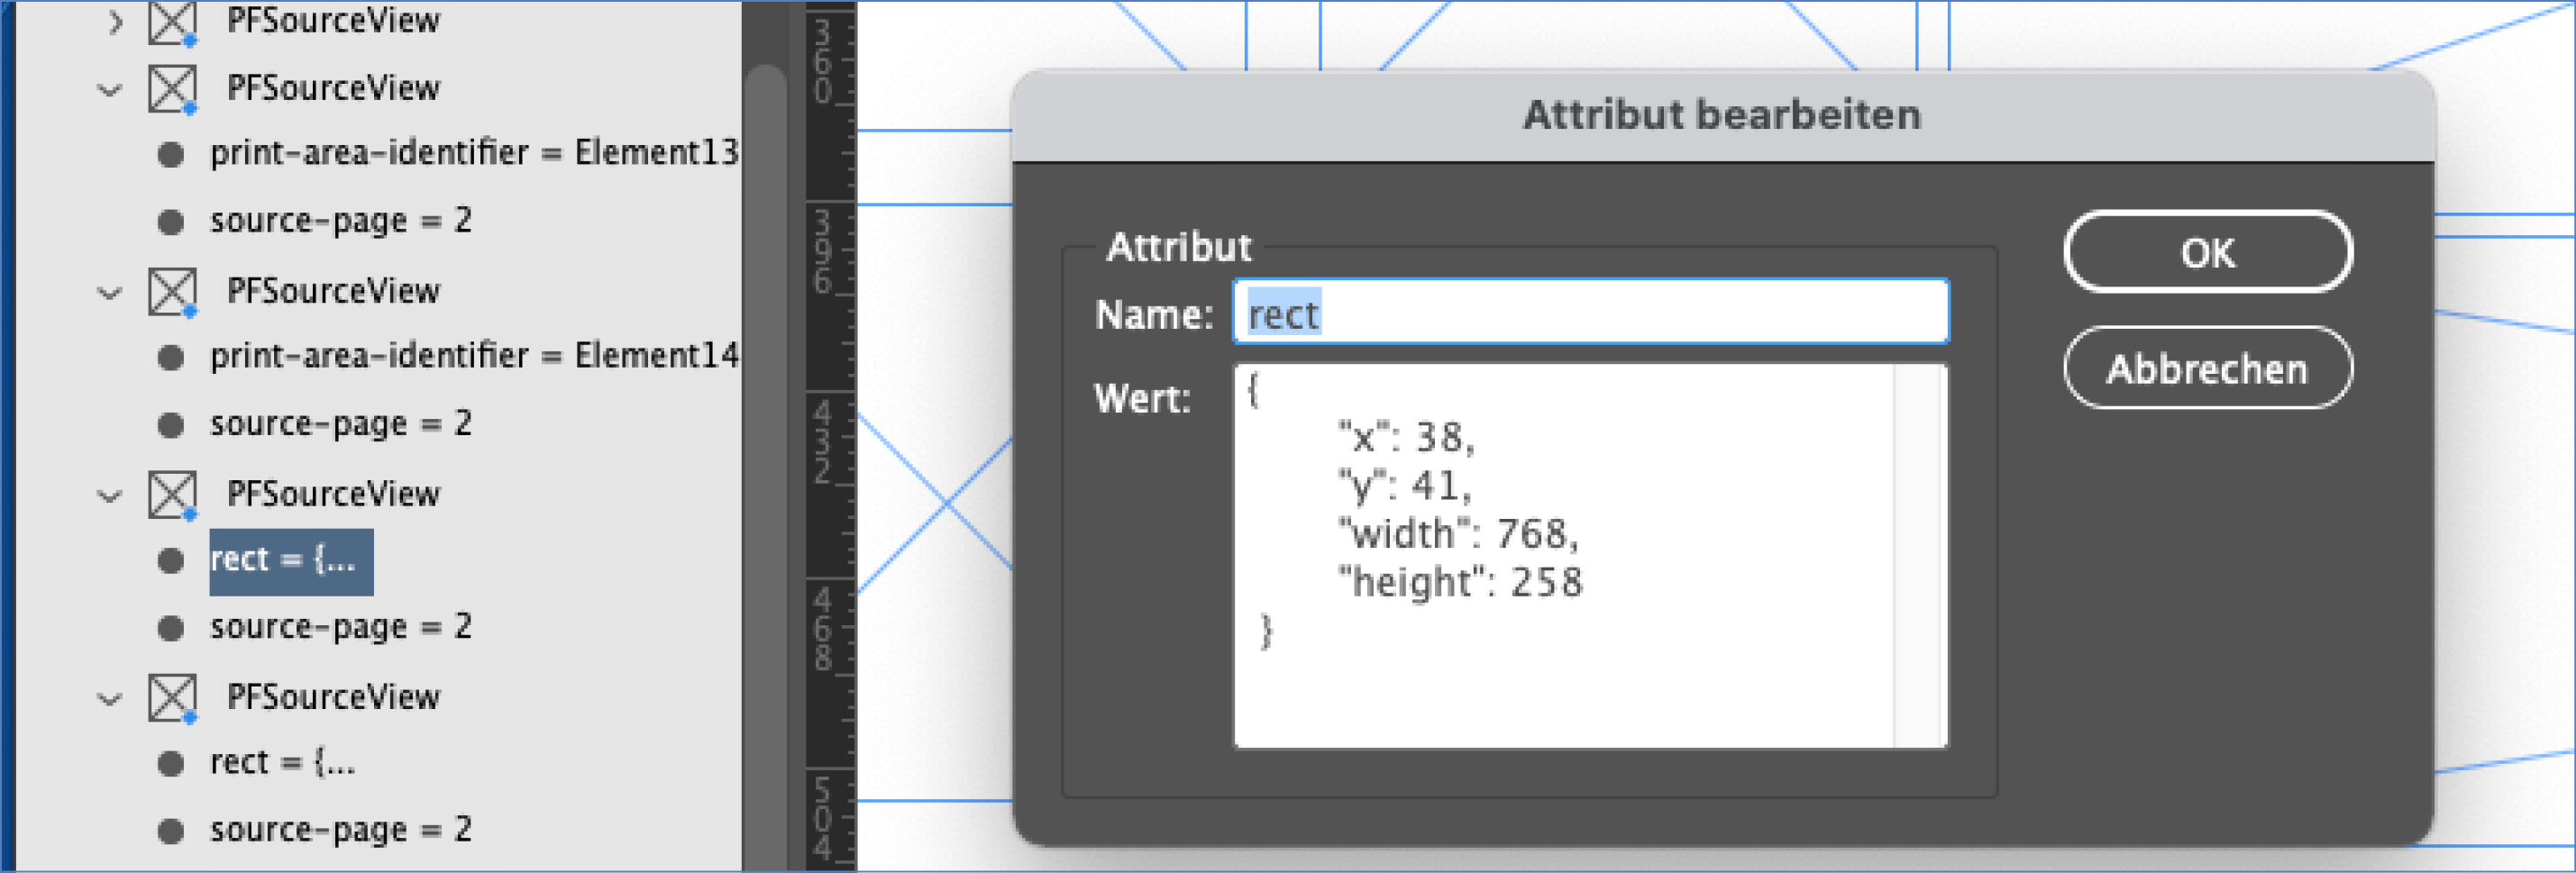
Alternatively, the rect attribute can be used. Here the areas to be placed are defined via position (x/y value) and size (width x height). The specification is made in points. If rect is used, no PrintAreas with identifiers are required (in the master template).
If the master template contains several pages, the source-page attribute must also be added to the placeholder frames.
Upload and settings
The two templates are now uploaded to the printformer in the menus Templates and Avail Templates.
(Start with availtemplate)The avail template must then be assigned to the master template. (The plus symbol displays a list of all the available avail templates, which can be selected by clicking). Via Usage you can select between preview or print PDF.
A template can be assigned to a maximum of two avail templates, each for preview or print PDF.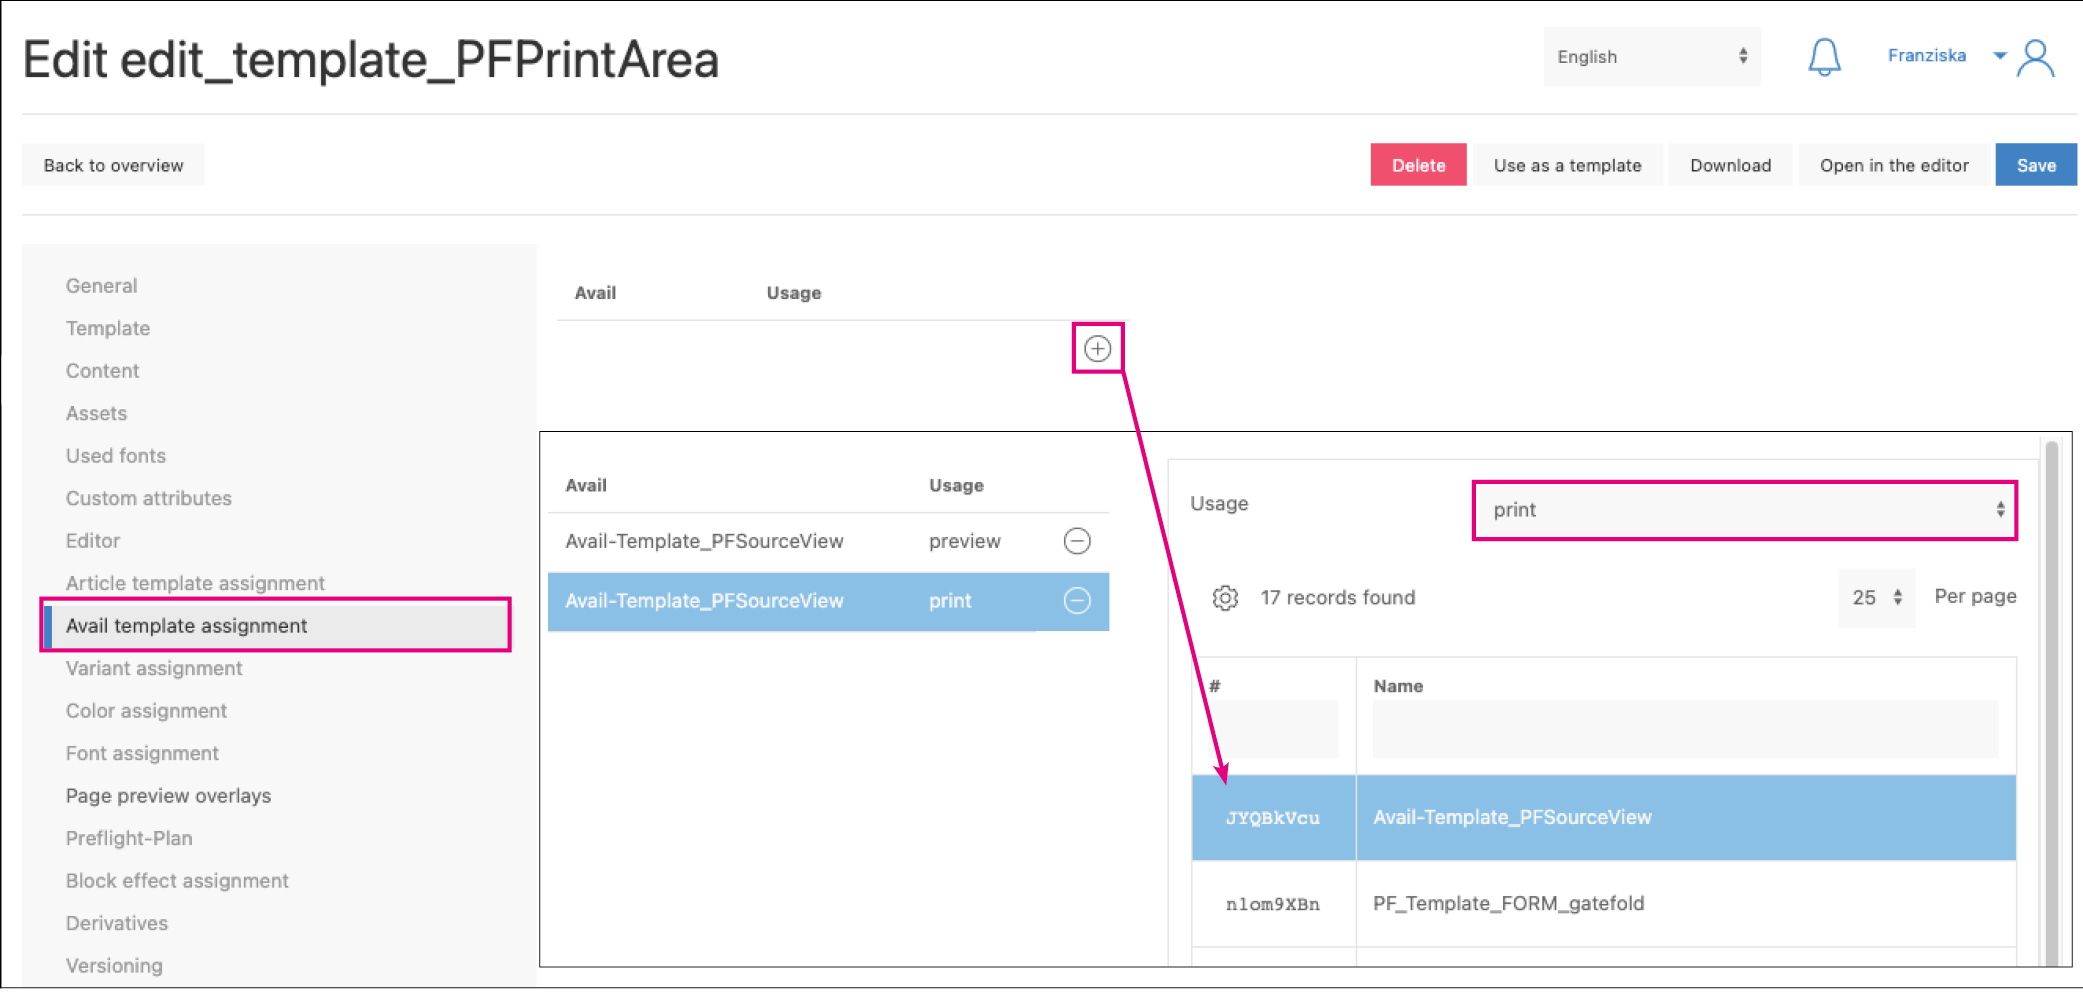
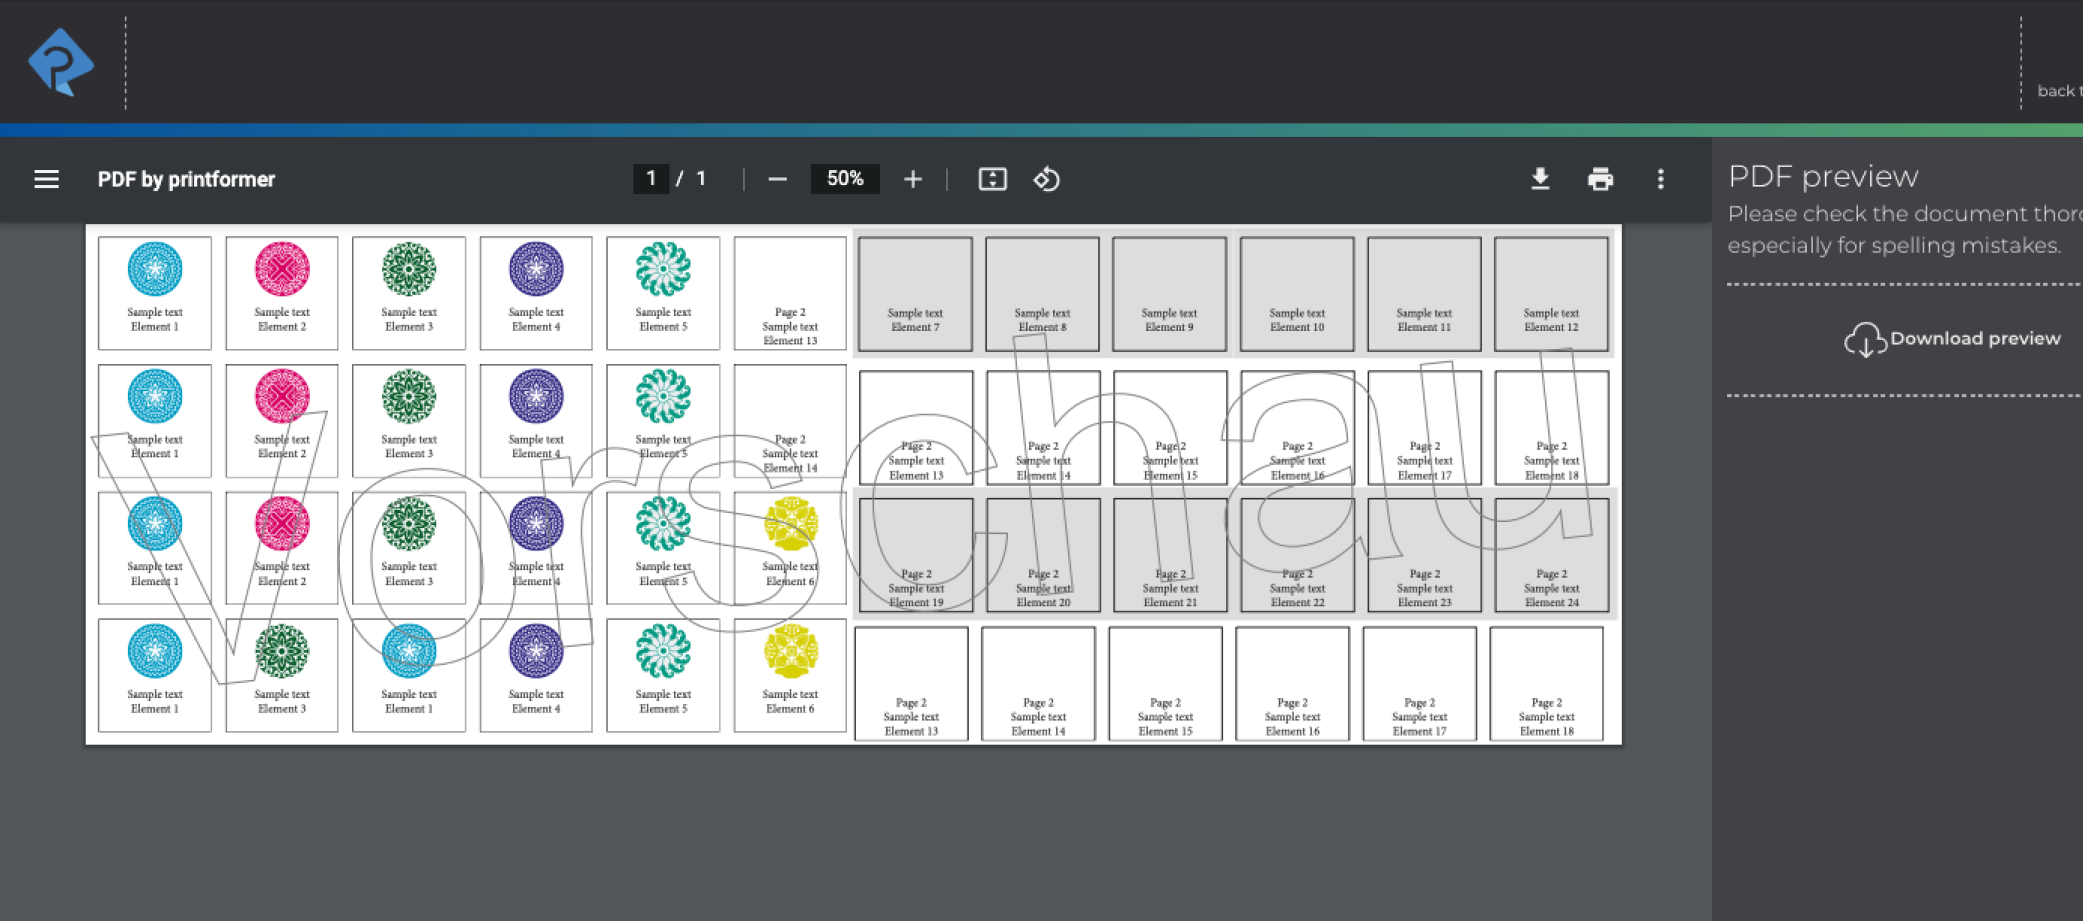
After saving the template, you can open it in the editor as usual and individualize. On the PDFs, all elements are then placed on a printing form as specified in the avail template.

Attribute | ||
|
The values listed under name are individual attributes of the tag PFContainer and are entered as name, the possible values are listed in the second column. If the cell is empty, the value is freely selectable. | ||
|---|---|---|
vame | value (Limitations) | usage |
PFPrintArea (Editor-Template) | ||
identifier | unique name of the print area (PFPrintArea block) | |
PFSourceView (Nutzentemplate) | ||
print-area-identifier | avail template: Identifier of the PFPrintArea block from the master template. | |
rect | Valid JSON object with numeric values for the x, y, width, and height properties. | Rectangle that describes the section of the source page to be displayed. (X/Y coordinates from the editor template as well as width and height) Point is used as the unit (in the InDesign document, the unit can be changed by right-clicking on the ruler) If the placeholder frame is smaller than the area to be inserted, it is placed scaled-down. Example: If the rect and print-area-identifier attributes are present on the same block, the print-area-identifier attribute has priority. |
source-page | Ganzzahl | This attribute is mandatory for multi-page editor templates: Page number (starting with 1) of the page on which the desired PrintArea is located. |