Editor jump
To get a Editor URL and jump into the editor we need to go through the following steps:
Create user
Create draft for template
Generate JWT
Create url to jump into the editor
Add callback URL and callback_cancel URL to JWT to extend redirection options
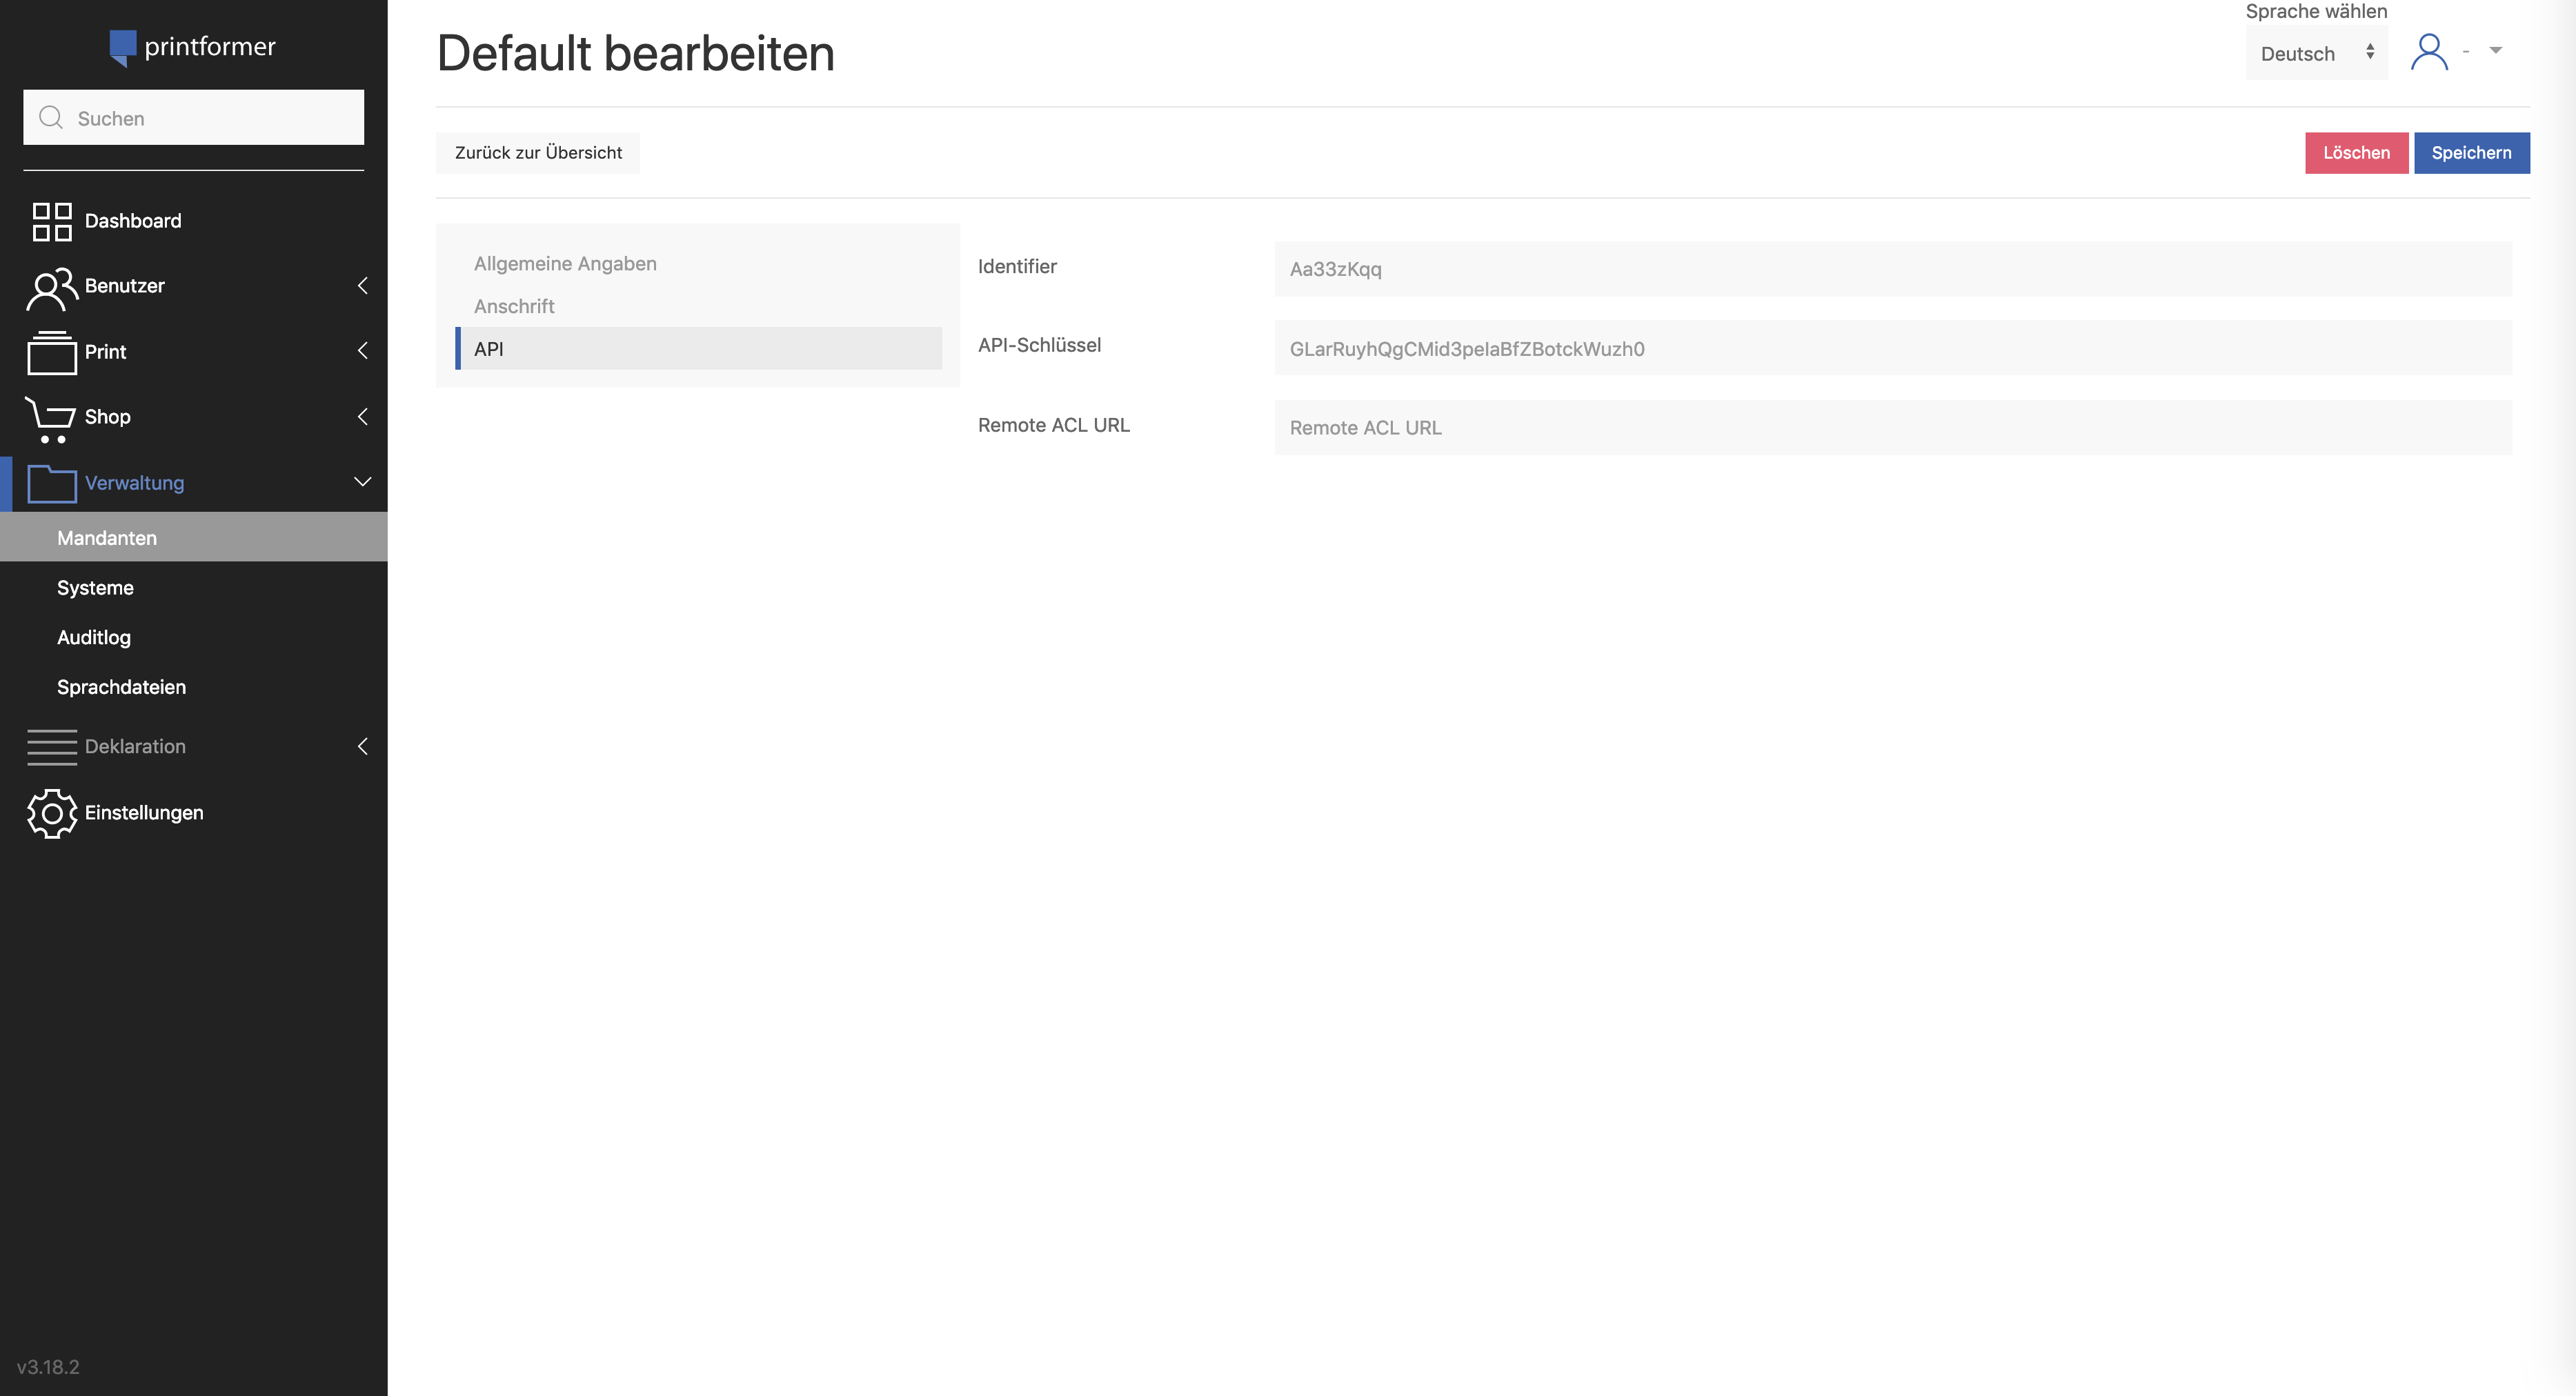
For this example you need a API-Key and Identifier that you can find after printformer login in your client API section.
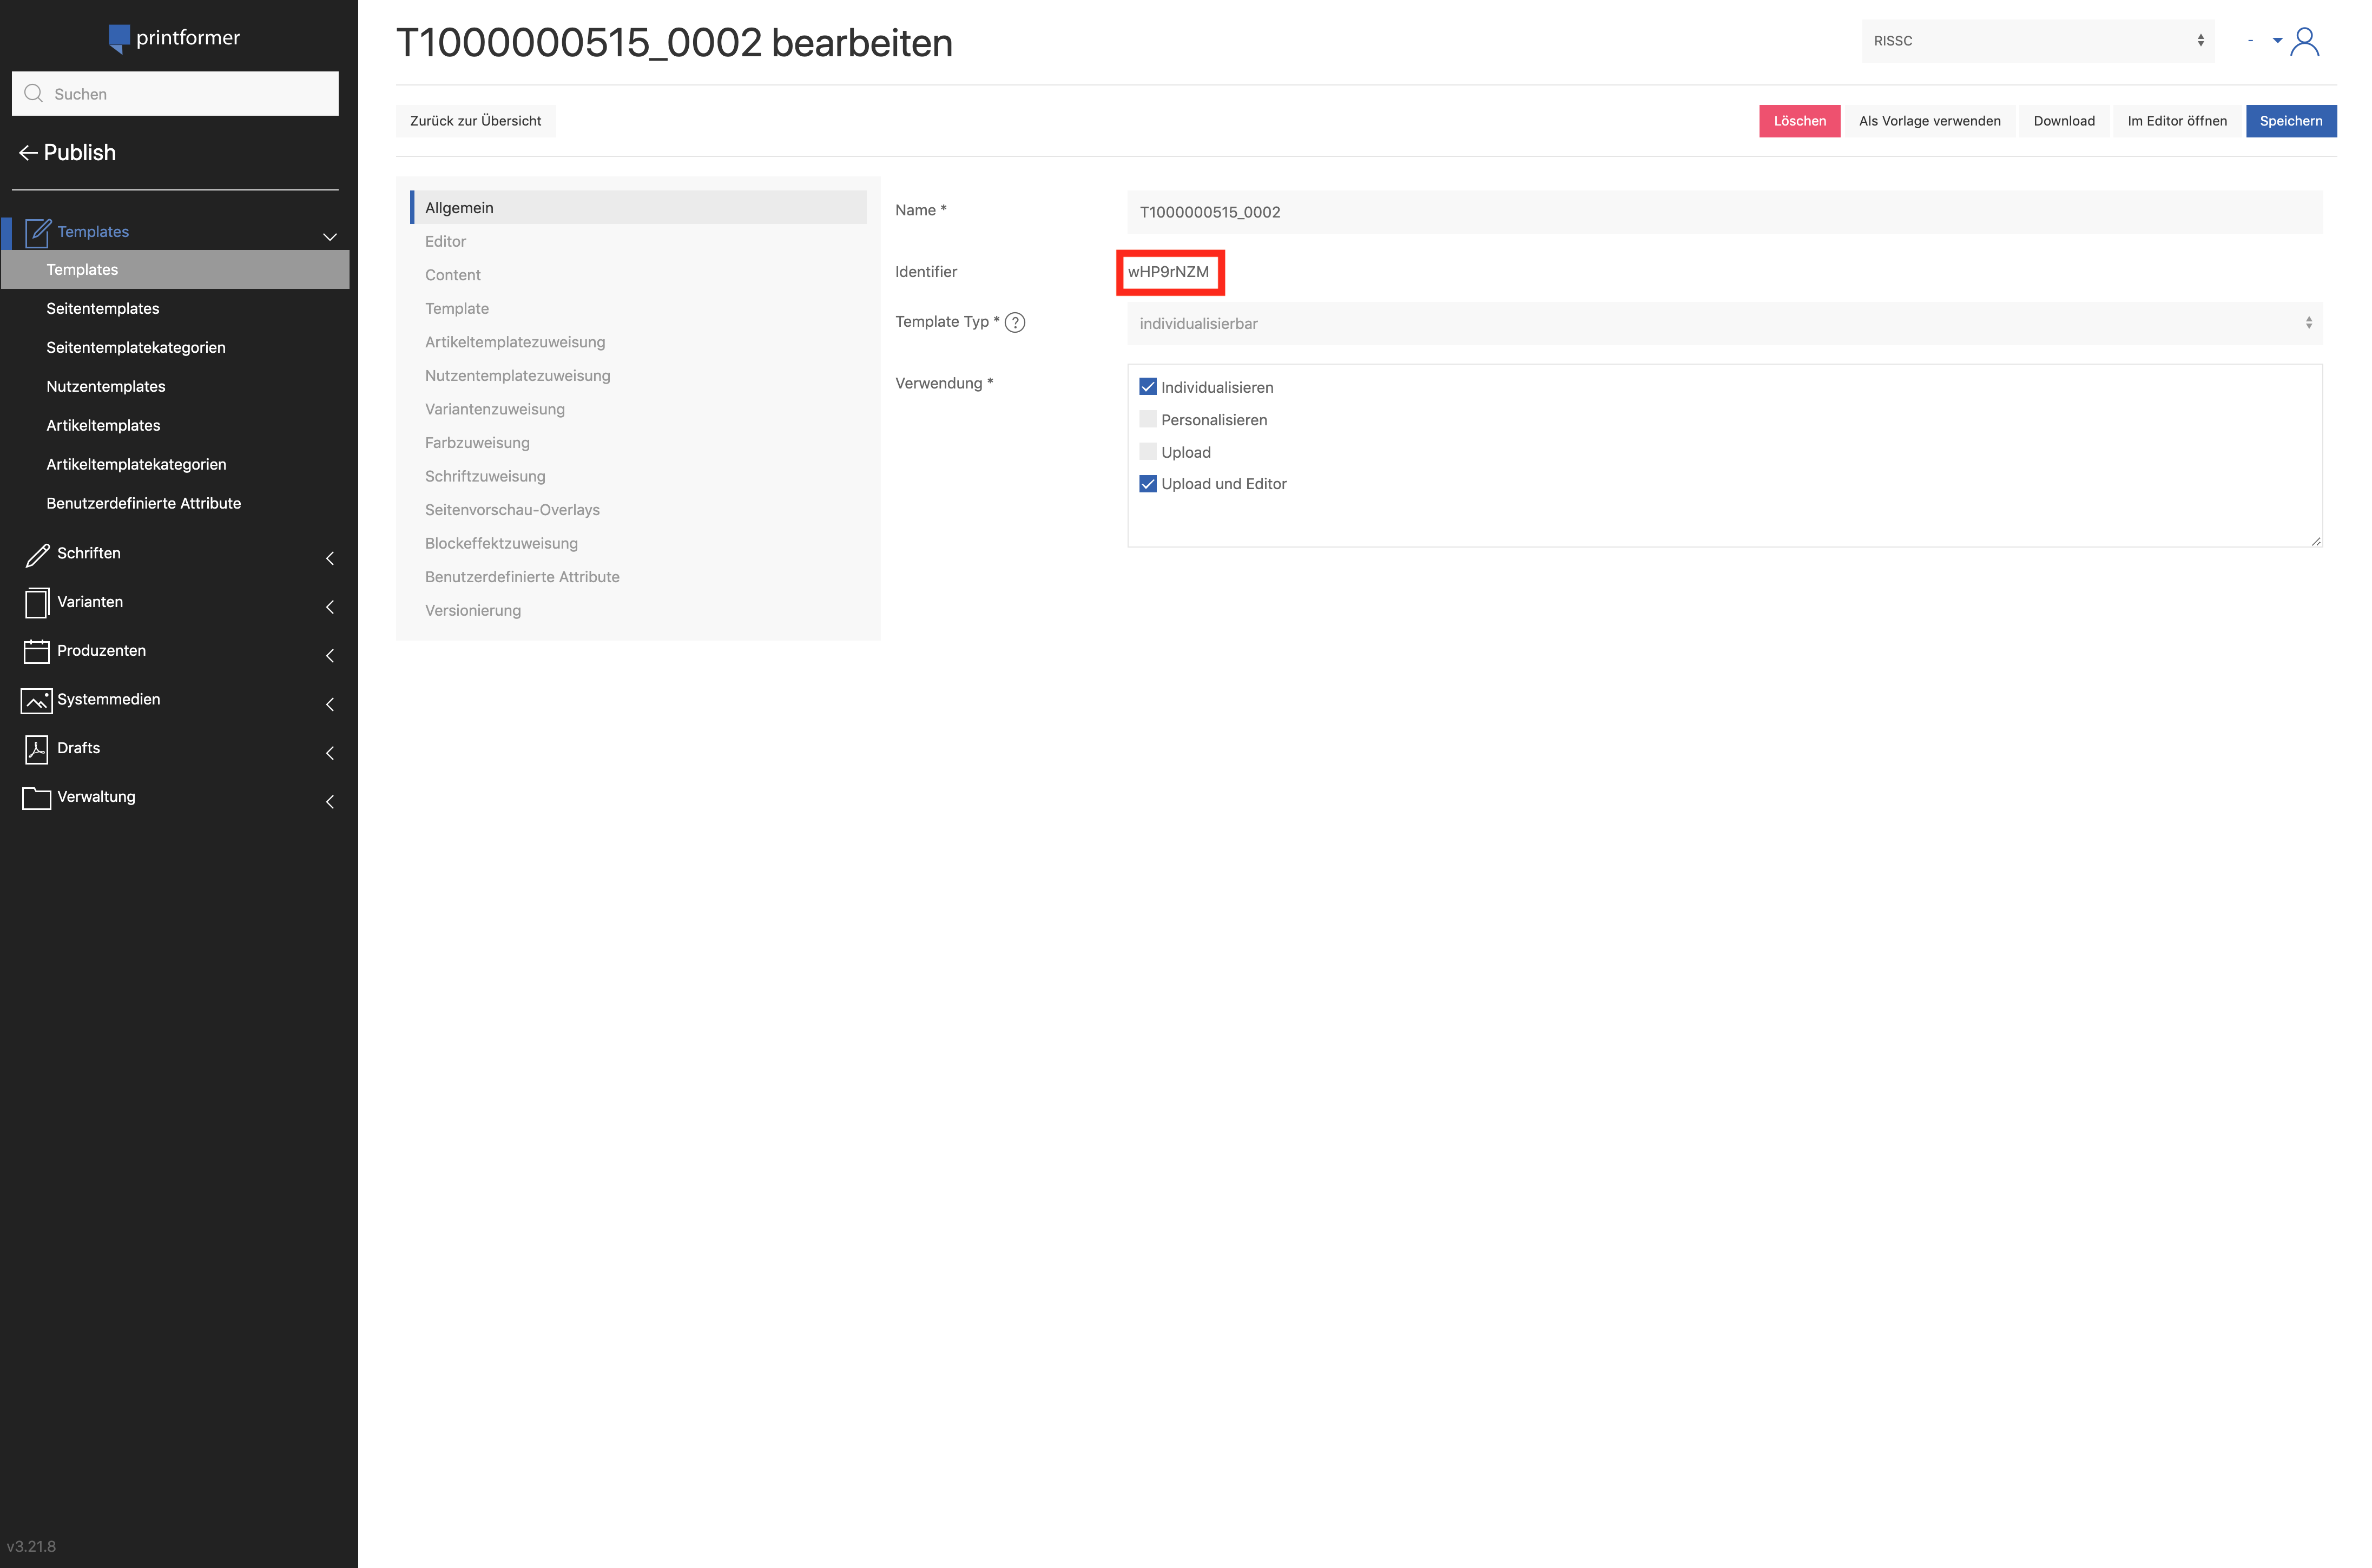
Also we need a template identifier that you can find in the template detail page that you can find under »Print« → »Templates« → »Select Template«. You also can call method “api-ext/template” to get all templates with all informations.
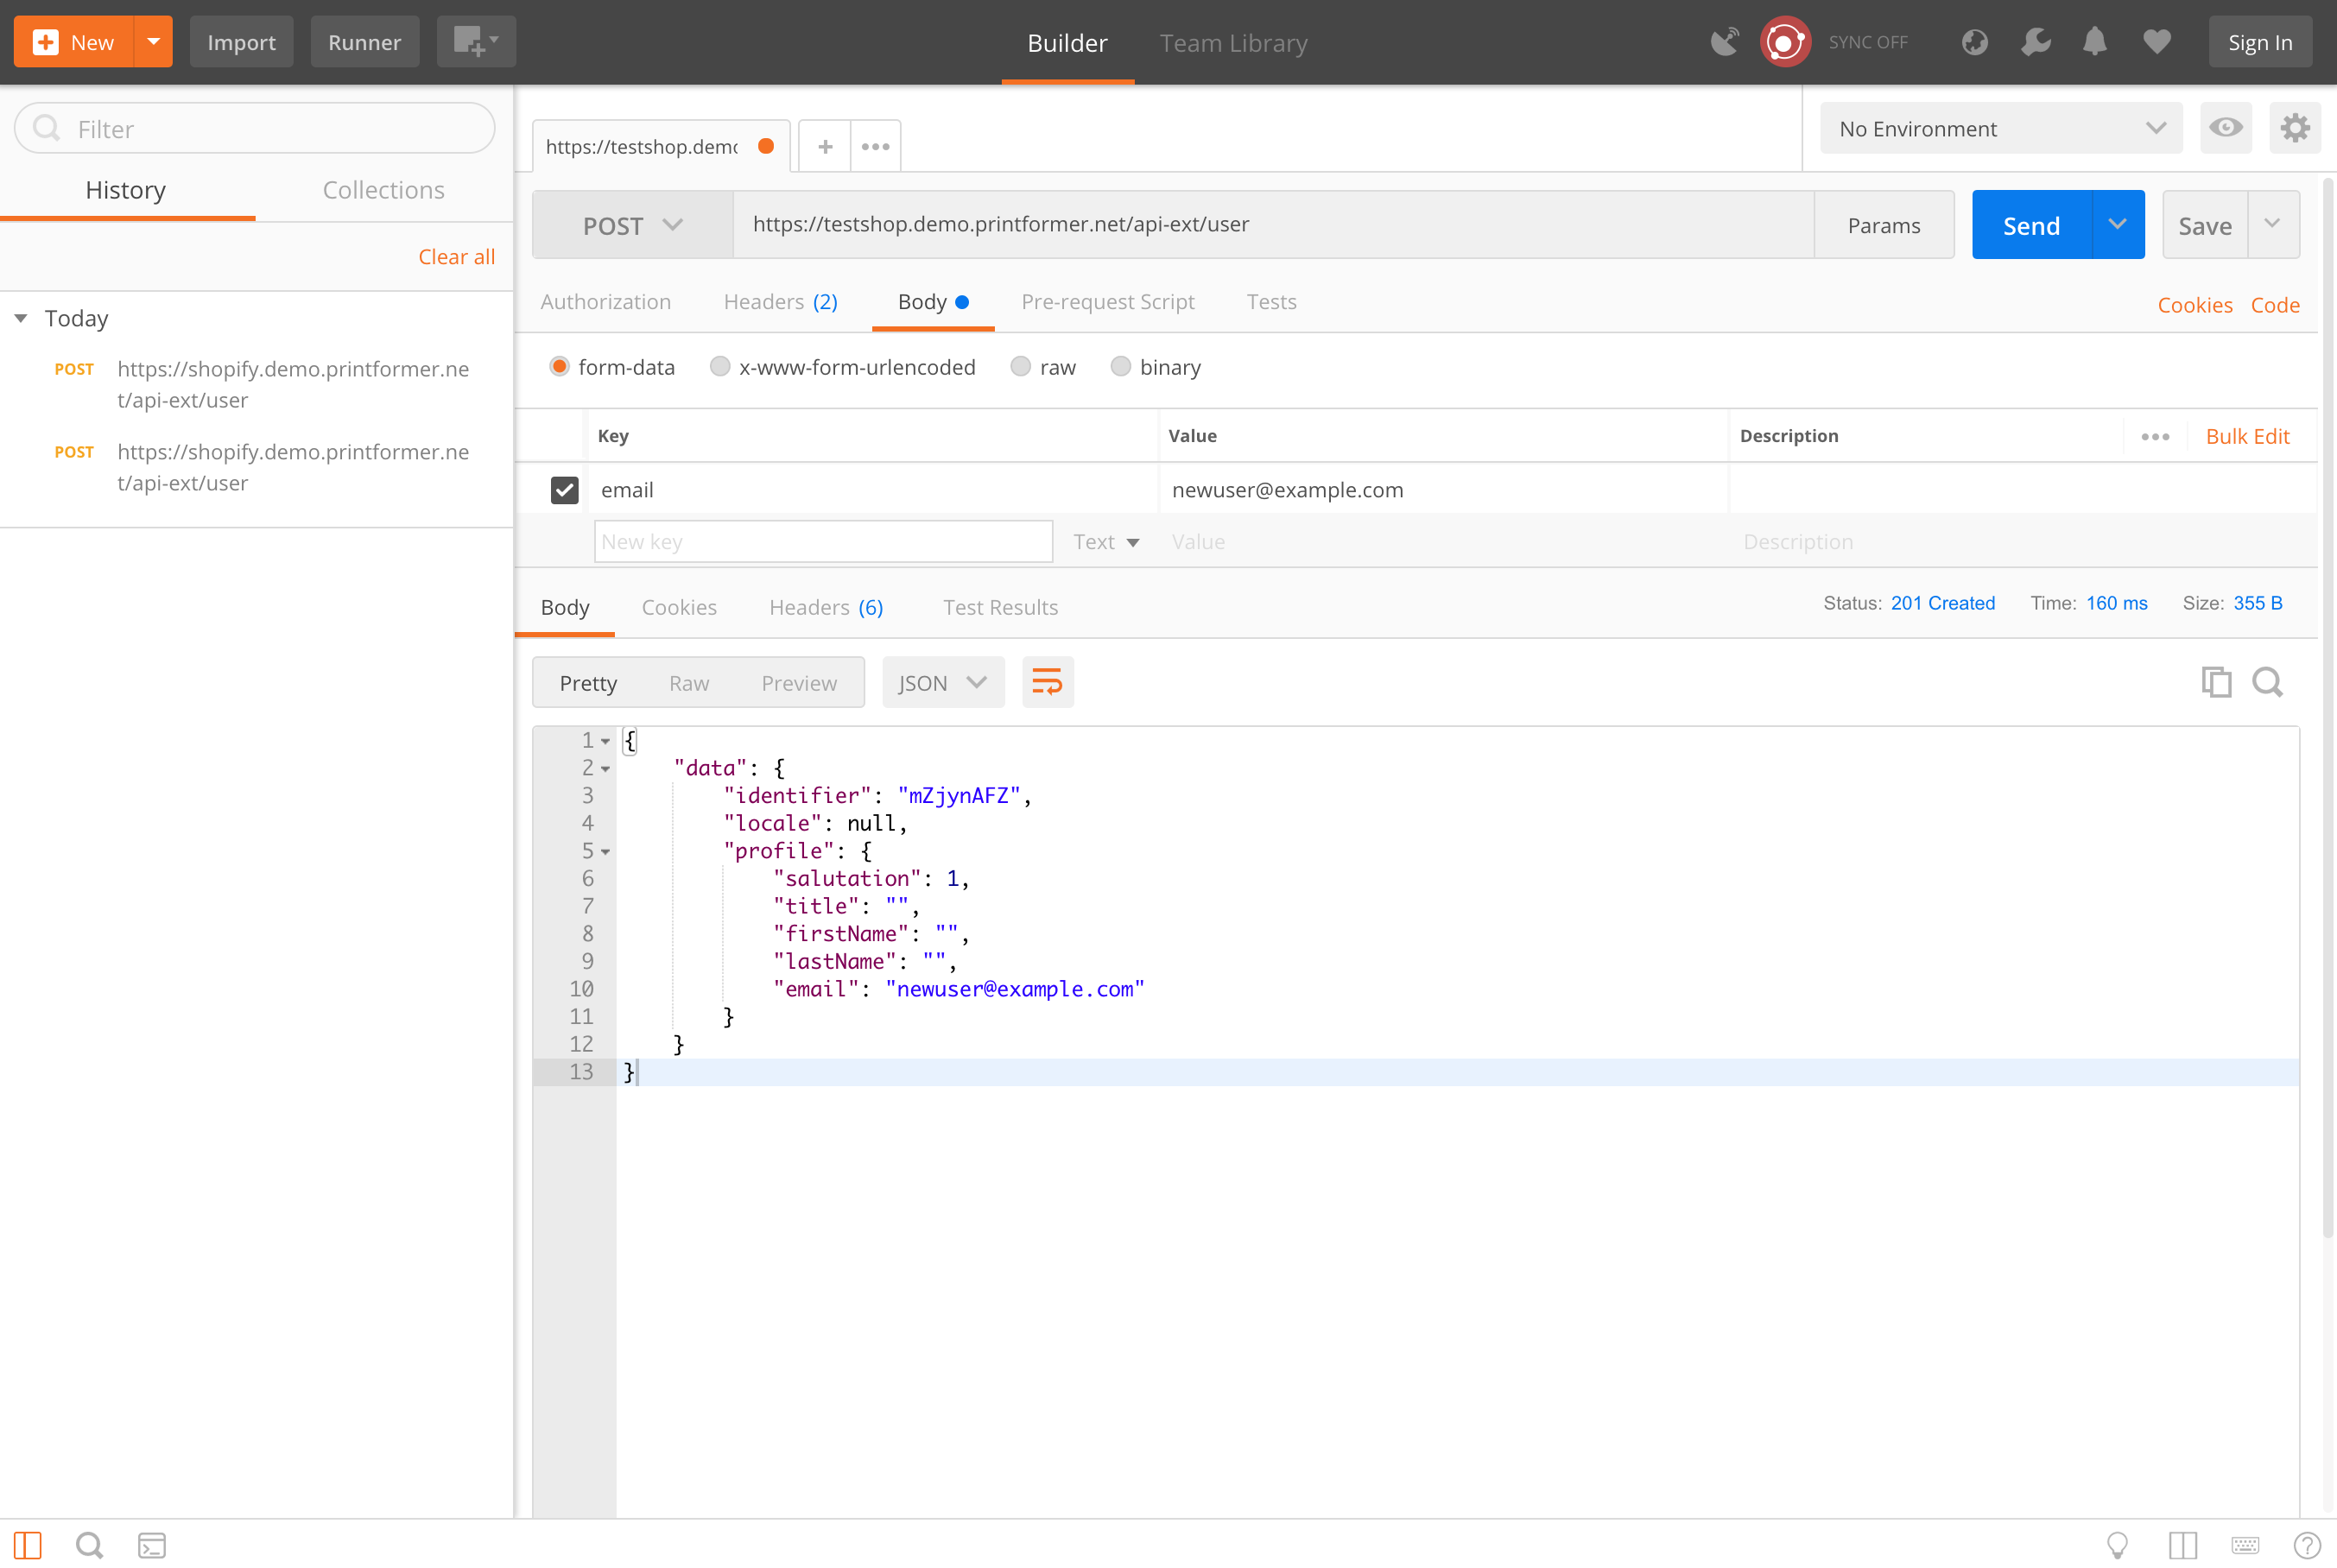
1. Create user
First we call Method “api-ext/user” with Postman and add authorization header that contains a combination of the word Bearer and API Key which is separated by a space.
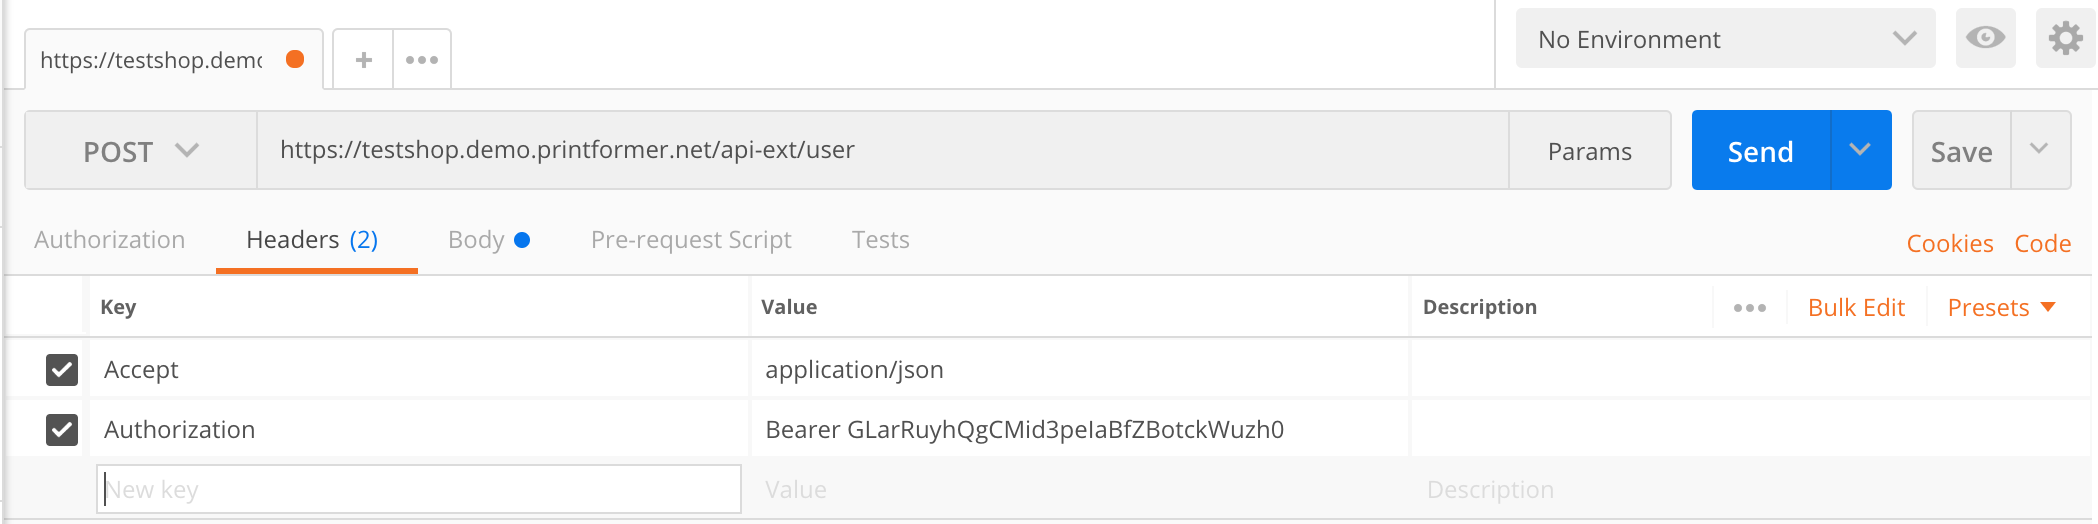
We also add a email address to our user and post our request to method “api-ext/user”. Printformer give us a response with a user identifier that we need in the next steps.
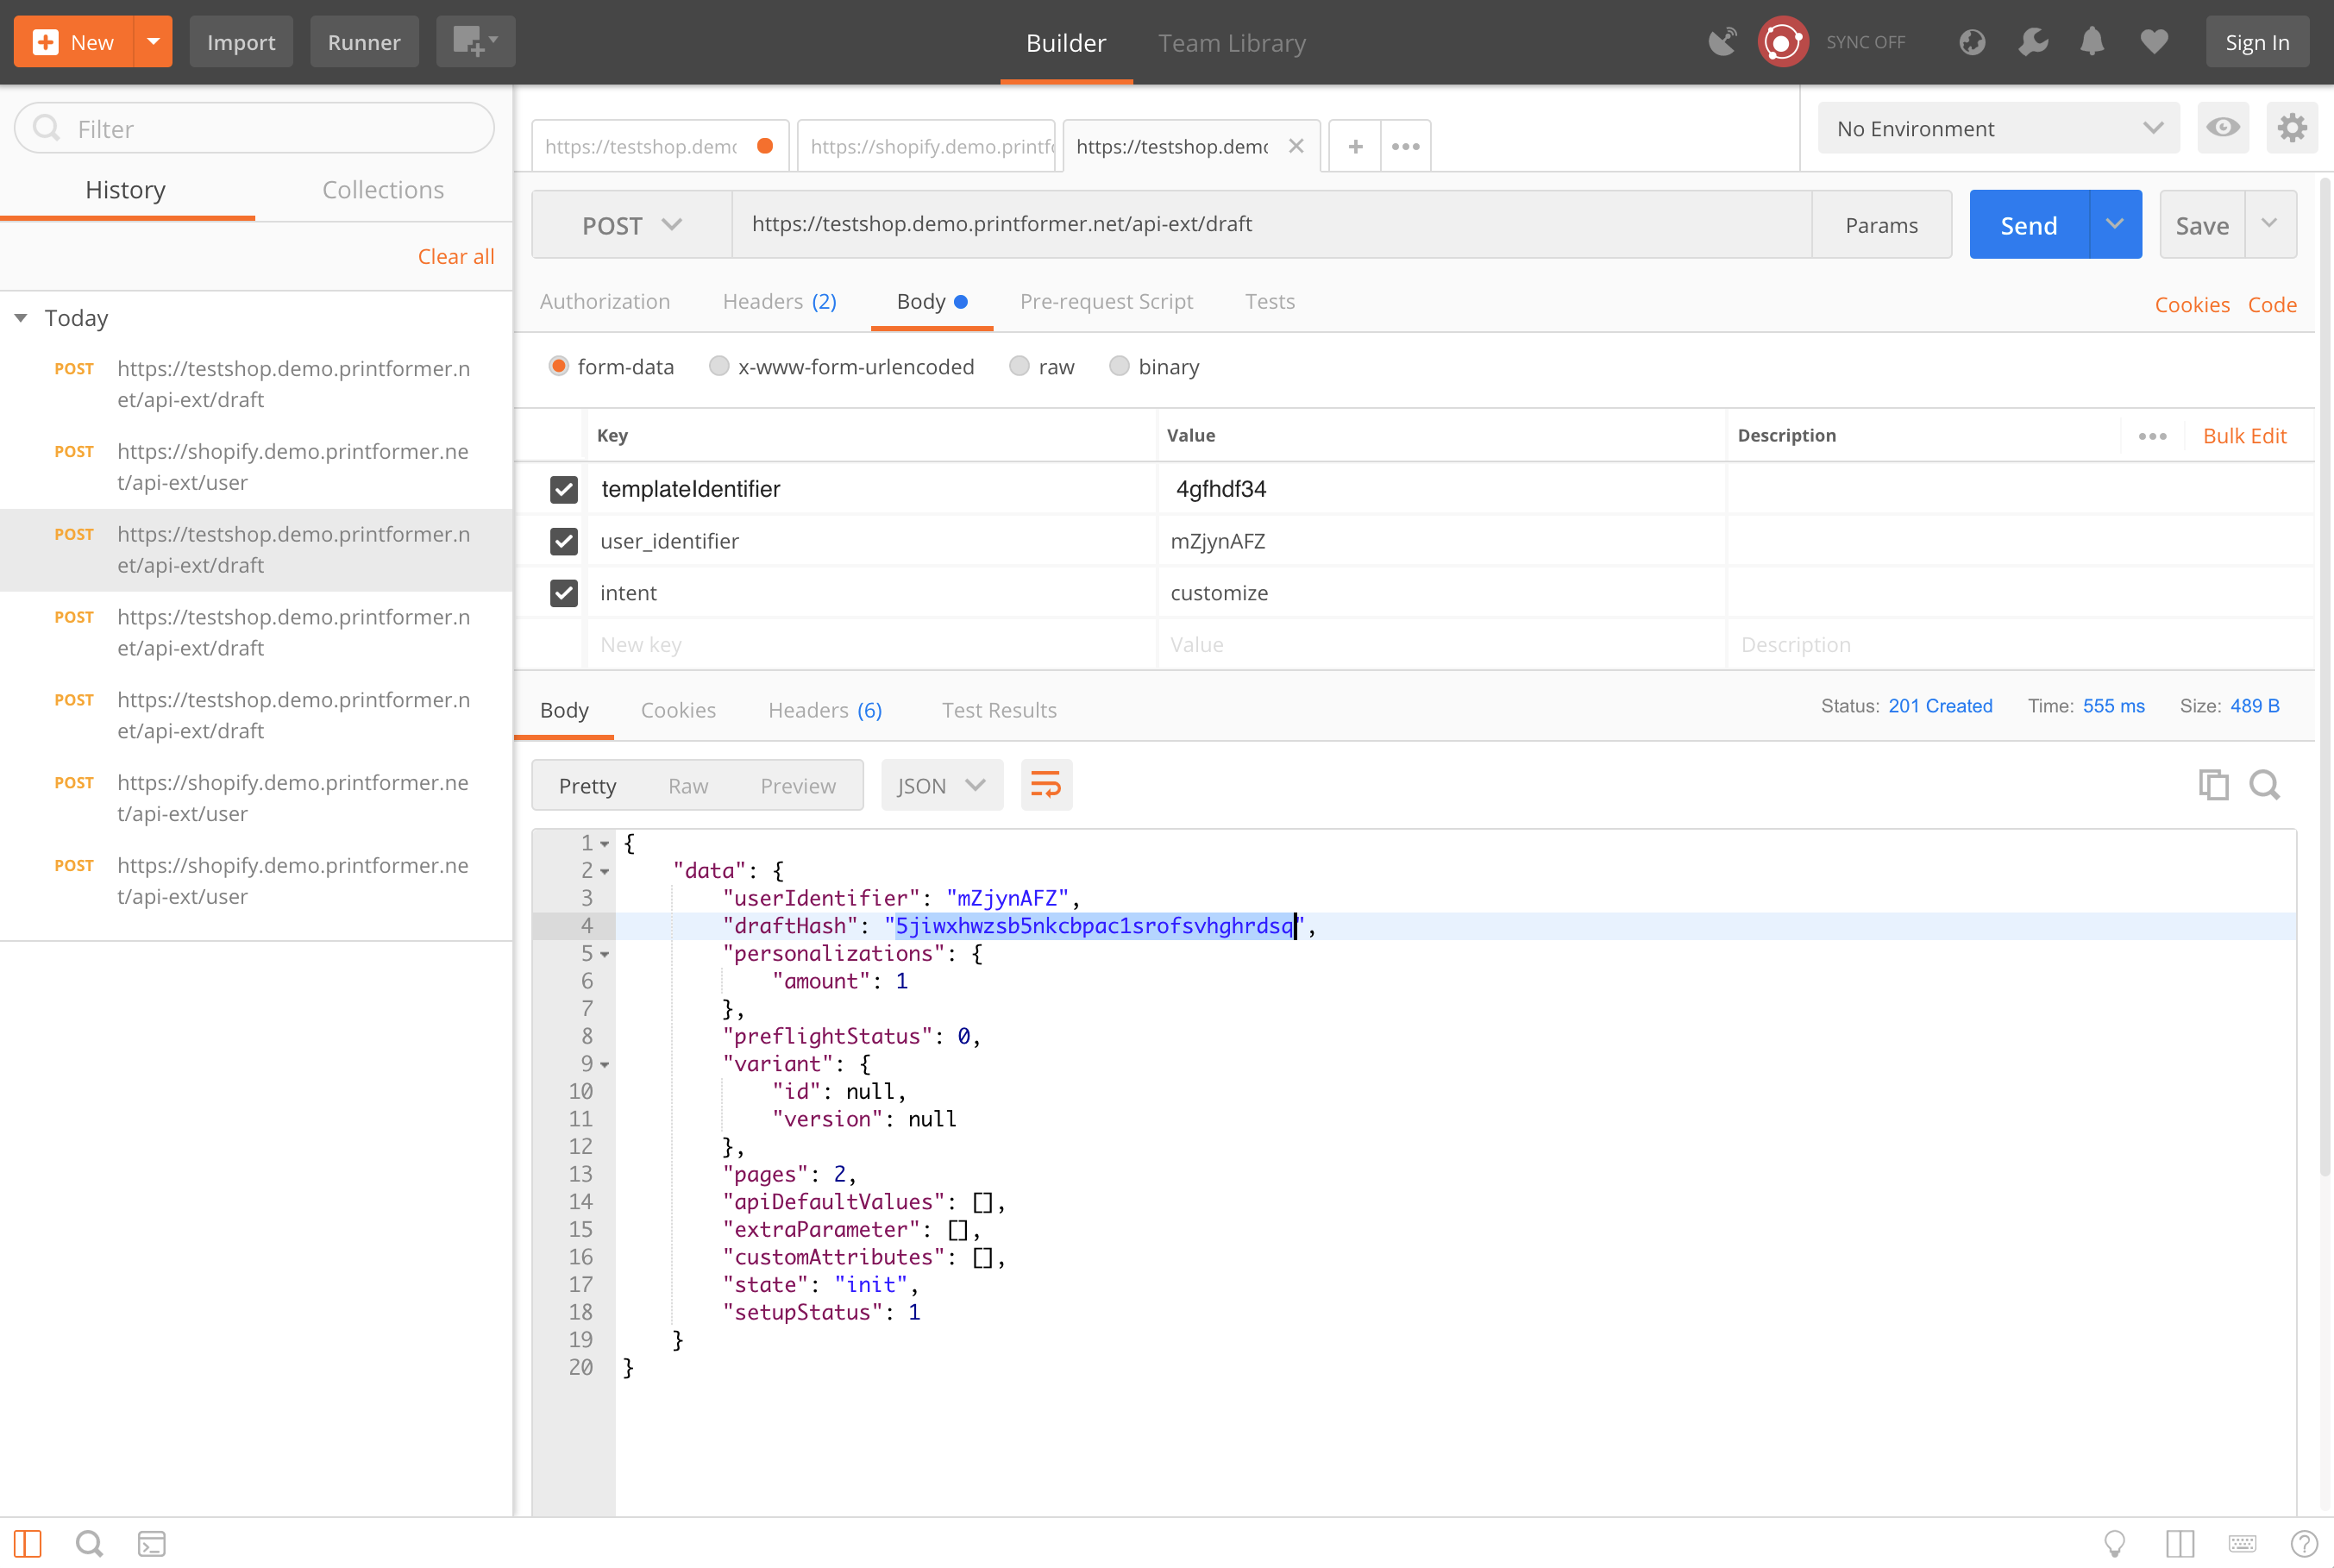
2. Create draft for template
To create a draft we add authorization header and the parameters templateIdentifier, user_identifier and intent and request Method “api-ext/draft”. Printformer give us a response with a draft hash that we need in the next step.
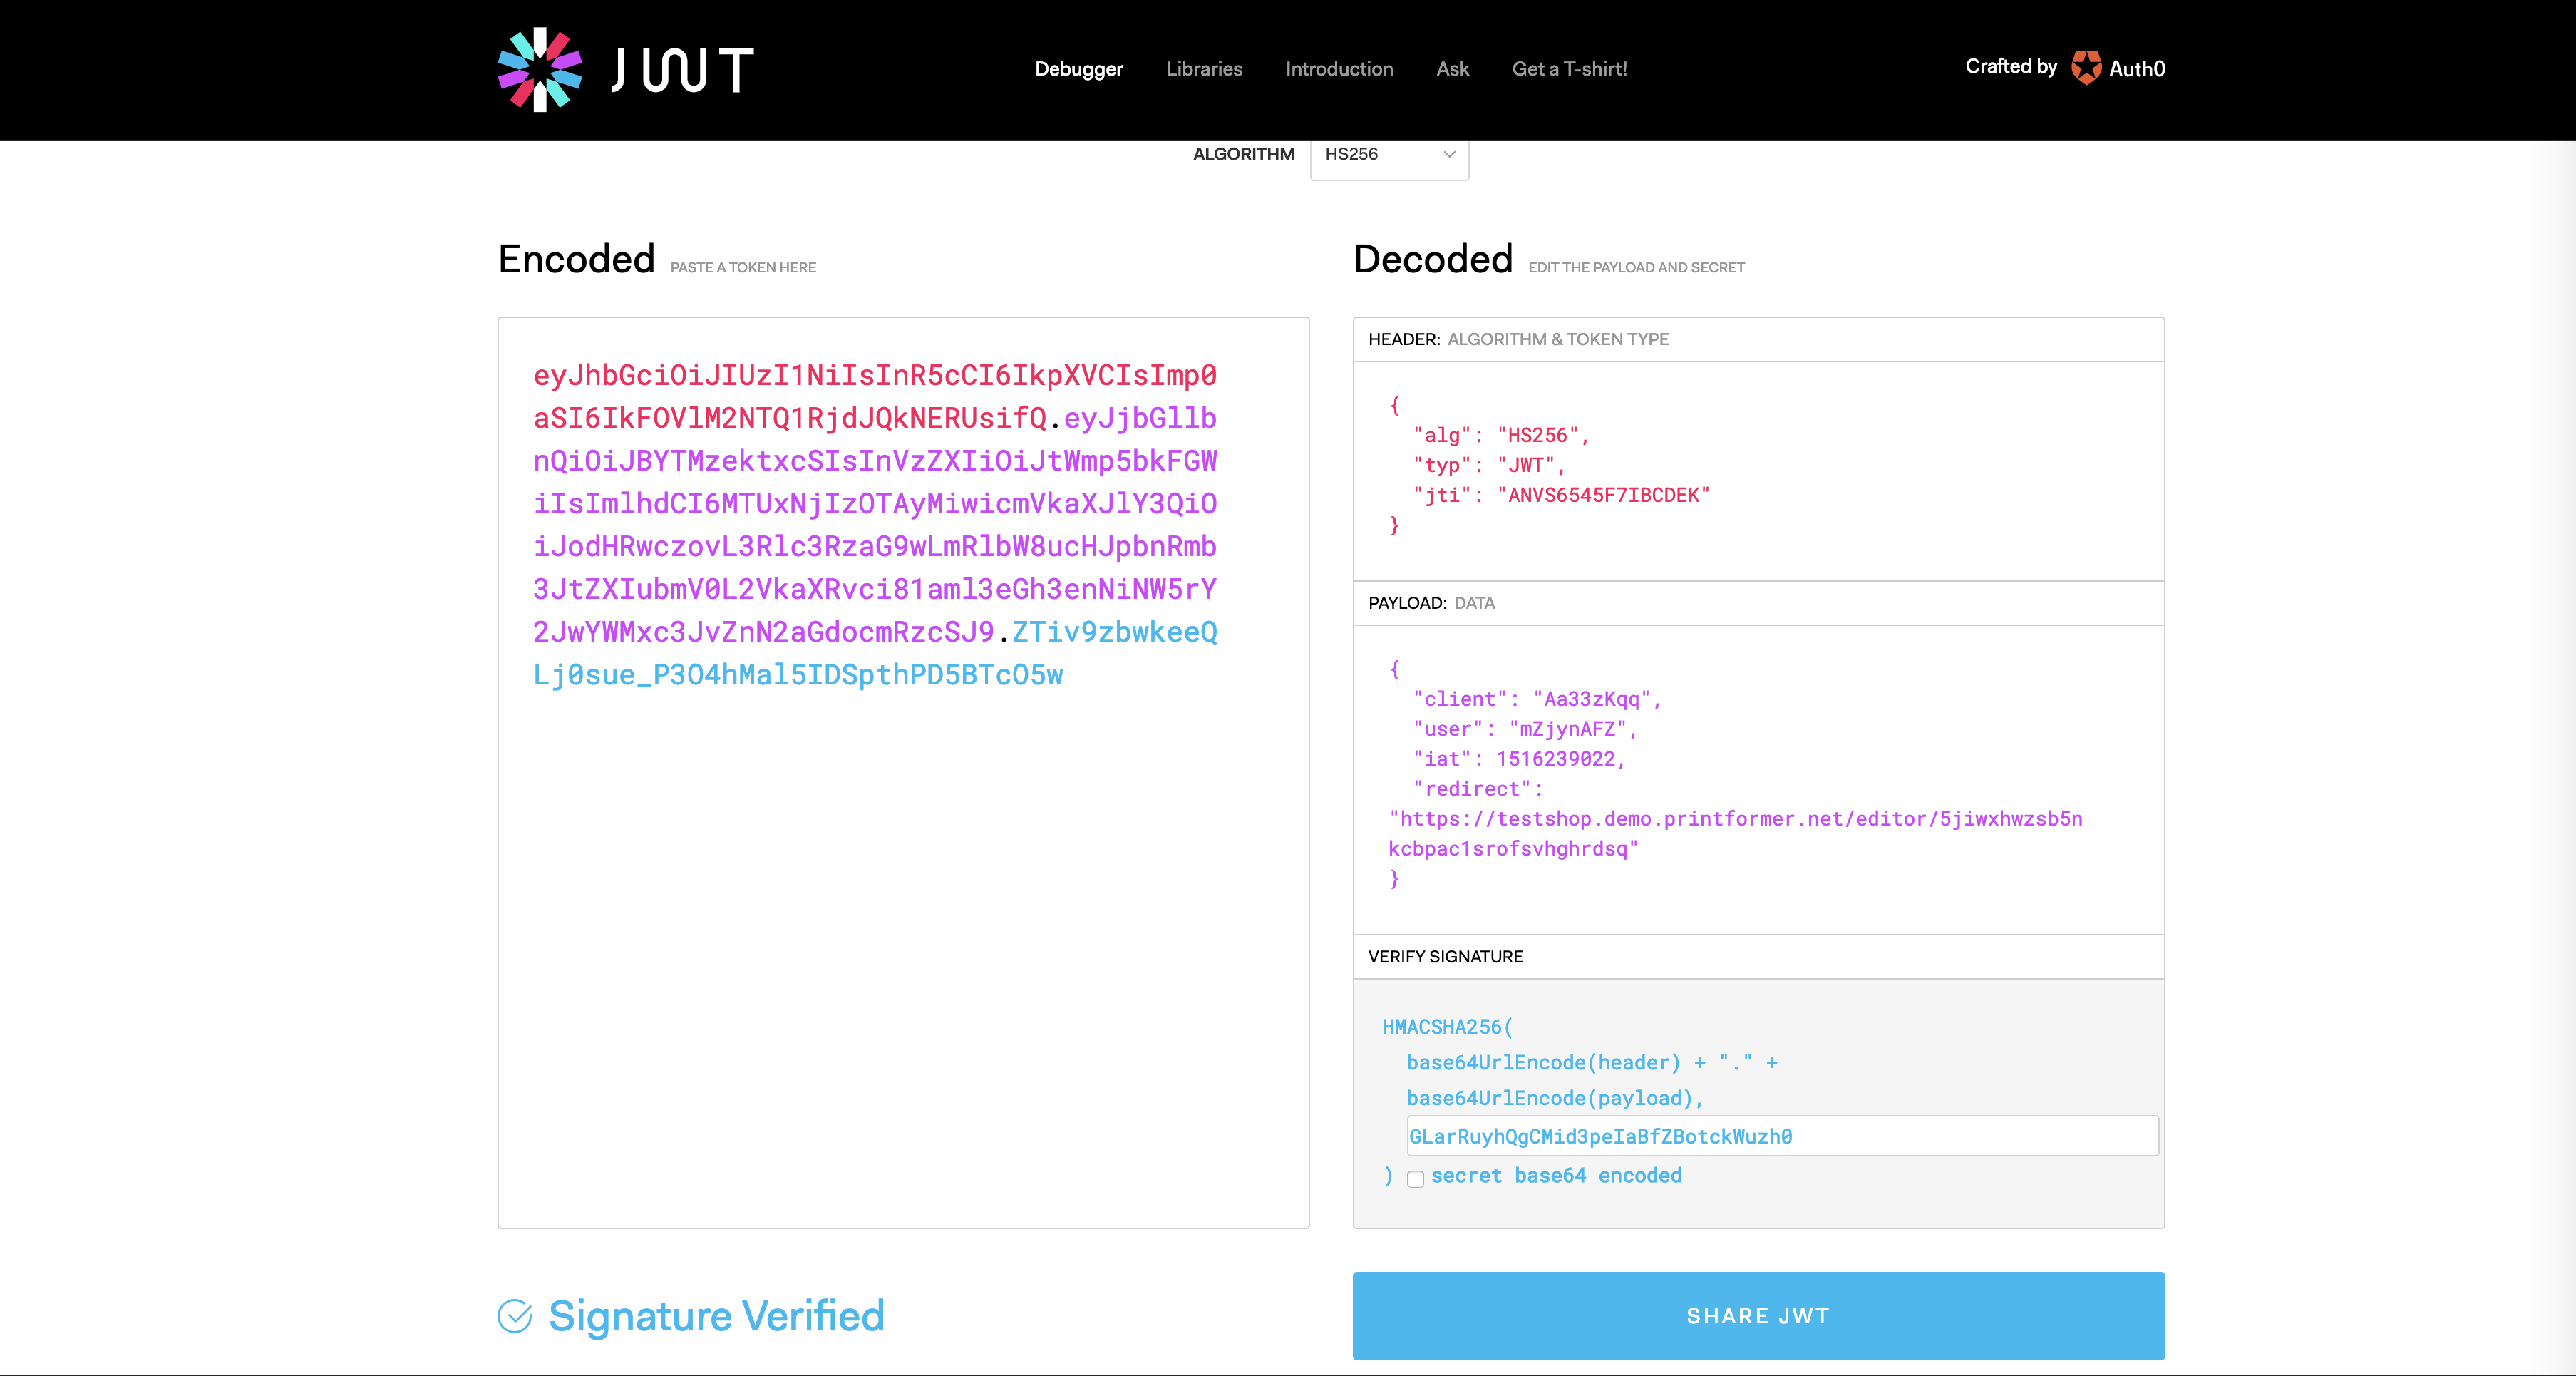
3. Generate JWT
To generate a JWT Token we can use http://jwt.io to decode, verify and generate a token for our editor url in the next step.
We need the following informations to generate our JWT Token:
Attribut | Position | Example Value | Description |
|---|---|---|---|
jti | Header | ANVS6545F7IBCDEK | Random String that only can use one time |
client | Payload | Aa33zKqq | printformer API credentials |
user | Payload | mZjynAFZ | we create user in step 1 |
iat | Payload | 1516239022 | timestamp |
redirect | Payload | https://testshop.demo.printformer.net/editor/5jiwxhwzsb5nkcbpac1srofsvhghrdsq | redirect to editor url after user login. Editor url contains draft hash in url we create in step 2 |
After that you need to verify signature JWT with printformer API Key.
4. Generate JWT
After you generate your JWT you can jump into editor with the following url:
{printformer URL}/auth?jwt={JWT Token}
Example URL:
https://testshop.demo.printformer.net/auth?jwt=eyJhbGciOiJIUzI1NiIsInR5cCI6IkpXVCIsImp0aSI6IkFOVlM2NTQ1RjdJQkNERUsifQ.eyJjbGllbnQiOiJBYTMzektxcSIsInVzZXIiOiJtWmp5bkFGWiIsImlhdCI6MTUxNjIzOTAyMiwicmVkaXJlY3QiOiJodHRwczovL3Nob3BpZnkuZGVtby5wcmludGZvcm1lci5uZXQvZWRpdG9yLzVqaXd4aHd6c2I1bmtjYnBhYzFzcm9mc3ZoZ2hyZHNxIn0.Y0oQp_H6LRRcPOFxXRFpABLrqtVEdn58WZtFytR7AQU5. Add callback URL and callback_cancel URL to JWT to extend redirection options
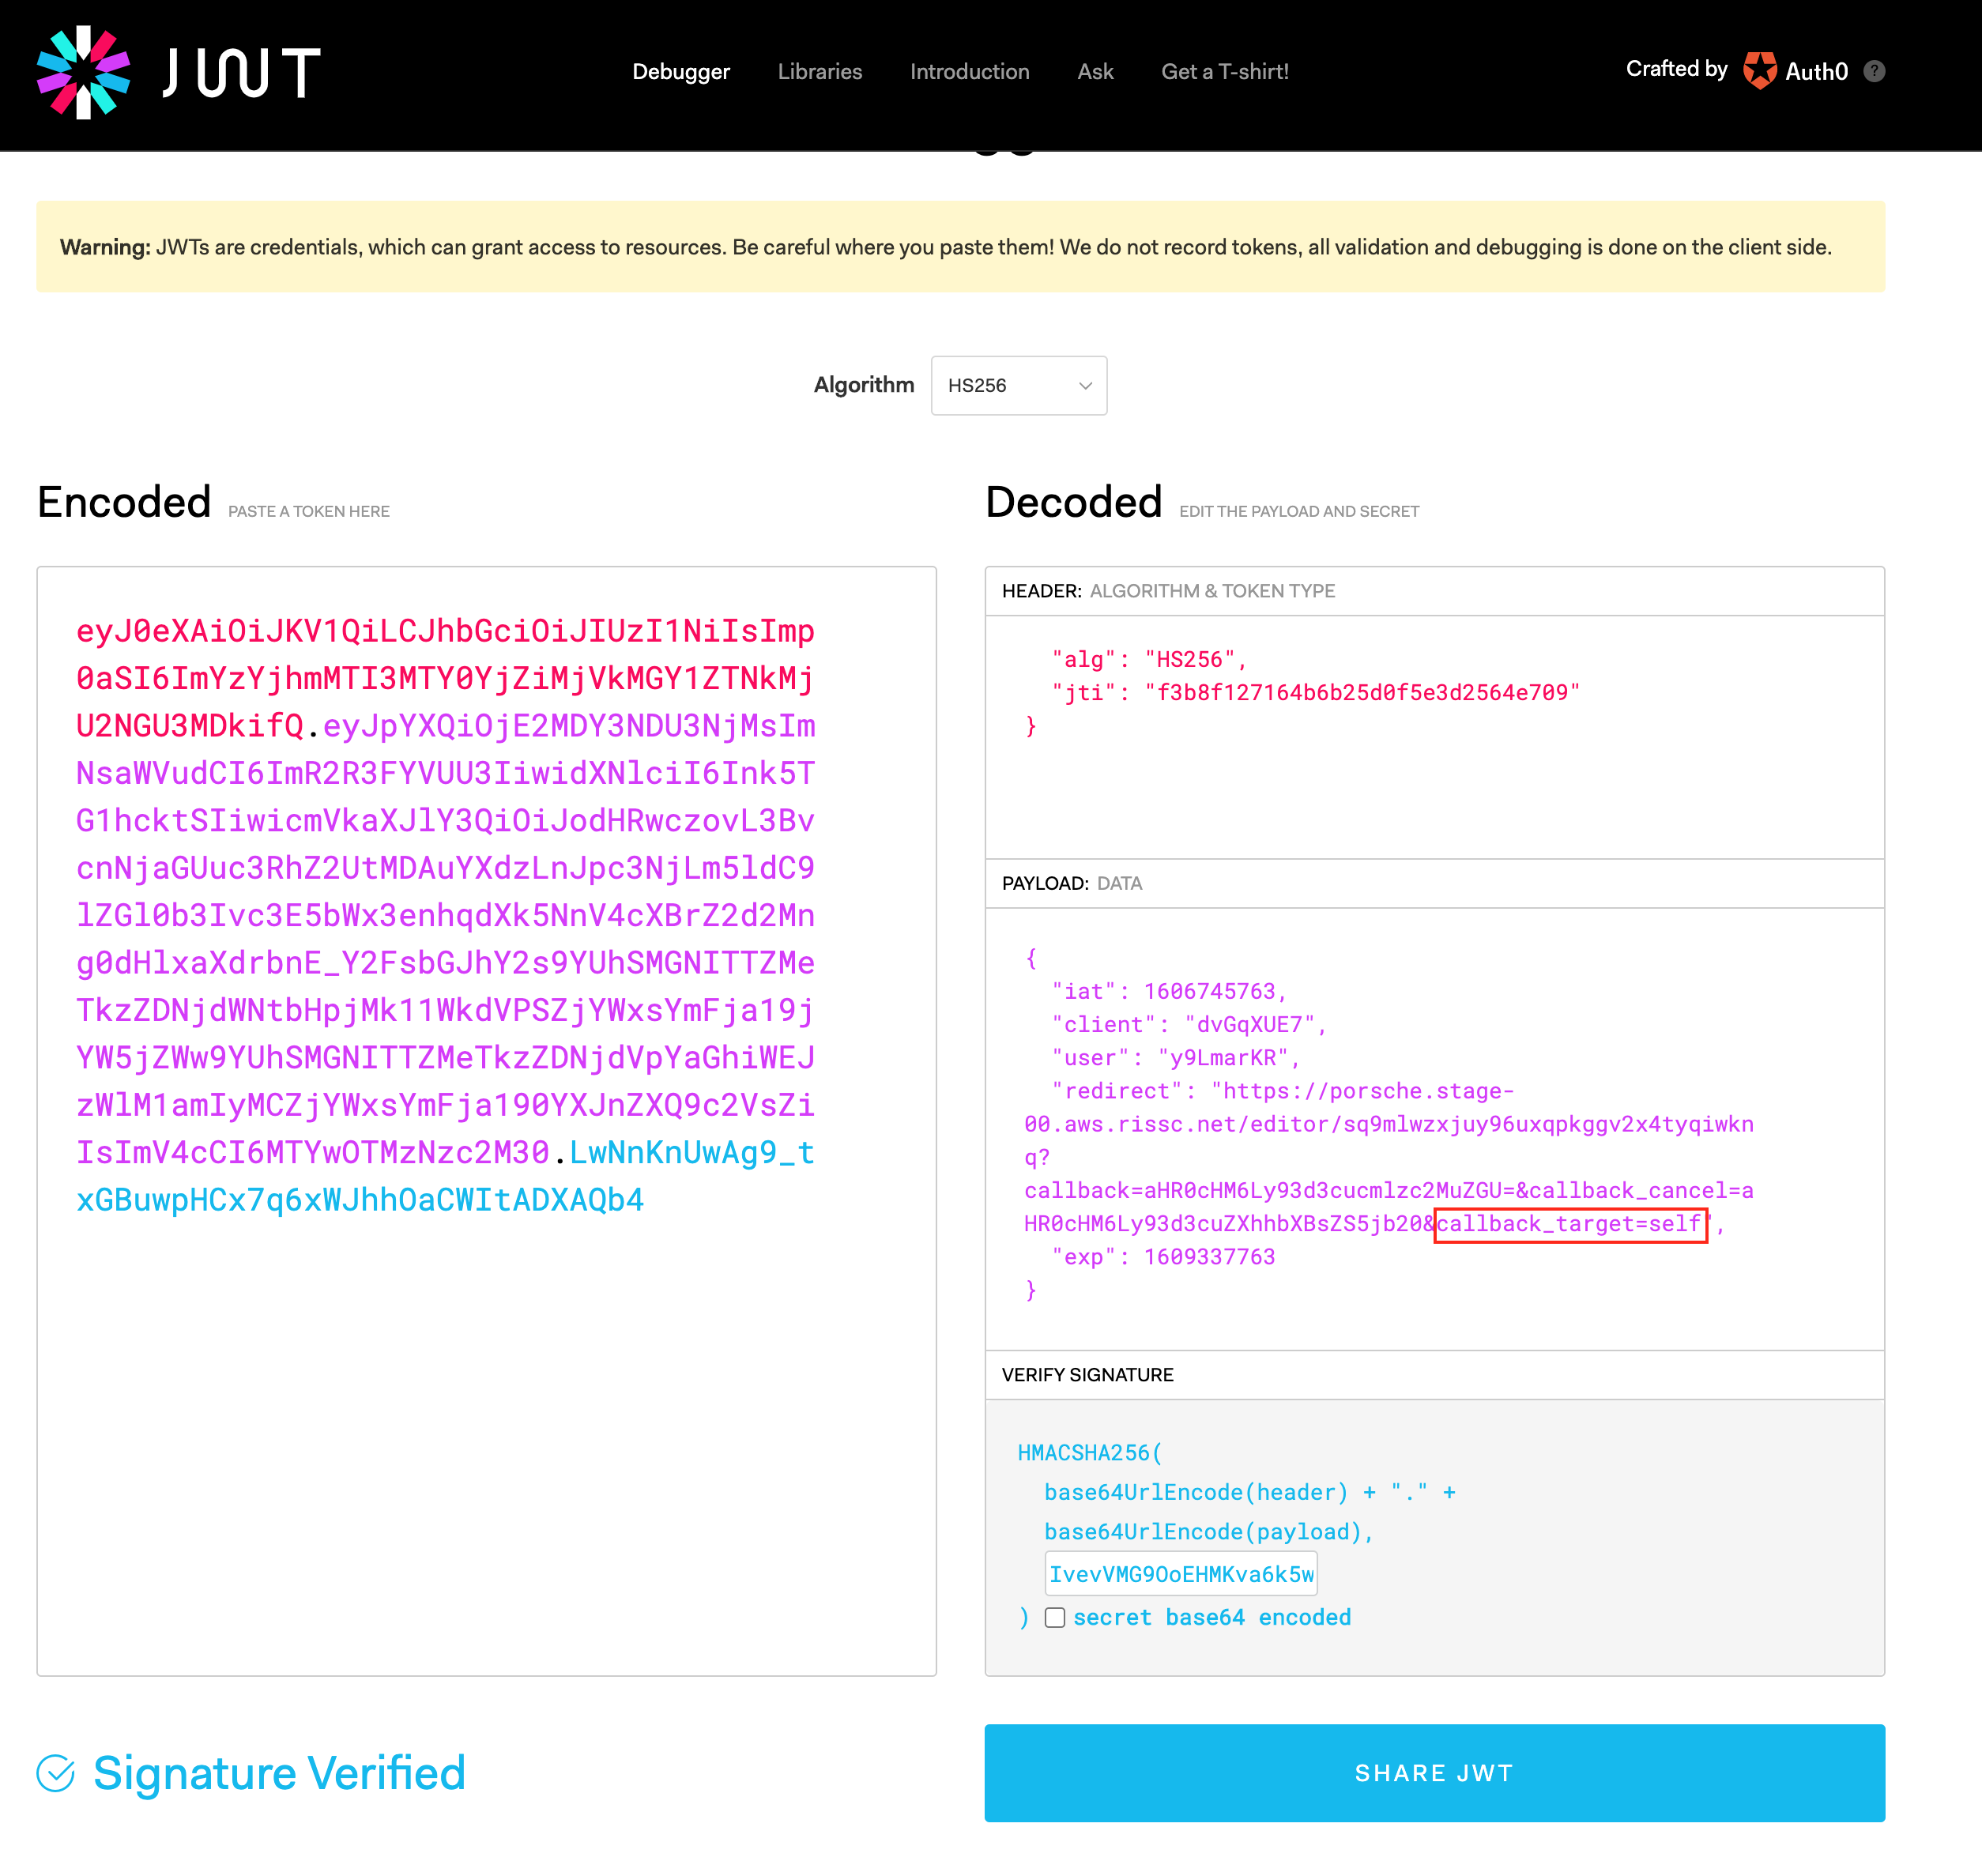
To redirect the user to a specific URL after entering the editor and choosing “done/Fertig” extend the redirect link in the payload section by adding a base 64 encoded callback URL:
https://testshop.demo.printformer.net/editor/5jiwxhwzsb5nkcbpac1srofsvhghrdsq
?callback={base64encodedURL}
In case of redirection after cancellation of the procedure “cancel/Abbruch“ add a base 64 callback_cancel URL“
https://testshop.demo.printformer.net/editor/5jiwxhwzsb5nkcbpac1srofsvhghrdsq
?callback_cancel={base64encodedURL}
Combined Solution:
.png?inst-v=365747cc-e854-41d4-90a6-f1f6a6b50d56)
With callback_target = top or self you can decide in which window the redirect need to be executed. This is only important when editor was embedded via iFrame. Default value is top.