3D / GLB
Sample files
Here are all the relevant files used in the tutorial: GLB-Beispiel-rissc.zip
https://pixabay.com/photos/seamless-tileable-texture-cardboard-1807376/
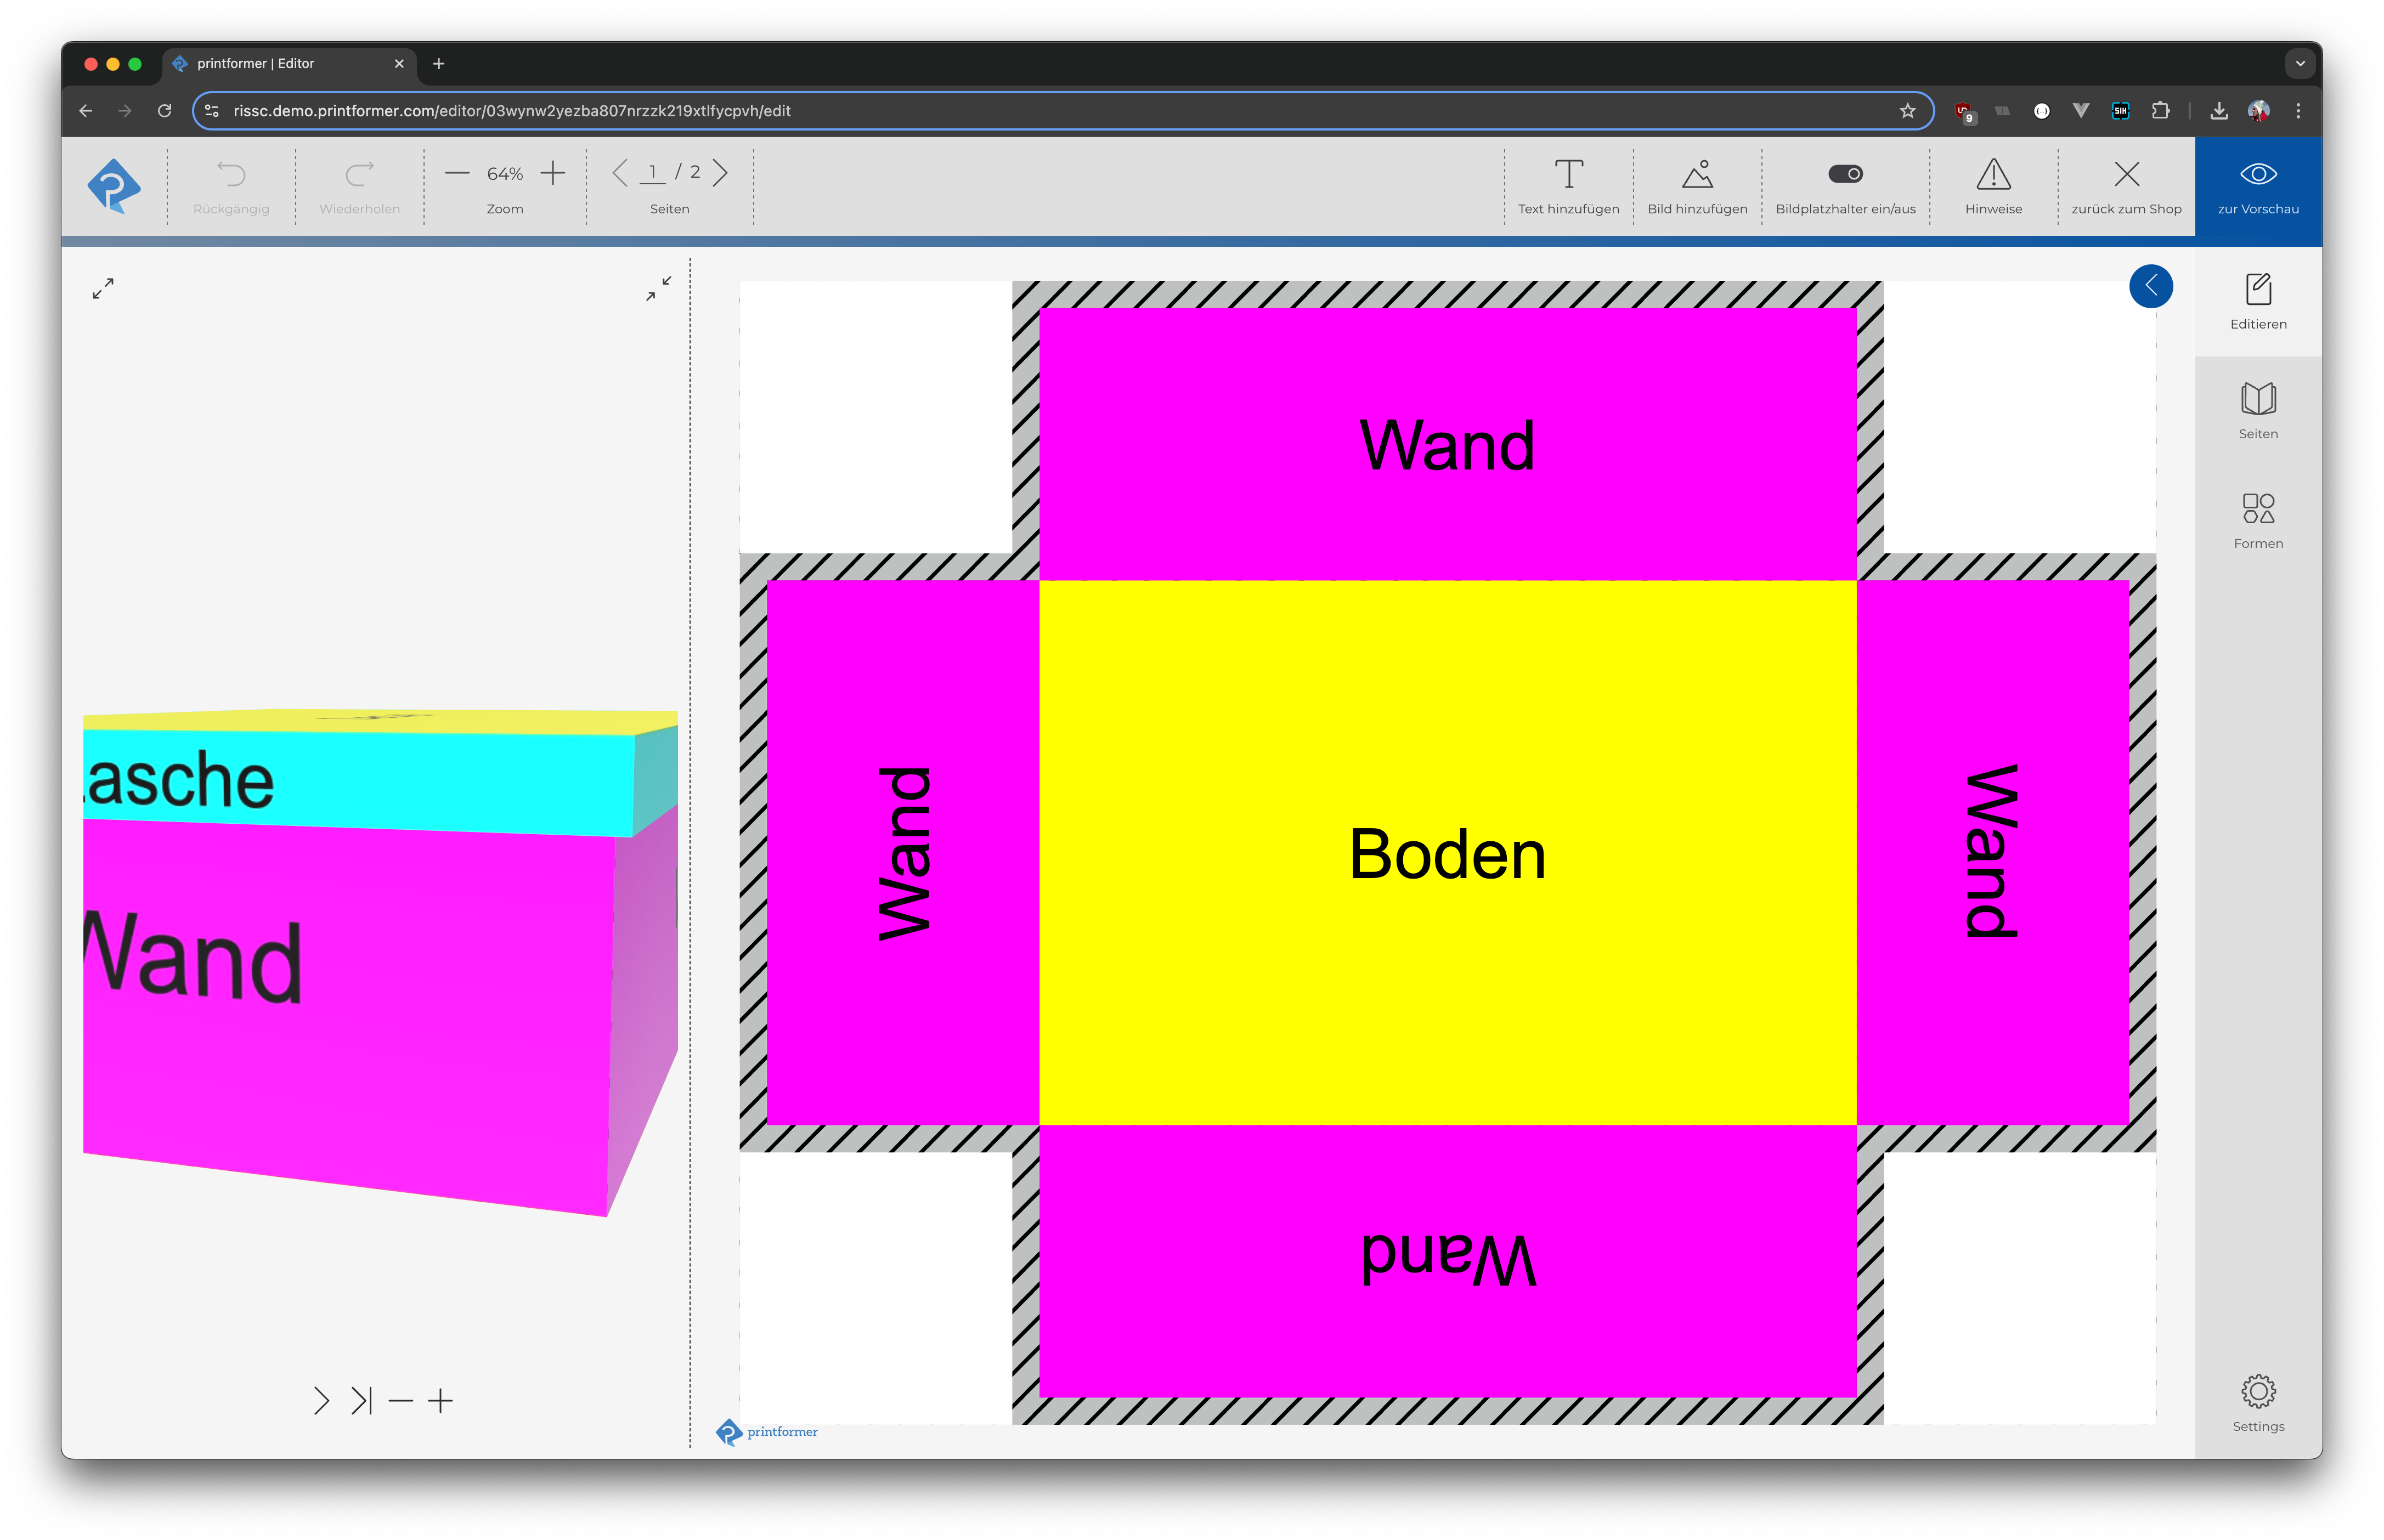
Live example
Here you can view the sample file in printformer:
Box in printformer
Step 1: Create your model in Blender
Step 2: Add an image as material
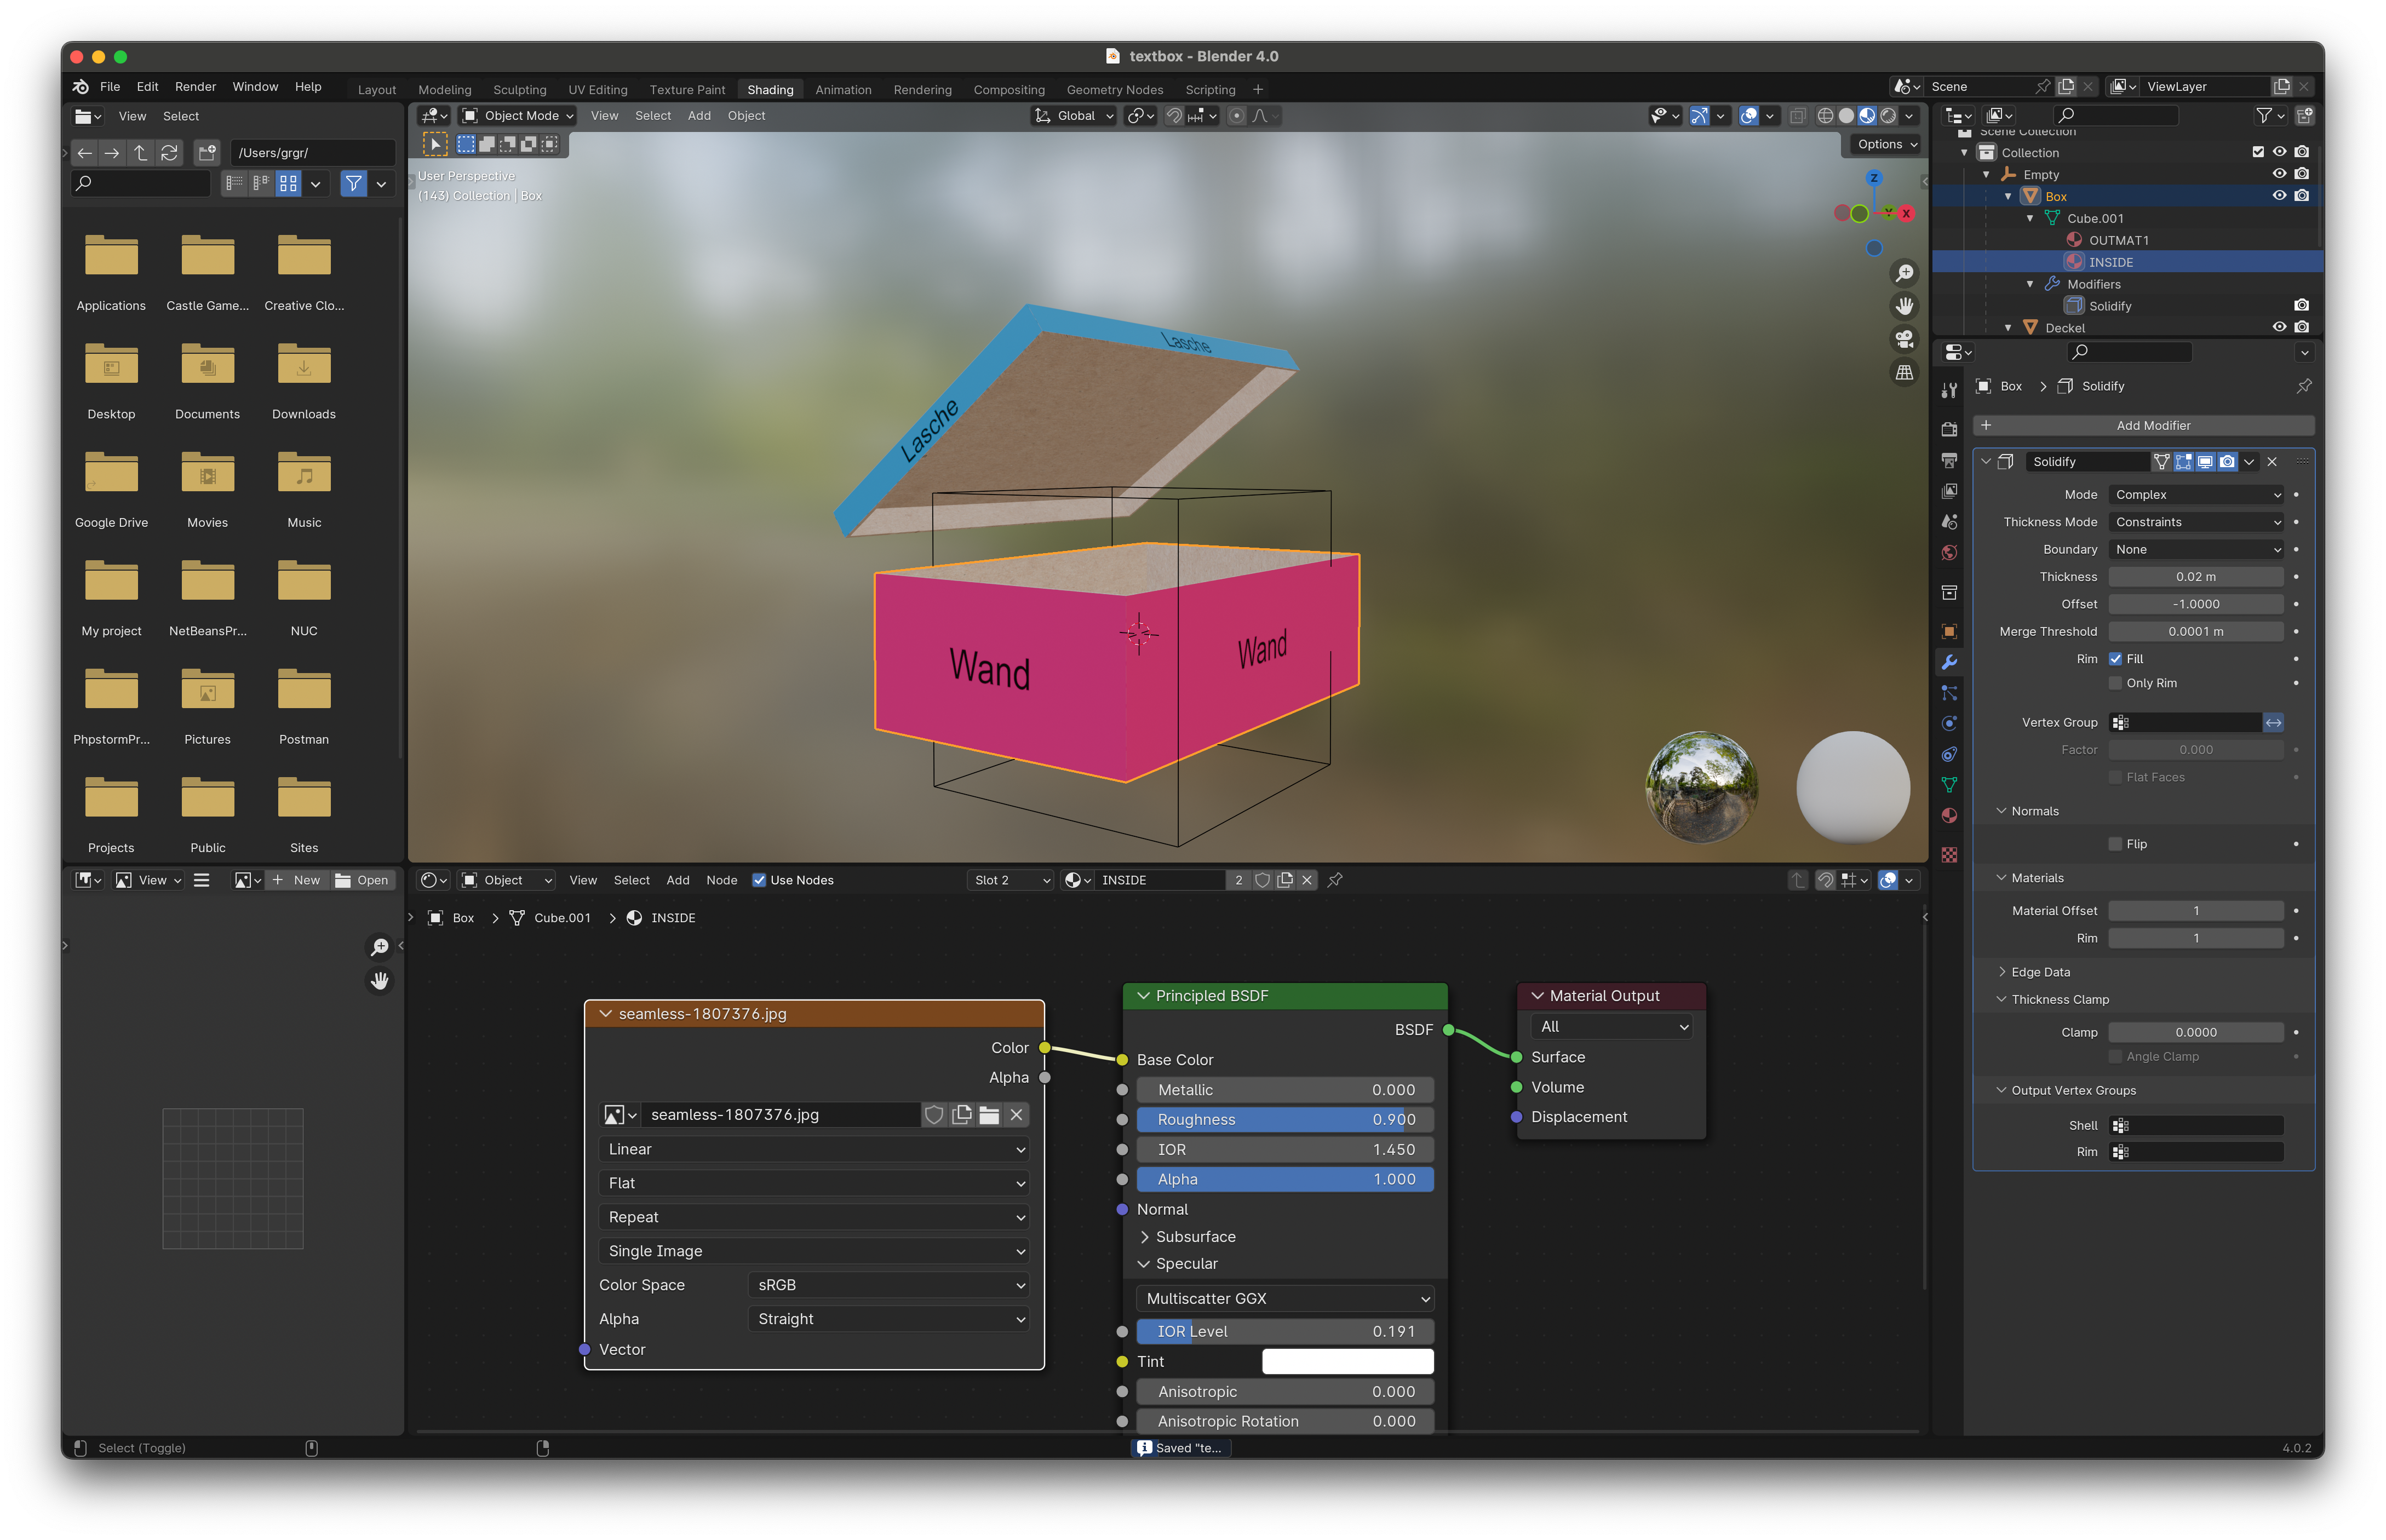
Select the 3D model and switch to the
Materialstab.Add a new material.
Rename the material to
OUTMAT1. For multi-page templates, the integer corresponds to the page in the template. You can therefore also set multiple materials to map all pages of the editor.To create a precise mapping, the added image must have the same dimensions as the template in printformer (including bleed, if applicable).
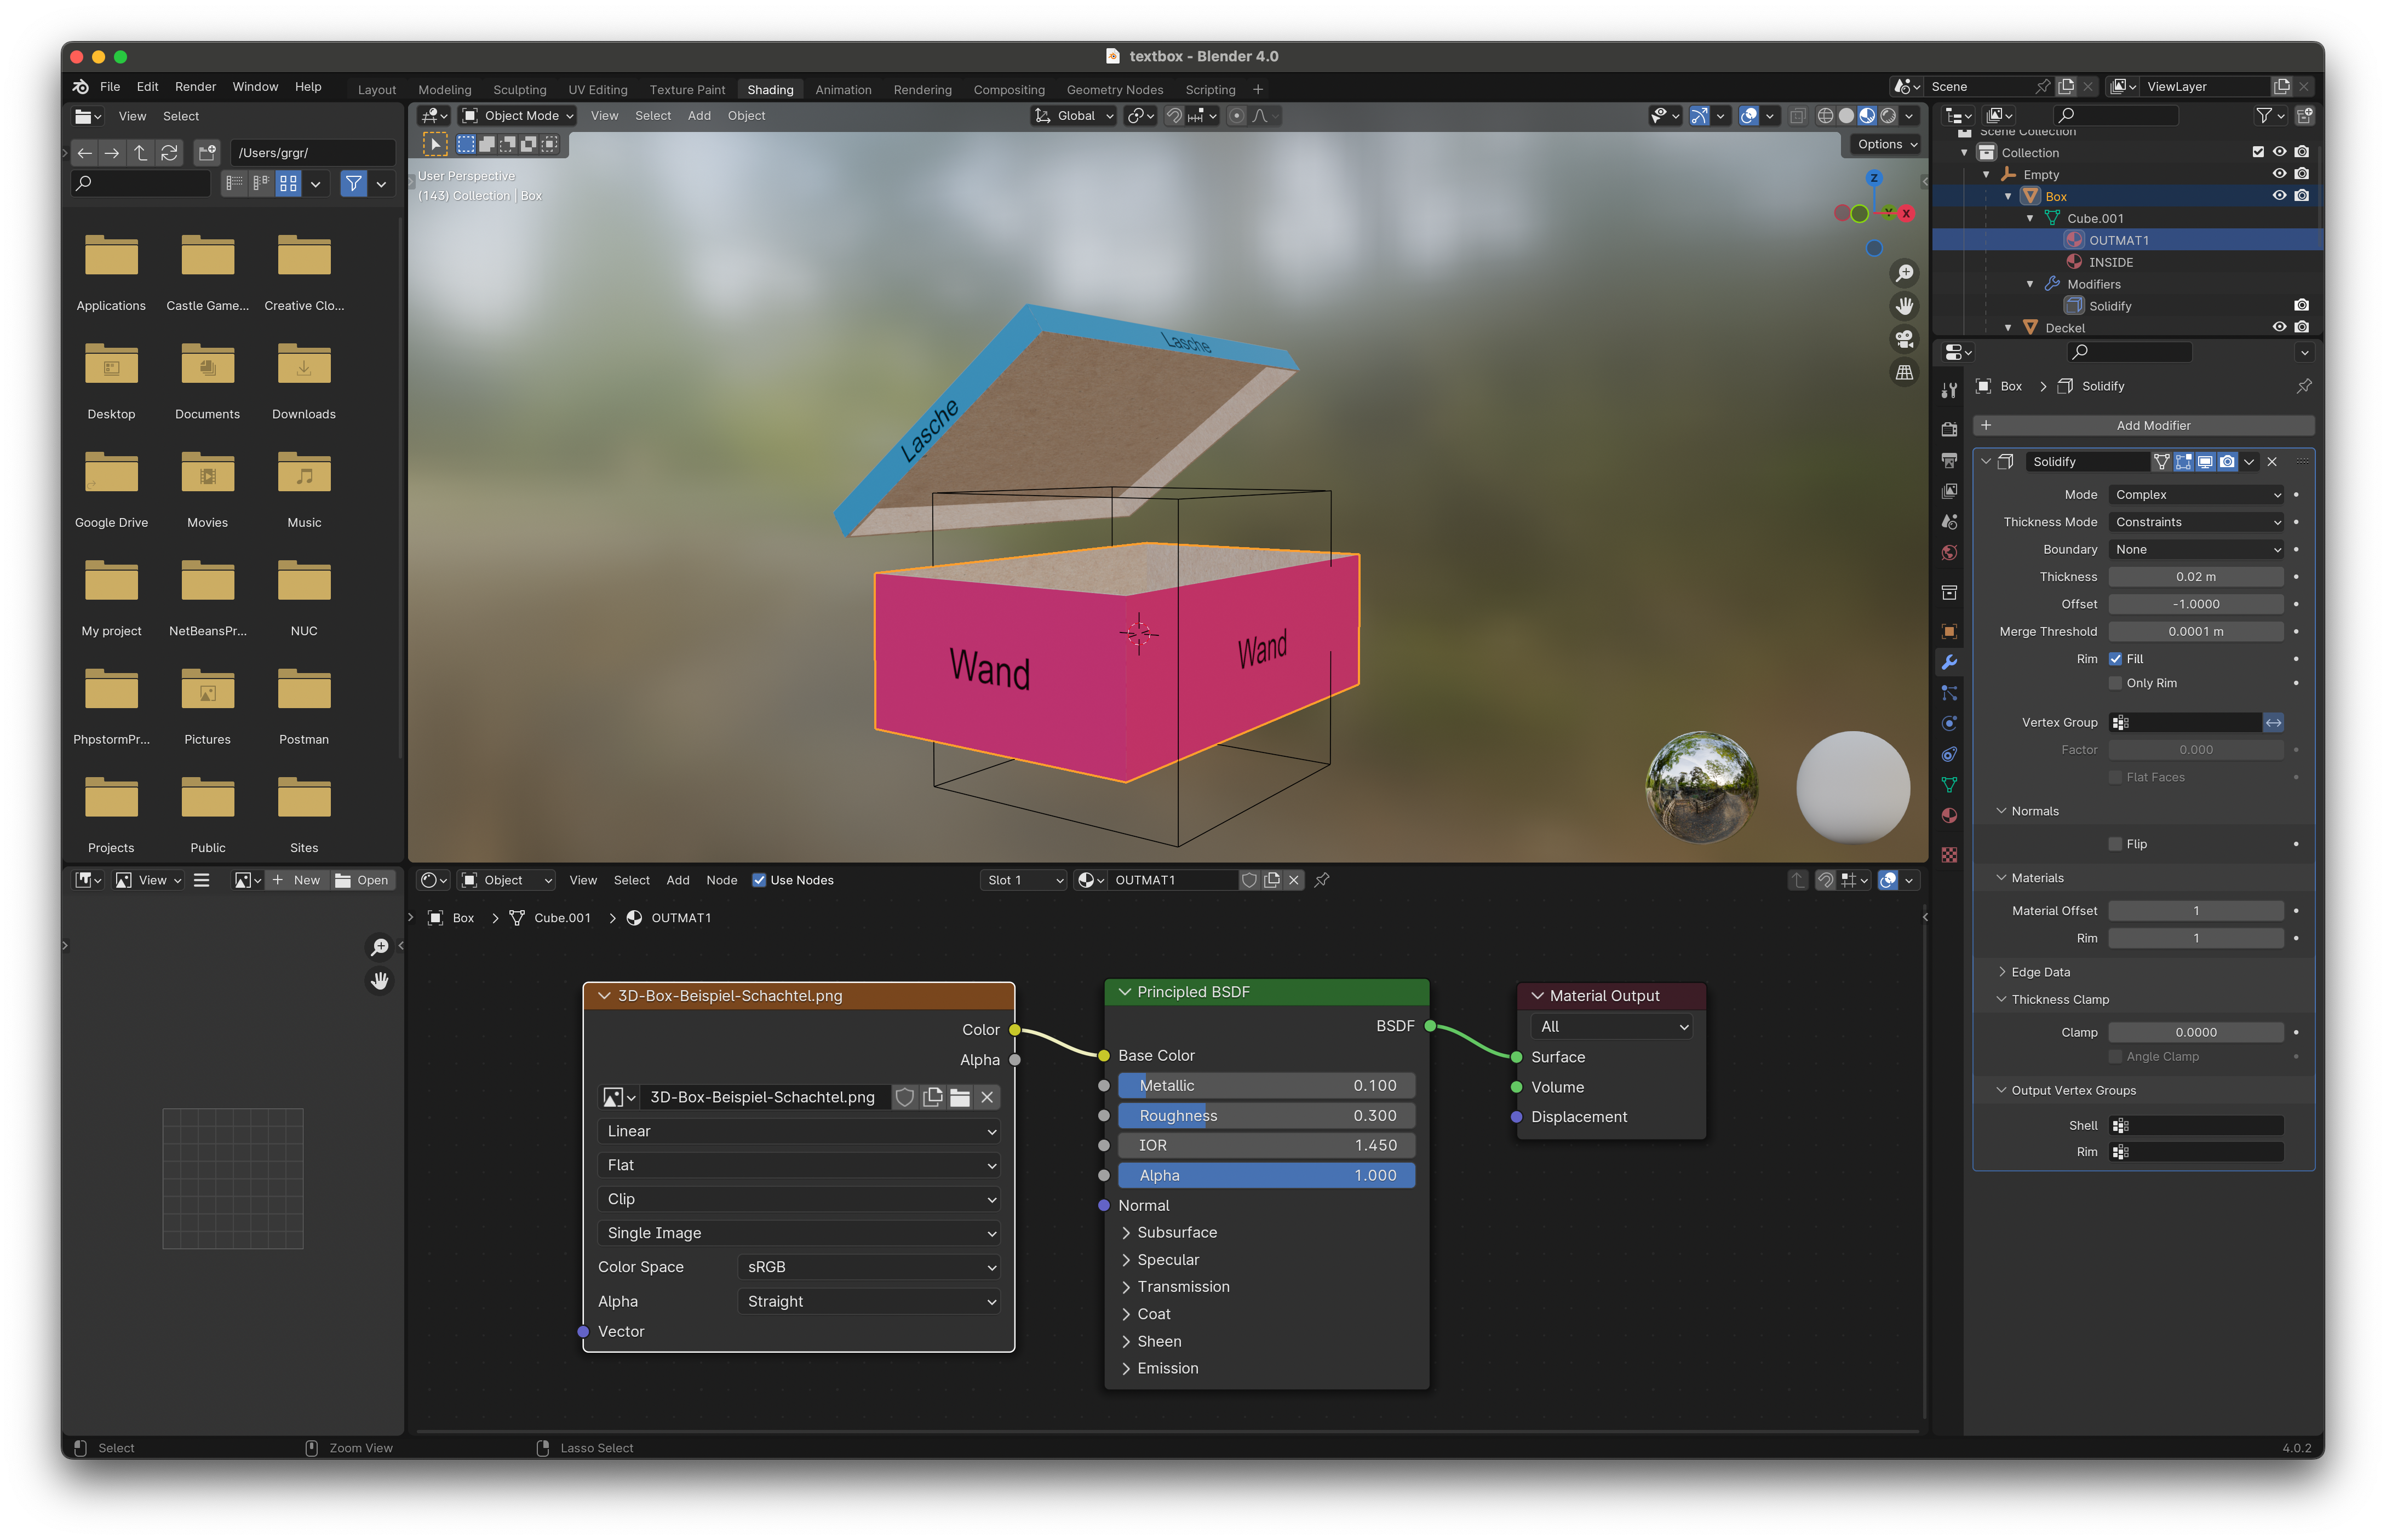
You can also add additional materials. These have no relation to the printformer. Therefore, the naming is not relevant. In this example, the box is given an interior with a wood look.
Step 3: Map the image to the 3D file in UV editing
Switch to
UV-editing-mode.Here, you usually start with the finished product. So you should exclude the bleed additions.
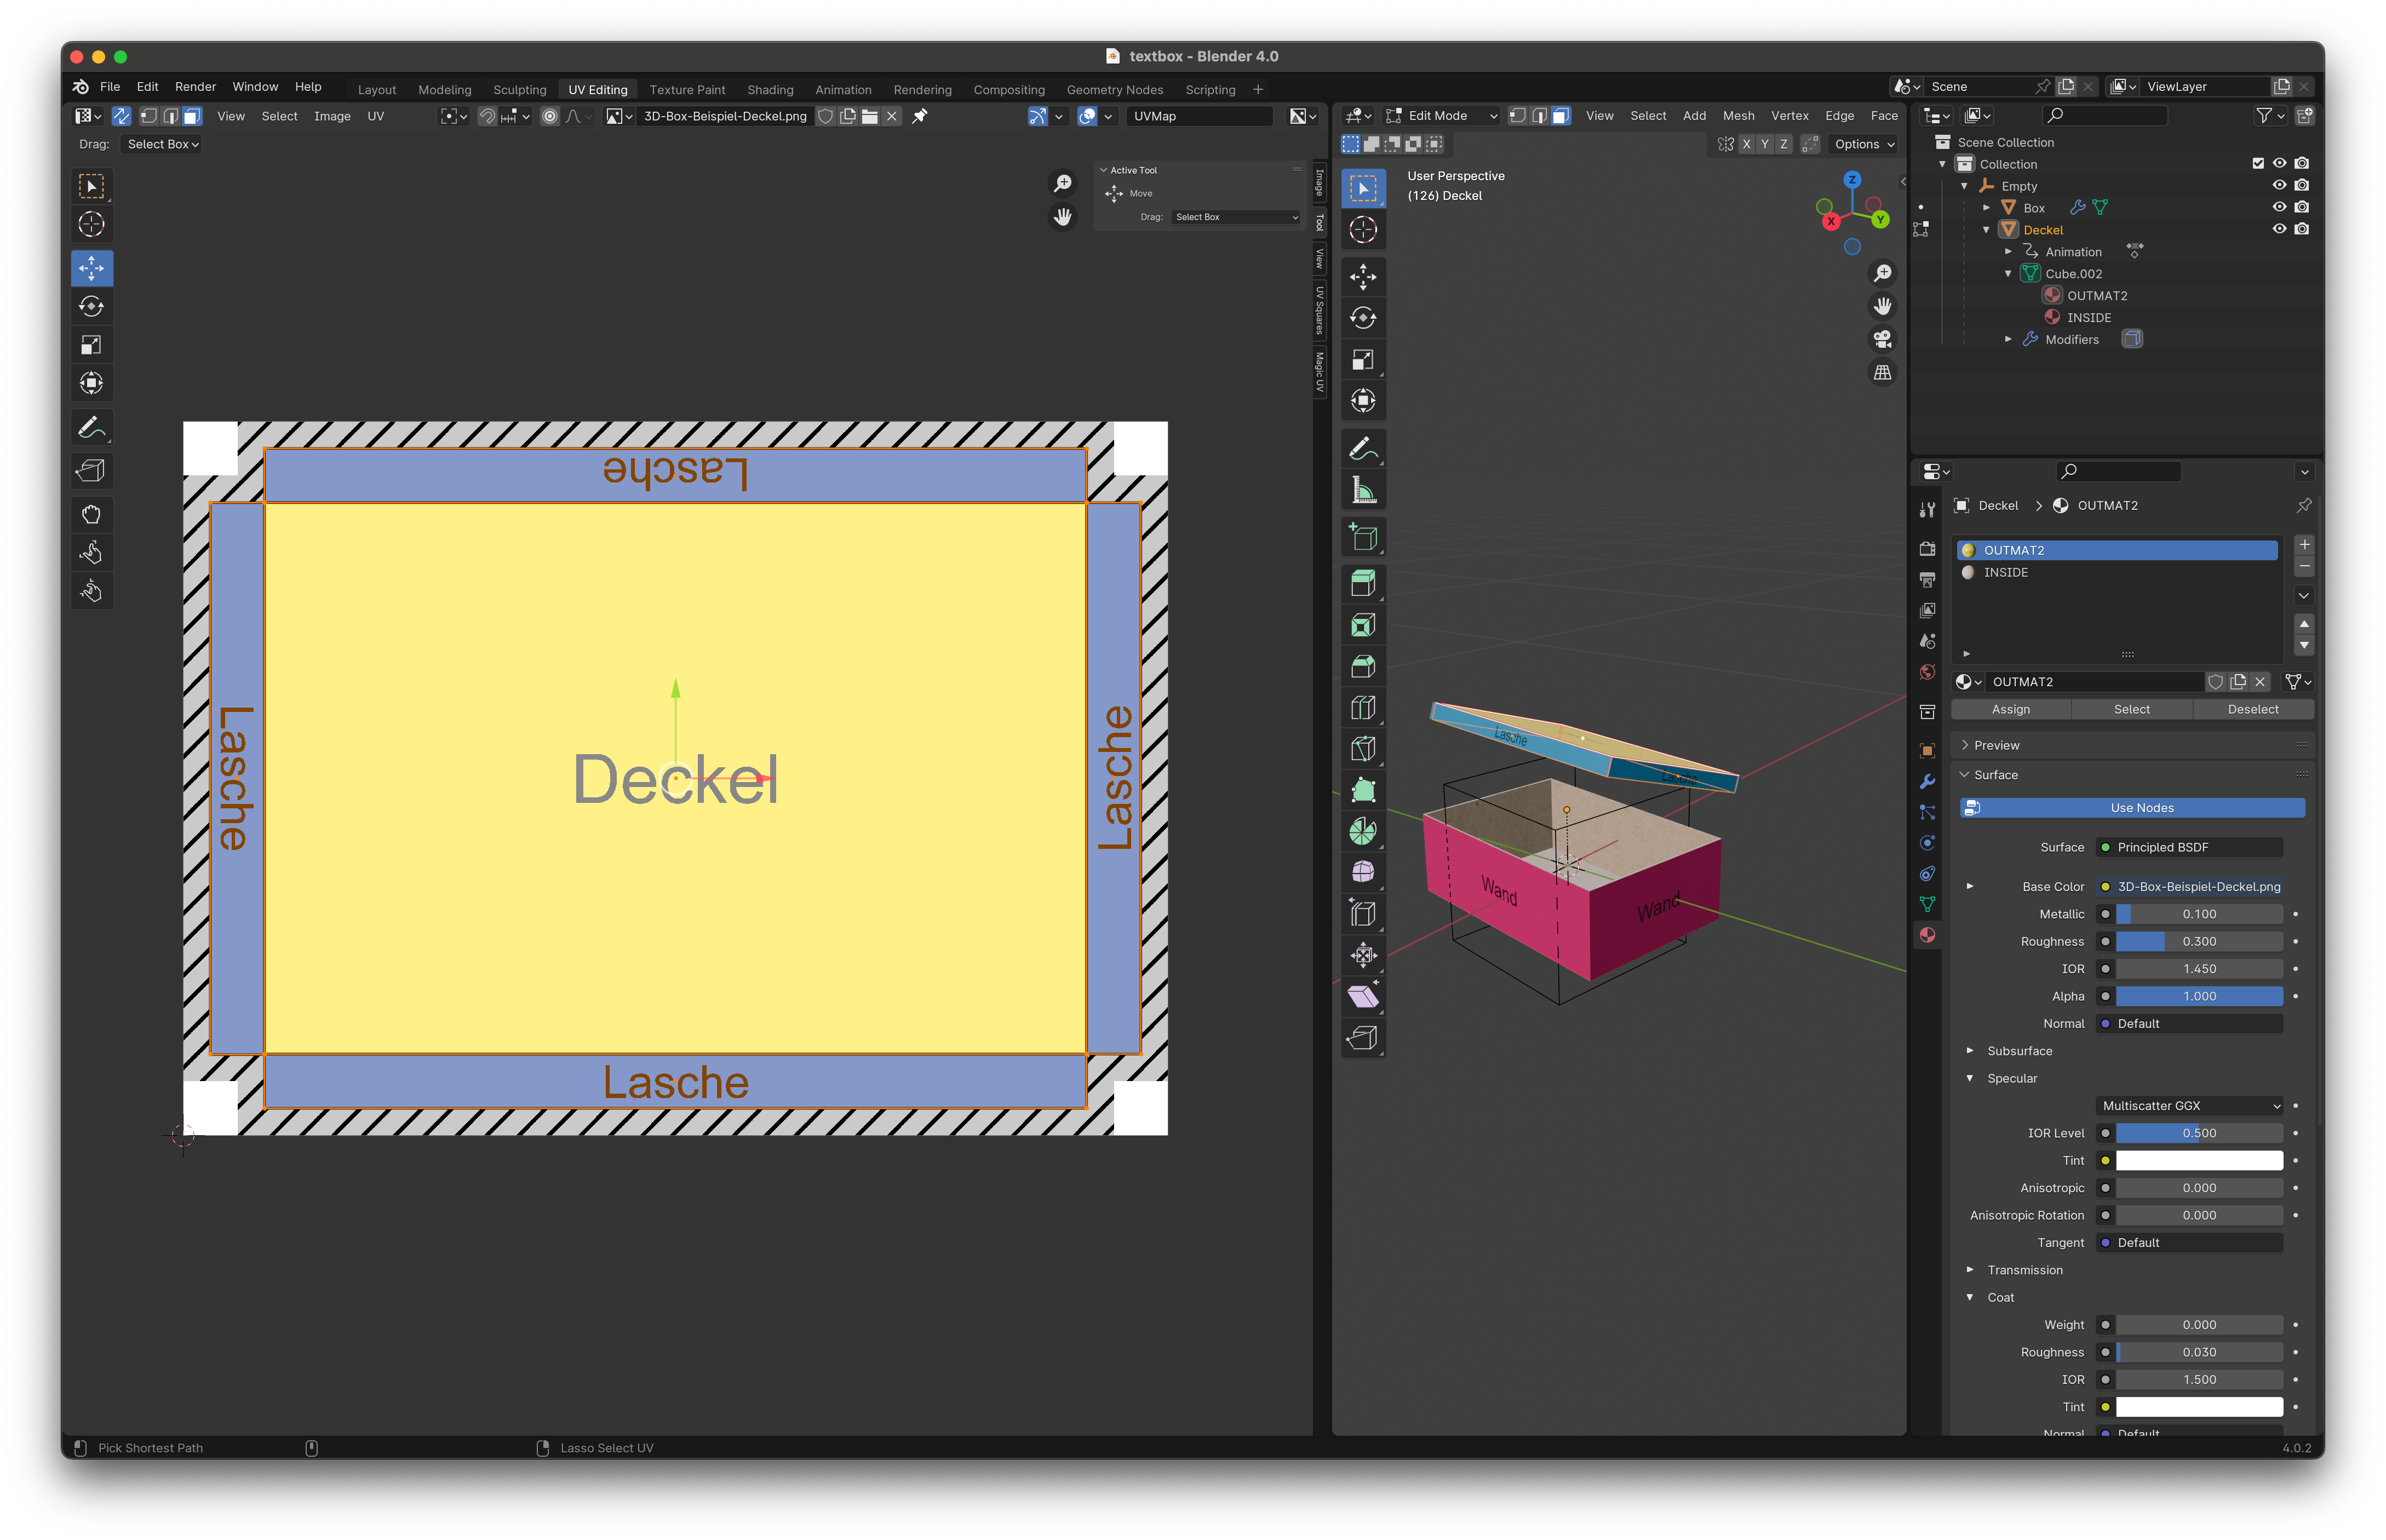
FYI Texture:
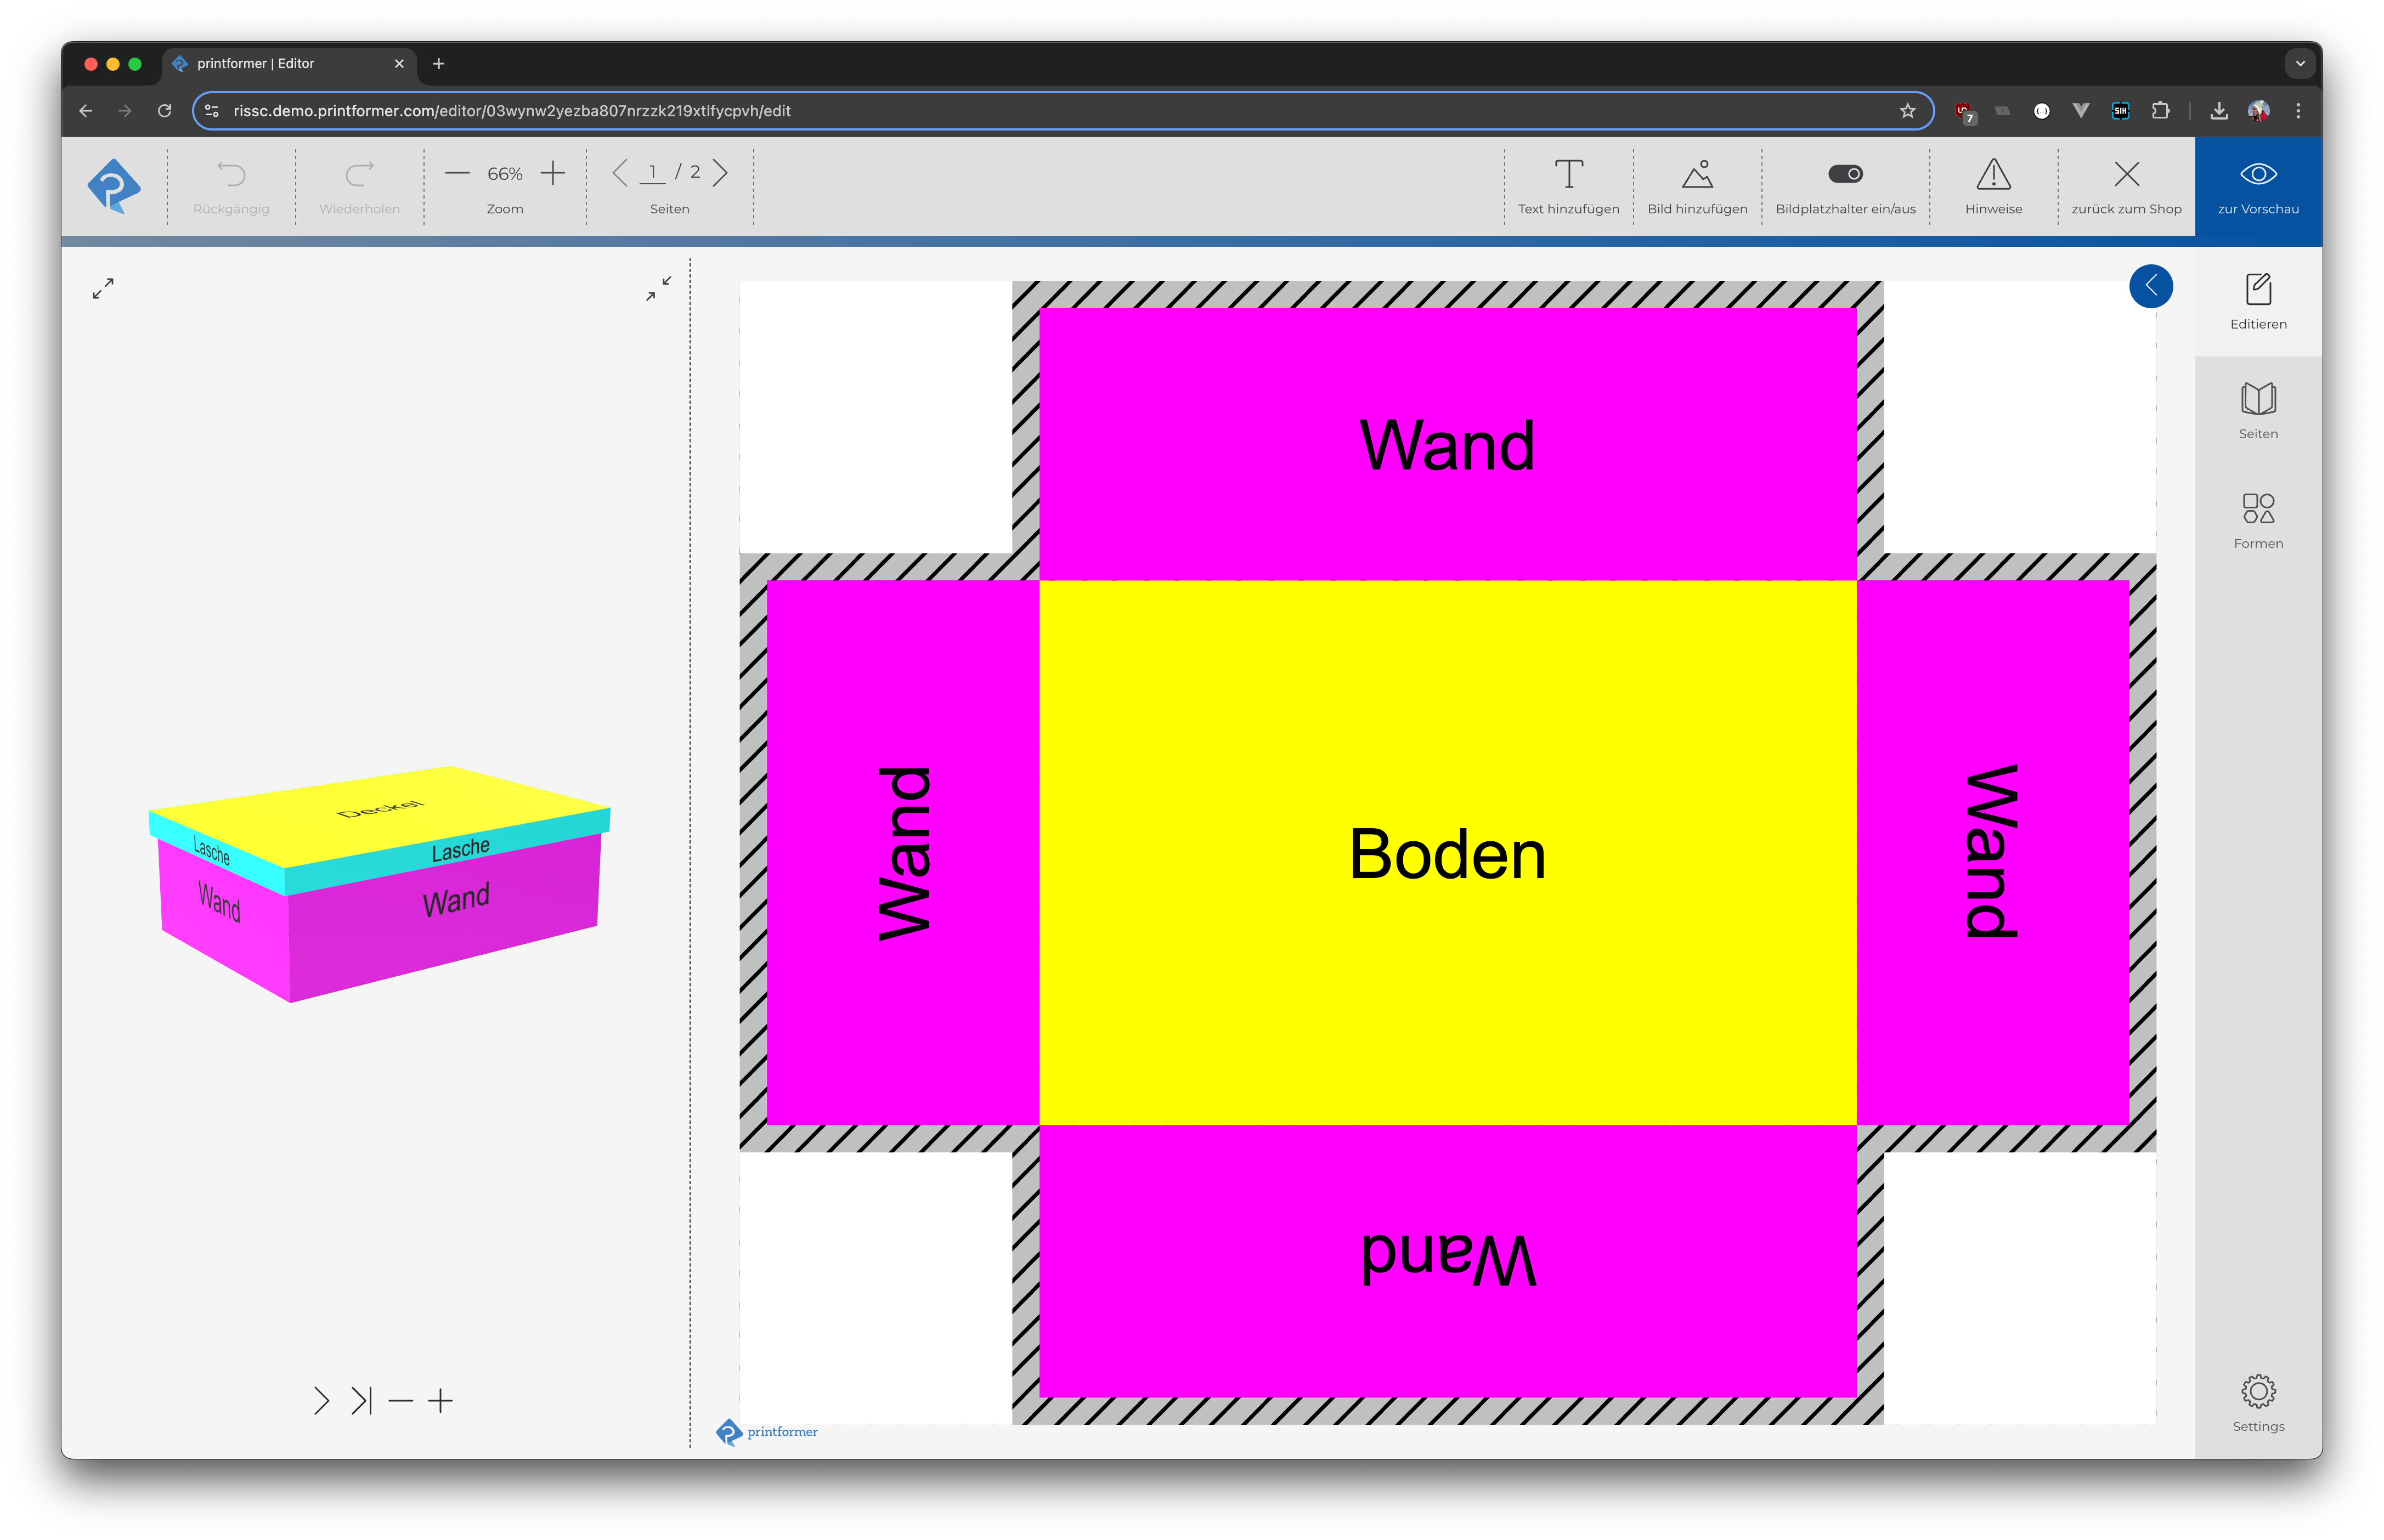
Use colored auxiliary texture: To map a folding box cleanly, we recommend using a colored texture. This makes orientation easier and is displayed when you first load it in the Printformer Editor.
Export GLB file: When you first open it in the Printformer Editor, your colored help texture will be visible for a brief moment.
Texture is replaced in the editor: The editor replaces the texture in less than a second with the current version of the template, which often has a neutral (white) background.
Insert final texture: After mapping, replace the auxiliary texture with a color-matched version with the same dimensions. This will make it visible directly in the 3D view in the editor.
Step 4: Export the model as GLB
There are several relevant settings for exporting. We have compiled the relevant ones for you in a preset.
printformer.py You must save this in the correct directory. If you do not yet have a preset for glTF, the export_scene.gltf folder does not exist. Either create a preset yourself beforehand or create the folder yourself. You can then save the file in the following directory:
MAC
Replace USERNAME and VERSION respectively
/Users/USERNAME/Library/Application Support/Blender/VERSION/scripts/presets/operator/export_scene.gltf/WINDOWS
Replace USERNAME and VERSION respectively
C:\Users\USERNAME\AppData\Roaming\Blender Foundation\Blender\VERSION\scripts\presets\operator\export_scene.gltf/When you are satisfied with the result, click on
File > Export > glTF (.glb/gltf).Now select the preset
printformer.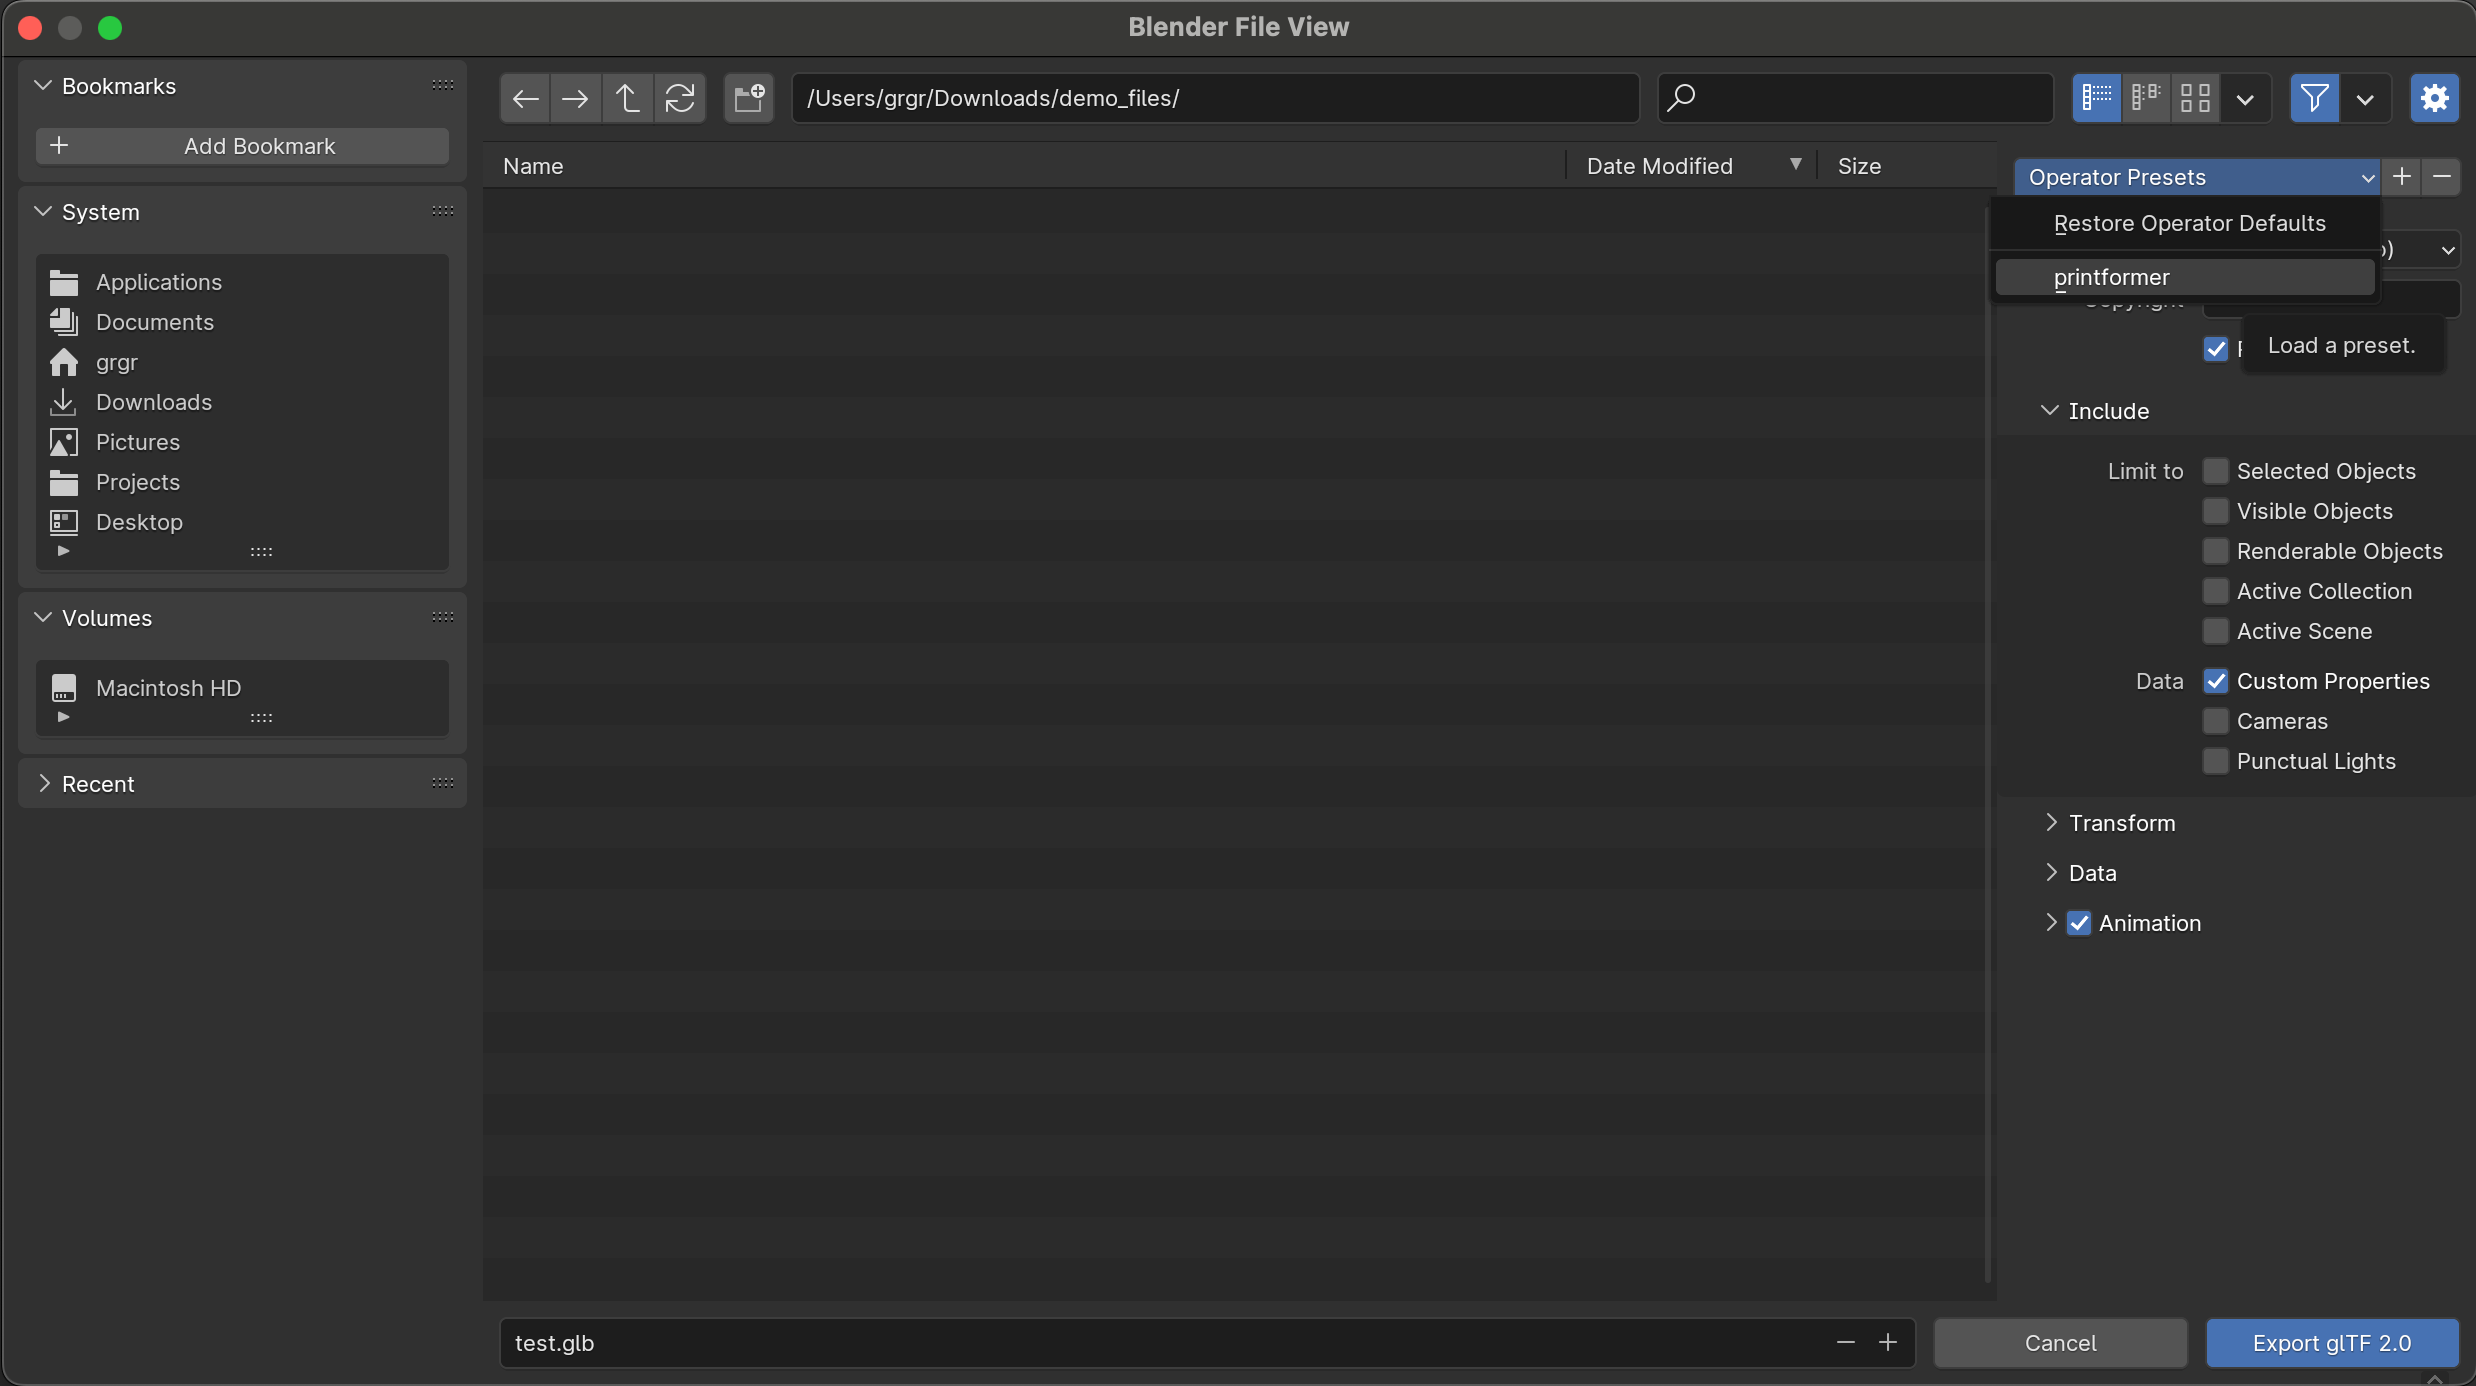
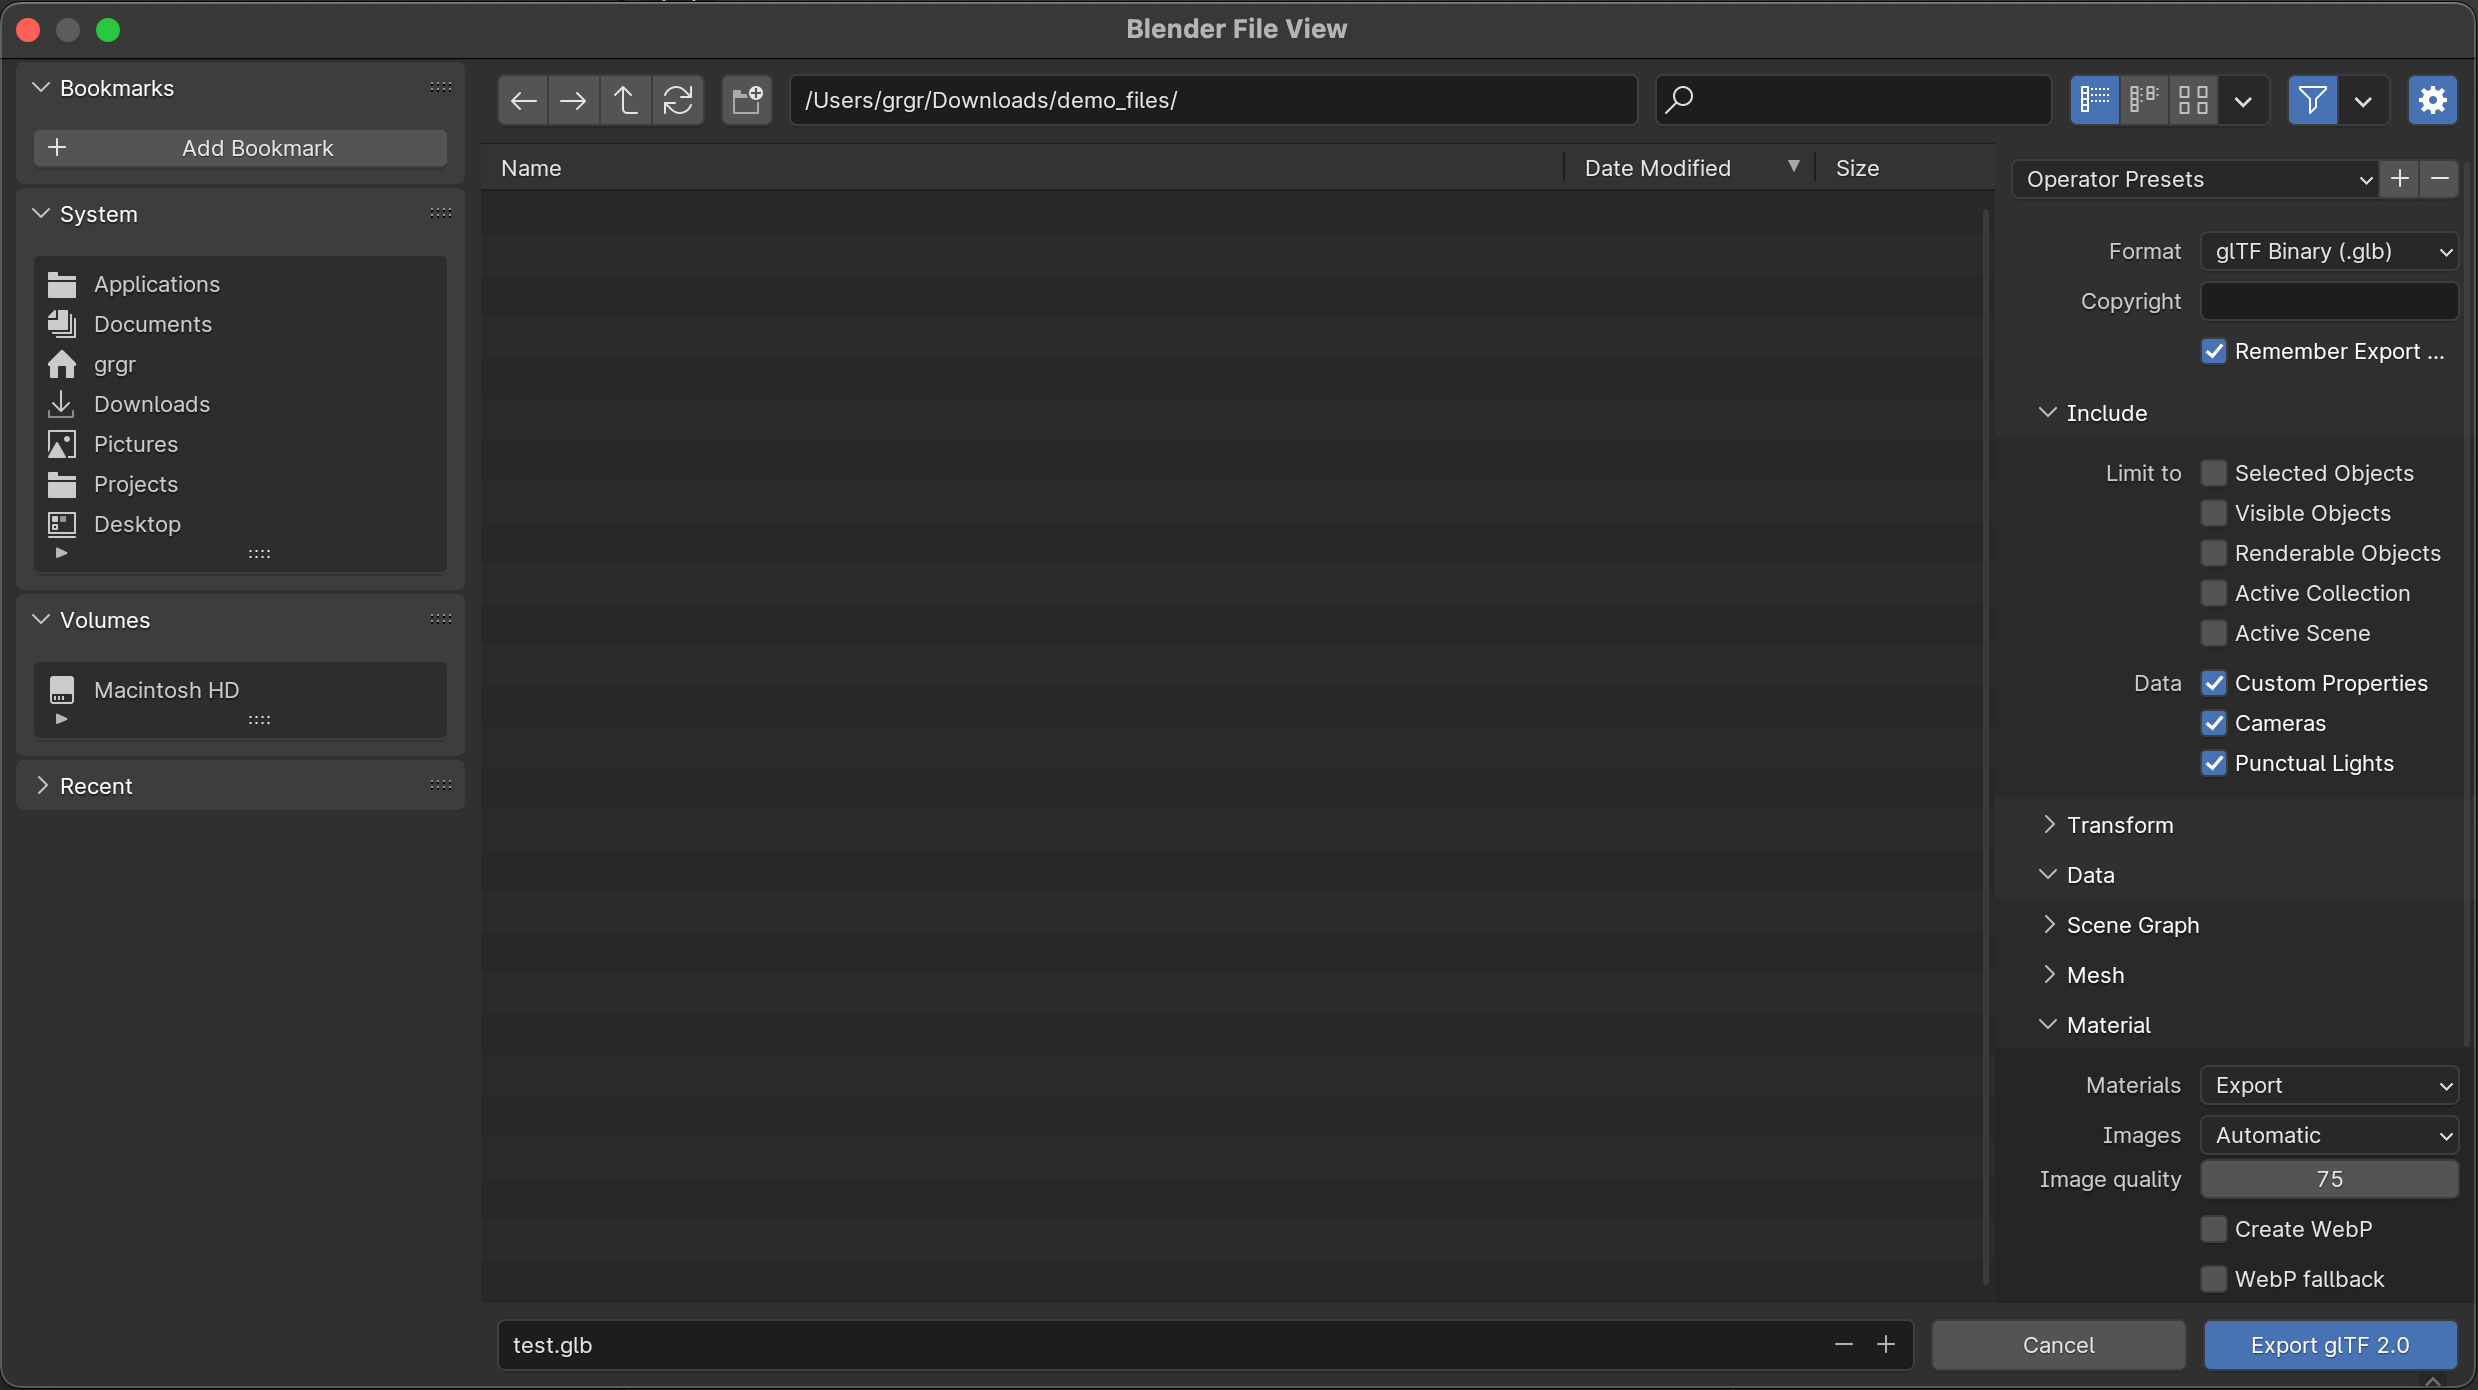
Select the storage location and click
Export.
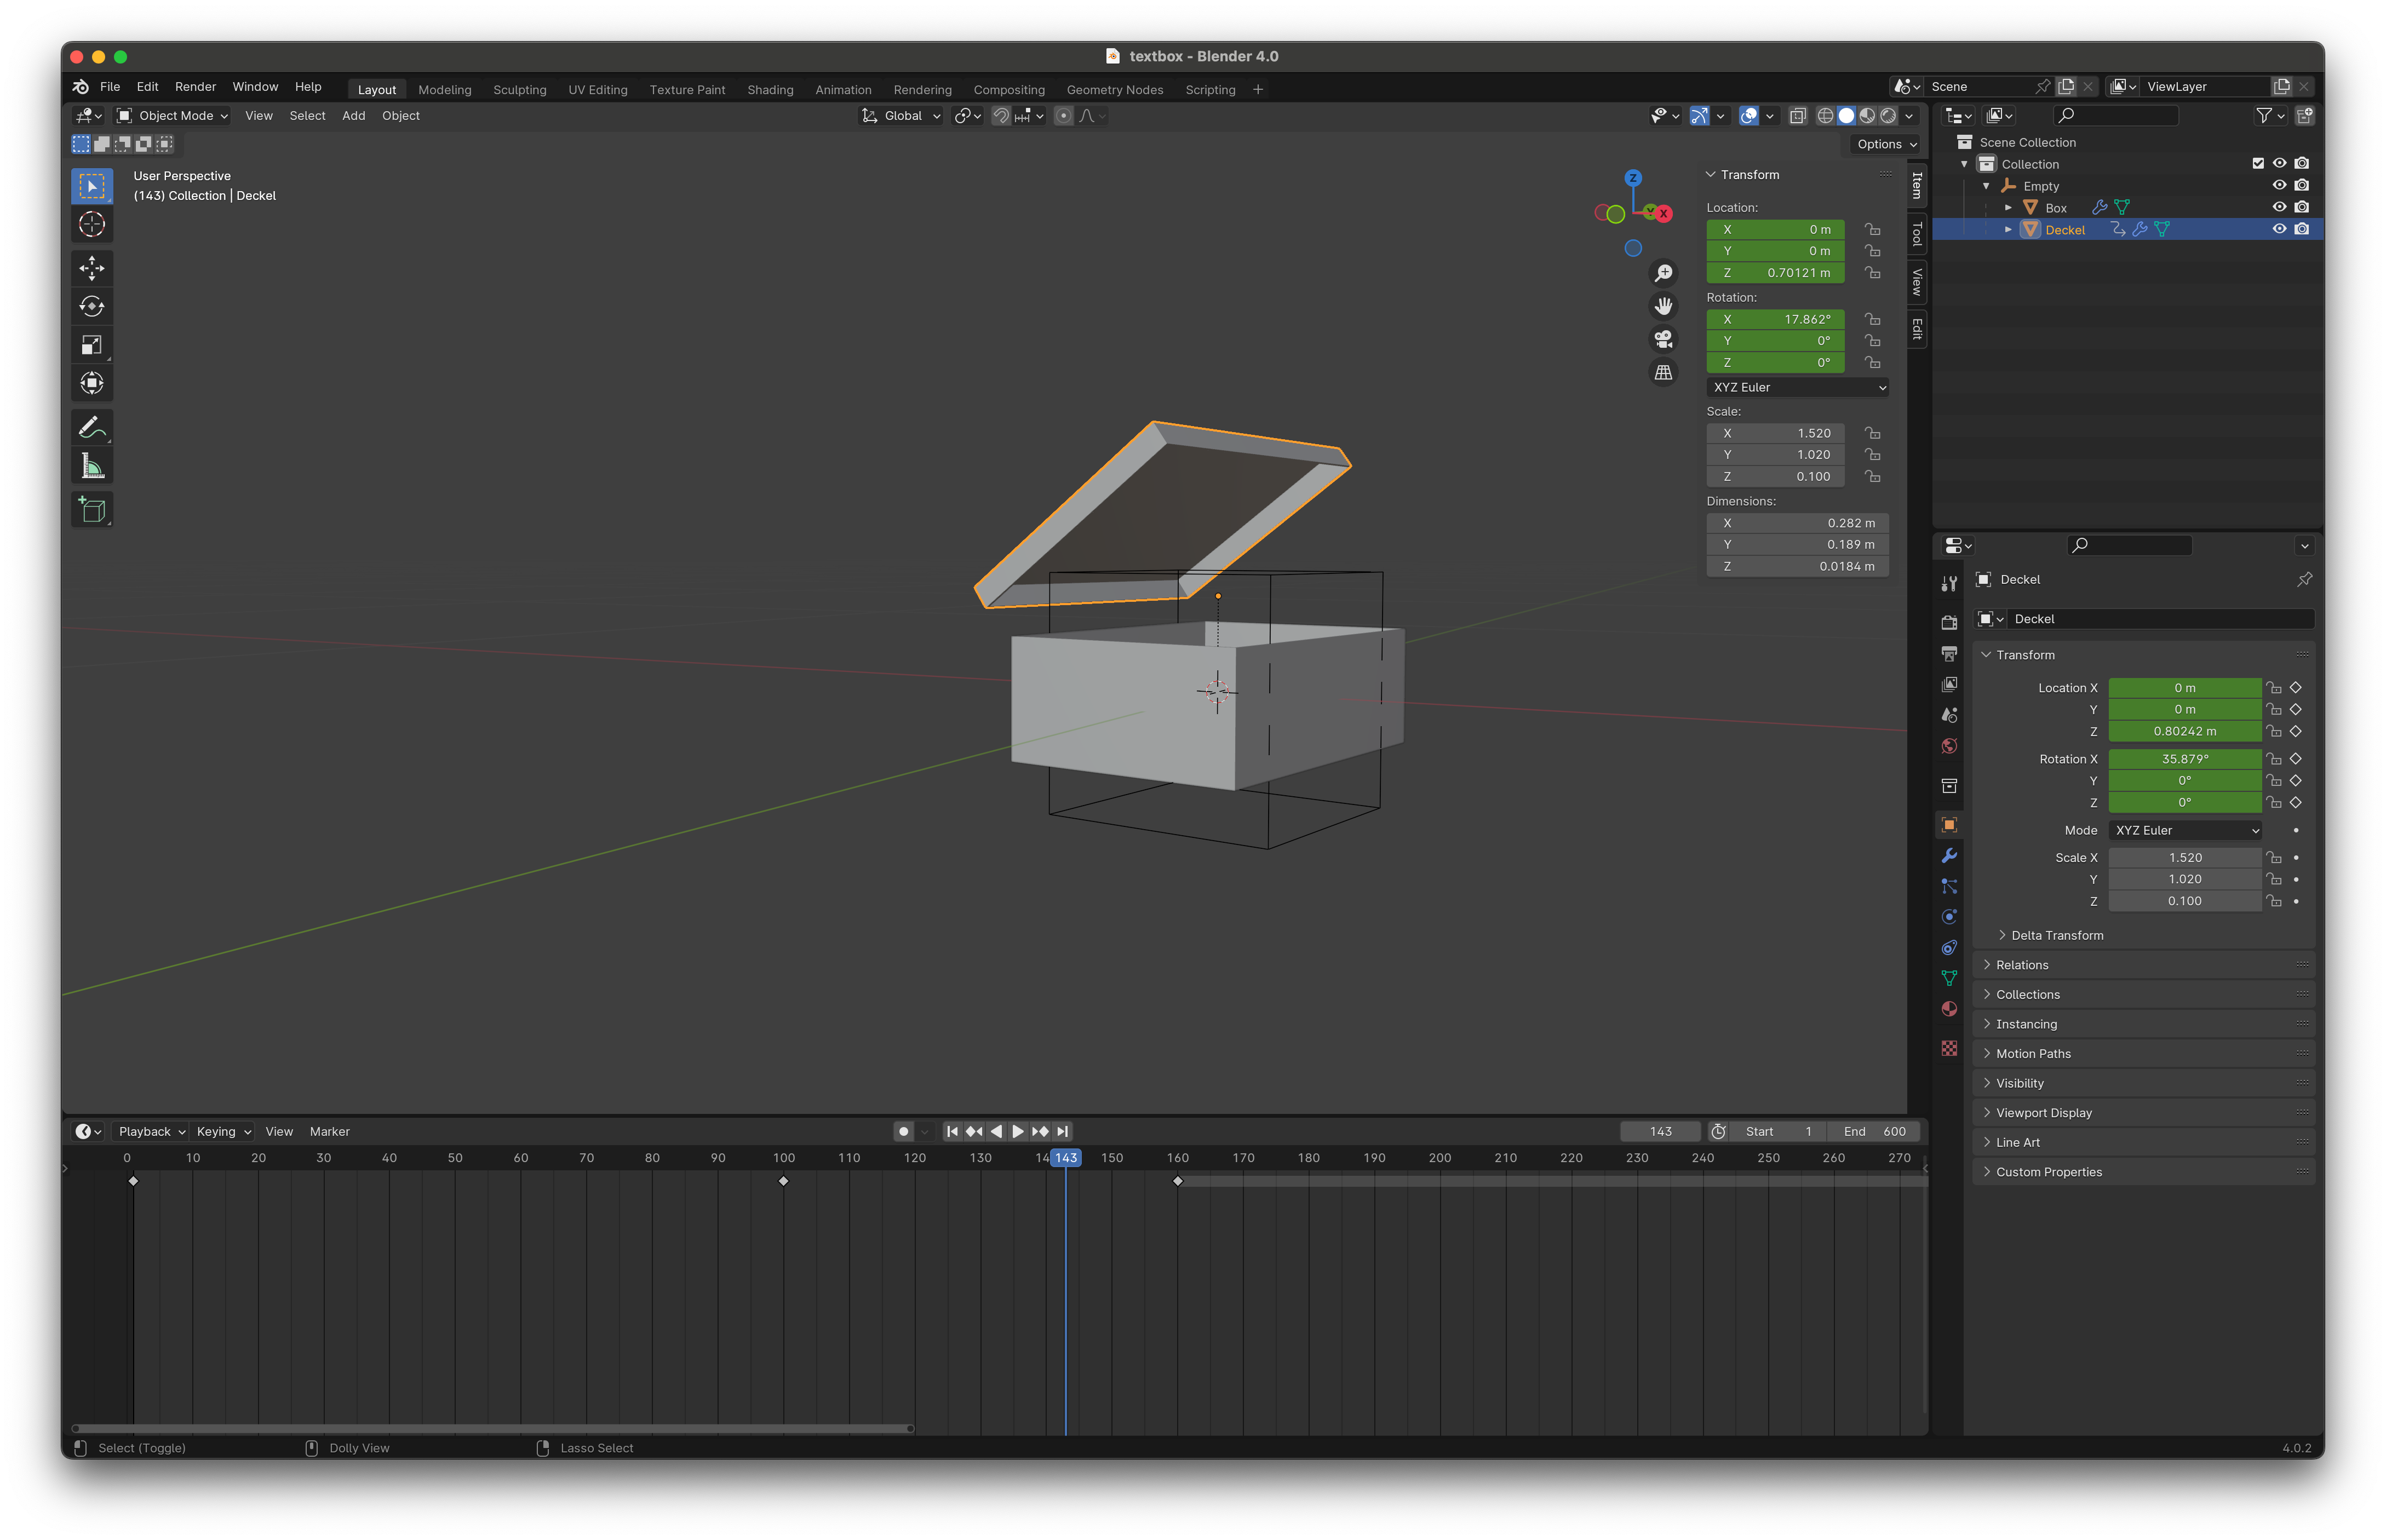
Step 5: Customize the initial view
The initial orientation and size of your model often need to be adjusted.
In the example, an empty cube was set as the parent so that the animation keyframes did not have to be readjusted. Scale and align your model and upload the .glb file again.
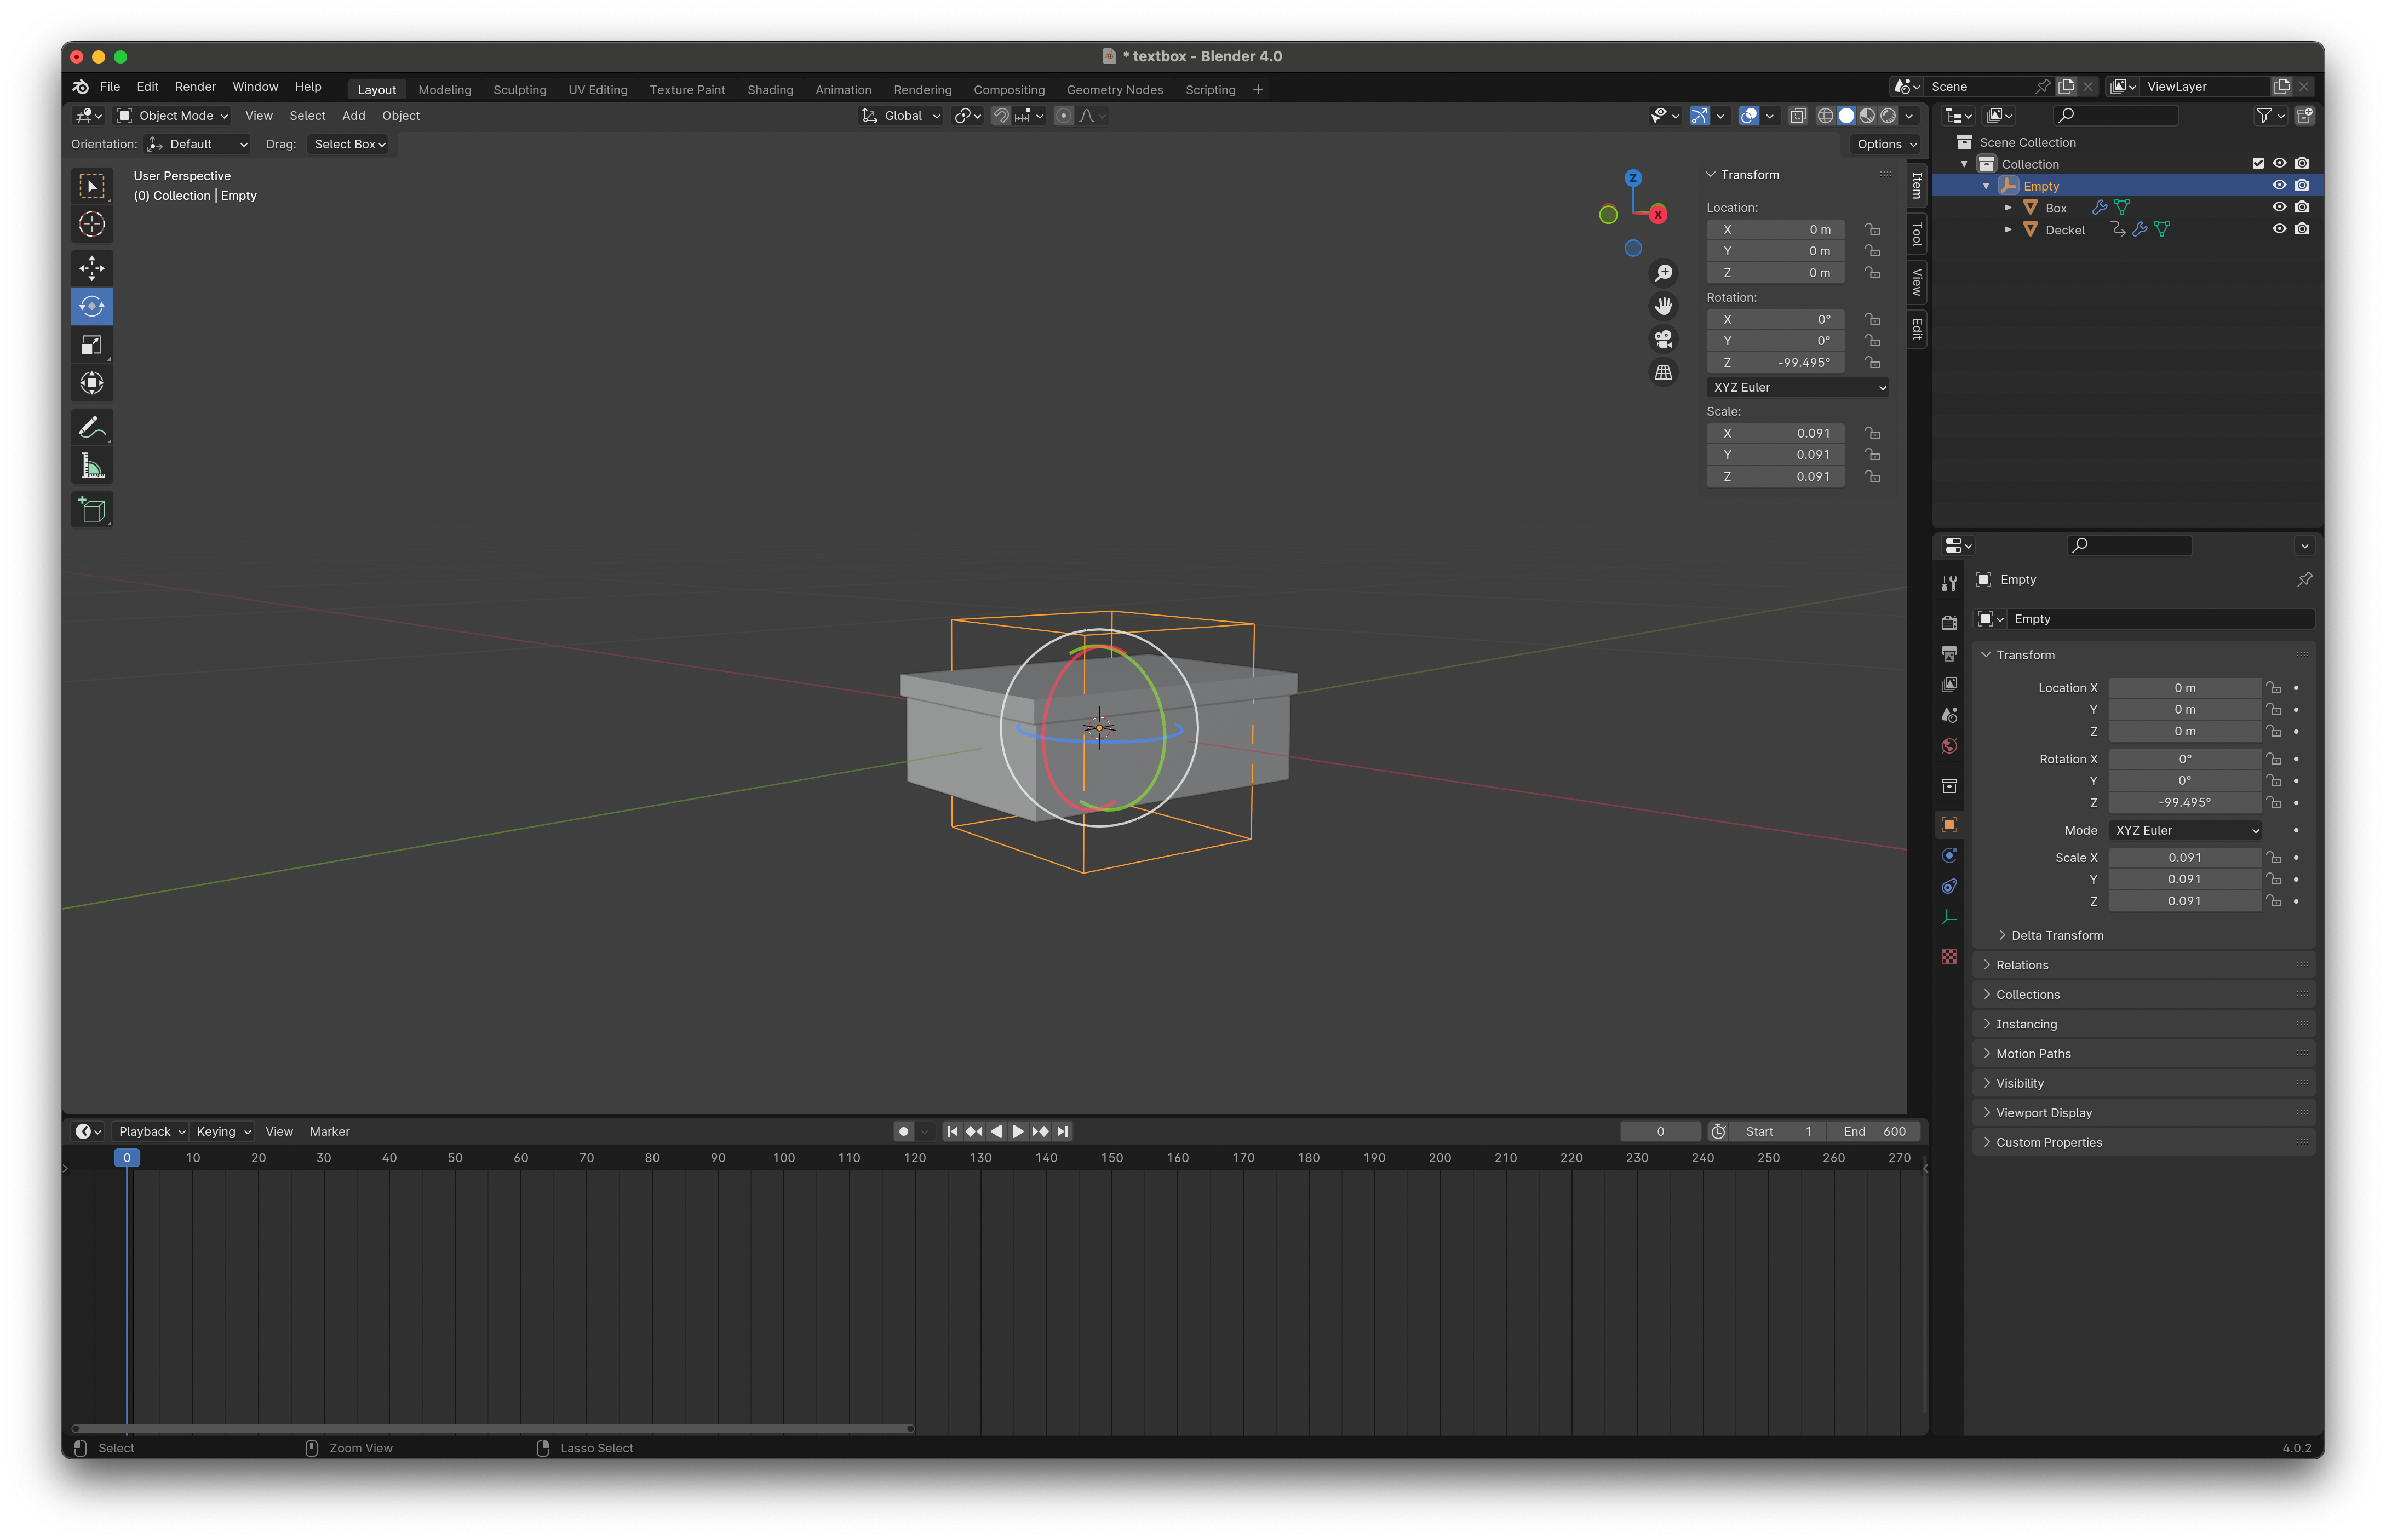
Now the initial view should also be correct.
FYI - Advantages of GLB over X3D
Camera: You can define and export fixed cameras. These can be selected later in the 3D preview.
Exposure: Exposure added by you can be exported.
Animation: Animations created in Blender are played back in the 3D preview.
Settings: Additional settings for GLB files can be defined in the template configuration.